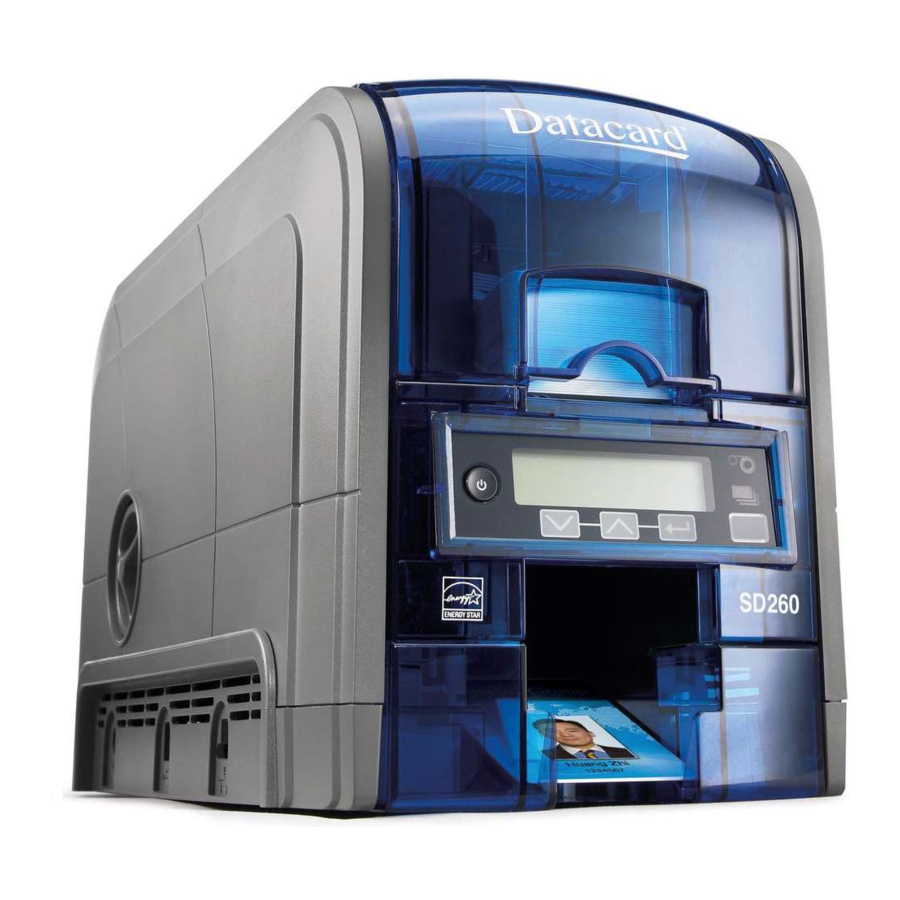
DataCard SD260 Installation And User Manual
Xps card printer
Hide thumbs
Also See for SD260:
- User manual (156 pages) ,
- Installation and administration manual (116 pages) ,
- Installation and administrator's manual (90 pages)

Related Manuals for DataCard SD260


Summary of Contents for DataCard SD260
- Page 1 Datacard XPS Card Printer ® Installation and User Guide October 2011 Part No. 539957-001, Rev B...
-
Page 2: Trademark Acknowledgments
All drawings and information herein are the property of DataCard Corporation. All unauthorized use and reproduction is prohibited. Trademark Acknowledgments Datacard is a registered trademark and service mark of DataCard Corporation in the United States and other countries. Windows is a registered trademark of Microsoft Corporation. -
Page 3: Table Of Contents
Set Up the Host PC for Printer Sharing, Windows XP, 32-bit ________________ 46 Install the Driver on the Client PC, Windows XP, 32-bit ____________________ 48 Set Up the Host PC for Printer Sharing, Windows Server 2003, 32-bit ________ 50 Install the Driver on the Client PC _______________________________________ 50... - Page 4 Operating Systems Supported __________________________________________ 57 Setup a Printer Pool, Windows 7 and Windows Vista ______________________ 58 Setup a Printer Pool, Windows XP and Windows Server 2003 (32-bit) _______ 60 Setup a Printer Pool, Windows Server 2008, 64-bit ________________________ 62 Tips for Success ________________________________________________________ 64...
- Page 5 500: The printer is not available. The card cannot print.___________________ 85 501: The printer connection was lost. Printing the card is canceled. _______ 85 502: The card data is missing or is not usable. The card cannot print. ______ 86 503: The magnetic stripe data is missing.
- Page 6 Updates ____________________________________________________________________ 115 Updating the Driver______________________________________________________ 115 Upgrades and Printer Options ________________________________________________ 116 Deviations __________________________________________________________________ 116 Chapter 9: Removing a Printer from a Windows PC________________________________ 117 Chapter 10: Troubleshooting_____________________________________________________ 121 Tools for Troubleshooting _________________________________________________ 121 Locate the Problem__________________________________________________ 122 Fixing the Printer System ______________________________________________ 123...
- Page 7 Contrast_____________________________________________________________ 155 Color Balance _______________________________________________________ 155 View Card Counts using the Driver________________________________________ 157 View Card Counts from the Printer LCD Menu _____________________________ 158 Change a Card Design __________________________________________________ 159 Run a Cleaning Card ____________________________________________________ 161 Clean the Printhead _____________________________________________________ 162...
- Page 8 Open Printer Properties __________________________________________________ 174 Open Printer Properties from My XPS Card Printer ______________________ 175 Open Printer Properties from the Start Menu in Windows 7 or Vista ______ 175 Open Printer Properties from the Start Menu in Windows XP_____________ 176...
- Page 9 Safety and Compliance _____________________________________________________ 201 Regulatory Compliance _________________________________________________ 201 Notice for USA (FCC notice) __________________________________________ 201 Notice for Canada __________________________________________________ 201 Notice for Europe ___________________________________________________ 202 Notice for Taiwan ___________________________________________________ 202 Notice for Japan ____________________________________________________ 202 Notice to All Users _______________________________________________________ 202 Liability Statement _______________________________________________________ 203 Safety __________________________________________________________________ 203 Safe environment ____________________________________________________ 203...
- Page 10 Revision Log DataCard XPS Card Printer Installation and User Guide Revision Date Description of Changes January 2011 First release of this document as a single file. October 2011 Includes features supported by driver version 2.1...
-
Page 11: Chapter 1: Welcome To Card Printer Information
Printer Information This manual describes the XPS Card Printer and how to use it. Before you use the printer, install and set up the printer. In most cases, install the Windows driver for the printer as part of setup. See steps to follow. -
Page 12: Printer Components
“Printer with Duplex Option” HINTS & TIPS • The printer is designed to issue cards either one at a time or in batches — up to 100 cards at a time. An optional 200-card input hopper is available for some printers. -
Page 13: Printer With Input Hopper
Printer with Input Hopper Inside a single-feed or hopper-equipped printer... -
Page 14: Printer With Duplex Option
Printer with Duplex Option Inside a printer with a duplex option Welcome to Card Printer Information... -
Page 15: Printer Configuration Label
• Configuration, which includes options in the printer: • Date and country of assembly • The MAC address to use when the printer is connected via an Ethernet network The printer label provides information that is useful when requesting service. It can also help you know the components installed. -
Page 16: Printer System
Printer System The card printer is used with other equipment and software to create a card production system. The system produces cards for a specific purpose and the cards must meet requirements. Ask about the requirements for cards that you... - Page 17 When the XPS Card Printer Driver is installed, the information is also installed. The installation creates a desktop icon called My XPS Card Printer. Use My XPS Card Printer to choose the user level. This sets the type of information you view. Using My XPS Card Printer, you can also: •...
- Page 18 Welcome to Card Printer Information...
-
Page 19: Chapter 2: Installation Requirements
Windows Vista, 32- or 64-bit Windows XP, 32-bit. Windows MSXML 6.0 and the Windows XPS Essentials pack are required to install the printer driver. The driver installer checks the operating system for these files and installs them if needed. Windows 2003 Server, 32- or 64-bit Windows 2008 Server, 32- or 64-bit •... -
Page 20: Network Requirements
To install a printer using a USB connection, the following components are required: • A high speed USB port. USB 2.0 is recommended. • A USB cable to connect the printer to the PC. A USB cable is supplied with the printer. • A PC that meets the requirements listed above. -
Page 21: Site Requirements
Options such as a large output stacker and 200-card input hopper add height to the printer. Additional clearance is required when using these options. • Place the printer in an environment with temperatures ranging from 60° F to 95° F (15° C to 35° C). -
Page 22: Electrical Requirements
Printer Model SD260 SD360 CD800 The power supply detects the input voltage, and works within the range stated. The printer is ENERGY STAR qualified only when used with the included power supply. ® and is rated as follows: Electrical Requirements 110-240V/50-60 Hz/3.0 Amp... -
Page 23: Chapter 3: Install The Printer
Most often, the driver is installed using the installation CD shipped with the printer. The driver installation procedure prompts you to power on the printer and when to connect cables. Installation includes the following steps:... -
Page 24: Choosing Your Installation Method
Choosing Your Installation Method Your installation method depends on how many users will print to the card printer, the operating system you will use to send card data, and other decisions in your environment. The printer can be installed using one of the following installation methods:... -
Page 25: Connecting More Than One Printer
Use the following guidelines to install more than one printer using USB cables: • Connect and install one printer at a time. The PC cannot run more than one installation program at a time. • USB protocol allows devices to be connected to the PC through another USB device. - Page 26 When using more than one printer on a PC, keep the following in mind: • Select the printer to use in the ID software or other application. Card jobs will be sent to the selected printer even if more than one card printer is attached to the PC.
-
Page 27: Prepare The Printer
Prepare the Printer Prepare the printer to print cards by installing supplies including blank card stock, print ribbon, the cleaning roller, and optional equipment. For more information on optional equipment, see Install Printer Options. Load Cards If you are using a manual feed... -
Page 28: Load Cleaning Roller
Load Cleaning Roller Load a new cleaning roller with each new roll of print ribbon. The printer ships with the cleaning roller spindle installed on the print ribbon cartridge. Remove the cleaning roller spindle from the ribbon cartridge and slide the continuous cleaning sleeve onto the spindle (a). -
Page 29: Install Ribbon Cartridge
Install Ribbon Cartridge Install the assembled print ribbon cartridge into the printer. Hold the print ribbon cartridge by the handle and lower into the printer with the handle toward the front of the printer. Check to see that the ribbon cartridge is correctly positioned in the guides. -
Page 30: Install The Printer Driver
Install the Printer Driver This section provides information about installing the printer driver on a PC running a supported Windows operating system. See list of supported operating systems. Most often, the driver is installed using the installation CD shipped with the printer. - Page 31 Follow the steps to “Prepare the Use the green media controls to view step-by-step instructions about how to Prepare the Printer. Click the blue arrow pointing to the right. Plug in and power on the printer. Printer”.
- Page 32 The installer will prompt you to connect the printer to the PC using a USB cable. Install the Printer...
- Page 33 “Ready” is displayed on the LCD panel and click the Print Sample Card button. Installation is complete when the sample card prints successfully. For more information on how to print a sample card or a printer test card, see “Print Driver Sample Cards”...
-
Page 34: Usb Installation Using A Downloaded Driver
USB Installation using a downloaded driver The printer ships with an Installation CD in the printer carton. In most cases, install the driver from the Installation CD. If you do not have access to the Installation CD, follow these steps: Log on to the PC as a user with Administrator access. - Page 35 Follow the steps to “Prepare the Use the green media controls to view step-by-step instructions about how to Prepare the Printer. Click the blue arrow pointing to the right. Plug in and power on the printer. Printer”.
- Page 36 The installer will prompt you to connect the printer to the PC using a USB cable. Connect the printer to the PC using a USB cable. Install the Printer...
- Page 37 “Ready” is displayed on the LCD panel and click the Print Sample Card button. Installation is complete when the sample card prints successfully. For more information on how to print a sample card or a printer test card, see “Print Driver Sample Cards”...
-
Page 38: Network Installation Using The Installation Cd
Log on to the PC as a user with Administrator access. Insert the driver CD in the PC’s drive. The driver installer window opens. Click the Install a Network Printer button. The driver might require additional software, and present a license agreement for that software. ... - Page 39 Follow the steps to “Prepare the Use the green media controls to view step-by-step instructions about how to Prepare the Printer. Click the blue arrow pointing to the right. Connect the printer to the network using an Ethernet cable. Printer”.
- Page 40 Plug in and power on the printer. Use the LCD panel to retrieve the printer’s IP Address. For step-by-step instructions, see Return to the Main menu on the LCD display. Check that “Ready” is displayed and the User button glows green.
- Page 41 The Card Printer installer opens the Printer Properties window automatically. When this window opens, click the Configure Port button and enter the IP Address retrieved in Step 9 in the Printer Name or IP Address area. IMPORTANT! In some cases, the Port Number changes when the printer’s IP address is entered.
-
Page 42: Network Installation Using A Downloaded Driver
Card button to verify that the installation is complete. Installation is complete when the sample card prints successfully. For more information on how to print a sample card or a printer test card, see “Print Driver Sample Cards” Network Installation using a downloaded driver The printer ships with an Installation CD in the printer carton. - Page 43 Browse to the location of the file saved in Step 2 on your PC. Double-click the downloaded file. The file will have a name similar to XPSCardPrinterDriver.exe. The driver installer window opens. Click the Install a Network Printer button.
- Page 44 Follow the steps to Use the green media controls to view step-by-step instructions about how to Prepare the Printer. Click the blue arrow pointing to the right. Connect the printer to the network using an Ethernet cable. “Prepare the Printer”. Install the Printer...
- Page 45 Plug in and power on the printer.
- Page 46 Use the LCD panel to retrieve the printer’s IP Address. For step-by-step instructions, see Return to the Main menu on the LCD display. Check that “Ready” is displayed and the User button glows green. “Retrieve the Printer IP Address”. Install the Printer...
- Page 47 The Card Printer installer opens the Printer Properties window automatically. When this window opens, click the Configure Port button and enter the IP Address retrieved in Step 11 in the Printer Name or IP Address area. IMPORTANT! In some cases, the Port Number changes when the printer’s IP address is entered.
- Page 48 Card button to verify that the installation is complete. Installation is complete when the sample card prints successfully. For more information on how to print a sample card or a printer test card, see “Print Driver Sample Cards” “Print a Printer Test Card”.
-
Page 49: Retrieve The Printer Ip Address
The choices are DHCP and Static IP. DHCP stands for “Dynamic Host Configuration Protocol” and means that the network assigns the IP Address to the printer. Static IP means that you set the IP Address assigned by your network support personnel. Network support personnel can tell you whether the network uses DHCP or static IP addressing. - Page 50 Press the E “IP Address” appears on Line 1 and the printer’s IP Address will be displayed on Line 2. Record the printer’s IP Address (i). Exit the menu system by pressing the U button repeatedly until “Ready” is displayed on Line 1 and the U to green.
-
Page 51: Printer Sharing
The printer is connected to a host PC with the printer driver installed. Client PCs print to the shared printer over a network. Client PCs do not have the same level of access to the printer driver as the host PC. -
Page 52: Printer Sharing Requirements
Printer Sharing Requirements Before sharing a printer over a network, the following requirements must be met: • Each PC that will use the printer must have a working network card installed. • Operating systems and combinations supported: • Windows 7, 64-bit Host PC •... -
Page 53: Set Up The Host Pc For Printer Sharing, Windows 7, 64-Bit
Set Up the Host PC for Printer Sharing, Windows 7, 64-bit Install the printer on the host PC: “Network Installation using the Installation CD” “Network Installation using a downloaded driver” Configure the host PC for printer sharing: From the Windows Start menu, open the Control Panel. -
Page 54: Install The Driver On The Client Pc, Windows 7
• If the printer is not discovered automatically, select "The printer that I want wasn't listed" entry. • In the address bar, type the name of the Host PC and the printer name following this format: \\host PC name\shared printer name. - Page 55 PC. The client PC will not automatically detect the type of ribbon installed in the printer; instead it will default to YMCKT ribbon and 300 x 300 dpi resolution. Follow these steps to...
-
Page 56: Set Up The Host Pc For Printer Sharing, Windows Xp, 32-Bit
Click on the Sharing tab. Click If you understand the risks but wnat to share printers without running the wizard, click here. Click Just enable Printer Sharing in the Enable Printer Sharing dialog box and click OK. Install the Printer... - Page 57 In the Names list, select the name or group for which you want to specify permissions. Select Manage this printer for the Everyone group. To restrict users, remove the check from the All Print permission in the Everyone group and set permissions for each user.
-
Page 58: Install The Driver On The Client Pc, Windows Xp, 32-Bit
Connect to this printer and click Next. Type the name of the Host PC and the shared printer name following this format: \\host PC name\shared printer name. Choose the shared printer from the drop-down list and then click Next . - Page 59 PC. The client PC cannot detect the type of ribbon installed in the printer; instead it default to YMCKT ribbon and 300 x 300 dpi resolution. Follow these steps to change the default settings.
-
Page 60: Set Up The Host Pc For Printer Sharing, Windows Server 2003, 32-Bit
Printers window opens. Right-click on the printer and select Properties. The Printing Properties window opens. Click on the Sharing tab and click the "Share this printer" radio button to enable sharing. Enter a printer name. Write down the name of the Host PC. - Page 61 In the Searching for available printers window, choose Connect to this printer and click Next. Type the name of the Host PC and the shared printer name following this format: \\host PC name\shared printer name. Choose the shared printer from the drop-down list and then click Next .
-
Page 62: Set Up The Host Pc For Printer Sharing, Windows Server 2008, 64-Bit
Set up the Host PC for Printer Sharing, Windows Server 2008, 64-bit Install the printer on the host PC. “Network Installation using the Installation CD” “Network Installation using a downloaded driver” Configure the host PC for printer sharing: From the Windows Start menu, open the Control Panel. -
Page 63: Install The Driver On The Client Pc
Select Apply to save the change. Save changes for each name. Close Printer Properties. Use the tabs and settings in Printing Preferences and Printer Properties to reflect the card design including ribbon type, print mode, and magnetic stripe options. Write the settings down so you can make the same settings on the client PC. - Page 64 • If the printer is not discovered automatically, select "The printer that I want wasn't listed" entry. • In the address bar, type the name of the Host PC and the shared printer name following this format: \\host PC name\shared printer name.
-
Page 65: Use The Printer From The Client Pc
• Pause or delete print jobs submitted from the Windows Print Manager. Client PC print jobs can be paused or deleted from the Print Manager. The card job remains in the print queue until it is sent to the printer. See Windows help for information on using Print Manager. -
Page 66: Tips For Success
• Error messages are displayed differently depending on the permissions set for the user’s account. Accounts with Manage Printer permissions will receive an error message. The message displays the printer name in the title bar and a description of the error. The message window also contains a Retry and a Cancel button. -
Page 67: Printer Pooling
Printer Pooling A printer pool treats a group of printers as one printer and distributes print jobs among the available printers. Printer pooling is used in card production environments in which an application prints to a group of printers. The user chooses to print to the pool and the pool distributes the print jobs to the next available printer. -
Page 68: Setup A Printer Pool, Windows 7 And Windows Vista
Installation CD” To install the printer using a downloaded driver, see Installation using a downloaded Connect each printer that will be included in the pool to the network using an Ethernet cable. Write down the IP address of each printer. See Address”for the steps to follow. - Page 69 Type the IP address of one of the unassigned printers. Enter a name in the Port Name field. Enter a name such as XPS Pool Printer 2. Click Next. Click Finish to complete the wizard. Repeat these steps for each printer that will be added to the pool.
-
Page 70: Setup A Printer Pool, Windows Xp And Windows Server 2003 (32-Bit)
Installation CD” To install the printer using a downloaded driver, see Installation using a downloaded Connect each printer that will be included in the pool to the network using an Ethernet cable. Write down the IP address of each printer. See Address”... - Page 71 Information Required window and then click Next. Click Finish to complete the Add Port wizard. Repeat these steps for each printer that will be added to the pool. Click Close when all printers and ports have been added. Enable printer pooling: From the Properties>...
-
Page 72: Setup A Printer Pool, Windows Server 2008, 64-Bit
Installation CD” To install the printer using a downloaded driver, see Installation using a downloaded Connect each printer that will be included in the pool to the network using an Ethernet cable. Write down the IP address of each printer. See Address”... - Page 73 Enable printer pooling: From the Print Server Properties> Ports tab, make sure there is a check in the box next to the original printer port. Click once on the original printer port and check the Enable Printer Pooling checkbox. Check the boxes next to the ports added in Step 4.
-
Page 74: Tips For Success
LCD panel, see Driver Sample Cards” • A printer that cannot process jobs will continue to get jobs assigned to it by the pool controller. The XPS Card Printer driver does not determine if each printer in the pool is ready to receive card jobs. -
Page 75: Chapter 4: Printing Cards
• Print a card to a printer with an input hopper. See with Input Hopper” • Print a card to a printer with a single feed slot. See with Single Feed Slot” • Print on both sides of a card. See details. -
Page 76: Printing Cards: Printer With Input Hopper
Make sure that the input hopper contains blank cards. Click Print to send the card to the printer. & T INTS The printer can get cards from more than one PC. It takes cards in the order received. “Load Cards” for the steps “Card Design and... -
Page 77: Printing Cards: Printer With Single Feed Slot
Enter the data for this card. Follow the instructions for your software. Capture the photo for this card, if used. Click the Print button to send the card to the printer. At the printer, insert a card in the single feed slot. Printing from Other Software Open the software application and select the card printer as the current printer. - Page 78 & T INTS • Push the card in until the printer moves it. • Orient all cards the same way. • Do not touch the card surface to be printed. • Handle cards by their edges or wear gloves. Printing Cards...
-
Page 79: Chapter 5: Using The Printer
1 to 2 seconds until the printer powers off. If the printer is processing cards, you can press for 2 or more seconds to power the printer off immediately. You hear the power-down tone. Cards in the printer are not completed. LCD panel The LCD panel shows the printeer’s menu system and also displays printer... -
Page 80: User Button And Light
• Press again for 2 seconds or more to clear all cards currently printing. • Make sure this action is allowed in your card system. • The light shows whether the printer is ready, busy printing, or not available. Green... -
Page 81: Card Light
Amber Blinking Amber Card Light The card light blinks amber when the printer has a card problem, such as out of cards. For printers with a single-feed slot, the card light blinks green when a card needs to be inserted. -
Page 82: Lcd Menus
Exit and then press the E Messages and Conditions When the printer cannot process the card sent, it issues a condition. Conditions are displayed on the LCD display on the front panel. In most cases, the driver also displays the condition as a message on the PC. -
Page 83: Messages On The Printer
• The printer issues messages that focus on recovering from problems. As a result, there are just a few messages. • If you cancel a job at the printer, the message will be removed from the PC. Any additional messages for the cancelled job, such as for a broken ribbon, will not appear on the PC. -
Page 84: Messages On The Printer Manager
Other Messages • The application you use can display messages. • Other printers can cause messages if more than one model of card printer is installed. • If SP or similar card printers are installed and use the 7.x driver, message DR00914 might be displayed. -
Page 85: 100: Request Not Supported
Send the new card to print again. HINTS & TIPS • The card, if it started to print, should be discarded. • Make sure you have chosen the correct printer in the application. Ask your Manager for assistance if needed. 101: Job could not complete The card took too much time. -
Page 86: 102: Card Not In Position
Press the printer P power it on again. HINTS & TIPS • If the printer works, the problem was temporary. • If the printer does not work, troubleshoot the problem. button to OWER button to OWER “110: Print ribbon out or... -
Page 87: 104: Critical Problem
Press the printer P OK to power the printer off. Request service. HINTS & TIPS • The printer needs to remain off due to an internal problem. • Pressing either the P printer. 105: Magstripe data error The printer could not verify the magnetic stripe data written on the card. -
Page 88: 106: Magstripe Data Not Found
“Retry” in the Message box. HINTS & TIPS • The card might not match printer settings or the data sent. • Ask the Manager to verify that the card, the data, and the printer settings match. 107: Magstripe read data error The printer could not read the magstripe data on the card. -
Page 89: 108: Magstripe Read No Data
Replace the ribbon cartridge and close the printer. HINTS & TIPS • Remove any debris from the print area. • If the card is in the printer, turn the knob to move the card so the printer can eject it. -
Page 90: 110: Print Ribbon Out Or Missing
Close the input hopper and resume printing. For printers with single card feed, push the card in until the printer moves it. HINTS & TIPS • Orient all cards the same way. -
Page 91: 112: Card Hopper Empty
112: Card hopper empty The printer does not detect cards in the input hopper. Open the input hopper. Insert cards in the input hopper. Cards can stick together: Slide or fan cards to separate the edges before loading the input hopper. -
Page 92: 115: Wait For Print Temperature
• Make sure you have chosen the correct printer in the application. Ask the Manager for assistance if needed. 116: Magstripe not available Look at the “config” area of the label inside of the printer cover. Does the label show “M” or “J”? If yes, the printer has a magstripe option that is not working. -
Page 93: 118: Print Ribbon Type Problem
Use ribbon designed for this printer brand and model. HINTS & TIPS • When the printer recognizes that a supported ribbon is installed, all enhanced product features are enabled and successful card printing can begin. 120: User paused the printer A person pressed the U printer and a card was in process. -
Page 94: 122: Magnetic Stripe Format Problem
HINTS & TIPS The printer has format settings for the data that can be encoded on the card. The magstripe data sent does not match those settings. • Ask the Manager to verify that the card, the data, and the printer settings match. -
Page 95: Printer Driver Messages
Ask network support for help, if needed. HINTS & TIPS • Make sure you have chosen the correct printer in the application. • Ask the Manager for assistance if needed. 501: The printer connection was lost. Printing the card is canceled. -
Page 96: 502: The Card Data Is Missing Or Is Not Usable. The Card Cannot Print
PC by another program or by a user. To solve the problem: • Remove the driver, using the Remove icon on the driver CD installer. Install the USB printer following the steps in the Quick Install Guide. • Find a Bonjour for Windows download and install it. -
Page 97: 506: A Card Is Currently Processing
506: A card is currently processing. The driver is currently processing an interactive job. Wait until the current card is complete and then send the card again. -
Page 98: Clean The Printer
• “Clean the printhead” Run a cleaning card Run a printer cleaning card to clean debris from the inside of the printer. The cleaning card can remove most contaminants from the printer. Begin with the printer powered on. Open the printer cover and remove the print ribbon cartridge. - Page 99 Replace the cleaning sleeve with a new sleeve, and remove the protective cover. See “Load Cleaning Roller” Replace the ribbon cartridge and close the printer. The printer is ready to print cards again. Discard the used cleaning card and cleaning sleeve.
-
Page 100: Clean The Printhead
• Change the cleaning sleeve each time you clean the printer or change the print ribbon. • You can also clean the printhead. See follow. Clean the printhead Clean the printhead when you notice unprinted lines on the finished card. This usually indicates dirt or contamination on the printhead. - Page 101 HINTS & TIPS • Avoid touching the printhead edge with your fingers. • Avoid touching the printing edge of the printhead cartridge with any sharp objects that can permanently damage the printhead. • Only use the cleaning pen to clean the printhead. Other materials can stick to the printhead and cause damage.
- Page 102 Using the Printer...
-
Page 103: Chapter 6: Card Design And Setup
Chapter 6: Card Design and Setup Card design is the name given to the combined features of the printed cards. Cards are useful only when all cards contain the required information. Card design includes: • The different types of data such as name and ID number, images including company logo or employee or other photos, and... -
Page 104: Card Components
C (cyan). The ribbon also includes a black (K) panel and a topcoat (T) panel. The printer applies the YMC color panels to the card first, prints black components using the K panel, and then applies the topcoat (T), which helps protect the color image from damage. -
Page 105: Managing Color
Printing Text The printer can print text in any color. Small characters are likely to be more readable if they are formatted as black and printed with the black (K) panel. The printer supports 6 point or larger text. - Page 106 Backgrounds that are black might print over colored images or text. Use a color that appears black for the background to prevent overprinting, or use white text over the black background. The printer uses the YMC panels of full-color ribbon to print grayscale graphics.
-
Page 107: Monochrome Printing
The printer continues to spool ribbon for the length of the image but no farther. (The printer leaves a small margin between each card to avoid image... -
Page 108: Printing Bar Codes
Bar codes printed with YMC panels will not be as crisp and sharp as when printed with K only. When an application prints bar codes, the data is often sent to the printer as an image. The format in which the application sends the image determines how the driver will render the image. - Page 109 Types of Bar Codes Detected The printer driver can detect the following 1-D, 2-D, and Postal bar codes: 1-D Bar Codes: • Code 11 • Code 39 • Code 39 Extended • Code 93 • Code 128 • 2of5 Interleaved •...
-
Page 110: Printing Text
Topcoat must be requested by the application or driver sending the card to the printer. When you use theXPS Card Printer Driver, it automatically requests topcoat for YMCKT, KT, and KTT ribbons. Most ID software also requests topcoat automatically. - Page 111 Topcoat should not be applied over the magnetic stripe, smart card chip, or signature panel of a card. To prevent topcoat application, see “Printing and Non-Printing Areas” for more information. & T INTS Topcoat is applied as an even, consistent film.
-
Page 112: Card Design: Magnetic Stripe
The magnetic stripe option is set up to define the coercivity, number of tracks, and data format. The coercivity and data format are set in the printer. The installer sets these values and they remain the same for all cards printed using the same design. See Magnetic Stripe Coercivity”... -
Page 113: Magnetic Stripe Formats
Magnetic Stripe Formats Three-Track Option The default data formats for a three-track magnetic stripe option are: • Track 1 — IATA • Track 2 — ABA • Track 3 — TTS This combination is often abbreviated IAT. This format is called ISO format. IATA (International Air Transport Association) The maximum number of characters for IATA format is 76 characters. - Page 114 From a PC running a Japanese edition of a supported Windows operating system Japanese-language characters are also supported. They include the following special characters: 45 Katakana characters: and the following 10 Katakana characters: Each time you start using Japanese-language characters, or stop using them, a hidden character is added.
-
Page 115: Card Design: Smart Card
• Card application that is customized to work with the printer and the smart card application (using the driver SDK or ID software application with a smart card application manager). -
Page 116: Smart Card Codes On The Printer Label
An integrator must install a contactless reader supplied by others. If the S2 value is included in the configuration code, the printer has shipped from the factory with the basic components of an S1, plus the SCM Dual (Contact/ Contactless) Interface installed. -
Page 117: Printing And Non-Printing Areas
If you use other applications to print cards, such as Microsoft printing areas using the XPS Card Printer Driver or escape codes. The XPS Card Printer Driver includes standard non-printing areas, such as three-track magnetic stripe and smart card chip. Both printing and topcoat are blocked in these areas. -
Page 118: Other Areas
Other Areas If you want to specify more than one area on the same side of the card or want an area other than the standard ones, see & T INTS • Blocking typically extends 0.1 inch beyond the edges of a feature. The dimensions listed include the extended blocking region. -
Page 119: Image Placement
Image Placement • Important images can include the photo, logo, and bar code. • Do not place an important image on the front of the card in the same area as a magnetic stripe or other machine-readable feature. Frequent use of a card in a reader can wear away the image on the opposite side of the card. -
Page 120: Settings
See • Operators can use the printer front panel and the Properties page of the driver to view card counts and status information. Operators should use the Printer Manager only at the direction of their manager. -
Page 121: Chapter 7: Printer Driver
Communication with the Printer How the XPS Card Printer Driver and printer communicate: • The printer can be connected to a PC using a USB cable or an Ethernet cable. For both connection types, the printer treats communication as if the PC (driver) is connected over a network. -
Page 122: Using The Driver
• When the printer and PC are connected using a USB cable, the printer and PC automatically set up a local network. The printer has an IP address, which can be used to view the Printer Manager. (See Each time another card printer is connected to the PC, the local network is updated to include the new printer. - Page 123 • Set Windows Permissions (see “Printer Permissions”) & T INTS The Ports tab of the Printer Properties dialog includes an “Enable Bidirectional Support” checkbox. The driver always uses bi-directional communication with the printer. Changing the checkbox prevents all printing from the driver.
- Page 124 Printer Driver...
-
Page 125: Chapter 8: Updates, Upgrades, And More
Updating the Driver If a newer printer driver is released, it can be downloaded from the Web site listed in the bar at the bottom of the page. Important! Do not use any of the following methods to remove or replace the existing driver: •... -
Page 126: Upgrades And Printer Options
(printer) is also changed. If you have a deviated driver, firmware or printer, be very careful about updating the driver or firmware. A deviated driver or firmware will have a version number with “d”... -
Page 127: Chapter 9: Removing A Printer From A Windows Pc
If you want to delete a job in the queue, click the job and then choose Document > Cancel. Click Yes to confirm. If the printer is paused or offline, the title bar for the window will include that status. Choose Printer and clear the appropriate choice to enable printing. - Page 128 Insert the driver CD into the PC’s drive. Click the Remove Printer Driver icon on the main installer screen. Click the Remove the Driver button. Removing a Printer from a Windows PC...
- Page 129 Wait until the driver is removed. The installer will show you the progress of the uninstall. You may be prompted to restart the PC. If a restart is required, remove the USB cable and then click the Restart Now button.
- Page 130 Removing a Printer from a Windows PC...
-
Page 131: Chapter 10: Troubleshooting
• Cleaning supplies, especially printer cleaning cards and a cleaning pen • The XPS Card PrinterDriver, if you use it when printing cards • The Printer Manager, for use by managers with the guidance of your service provider • Procedures to identify where a problem is occurring “Locate the... -
Page 132: Locate The Problem
If no, the printer is not working correctly. Request service for the printer. Connect the printer data cable, if needed. Make sure you use the same type of cable – USB or network – used when the printer was installed. -
Page 133: Fixing The Printer System
• If the printer produced a blank card, you might have the wrong page size or driver settings. • If the card causes an error, the card might have a type of data the printer does not support. & T INTS This process will not help with card appearance problems. -
Page 134: Using The Printer Plug-In
ID software does not know the capabilities of the printer and you are responsible for selecting card features that work with the printer you have. If you do not use ID software, make sure the software you use supports the requirements for creating cards. -
Page 135: Usb Installation Troubleshooting
Be sure to use a cable rated for USB 2.0 data transmission. If the printer is not recognized by the PC, or if installation was interrupted, the Device Manager might have an entry for the printer that needs to be removed before the printer can be installed. - Page 136 VPN Client software. Solution The first printer installed on a PC using a USB connection must be installed from the driver CD or downloaded driver. Remove the driver before re-installing the printer. For more information on how to remove the driver, see“Removing a Printer from a Windows...
-
Page 137: Network Installation Troubleshooting
The printer is not configured with the correct network address Driver Problems The driver and printer can have the following communication problems: • “The driver does not detect the network-connected printer” • “The driver does not detect the USB-connected printer ”... -
Page 138: The Driver Does Not Detect The Network-Connected Printer
You cannot switch the type of data cables after installing. Check the current Printer IP Address. Update the IP Address on the Printer Properties > Ports tab. If this happens often, consider switching from DHCP network addressing to Static IP addressing. See the Driver Network Port Value”... -
Page 139: The Driver Does Not Detect The Usb-Connected Printer
Hardware list. Unexpected messages appear When using the XPS Card Printer Driver on a PC with some older card printers installed, the older printer driver can display message DR00914 “The printer driver was not started successfully.” naming the XPS Card Printer as a printer that did not get installed correctly. -
Page 140: Driver Status Or Windows Print Queue Does Not Provide Expected Data
The printer USB cable was disconnected after the application sent the job. The USB adapter in the printer appears in the list. This cannot be changed. The printer might be shared with another PC. The printer driver does not support sharing. -
Page 141: Card Appearance
The page size was not set to ISO-ID1. In the application, use Print set up to choose the card printer. The correct page size will be available after choosing the printer. See “Printing Cards”... -
Page 142: Printing Includes Unexpected Data
Run a cleaning card. See “Run a Cleaning Card”. Use cards that meet the size requirement for the printer. See “Cards” specifications. If you must use the cards you have, ask your manager for help. For best results, use an image-editing program to create the correct size image for the card. - Page 143 Design the card to avoid printing photos over signature panel residue. Run a cleaning card. See “Run a Cleaning Card”. Use cards that meet the requirements for the printer. See for specifications. If needed, obtain a different supply of cards. “Cards”...
-
Page 144: The Printing Is Too Light
The printing is too light Problem Probable Cause Photos look faded. The image capture system needs adjustment. The printing is very light. The ribbon is loaded incorrectly. The card was previously printed and has topcoat on it. The printhead is not installed correctly. -
Page 145: The Monochrome Printing Has Flaws
The monochrome printing has flaws Problem Probable Cause Text has broken (partly The monochrome (K) printed) characters. power setting is balanced to print both fine text and bar codes. The text is formatted to print with color, and the card is being printed with monochrome ribbon. -
Page 146: Magnetic Stripe
To begin troubleshooting a magnetic stripe problem, first print a magnetic stripe sample card from the driver. See follow. The printer uses the coercivity set using the LCD panel or Printer Manager, and uses the data format set using the Printer Manager. Problem Cards are not loaded correctly. -
Page 147: For Managers Only
For Managers Only The Printer Manager provides access to settings that you can use when setting up card designs, and access to troubleshooting tools. See the Solution Guide, available to users who choose “Advanced” on My XPS Card Printer, for information about using the Printer Manager. - Page 148 Troubleshooting...
-
Page 149: Chapter 11: Supplies And Parts
Chapter 11: Supplies and Parts This section describes the supplies used with the printer and parts for the printer. It includes: • “Print Ribbon ” • “Cards” • “Cleaning Supplies” • “Replacement Parts” • “Cables used with the Printer” Print Ribbon Print ribbon kits are available from your dealer. -
Page 150: Monochrome Print Ribbon
• A continuous color, such as red or silver A roll of certified monochrome ribbon enables the Ribbon Saver feature in the printer. Ribbon Saver can increase the number of cards printed with each roll of ribbon. The following ribbon kits are available: •... -
Page 151: Print Ribbon Storage Guidelines
• Continuous scratch-off, up to 1500 images per roll Print Ribbon Storage Guidelines • Store print ribbon in the original package until you load it in the printer. • Keep the original packaging closed. • The print ribbon maintains its quality for about one year. For optimum card quality, purchase and store quantities that can be used within one year. -
Page 152: Card Size
New Cards for Color Printing The printer is designed to print on new card stock. If you print on cards twice, be careful to avoid getting dirt, fingerprints, or other contamination on cards before the second printing. Previous printing can interfere with printing and result in cards that do not have the appearance you want. -
Page 153: Adhesive Backed Cards
Do not touch the print surface of a card with your fingers or hands. • Do not use a rubber band to bind blank cards together. • If you drop a card on the floor, do not insert it into the printer. -
Page 154: Card Storage
• Keep cards in their original packaging. • Cards should be at room temperature when they are used. If cards are stored in a cooler environment than the printer, allow them to reach room temperature before using. Replacement Parts The following replacement parts for use with the printer are available. -
Page 155: Cleaning Supplies
100 cards. The user can replace the small, standard hopper with the large hopper without using tools. Lock Option The printer can be used with a cable lock. Obtain the lock from your dealer, because it includes an added security plate. Power Supply The power supply is rated at 100-240 VAC, 50-60 Hz and uses up to 3 amps. -
Page 156: Cables Used With The Printer
Cables used with the Printer The printer uses a data cable and a power cable. Data Cable The data cable connects the printer to the network or PC sending cards. The data cable can be: • USB cable • Network cable... - Page 157 • Chinese power cable • Japanese power cable & T INTS • Use only one data cable with a printer. • If you need to connect more than one PC to a printer, use a network connection.
- Page 158 Supplies and Parts...
-
Page 159: Chapter 12: How-To Topics
• “Install the Lock Option” • “Adjust the Colors Printed” • “View Card Counts using the Driver” • “View Card Counts from the Printer LCD Menu” • “Change a Card Design” • “Run a Cleaning Card” • “Clean the Printhead”... - Page 160 • “Rotate the Card” • “View Printer Status” • “Find the Printer Serial Number” • “Set Magnetic Stripe Coercivity” • “Set the Print Area” • “Set IP Address Type” • “Use Print Blocking Escapes” • “Use Magnetic Stripe Escapes” •...
-
Page 161: Install A Large Output Hopper
Push up (a) to insert the four tabs in the slots and then push the base forward (b) to lock it to the printer. Position the other base section with the opening to the front of the printer. -
Page 162: Install The 200-Card Input Hopper
Remove the 25-card output hopper from the printer. Slide it out, similar to a drawer. Slide the 100-card output hopper into the assembled base and printer. Make sure the tabs (in circles) secure the hopper to the printer. & T INTS •... -
Page 163: Install The Lock Option
Load up to 200 cards in the hopper and close the cover. The printer is ready to print cards. Install the Lock Option The lock option is a user-installed feature that does not require special tools to install. The package contains a Kensington metal security plate. -
Page 164: Adjust The Colors Printed
Adjust the Colors Printed The XPS Card Printer driver for use with Windows operating systems includes a Color Adjustment feature in Printing Preferences. Using the Color Adjustment tab, you can: • Change the brightness of color printing on the card •... -
Page 165: Contrast
Evaluate the appearance of the cards. Repeat these steps until the cards meet your requirements. Click the Apply button to save the new values. Contrast To change the degree of difference between the light and dark values of an image, change the Contrast setting. Click the Up arrow to increase contrast, or the Down arrow to decrease contrast. - Page 166 Determine which color needs adjustment: • Increase red, or decrease red to add cyan (light blue). • Increase green, or decrease green to add magenta (red-purple). • Increase blue, or decrease blue to add yellow. • If changing the obvious color does not produce the desired effect, try changing the other two.
-
Page 167: View Card Counts Using The Driver
View Card Counts using the Driver The XPS Card Printer Driver displays card counts in the Printer Properties dialog. Follow the steps in this topic to view card counts using the XPS Card Printer Driver. Open the Printer Properties dialog. -
Page 168: View Card Counts From The Printer Lcd Menu
View Card Counts from the Printer LCD Menu The printer front panel has an LCD menu system that displays information about the printer, including card counts. See all the LCD menu system. Begin with the printer powered on and in the “Ready” state. -
Page 169: Change A Card Design
Press the E Press the E Press the E Press the E Press the E Press the E Press the E Press the E To print cards, press the E Menu Available” display. Press the U Change a Card Design Card design is the name given to the combined features of the printed cards. - Page 170 • Use cards with a magnetic stripe or bar code in a reader to verify the data works as expected. • If you print large groups of cards (batches), print a typical group of cards and check cards printed at the beginning, middle, and end to make sure they all work.
-
Page 171: Run A Cleaning Card
Run a Cleaning Card Run a printer cleaning card to clean debris from the inside of the printer. The cleaning card can remove most contaminants from the printer. Begin with the printer powered on. Open the printer cover and remove the print ribbon cartridge. -
Page 172: Clean The Printhead
Replace the ribbon cartridge and close the printer. The printer is ready to print cards again. Discard the used cleaning card and cleaning sleeve. Clean the Printhead Begin with the printer powered off. Open the printer cover and remove the print ribbon cartridge. -
Page 173: Set The Driver Network Port Value
& T INTS The IP address can change when the printer is powered off and powered on, and the Address Method is DHCP. If the IP Address method is Static, then the IP Address is assigned using the printer LCD panel and the address does not change. -
Page 174: Encode Magnetic Stripe Without Printing
If the printer changes address often and that causes problems, ask your manager or network support person to assign a printer name, and enter the printer name using these steps. See The Ports tab shows the Windows “Enable Printer Pooling” checkbox. The XPS Card Printer driver does not support pooling. -
Page 175: Change The Lcd Backlight
When the light is the level you want, press the E The printer saves the setting and returns to the Configuration menu. Press an arrow key repeatedly to display “Exit” on line 2. -
Page 176: Get The Printer Network Ip Address
Get the Printer Network IP Address The printer can display the IP address it uses when connected to the network. It also displays the Subnet Mask, Gateway Address, and MAC Address. Begin with the printer power connected, and the printer connected to the network. -
Page 177: Get The Printer Usb Ip Address
Get the Printer USB IP Address Follow these steps if the printer is connected using a USB cable and you want to use the Printer Manager. Begin with the printer power connected, and the printer connected to the PC using a USB cable. -
Page 178: Load Cards
Load Cards If you are using a manual feed printer, keep a supply of blank cards close to the printer. For printers with an input hopper, continue with these steps: Open the input hopper (a). Fan cards before placing them into input hopper (b). -
Page 179: Load Cleaning Roller
Load Cleaning Roller Load a new cleaning roller with each new roll of print ribbon. The printer ships with the cleaning roller spindle installed on the print ribbon cartridge. Remove the cleaning roller spindle from the ribbon cartridge and slide the continuous cleaning sleeve onto the spindle (a). -
Page 180: Open Printing Preferences
Open Printing Preferences You can open the Printing Preferences dialog in the following ways: • Using the Open Printers Window button in My XPS Card Printer • From the Start Menu in Windows 7 or Vista • From the Start Menu in Windows XP... -
Page 181: Open Preferences From The Start Menu In Windows 7 Or Vista
Windows 7 or Vista From the Windows Start menu, choose Control Panel. Click the Hardware (Printers) choice to open the Printers Window. Right-click the icon for the printer to select it. Choose Printing Preferences from the Pop-up Menu. The Printing Preferences dialog opens. -
Page 182: Open The Printer Manager
• Advanced button: • See • See • Settings return to default values if the printer name is changed in the Printers (and Devices) window. Open the Printer Manager The printer includes the Printer Manager, which displays information about the printer. - Page 183 • Model, versions and other information about the printer: Choose Status > • The Supplies installed and information about them; Choose Status > Supplies. • For the safest printer, use the Log Out button in Printer Manager and close the browser after logging out.
-
Page 184: Open Printer Properties
Open Printer Properties You can open the Printer Properties dialog in the following ways: • Using the Open Printers Window button in My XPS Card Printer • From the Start Menu in Windows 7 or Vista • From the Start Menu in Windows XP &... -
Page 185: Open Printer Properties From My Xps Card Printer
Windows feature does not override the timing of jobs or the order of jobs in the printer. As a result, higher priority cards might print after lower priority cards. Windows 7 includes a Keep printed documents choice on the Printer Properties... -
Page 186: Open Printer Properties From The Start Menu In Windows Xp
If the PC to which the printer is attached has more than one user, set permissions that: • Give users access to all features of the printer and driver, including messages. -
Page 187: Print Driver Sample Cards
From the Permissions list, select the access: To enable printing, select Allow for Print, Manage Printers, and Manage Documents. For a user who should not print to the card printer, select Deny for all permissions. Select Apply to save the change. Save changes for each name. -
Page 188: Print A Printer Test Card
The data cannot be changed. • The magnetic stripe data sent by the driver requires that the printer be set to encode the three-track ISO format for a three-track module, or the JIS-II format for the single-track module. -
Page 189: Print On Both Sides Of The Card
Some printers include an automatic duplex module which automatically turns the card to print both sides. Check the configuration label located on the left side of the printer to verify if the printer includes a duplex module. See Configuration Label ”... - Page 190 Press the U the card. The printer picks the card again and prints the second side. & T INTS The driver uses the “Short Edge” setting for both “Flip on Short Edge” and “Flip on Long Edge”...
-
Page 191: Print More Than One Copy Of A Card
Print More Than One Copy of a Card The Layout tab of Printing Preferences contains a Number of Copies entry area used for printing several copies of the same card design. You can print from 1 to 255 copies of the same card. To print more than one copy If you are using a card design application, set the number of copies in the application. -
Page 192: View Printer Status
Busy The printer is processing a card or a command, or the printer menu system is being used. Message If the printer has issued a message for a card sent from this PC, the message text is displayed. How-To Topics... -
Page 193: Port Type
Icon Port Type The Port Type line shows: • “USB” for a locally connected printer. • “Network” for a printer connected using a network connection. The line also displays the printer IP address. Printer Information The Printer Information box shows:... -
Page 194: Test
Card button. See Find the Printer Serial Number The printer serial number is available from several sources. • When the printer is powered off, the printer configuration label is the easiest way to find the serial number. See information. • The XPS Card Printer Driver provides the serial number on the Printer Properties >... -
Page 195: Viewing The Serial Number From The Front Panel
Viewing the Serial Number from the Front Panel Begin with the printer powered on and in the “Ready” state. Press the U shows “Suspended”. Press the E Press the down arrow to display “Status” on line 2. Press the E Status is displayed on Line 1 and Serial Number is displayed on Line 2. -
Page 196: Set Magnetic Stripe Coercivity
Set Magnetic Stripe Coercivity The printer setting for coercivity can be changed from the LCD panel, if needed. Usually, coercivity is a system-wide decision and does not change. Begin with the printer “Ready”. The U shows steady green. Press the U Line 1 of the LCD panel. -
Page 197: Set The Print Area
Set the Print Area The XPS Card Printer Driver can prevent printing and topcoat on specific areas of the card. By default, the entire side of the card is printed. If your cards include a magnetic stripe, a smart card chip, or other area, define the area to block printing. -
Page 198: Set The Print Resolution
For example, the black text of a card design can print at high resolution while the color images print at standard resolution. The ability of a printer to support high resolution printing is set at the factory. If the printer includes the High Resolution Print option, the available resolutions will be listed on the Status tab of Printer Properties. -
Page 199: Set Ip Address Type
The choices are DHCP and Static IP. DHCP stands for “Dynamic Host Configuration Protocol” and means that the network assigns the IP Address to the printer. The printer is set to DHCP in the factory. See “Get the Printer Network IP Address”... - Page 200 Obtain the IP Address, Subnet Mask, and Gateway Address for each printer before you begin this procedure. Begin with the printer “Ready”. The U button glows steady green. Press the U “Suspended” on Line 1 and Menu available on Line 2.
- Page 201 Enter the assigned address: • The IP Address has 4 bytes, separated by periods. • A curser appears under the digit that will change. Use the arrow keys to change one digit at a time. Use the E key to navigate NTER through the address bytes.
-
Page 202: Use Print Blocking Escapes
For magnetic stripe and smart card areas, see areas which you define, use this topic. The XPS Card Printer Driver recognizes escape statements to define print areas. Escape statements are specific sequences of characters that mark data with a special purpose. Areas defined using escapes override driver settings, unless no area is defined. -
Page 203: Print Blocking
• ~ is the beginning of the statement • XX represents the type of action – Block Print, Add Topcoat, or Remove Topcoat. • n1 is the distance from the top of the card to the start of the area •... -
Page 204: Topcoat Add Statement
Topcoat Add Statement The topcoat add statement prints topcoat in the area defined in the statement. All other areas of the card do not have topcoat. All full-color printing must be covered with topcoat. Use this option with care. The topcoat add statement begins with ~TA% Examples: ~TA%0 0 86.5 37? ~TA%16.8 0 37.1 5;30.5 45.23 15 15? - Page 205 • If you do not use the driver or ID software, you can use the dimensions provided for smart card and magnetic stripe to customize your print and topcoat areas. • Use ID software, a custom application, or escapes to define custom non- printing areas for one or more of the following: •...
-
Page 206: Use Magnetic Stripe Escapes
The data to encode on a magnetic stripe is entered as text and can look like data to print. The XPS Card Printer Driver uses special characters called Escape Codes to identify data to encode. Data within escape codes is not printed. The driver supports several Escape Code systems to allow easy compatibility with other card printers. -
Page 207: Supported Escape Codes
The Escape Code defines the track for the data. The data format for each track is set in the printer, and you must enter the type of data the format requires. The table below shows the default ISO format data, and how the data looks when formatted. -
Page 208: Use Magnetic Stripe Fonts
• Data to encode can be on side 1 (front) or side 2 (back) of the card. Select a line of data and apply one of the following fonts: • Mag Track 1 XPS Card Printer • Mag Track 2 XPS Card Printer • Mag Track 3 XPS Card Printer •... -
Page 209: View The Driver Version
View Network Information When the printer and PC using the XPS Card Printer Driver are connected using a network, the network settings on the PC and the printer must match. The driver Printer Properties dialog includes the Ports tab for specifying or viewing the printer IP Address being used. -
Page 210: Print Bar Codes Using Monochrome
“Set IP Address Print Bar Codes Using Monochrome The card printer can be set to detect bar codes that could be embedded in an image and send the data to print using the K panel of color print ribbon. See “Types of Bar Codes Detected”... -
Page 211: Chapter 13: Legal Notices
Chapter 13: Legal Notices Safety and Compliance Please note and heed the WARNING and CAUTION labels that have been placed on the equipment for your safety. Please do not attempt to operate or repair this equipment without adequate training. Regulatory Compliance Notice for USA (FCC notice) This equipment has been tested and found to be within the limits for Class A computing devices, pursuant to Subpart J of Part 15 of FCC rules, designed to... -
Page 212: Notice For Europe
We hereby certify that this printer complies with EMC Directive 89/336/EEC, R&TTE Directive 1999/5/EC, and the EU RoHS Directive EU Directive 2002/95/ EG. This printer conforms to Class A of EN 55022 and to EN 301 489-5. Operation of this equipment in a residential environment may possibly cause interference. -
Page 213: Liability Statement
Datacard Group brand equipment are primarily environmental and human interface. The following basic safety tips are given to ensure safe installation, operation and maintenance of Datacard Group brand equipment and are not to be considered as comprehensive on all matters of safety. Safe environment Connect equipment to a grounded power source. -
Page 214: Safe Human Interface
PLR IP Holdings, LLC does not manufacture this product or provide any Manufacturer's Warranty or support. is a registered trademark of DataCard Corporation in the United States and/or other countries. PartnerPage is a service mark of DataCard Corporation in the United States and/or other countries. -
Page 215: Disclaimer
Disclaimer Names and logos on sample cards are fictitious. Any similarity to actual names, trademarks, or trade names is coincidental. Proprietary Notice All drawings and information herein are the property of DataCard Corporation. - Page 216 Legal Notices...