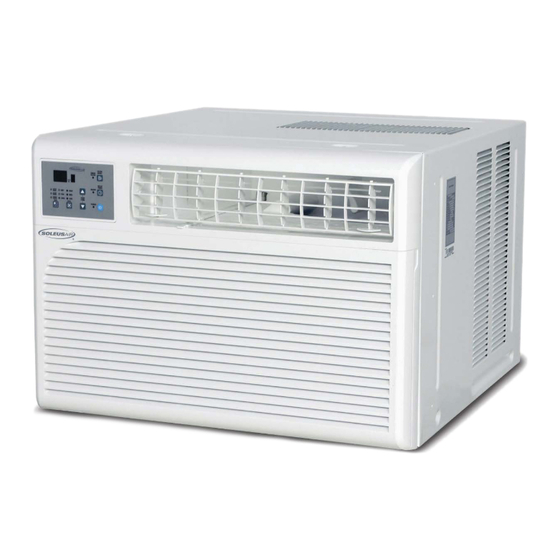
Summary of Contents for Soleus Air WM1-15E-01
- Page 1 Models WM1-15E-01 15,400 BTU WM1-18E-01 18,300 BTU WM1-24E-01 24,700 BTU Electronic Window Air Conditioner Operating Instructions V170124...
-
Page 2: Purchase Information
PURCHASE INFORMATION Thank you for choosing a Soleus Air Air Conditioner. This owner’s manual will provide you with valuable information necessary for the proper care and maintenance of your new product. Please take a few moments to thoroughly read the instructions and familiarize yourself with all the operational aspects of your new air conditioner. -
Page 3: Power Cord And Plug
If test button is pressed and unit can still be turned on, current leakage has been detected. Do not use the air conditioner or attempt to reset the LCDI Plug. Contact Soleus Air Customer Service for troubleshooting recommendations. -
Page 4: Package Contents
PACKAGE CONTENTS Hardware Qty. (in plastic bag) Sash Lock Screw and Locknut WINDOW SASH SEAL Flathead Bolt and Locknut SASH LOCK AND Sill Angle SHORT SCREW Bracket TOP MOUNTING FOAM GASKET Curtain Lock RAIL SHORT SCREW Long Screws CURTAIN Short Screws CURTAIN LOCK FRAME TOOLS NEEDED... -
Page 5: Specifications
Power consumption is measured when the fan runs at the highest speed setting. These specifications are for reference only. For actual data, please refer to the rating label on the back of the unit. Model WM1-15E-01 Power Supply (Ph/V/Hz) 1/115/60 Rated Cooling Capacity (BTU/h) 15,400... -
Page 6: Electrical Safety
ELECTRICAL SAFETY Avoid fire hazard or electronic shock, WARNING: DO NOT use an extension cord or an adapter plug. DO NOT remove any prong from the power cord. DO NOT under any circumstances, cut, remove, or bypass the grounding prong!! Power supply cord with 3-prong grounding plug and current detection device DISCLAIMER... -
Page 7: Installation
Make sure the window is in good shape and able to firmly hold the needed screws. If not, make repairs prior to installing the unit. Model WM1-15E-01 WM1-18E-01 / WM1-24E-01 Unit Height 17 33/4"... - Page 8 INSTALLATION INSTALLATION & ASSEMBLY INSTRUCTIONS - WINDOW MOUNTING REMOVE CHASSIS 1. Pull down the front panel and remove the filter. (See Fig. 3) 2. Lift the front panel upwards to remove and place to the side. Fig. 3 Fig. 4 3.
-
Page 9: Curtain Installation
INSTALLATION Curtain Installation Top Mounting Rail 1. Attach the top mounting rail to the unit with short screws (Fig.8) Fig. 8 Weather Insulation Board 2. Slide the free end of the curtain into the side panel of the air Fig.11 conditioner. -
Page 10: Install Support Brackets
INSTALLATION Install the Window Lock and Sash Seal Install Support Brackets 1. Trim the sash seal to fit the width of the window. Insert 1. Hold each support bracket flush against the outside of the sash seal into space between the upper and lower the window sill. - Page 11 INSTALLATION Installing the Chassis into the Cabinet Extend the Curtain Panels 1. Carefully raise the window to expose the curtain panel 1. Team lift (two people) the air conditioner chassis and carefully slide it into the cabinet. Let the front of the air and panel frame.
-
Page 12: Control Panel Layout
CONTROL PANEL LAYOUT Electronic Control Panel & Remote Control Note: This control panel display always shows the room 4. Timer Set: Use these buttons on the temperature in Fan Mode except when setting the tem- control panel and remote control to set the perature and timer. -
Page 13: Remote Control
REMOTE CONTROL LCD Display MODE SLEEP ENERGY HIGH SAVER TIMER C/ F CHILD MYTEMP MODE LOCK Battery Size: AAA - NOTE: Do not mix old and new batteries or different types of AAA batteries. * Remote Colors may differ from the image above. - Page 14 OPERATING INSTRUCTIONS 1. ON/OFF - Press the button to turn the A/C on or off. When the unit is turned off, the Timer function will be cancelled. The set temperature will be saved. 2. MODE SELECTION - Press the MODE button repeatedly to cycle between the different modes: Auto, Cool, Dry (Dehumidifier), and Fan.
- Page 15 USE THE AIR CONDITIONER 5. Fan Only Mode: Use Fan Only mode at High, 1. Freezing Conditions: This is a cooling only air Medium, or Low fan speed to provide air circula- conditioner. It is not designed for freezing outdoor tion and filtering without cooling.
-
Page 16: Care And Cleaning
Cabinet Cleaning CARE AND CLEANING To clean the air conditioner cabinet: Clean your air conditioner to keep it looking new and to minimize dust build up. Unplug the air conditioner to prevent shock or a fire hazard. The cabinet and front panel of Air Filter Cleaning the air conditioner may be dusted with an oil- The air filter should be checked at least once... -
Page 17: Troubleshooting
TROUBLESHOOTING PROBLEM POSSIBLE CAUSES SOLUTIONS The Air Conditioner will not start The air conditioner is unplugged Make sure the air conditioner plug is pushed completely into the outl- Check the main fuse/circuit The fuse is blown/circuit breaker is breaker box and replace the fuse tripped. - Page 18 TROUBLESHOOTING PROBLEM POSSIBLE CAUSES SOLUTIONS Water is dripping outside Hot and Humid weather. This is normal Water is dripping inside the room The air conditioner is not correctly For proper water drainage, make tilted outside. sure the air conditioner is slightly tilted downward from the front of the unit to the rear.
-
Page 19: Limited Warranty
Two Year Components Limited Warranty Five Year Compressor Limited Warranty Soleus N.A. warrants the accompanying Soleus Air Air Conditioner to be free of defects in material and workmanship for the applications specified in its operation instruction for a period of TWO (2) years for components and FIVE (5) years for the compressor from the date of original retail purchase in the United States.


