
Related Manuals for Soleus Air WCM1-08E-01


Summary of Contents for Soleus Air WCM1-08E-01
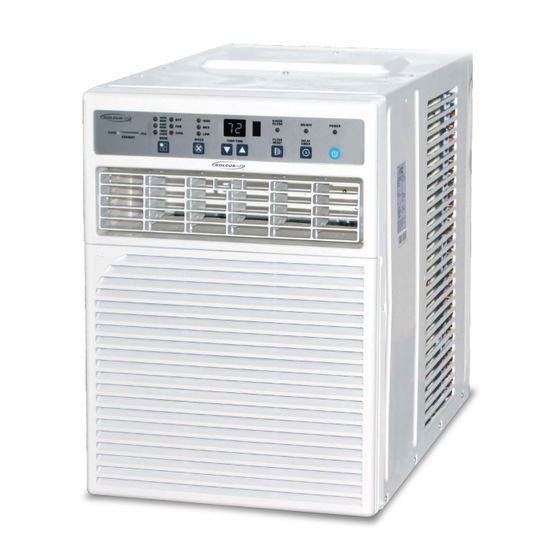
- Page 1 Model WCM1-08E-01 8,000 BTU Electronic Casement Window Air Conditioner Operating Instructions 3058080 V151208...
- Page 2 Thank you for choosing a Soleus Air Air Conditioner. This owner’s manual will provide you with valuable information necessary for the proper care and maintenance of your new product. Please take a few moments to thoroughly read the instructions and familiarize yourself with all the operational as- pects of your new air conditioner.
-
Page 3: Specifications
Power consumption is measured when the fan runs at the highest speed setting. These specifications are for reference only. For actual data, please refer to the rating label on the back of the unit. Model WCM1-08E-01 Power Supply (Ph/V/Hz) 1/115V/60Hz Dehumidifying Capacity (Pints/Day) 34.8... -
Page 4: Receptacle Wiring
IMPORTANT SAFETY INSTRUCTIONS Read all instructions before using this air conditioner These instructions describe installation in a typical wood framed window with a wood SLIDE-BY sash, or installation in a metal CASEMENT window. Modification may be necessary when installing in windows made differently than those shown in these instructions. -
Page 5: Electrical Information
IMPORTANT SAFETY INSTRUCTIONS (Continued) Read all instructions before using this air conditioner ACCIDENT PREVENTION To reduce the risk of fire, electrical shock, or injury to persons when using your air conditioner, follow basic precautions, including the following: Be sure the electrical service is adequate for the model you have chosen. This information can be found on the rating label located on the side of the cabinet or behind the grille. -
Page 6: Lcdi Power Cord And Plug
If test button is pressed and unit can still be turned on, current leakage has been detected. Do not use the air conditioner or attempt to reset the LCDI Plug. Contact Soleus Air Customer Service for troubleshooting recommendations. -
Page 7: Preparing For Installation
PREPARING FOR INSTALLATION Installation Tips For wood-frame casement windows: It may be necessary to construct a frame, using at least 1-inch thick wood, with a 15-1/2-inch wide opening. For brick or cement building construction: It may be necessary to put a wood stool strip under AC, for mounting purposes. -
Page 8: Table Of Contents
PARTS LIST & INSTALLATION Installation Kit Contents Platform (1) Support brace (1) Adjustment bolt (1) Hex flange nut—1/4” (1) Track seal (1) Side channel seal (1) Foam seal strip/Sash seal Safety bracket (1) 9-11.Screw—2-1/2” (2), or Screw– 1- 3/4” (2) or Screw– 1” (2) 12. -
Page 9: Adjustment
INSTALLATION INSTALLING THE UNIT IN A SLIDING WINDOW 1. Attach support brace to platform as shown. Use adjustment bolt and hex flange nut to complete assembly. Choose slot and adjustment bolt hole locations that will create a 45 degree angle between platform and support brace. -
Page 10: Plastic Window
INSTALLATION—SLIDING INSTALLING THE UNIT IN A SLIDING WINDOW (CONT.) Peel off protective backing from track seal. Apply seal to room side of window track. Center of seal strip should coincide with the line marked in Step 2. The two screw holes drilled in Step 3 should be directly above seal strip in the inner track. -
Page 11: Weather Insulation
INSTALLATION—SLIDING INSTALLING THE UNIT IN A SLIDING WINDOW (CONT.) 10. Clamp plastic window panel between a board and a work table, and cut along cutting line with a fine tooth saw. Remove any burrs with a file. 11. Fasten side channels to the sides of the AC using 3 screws (Item 17) per channel. -
Page 12: Side Channel
INSTALLATION—SLIDING INSTALLING THE UNIT IN A SLIDING WIN- DOW (CONT.) 13. Cut side channel seal into 2 equal lengths. Remove protective backing and apply it to the rear side of cabinet side channels, starting just below panel frame assembly. Pinch off excess length so seal is even with the bottom of the cabinet side channel. - Page 13 INSTALLATION—SLIDING INSTALLING THE UNIT IN A SLIDING WINDOW (CONT.) 16. Slide inner window sash firmly against side of the cabinet. Make sure not to peel the seal strips from the window track and cabinet side channels. If the panel frame does not fit snugly to the inner window sash, secure the panel frame to the sash with #8x3/4-inch screws, or #8-32x3/4-inch self- threading screws.
- Page 14 INSTALLATION—CASEMENT INSTALLING THE UNIT IN A CASEMENT WINDOW NOTE: Open the window the maximum amount to allow for clearance of the cabinet. The crank handle should be removed to allow the platform to be fastened to the jamb. If the window cannot open far enough (more than 15-1/2 inches) for the cabinet to clear the window, remove the window entirely by drilling out the rivets.
- Page 15 INSTALLATION—CASEMENT INSTALLING THE UNIT IN A CASEMENT WINDOW (CONT.) 5. Adjust the platform assembly so that the rear of the air conditioner will be 3/16-inch lower than the front. This ensures proper water drainage from the air conditioner. NOTE: A projection below the base of the air conditioner will require the rear of the platform to be 7/16-inch lower than the front to create the 3/16-inch slant from front to rear.
- Page 16 INSTALLATION—CASEMENT INSTALLING THE UNIT IN A CASEMENT WINDOW (CONT.) 11. Cut side channel seal into 2 equal lengths. Remove the protective backing and apply it to the rear side of the cabinet side channels, starting just below the panel frame assembly. Pinch off excess length so the seal is even with the bottom of the cabinet side channel.
-
Page 17: Remote
OPERATING YOUR AIR CONDITIONER Before you start using your air conditioner, please familiarize yourself with the control panel and remote control functions. This air conditioner can be controlled by the control panel (touch pad) CONTROL PANEL 1) Power On and Off - Press the POWER to turn the unit ON and OFF. 2) Digital Display - Displays the set temperature in Auto, Cool, Dry modes, and current room tempera- ture in Fan mode. - Page 18 OPERATING YOUR AIR CONDITIONER -Fan Mode : When the unit is in Fan Mode, the Fan Mode light will turn on. Fan Mode operates the unit just like a fan and circulates air throughout the room without any additional cooling. -Dry Mode : When the unit is in Dry mode, the Dry mode light will turn on.
-
Page 19: Remote Control Operating Instructions
REMOTE CONTROL OPERATING INSTRUCTIONS Using the Remote Control LCD Display MODE SLEEP ENERGY HIGH SAVER TIMER C/ F CHILD MYTEMP MODE LOCK Battery Size: AAA - NOTE: Do not mix old and new batteries or different types of AAA batteries. - Page 20 REMOTE CONTROL OPERATING INSTRUCTIONS 1. ON/OFF - Press the button to turn the A/C on or off. When the unit is turned off, the Timer function will be cancelled. The set temperature will be saved. 2. MODE SELECTION - Press the MODE button repeatedly to cycle between the different modes: Auto, Cool, Dry (Dehumidifier), and Fan.
- Page 21 OPERATING YOUR AIR CONDITIONER AIR CONDITIONER FEATURES There is a 3 minute delay when cooling mode is engaged or disengaged. This delay prevents the com- pressor from overheating and possible tripping of the circuit breaker. The fan will continue to run during this time.
-
Page 22: Care And Cleaning
TAKING CARE OF YOUR AIR CONDITIONER CARE AND CLEANING Cabinet Cleaning Clean your air conditioner to keep it looking new To clean the air conditioner cabinet: and to minimize dust build up. Unplug the air conditioner to prevent shock or a ... -
Page 23: Troubleshooting
TROUBLESHOOTING PROBLEM POSSIBLE CAUSES SOLUTIONS The Air Conditioner will not start The air conditioner is unplugged Make sure the air conditioner plug is pushed completely into the out- let. Check the house fuse/circuit The fuse is blown/circuit breaker is breaker box and replace the fuse tripped. - Page 24 TROUBLESHOOTING (Continued) PROBLEM POSSIBLE CAUSES SOLUTIONS Water is dripping outside Hot and Humid weather. This is normal Water is dripping inside the room The air conditioner is not correctly For proper water drainage, make tilted outside. sure the air conditioner is slightly tilted downward from the front of the unit to the rear.
- Page 25 Warranty Soleus Home Comfort warrants the accompanying Soleus Air Air Conditioner to be free of defects in mate- rial and workmanship for the applications specified in its operation instruction for the period of parts specified below. 5 YEARS FOR COMPRESSOR 2 YEAR FOR OTHER COMPONENTS This warranty shall not apply to broken or marred cabinets, accessories, knobs, filters or routine maintenance.