Table of Contents
Advertisement
Available languages
Available languages
Owner's Manual/Manual
Del Propietario
1/2 HP
GARAGE DOOR OPENER
ABRIDOR
DE PUERTA DE COCHERA
For Residential
Use Only/Sblo
para uso residencial
Models/Modelos
• 139.53975SRT1
• 139.53962SRT1
Read and follow
all safety rules
and operating
instructions
before
first use of this product.
Fasten the manual near the garage
door after installation.
Leer y seguir todas las reglas de
seguridad
y las instrucciones
de
operacibn
antes de usar este
producto por primera vez.
Guardar este manual cerca de la
puerta de la cochera.
Periodic checks of the opener are
required to ensure safe operation.
Se deben realizar revisiones
peribdicas
del abridor de puertas
para asegurar su operacibn
segura.
Sears,
Roebuck
and Co.,
Hoffman
Estates,
IL 60179
U.S.A
www.sears.com/craftsman
Advertisement
Chapters
Table of Contents

Related Manuals for Craftsman 139.53962SRT1


Summary of Contents for Craftsman 139.53962SRT1
- Page 1 Sears, Roebuck and Co., Hoffman www.sears.com/craftsman Del Propietario para uso residencial • 139.53962SRT1 Leer y seguir todas las reglas de before seguridad operacibn producto por primera vez. Guardar este manual cerca de la puerta de la cochera.
-
Page 2: Table Of Contents
Symbol and Signal Word Review This garage door opener has been designed and tested to offer safe service provided it is installed, operated, maintained and tested in strict accordance with the instructions and warnings contained in this manual. Mechanical Electrical Adjustment Adjust the travel limits ... -
Page 3: Preparing Your Garage Door
BEFORE installing and operating garage door opener to avoid entanglement. To prevent damage to garage door and opener: • ALWAYSdisable locks BEFORE installing and operating the opener. • ONLYoperate garage door opener at 120V, 60 Hz to avoid malfunction and damage. Door Tools needed... -
Page 4: Planning
Planning Identify the type and height of your garage door. Survey your garage area to see if any of the conditions below apply to your installation. Additional materials may be required. You may find it helpful to refer back to this page and the accompanying illustrations as you proceed with the installation of your opener. -
Page 5: Planning
Planning (continued) ONE-PIECE DOOR INSTALLATIONS • Generally, a one-piece door does not require reinforcement. If your door is lightweight, refer to the information relating to sectional doors in Installation Step 11. • Depending on your door's construction, you may need additional mounting hardware for the door bracket (Step 11). -
Page 6: Carton Inventory
Carton Inventory Your garage door opener is packaged in two cartons which contains the motor unit and the parts illustrated below. Note that accessories will depend on the model purchased. If anything is missing, carefully check the packing material. Parts may be stuck in the... -
Page 7: Hardware Inventory
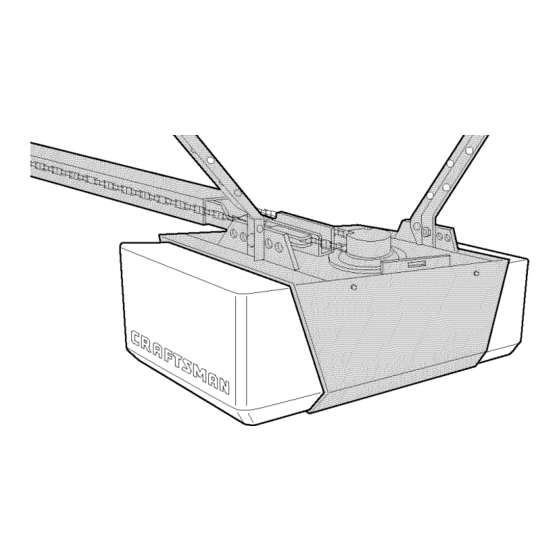
Hardware Inventory Separate all hardware and group as shown below for the assembly and installation procedures. Chain Spreader Bolt 1/4"-20 x 1-3/4" (2) Trolley Threaded Carriage Bolt Wing Nut 1/4"-20xl/2" 1/4"-20 (2) Lag Screw 5/16"-9xl-5/8" Lag Screw 5/16"-18xt -7/8" (2) Carriage Bolt 5/16"-18x2-1/2"... - Page 8 Assemble the Rail & Install To avoid installation difficulties, do not run the garage door opener until instructed to do so. The front rail has a cut out "window" at the door end (see illustration). The hole above this window larger on the top of the rail than on the bottom.
- Page 9 Tighten securely with a 1/4"-20 lock nut. Idler Boit Unit To avoid serious damageto garage door opener, use only those screws mounted in the top of the opener. "U" Bracket Boll Cover...
- Page 10 Squeeze cover and insert tabs in slots. To avoid possible SERIOUSINJURYto fingers from Cover moving garage door opener: • ALWAYSkeep hand clear of sprocket while operating opener. • Securely attach sprocket cover BEFORE operating. Master Link _...
-
Page 11: Tighten The Chain
4. Disable all locks and remove all ropes connected to garage door BEFORE installing opener to avoid entanglement. 5. Install garage door opener 7 feet or more above floor. 6. Mount emergency releasehandle 6 feet above floor. 7. NEVERconnect garage door opener to power source until instructed to do so. -
Page 12: Determine The Header Bracket Location
INSTALLATION STEP Determine the Header Bracket Location To prevent possible SERIOUSINJURYor DEATH: • Header bracket MUST be RIGIDLYfastened to structural support on header wall or ceiling, otherwise garage door might not reverse when required. DO NOT install header bracket over drywall. •... - Page 13 ONE-PIECE DOOR WITHOUT TRACK 1. Close the door and mark the inside vertical centerline of your garage door. Extend the line onto the header wall above door, as shown. If headroom clearance is minimal, you can install the header bracket on the ceiling. See page 14. If you need to install the header bracket on a 2x4 (on wall or ceiling), use lag screws (not provided) to securely fasten the 2x4 to structural supports...
-
Page 14: Install The Header Bracket
INSTALLATION STEP Install the Header Bracket You can attach the header bracket either to the wall above the garage door, or to the ceiling. Follow the instructions which will work best for your particular requirements. Do not install the header bracket over drywall. -
Page 15: Attach The Rail To The Header Bracket
Header Wall Header Bracket Spring Garage Door HARDWARE SHOWN ACTUAL Clevis Pin 5/16"x1-1/2" INSTALLATION STEP Attach the Rail to the Header Bracket NOTE: (Optional) With an existing Craftsman installation, you may re-use the old header bracket with the two plastic spacers included in the hardware bag. -
Page 16: Position The Opener
INSTALLATION STEP Position the Opener Follow instructions which apply to your door type as illustrated. SECTIONAL DOOR OR ONE-PIECE TRACK A 2x4 laid flat is convenient for setting an ideal door- to-rail distance. • Raise the opener onto a stepladder. You will need help at this point if the ladder is not tall enough. -
Page 17: Hang The Opener
5/16"-18xl-7/8" © Hex Screw 5/16"- 18x7/8" Nut 5/16"-18 To avoid possible SERIOUSINJURYfrom a falling garage door opener,fasten it SECURELY to structural supports of the garage. Concrete anchors MUST be used if installing any brackets into masonry. Figure 1 Measure Distance Figure 2 5/16"- 18x7/8"... -
Page 18: Install The Door Control
INSTALLATION STEP Install the Door Control Locate door control within sight of door, at a minimum height of 5 feet where small children cannot reach, away from moving parts of door and door hardware. If installing into drywall, drill 5/32" holes and use the anchors provided. -
Page 19: Install The Lights And Lens
• For convenience, the lenses may be installed after Adjustment Step 4 on page 30. • To remove, reverse the procedure. Use care to avoid snapping off lens tabs. • Use standard neck Garage Door Opener bulbs for replacement. INSTALLATION STEP... -
Page 20: Electrical Requirements
INSTALLATION STEP Electrical Requirements To avoid installation difficulties, do not run the opener at this time. To reduce the risk of electric shock, your garage door opener has a grounding type plug with a third grounding pin. This plug will only fit into a grounding type outlet. -
Page 21: Install The Safety Reversing Sensor
INSTALLATION STEP Install The Safety Reversing The safety reversing sensor must be connected and aligned correctly before the garage door opener will move in the down direction. IMPORTANT INFORMATION ABOUT THE SAFETY REVERSING SENSOR When properly connected and aligned, the sensor will detect an obstacle in the path of its electronic beam. - Page 22 INSTALLING THE BRACKETS Be sure power to the opener is disconnected. Install and align the brackets so the sensors will face each other across the garage door, with the beam no higher than 6" above the floor. They may be installed in one of three ways, as follows.
- Page 23 MOUNTING AND WIRING THE SAFETY SENSORS • Slide a 1/4"-20xl/2" carriage bolt head into the slot on each sensor. Use wing nuts to fasten sensors to brackets, with lenses pointing toward each other across the door. Be sure the lens is not obstructed by a bracket extension.
-
Page 24: Fasten The Door Bracket
INSTALLATION STEP Fasten the Door Bracket Follow instructions which apply to your door type as illustrated below or on the following page. A horizontal reinforcement brace should enough to be secured to two vertical supports vertical reinforcement brace should cover the height of the top panel The illustration shows one piece of angle iron as the horizontal brace. - Page 25 ONE-PIECE D OORS Please read and comply with the warnings and reinforcement instructions on the previous page. They apply to one-piece doors also. • Center the door bracket on the top of the door, in line with the header bracket as shown. Mark either the left and right, or the top and bottom holes.
- Page 26 INSTALLATION STEP Connect Door Arm to Trolley Follow instructions which apply to your door type as illustrated below and on the following page. SECTIONAL DOORS ONLY • Make sure garage door is fully closed. Pull the emergency release handle to disconnect the outer trolley from the inner trolley.
-
Page 27: Connect The Door Arm To The Trolley
ALL ONE-PIECE DOORS 1. Assemble the door arm, Figure 4: • Fasten the straight and curved door arm sections together to the longest possible length (with a 2 or 3 hole overlap). • With the door closed, connect the straight door arm section to the door bracket with the 5/16"x1-1/4"... -
Page 28: Adjustment
ADJUSTMENT STEP Adjust the UP and DOWN Travel Limits Limit adjustment settings regulate the points at which the door will stop when moving up or down. To operate the opener, press the Door Control push button. Run the opener through a complete travel cycle. -
Page 29: Adjust The Force
ADJUSTMENT STEP Adjust the Force Force adjustment controls are located on the right side panel of the motor unit. Force adjustment settings regulate the amount of power required to open and close the door. If the forces are set too light, door travel may be interrupted by nuisance reversals in the down direction and stops in the up direction. -
Page 30: Test The Safety Reversal System
The door will not move more than an inch, and the opener lights will flash. The garage door opener will not close from a remote if the indicator light in either sensor is off (alerting you to the fact that the sensor is misaligned or obstructed). -
Page 31: Operation
• The wall-mounted Door Control: Hold the push button down until the door starts to move. • The Keyless Entry (See Accessories): with your garage door opener, it must be programmed before use. See Programming. When the opener is activated (with the safety reversing sensor correctly installed and aligned) 1. -
Page 32: Using The Wall-Mounted Door Control
Using WaU.Mounted Door Control THE PREMIUM CONTROL CONSOLE Light feature Press the Light button to turn I-f_ the opener light on or off. It will not control the opener lights when the door is in motion. If you turn it on and then activate the opener, the light will remain on for 4-1/2 minutes. - Page 33 Care of Your Opener LIMIT AND FORCE ADJUSTMENTS Weather conditions may FORCE CONTROLS cause some minor changes in door operation requiring some re-adjustments, particularly during the first year of operation. Pages 28 and 29 refer to the limit and force adjustments.
-
Page 34: Having A Problem
12. The opener lights don't turn on: • Replace the light bulbs (75 watts maximum). Use a standard neck garage door opener bulb if regular bulb burns out. 13. The opener lights don't turn off: • Is the Light feature on? Turn it off. -
Page 35: Programming
PROGRAMMING Your garage door opener has already been programmed at the factory to operate with your hand-held remote control. The door will open and close when you press the large push button. Below are instructions for programming your opener to operate with additional Security÷ remote controls. -
Page 36: To Add/Change Keyless Entry Pin
To Add NOTE: Your new Keyless Entry must be programmed to operate your garage door opener. USING THE "LEARN" BUTTON 1. Press and release the "learn" button on motor unit. The learn indicator light will glow steadily for 30 seconds. -
Page 37: Repair Parts
REPAIR PARTS Rail Assembly Parts Installation Parts PART 4A1008 41C5141-1 183C158-3 183C157-3 144C56 41A5249 144C62 12D598-1 PART DESCRIPTION 41A4884 Premium control console 41A5076 3-function remote control case (no circuit board) 10A20 3V 2032 Lithium battery 29B137 Visor clip 31D431 Keyless entry keypad cover 31B430 Keyless entry battery cover 10A2... -
Page 38: Motor Unit Assembly Parts
Motor Unit Assembly Parts PART DESCRIPTION 31D380 Sprocket cover 41C4220A Gear and sprocket assembly Complete Thrust washer, Retaining ring, Bearing plate, Roll pins (2), Drive gear and worm gear, Helical gear w/retainer and grease 41A2817 Drive/worm gear kit w/grease Roll pins (2) 41B4245 Line cord 41C4253... -
Page 39: Accessories
FULL 90-DAY WARRANTY ON GARAGE DOOR OPENER For 90 days from the date of purchase, Sears will repair this Garage Door Opener, free of charge, if defective in material or workmanship. From the 91st day until 1 year from the date of purchase, Sears will furnish replacement You pay for labor. - Page 40 CONTENIDO Introducci6n Revision de los sfmbolos y terminos de seguridad ... 2 Preparaci6n de la puerta de su cochera ... 3 Herramientas necesarias ... Planificaci6n Inventario de las cajas de cart6n ... Inventario de piezas ... Montaje Montaje el riel y instale el trole ... Sujete el riel al motor e instale el trole Ioco ...
-
Page 41: Preparaci6N De La Puerta De Su Cochera
Preparaci6n de la puerta de su cochera Antes de comenzar: • Desarme las cerraduras. • Retire cualquier cuerda o cable que este conectado a la puerta. • Haga la siguiente prueba con su puerta para verificar que este equilibrada y que no se atore ni se pandee: 1. -
Page 42: Planificaci6N
Planificaci6n Identifique la altura y el tipo de su puerta de cochera. Revise el Area de su cochera y observe si alguna de las siguientes instalaciones corresponden A veces se requieren materiales adicionales, asi que tal vez sea conveniente tener esta hoja y las ilustraciones correspondientes a la mane cuando inicie la instalaci6n de su abridor. - Page 43 Planificacibn (continua) INSTALACI()N CON PUERTAS DE UNA SOLA PIEZA • Generalmente una puerta de una sola pieza no requiere de refuerzos adicionales Si usted tiene una puerta de material liviano y quiere reforzarla informacion respecto a puertas seccionales, contenida en Instalaci6n Paso 11 •...
-
Page 44: Inventario De Las Cajas De Cart6N
Inventario de las cajas Su abridor viene empacado en dos cajas de cart6n que contienen el motor y las piezas que se muestran en la siguiente ilustracion. Tome nora de que los accesorios van a depender del modelo que haya comprado. Si falta alguna pieza, revise con cuidado el material de empaque ya que en ocasiones las piezas se atoran en el hule espuma. -
Page 45: Inventario De Piezas
Inventario de piezas Antes de la instalaci6n, organice todas las piezas en grupos como se muestra en la siguiente ilustraci6n. TORNILLER|A Despiegadorde la cadena (2) Pemo de 1/4-20xl-3/4 pulg. (2) Flecharoscada del trole (1) TORNILLERiA Perno de Tuerca de mariposa 1/4-20xl/2 pulg (2) 1/4-20(2) de 5/16-9xl-5/8 de pulg (3) -
Page 46: Montaje El Riel Y Instale El Trole
MONTAJE, PASO Monte el riel e instale el trole No encienda ni use el abridor hasta que Ilegue al paso de la instalacibn correspondiente, de otra manera corre el riesgo de complicar el proceso de instalacibn. El fie! delantero tiene una "ventana" cortada en e! extremo de la puerta (vea la ilustraci6n). - Page 47 MONTAJE, PASO Sujete el riel al motor • Coloque un perno de 1/4-20xl-3/4 de pulg. dentro del orificio de la cubierta de protecci6n que se encuentra en el extremo posterior del r/el, como se indica en la ilustraci6n. Apt/ere bien el pemo con con tuerca de 1/4-20 de pulg.
-
Page 48: De La Polea
MONTAJE, PASO Instale la cadena y cable la cubierta de la polea 1 Jale el cable alrededor de la polea Ioca y hacia el trole 2 Conecte la lazada del cable a la ranura de retenci6n del trole, come aparece en la ilustraci6n: •... -
Page 49: Apriete La Cadena
MONTAJE, PASO Apriete la cadena • Gire la tuerca interna y ajuste la roldana; baje ambas por la flecha roscada, alejandolas del trole. • Para apretar la cadena, gire la tuerca extema en la direcci6n que se indica en la Figura 1. •... -
Page 50: Determine Donde Va A Instalar
INSTALACION, PASO Determine d6nde va a instalar la m_nsula del cabezal Para evitar una posible LESIONGRAVEo incluso la MUERTE: • La m_nsula del cabezalDEBEquedar RiGIDAMENTEsujeta al soporte estructural en la pared delantera o en el cielo raso, de no ser asi es posible que la puerta de la cochera no retroceda cuando se requiera. - Page 51 PUERTA DE UNA SOLA PIEZA SIN CARRIL 1. Cierre la puerta y marque la ffnea central vertical en la parte interior de la puerta de la cechera. Extienda esta ffnea basra la pared delantera arriba de la puerta, como se muestra en la ilustraci6n. Si el espacio en la parte superior es muy reducido, puede instalar la mensula del cabezal en el techo.
-
Page 52: La Mensula Del Cabezal
INSTALACION, PASO Instale la m_nsula del cabezal La mensula del cabezal se puede sujetar a la pared justo arriba de la puerta de la cochera o en el cielo raso. Siga las instrucciones que sean las mAs adecuadas para las necesidades de su cochera. -
Page 53: Coloque El Riel En La Mensula Del Cabezal
M_nsuladel cabezaJ t0rsi6n lacochera ESTAS PIEZAS SE MUESTRAN EN SU TAMANO NORMAL Pasador de chaveta de 5/16 pot 1-1/2pulg. INSTALACION, PASO Coloque el riel en la m_nsula cabezal NOTA: (Opciona!) Si hay una instalaci6n previa de Craftsman, puede volver a usar la m_nsula de! cabezal de la instalaci6n previa con los dos espaciadores que se ineluyen en la bolsa de tomil!os espaciadores... -
Page 54: Coloque El Abridor
INSTALACION, PASO Coloque el abridor Siga las instrucciones correspondientes de su cochera, como se muestra en la ilustracion PUERTA SECCIONAL O PUERTA DE UNA SOLA PIEZA CON CARRIL Un pedazo de madera de 5x10 cm (2x4 pulg) le ser_ de ayuda al determinar la distancia ideal entre la puerta y el riel •... -
Page 55: Cuelgue El Abridor
INSTALACION, PASO Cuelgue el abridor Aqui se muestran dos ejemplos distintos para la instalaci6n; sin embargo, es posible que su cochera no concuerde con ninguno de ellos. Las mensulas de soporte deben de estar en angulo, (Figura 1), para que prepercionen un soperte rigido. -
Page 56: Instale La Unidad De Control De La Puerta
INSTALACION, PASO Instale la unidad de control de la puerta Ubique el control de la puerta de manera que quede a la vista desde la puerta y a una altura mfnima de 1.5 m (5 pies) donde los niRos pequeSos no Io puedan alcanzar y lejos de las partes m6viles de la puerta y de la tornilleria. -
Page 57: Instale Las Luces Y La Lente
INSTALACION, PASO Instale las luces y lentes • Instale un foco de 75 vatios (maximo) en cada socket del abridor. Si este se encuentra conectado, la luces permanecer_.n encendidas por aproximadamente minutos y medio, y se apagaran por si solas. •... -
Page 58: Requisitos Para La Instalaci6N Electrica
INSTALACION, PASO Requisitos para la instalaci6n Para evitar dificultades con la instalaci6n, ni use el abridor en este momento. Para reducir el riesgo de choque el6ctrico su abridor para puerta de cochera viene con una clavija de conexiSn a tierra de tres patas Esta clavija solo se puede conectar a una toma de corriente puesta a tierra y con tres entradas Si la clavija no entra en la toma de corriente que usted tiene dirfjase a un electricista profesional para que le... -
Page 59: Reversa De Seguridad
INSTALACION, PASO Instale el sensor del sistema reversa de seguridad El sensor del sistema de reversa de seguridad debe estar instalado y correctamente alineado, antes de que el abridor de la puerta de cochera mueva la puerta hacia abajo. Este es un dispositivo de seguridad que no se puede desactivar. - Page 60 INSTALACION DE LAS M#:NSULAS Asegdrese de que el abridor no est_ conectado a la corriente el_ctrica. Instale y alinee las m#nsulas de manera que los sensores est#n uno frente al otro en los lados opuestos de la puerta, a una distancia m#xima de 15 cm (6 pulg.) de! piso.
- Page 61 MONTAJE Y CABLEADO DE LOS SENSORES SISTEMA DE REVERSA DE SEGURIDAD • Deslice la cabeza de un pemo de coche de 14-20xl/2 pulgada dentro de la ranura de los sensores. Use tuercas de mariposa para sujetar los sensores alas mensulas, con las lentes de cada sensor frente a frente a ambos lados de la puerta.
-
Page 62: Sujete La M_Nsula De La Puerta
INSTALACION, PASO Sujete la m_nsula de la puerta Siga las instrucciones que correspondan de cochera que usted tenga, come se muestra en la ilustraci6n o en la p_.gina siguiente. Si usa un puntal horizontal, _ste debe de ser Io sufieientemente largo para sujetarlo a dos soportes vertieales. - Page 63 PUERTAS DE UNA SOLA PIEZA Lea y respete todas las advertencias respecto a los refuerzos, contenidas en la pAgina anterior, Instalaci6n de puerta plagables, ya que todos los refuerzos para su puerta de una sola pieza son los mismos. • Coloque la mensula de la puerta al centro de la parte superior de la misma, alineada con la mensula del cabezal, segL_nse indica en la ilustracion.
-
Page 64: Conecte El Braze De La Puerta Al Trole
INSTALACION, PASO Conecte el brazo de la puerta Siga las instrucciones que correspondan de cochera que usted tenga, come se muestra a continuacion yen las dos p_.ginas siguientes. SOLO PARA PUERTAS SECCIONALES • Cerciorese de que la puerta de la cochera este completamente cerrada. - Page 65 TODAS LAS PUERTAS DE UNA SOLA PIEZA 1. Arme el brazo de la puerta, Figura 4: • Sujete las dos secciones del los brazos de la puerta (recto y curvo) a la mayor distancia posible, de (manera que dos o tres de los orificios se sobrepongan uno al otro).
-
Page 66: Ajustes
AJUSTES, PASO Ajuste el limite del recorrido arriba y hacia abajo AI ajustar el limite del recorrido de la puerta, se regula hasta que punto esta se detendra al abrir y al cerrar. Para poner en marcha el abridor, oprima el bot6n de control de la puerta. -
Page 67: Ajuste La Fuerza
AJUSTES, PASO Ajuste la fuerza Los tornillos para el ajuste de la fuerza del abridor se encuentran en el panel del lado derecho de la unidad del motor. Estos ajustes controlarAn la fuerza que serA necesaria para abrir y cerrar la puerta. Si la fuerza es muy d6bil, es posible que la puerta haga esos molestos retrocesos al cerrarla (movimiento abajo) y que se detenga al abrirla (movimiento... -
Page 68: Pruebe El Sistema De Reversa De Seguridad
AJUSTES, PASO Pruebe el sistema de reversa seguridad PRUEBA • Abra completamente la puerta, coloque un pedazo de madera de 2.5 cm (1 pulg.) (o un pedazo de madera de 5x10 cm (2x4 pulg.) acostado sobre el piso) acostado sobre el piso al centre de la puerta de la cochera. •... -
Page 69: Operaci6N
OPERACION IMPORTANTES Para reducir el riesgo de lesiones graves o la muerte: 1. LEA Y RESPETE TODAS LAS ADVERTENCIAS Y LAS INSTRUCCIONES DE OPERACION 2. SIEMPREconserve los controles remotos lejos del alcance de los ni_os. NUNCApermita que los nifios operen o jueguen con los botones del control de la puerta de la cochera ni con los controles remotos. -
Page 70: Como Usar La Unidad De Control De Pared
C6mo usar la unidad de control LA CONSOLA DE CONTROL PREMIUM Optima el bot6n Luz para encender o apagar la luz del abridor. Este bot6n no controla las luces del abridor cuando la puerta est,. en movimiento. Si usted enciende la luz y luego activa el abridor, la luz permanecerA encendida durante cuatro minutos y medio. -
Page 71: Mantenimiento De Su Abridor De Puerta De Cochera
Mantenimiento de su abridor de cochera AJUSTES DE LiMITE Y FUERZA Las condiciones COMMANDESDEFORCE climatologicas pueden ocasionar cambios menores en la operaci6n de la puerta, los cuales van a requerir algunos reajustes, COMMANDES en particular durante el primer afio de operaci6n. En las p_ginas 28 y 29 se encuentra la informaci6n sobre los ajustes de limite... -
Page 72: Si Tiene Algt]N Problema
Si tiene algbn problema 1. E! abridor no funciona con el control de la puerta ni con el control remote: • ),Esta el abridor conectado a la electricidad? lampara a la toma de corriente. Si no se enciende, revise la caja de fusibles o el cortacircuito. -
Page 73: Controles Remotos De Tres Funciones
COMO PROGRAMAR EL ABRIDOR Su abridor de puerta de cochera ya viene programado de fabrica para operar con su control remoto manual. La puerta se abrirA y se cerrara cuando oprima el bot6n grande. A continuaci6n aparecen las instrucciones para programar su abridor para que opere con controles remotos Security+ adicionales. - Page 74 Para poner NOTA: Su nueva Entrada sin/lave debe programarse para que opere el abridor de la puerta de su cochera. COMO USAR EL BOT(_N "APRENDER" (LEARN) 1. Oprima y suelte el bot6n "Aprender" de la unidad del motor. La luz indicadora de este bot6n estarA encendida por 30 segundos.
-
Page 75: Accesorios
SEARS NO SERA RESPONSABLE POR LAS P_:RDIDAS O DAI_OS QUE SUFRA LA PROPIEDAD, NI POR PERDIDAS O GASTOS INClDENTALES O CONSECLIENTES DERIVADOS DE DANOS A LA PROPIEDAD QUE PUDIERAN DIRECTA O INDIRECTAM ENTE SER EL RESULTADO DEL LISAR ESTE PRODUCTO. - Page 76 Sears: (U.S.A.) 1-800-361-6665 Au Canada piezas: / TMTrademark / M Service Mark of Sears, Roebuck / TMMarca de F#,bdca / s_ Marca de Servic{o de Sears, Roebuck and Co. lawn equipment, (U.S.A.) (Canada) pour service en fran£ais: 1-800-LE-FOYER (1-800-533-6937) www.sears.ca...