
Related Manuals for E-FLITE Delta Ray One


Summary of Contents for E-FLITE Delta Ray One
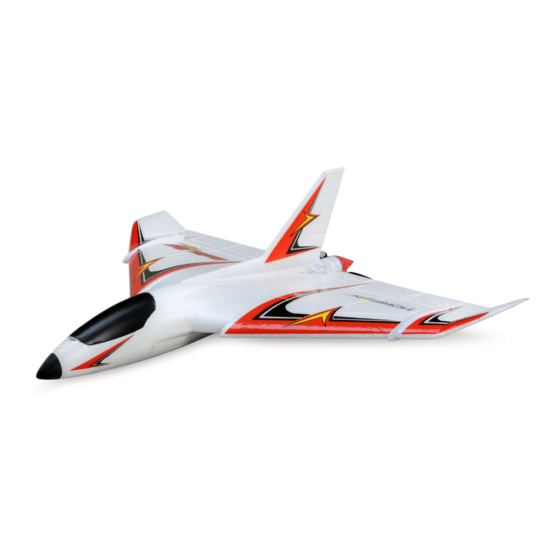
- Page 1 ® SAFE Technology, Optional Flight Envelope Protection Instruction Manual Bedienungsanleitung Manuel d’utilisation Manuale di Istruzioni...
- Page 2 NOTICE All instructions, warranties and other collateral documents are subject to change at the sole discretion of Horizon Hobby, LLC. For up-to-date product literature, visit www.horizonhobby.com and click on the support tab for this product. Meaning of Special Language: The following terms are used throughout the product literature to indicate various levels of potential harm when operating this product: WARNING: Procedures, which if not properly followed, create the probability of property damage, collateral damage, and serious injury OR create a high probability of superfi...
-
Page 3: Table Of Contents
Charging Warnings..........5 Compass Calibration ...........22 Charging the Flight Battery ........5 Flight Modes ............23 Transmitter Batteries Installation ......6 Flying the Delta Ray One with SAFE+ ....23 Transmitter ............6 In-Flight GPS OFF ..........23 BNF AIRCRAFT ONLY ..........7 Virtual Fence Mode and GPS .......24 Binding ..............8... -
Page 4: Introduction- Safe Technology Out Of The Box
Included in the Box Transmitter Double (RTF Only) Delta Ray One Aircraft Sided tape Hook and Loop Tape AA Alkaline Batteries (4) (RTF Only) 280 mAh 7.4V 2S 7.4V Li-Po battery Li-Po Battery AC power Supply (RTF Only) charger (RTF Only) -
Page 5: Charging Warnings
Charging Warnings The included (RTF Only) battery charger even catch fi re. • Always charge batteries away from fl ammable (EFLUC1007) has been designed to safely charge materials. the Li-Po battery. • Always inspect the battery before charging. CAUTION: All instructions and warnings must •... -
Page 6: Transmitter Batteries Installation
Transmitter The included transmitter comes pre-bound to the aircraft. Low Battery Alarm Mode 2 shown When the battery voltage drops too low, an alarm sounds and the Power LED fl ashes. The batteries must be Power LED Switch replaced immediately. If this happens while fl... - Page 7 ® Transmitter Setup Computerized Transmitter Setup IMPORTANT: The installed receiver has been programmed for operation Start all transmitter programming with a blank model setup (do a specifi cally in this aircraft. model reset), then name the model. To operate the SAFE ®...
-
Page 8: Binding
Binding Re-Binding the RTF Transmitter Your Delta Ray One RTF transmitter comes pre-bound to the aircraft. If you ever need to re-bind your aircraft, follow this binding table. Binding Procedure Without optional GPS 1. Make sure the fl ight battery is disconnected from the aircraft. -
Page 9: Install The Flight Battery
Install the Flight Battery Battery Selection • The E-fl ite ® 280mAh 7.4V 2S 30C Li-Po battery (EFLB2802S30) is recommend. • We recommend only using the suggested battery for proper performance. 1. Lower the throttle stick to the lowest setting and center the throttle trim with your transmitter powered on. -
Page 10: Safe ® Technology Flight Modes
fi rst few fl ights in experienced mode or until you become familiar with the fl ight performance of the Delta Ray One. • Switch to beginner mode at any time and release the control sticks for self-leveling. -
Page 11: Control Direction Test
Control Direction Test 1. Place the aircraft into Experienced mode (Mode switch position 2). 2. Place the aircraft on the ground facing away from you. 3. Move the sticks on the transmitter to ensure the aircraft responds as shown. 4. If the aircraft responds as shown, move the SAFE ®... -
Page 12: Safe ® Control Direction Test
® SAFE Control Direction Test Perform the Control Direction Test in Aircraft SAFE Reaction beginner mode to ensure the aircraft movement responds correctly to your transmitter. Once you are sure the aircraft responds correctly, stay clear of the prop, run the motor briefl y to above half power or more. -
Page 13: Takeoff
Takeoff Hand Launch Use the Beginner mode for launching the aircraft. Get help to hand launch your aircraft for the fi rst few fl ights so you can concentrate on fl ying. If you must hand launch the aircraft alone, hold the Aircraft in your dominant hand and the transmitter in your other hand. -
Page 14: Adjusting Trim In Flight
Adjusting Trim in Flight Direction of Drift Button to Correct Familiarize yourself with your transmitter’s controls and the aircraft’s response before fl ying by performing the recommended Control Direction Test. Press the trim buttons on your transmitter to adjust how the aircraft fl ies. If the aircraft’s nose drifts while the sticks are at neutral (centered) and the throttle is at 50%, press the trim buttons:... -
Page 15: After Flying
After Flying 1. Lower the throttle stick completely. Wait at least fi ve seconds. 2. Disconnect and remove the battery from the aircraft. Keep hands away from the propeller. 3. Power off the transmitter. 4. Fully charge the aircraft battery. 5. -
Page 16: Motor Service
Motor Service Disassembly CAUTION: DO NOT handle the propeller while the fl ight battery is connected to the ESC. Personal injury could result. Disconnect the battery. 1. Remove the four screws from the bottom of the airframe holding the motor cover in place. 2. -
Page 17: Troubleshooting Guide
® Troubleshooting Guide (SAFE ) without GPS Possible Cause Solution Problem Control surfaces not at Control surfaces may not have been Center control surfaces mechanically by neutral position when mechanically centered from factory adjusting the U-bends on control transmitter controls are at linkages neutral Aircraft was moved after the fl... - Page 18 Troubleshooting Guide without GPS Possible Cause Solution Problem Aircraft does Aircraft is not upright and immobile Keep the Aircraft upright and immobile after not connect after battery is connected connecting the battery to transmitter Aircraft bound to different model Select correct model memory on transmitter after battery is memory (ModelMatch™...
-
Page 19: Adding The Safe+ Gps Module
The Delta Ray One receiver includes SAFE technology out of the box. The Delta Ray One aircraft is upgradable with the addition of the optional EFL9512 GPS module (not included) which enables Advanced SAFE+ features. With SAFE+, the aircraft can fl y a holding pattern on its own, return home and land by itself, and prevent the model from fl... - Page 20 Optional SAFE+ GPS Upgrade GPS MODULE INSTALLATION: (continued) 5. Remove the piece of hook and loop tape applied to the bottom of the battery compartment from the factory. 6. Apply a piece of double side tape on the bottom of the GPS circuit board and the GPS 60 –...
-
Page 21: Compass Calibration
Optional SAFE+ GPS Upgrade Compass Calibration Compass calibration is required after installing the GPS module, before fl ight. The aircraft will automatically enter compass calibration on the fi rst power up after the GPS module is installed, after binding. IMPORTANT: The aircraft must be outside and needs to acquire a GPS lock in order to begin compass cali- bration. -
Page 22: Flight Modes
GPS system resume command. • The Delta Ray One with SAFE+ technology added does not have obstacle avoidance technology, be prepared to guide the aircraft if it is headed toward a tree or other object. - Page 23 Red LED fl ashes Three times LEDs are located under the magnetic hatch on the fl ight controller. *When fl ying the Delta Ray One Aircraft with the RTF MLP6 transmitter and the optional GPS module, only use the Small Circle Virtual Fence option.
-
Page 24: Virtual Fence Mode And Gps
Optional SAFE+ GPS Upgrade Virtual Fence Mode and GPS Ci rcle Virtual Fence, Small (Default): sets the virtual fence in a circle with a radius of approximately 280 ft (85m) from the home location. Ci rcle Virtual Fence, Large: sets the virtual fence in a circle with a radius of approximately 500 ft (125m) from the home location. -
Page 25: Holding Pattern (Hp)
Optional SAFE+ GPS Upgrade Holding Pattern (HP) If at anytime the aircraft seems too far away, press and release the HP/AL (bind) button on the transmitter. Press The aircraft will maneuver to an altitude of approxi- mately 120 feet (36m) and begin to fl y a circular pat- Release tern over the home location. -
Page 26: Autoland (Al)
Optional SAFE+ GPS Upgrade AutoLand (AL) Press When you are ready to land or your fl ight timer has and hold signaled, press and hold the red HP/AL button on the for 4 sec. transmitter for 4 seconds. The aircraft will instantly respond and begin a landing approach in the direction set during initialization. -
Page 27: Powering On With Gps
Optional SAFE+ GPS Upgrade Powering On with GPS GPS Initialization and Establishing Home Location CAUTION: Keep aircraft away from magnetic sources such as cameras, camera mounts, speakers ect. These may interfere with the GPS system and loss of control may result. 1. -
Page 28: Disabling Gps
Optional SAFE+ GPS Upgrade Optional SAFE+ GPS Upgrade Disabling GPS The GPS system will not be able to establish a GPS lock if activated while indoors. GPS will need to be turned off before operation indoors can take place. The aircraft will be unresponsive to transmitter commands while searching for a GPS signal. -
Page 29: Troubleshooting Guide
IMPORTANT: If the optional GPS module is installed, turn the GPS function off before doing a range test. The Delta Ray One aircraft is not compatible with DX4e or DX5e transmitters or the original version of the MLP6DSM transmitter when using GPS features... -
Page 30: Fpv Camera With Osd
OSD to display your HAM call sign to satisfy amateur radio rules. Installing the optional FPV camera BLH8852 on the Delta Ray One requires the option part EFL9511 to connect the camera to the aircraft. Remove the magnetic hatch on the bottom of the aircraft and see the diagram for details of where to connect the FPV Camera Cable. -
Page 31: Fpv Features With The Gps Module Installed
Optional FPV Upgrade FPV features with the GPS module installed When the FPV camera and the GPS module are connected, the OSD takes advantage of the GPS data available on the aircraft to deliver the pilot useful information on the video display. GPS adds Speed and altitude, GPS status, distance to home and an arrow pointing home. - Page 32 LED Indications Plane Status On-board LED Indication and required Surface Movement Receiver calibration Flash red slowly Elevons are centered. Plane ready to bind red and green LEDs fl ash rapidly Elevons are centered. Loss of control signal Flash red rapidly See troubleshooting guide for RF loss AUX 1 on controller is reversed Flash green rapidly...
-
Page 33: Limited Warranty
Limited Warranty What this Warranty Covers Horizon has no control over use, setup, fi nal Horizon Hobby, LLC, (Horizon) warrants to the assembly, modifi cation or misuse, no liability original purchaser that the product purchased (the shall be assumed nor accepted for any resulting “Product”) will be free from defects in materials and damage or injury. - Page 34 Horizon, please include your RMA number, a list expense unless the expense exceeds 50% of the of the included items, and a brief summary of the retail purchase cost. By submitting the item for problem. A copy of your original sales receipt must service you are agreeing to payment of the service be included for warranty consideration.
- Page 35 2.400GHz to 2.4835GHz frequency range. Supplier’s Declaration of Conformity Delta Ray One BNF Basic w/SAFE EFL9550 This device complies with part 15 of the FCC Rules. Operation is subject to the following two conditions: (1) This device may not cause harmful interference, and (2) this device must accept any interference received, including interference that may cause undesired operation.
- Page 36 RED Directive. EFL9500 DELTA RAY ONE RTF; Horizon Hobby, LLC hereby declares that this product is in compliance with the essential requirements and other relevant provisions of the RED, EMC and LVD Directives.
-
Page 37: Replacement Parts
Spinner 23,5 mm Pu- Propulsion de 23,5 mm Ogiva 23,5 mm Spin- EFL9508 Pusher: Delta Ray One sher: Delta Ray One à cône : Delta Ray One gente: Delta Ray One RX/ESC Unit: Delta RX/ESC-Einheit: Delta Unité RX/Variateur Unità RX/ESC: Delta EFL9509... -
Page 38: Optional Parts
Caméra FPV avec OSD Videocamera FPV con BLH8852 FPV Extension Lead: FPV-Kameraleitung Câble de caméra FPV Videocamera FPV cavo EFL9511 Delta Ray One Hook and Loop Set Klettband (5): Ultra Bande autoagrippante Set fascette fi ssaggio PKZ1039 (5): Ultra Micros Micros... - Page 39 © 2018 Horizon Hobby, LLC. E-fl ite, Delta Ray, SAFE, the SAFE logo, Celectra, Bind-N-Fly, BNF, the BNF logo, DSM, DSM2, DSMX, ModelMatch, and the Horizon Hobby logo are trademarks or registered trademarks of Horizon Hobby, LLC. The Spektrum trademark is used with permission of Bachmann Industries, Inc. US 9,056,667.