Table of Contents
Advertisement
QSG_Eng.book Page I Tuesday, April 26, 2005 11:03 AM
Read this Quick Setup Guide before using the printer.
Before you can use the printer, you must set up the hardware and install
the driver.
Step 1
Step 2
USB
(for Windows
98/Me/2000/XP)
page 10
Peer-to-
Peer-to-
Peer (LPR)
Peer
page 13
For the latest drivers, visit http://www.fxprinters.com
Keep this Quick Setup Guide and supplied CD-ROM in a convenient place for quick and easy
reference at all times.
Setting Up Your Printer
Installing the Print Driver
Parallel
Network
®
(for DP 204A)
page 12
Peer-to-
Peer-to-
Network
Network
Peer
Peer
Shared
Shared
(NetBIOS)
(NetBIOS)
Printer
Printer
page 13
page 15
Setup is Complete!
How to use the printer, see the User's Guide in the CD-ROM.
USB
®
®
Mac OS
X
Mac OS
Mac OS
10.2.4 or
9.1 – 9.2
10.2.4 or
greater
page 18
greater
page 16
page 19
Network
(for DP 204A)
®
®
X
Mac OS
9.1 – 9.2
page 21
Advertisement
Chapters
Table of Contents

Related Manuals for Fuji Xerox DocuPrint 203A


Summary of Contents for Fuji Xerox DocuPrint 203A
- Page 1 QSG_Eng.book Page I Tuesday, April 26, 2005 11:03 AM Read this Quick Setup Guide before using the printer. Before you can use the printer, you must set up the hardware and install the driver. Step 1 Setting Up Your Printer Step 2 Installing the Print Driver Parallel...
- Page 2 Microsoft Corporation in the United States and/or other countries. All product/brand names are trademarks or registered trademarks of the respective holders. Damage related to computer virus Fuji Xerox is not responsible for any breakdown of machines due to infection of computer virus or computer hacking. Important (1) This manual is copyrighted with all rights reserved.
-
Page 3: Before Using The Machine
These accompanying manuals include descriptions The safety and environment testing and performance on configurations and operation of the product. of this product have been verified using Fuji Xerox Quick Setup Guide (This document) materials only. This guide describes how to set up the printer and Warning: Any unauthorized alteration, which may install the print driver. - Page 4 QSG_Eng.book Page IV Tuesday, April 26, 2005 11:03 AM For installation & relocation our Customer Support Centre or your dealer. Rated voltage 100 to 120 V, 8.6 A Do not place the machine near heaters or Rated frequency 50/60 Hz volatile, flammable, or combustible materials Rated voltage 220 to 240 V, 4.3 A such as curtains that may catch fire.
- Page 5 QSG_Eng.book Page V Tuesday, April 26, 2005 11:03 AM Be sure to switch off and unplug the machine instructions given in the manual. There may be a before accessing the interior of the machine for danger of laser beam leakage. cleaning, maintenance, or fault clearance.
- Page 6 To protect the global environment and conserve energy resources, the International Energy Star Program encourages the following product features. Fuji Xerox confirms DocuPrint 203A/204A satisfies the requirements for this program. 2 sided feature To reduce the volume of copy paper used, the 2 sided copying feature is set as a default for the machine.
-
Page 7: Table Of Contents
QSG_Eng.book Page 1 Tuesday, April 26, 2005 11:03 AM Table of Contents Before using the machine Getting Started Carton Components ........................2 Control Panel ..........................3 Supplied CD-ROM ........................4 Setting Up Your Printer Step 1 Insert the CD-ROM into the CD-ROM Drive ..............5 Install the Drum Unit Assembly ...................6 Load Paper in the Paper Tray ..................7 Print a Test Page ......................8... -
Page 8: Getting Started
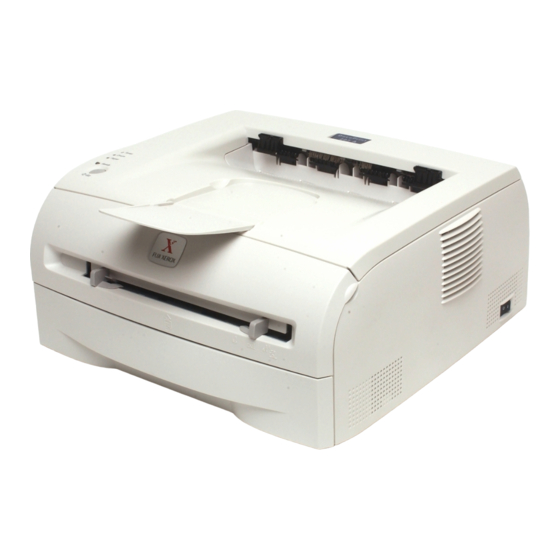
QSG_Eng.book Page 2 Tuesday, April 26, 2005 11:03 AM Getting Started Carton Components Printer Face-down Output Tray Support Flap (Support Flap) Control Panel Front Cover Manual Feed Slot Paper Tray Power Switch Face-down Output Tray (Top Output Tray) CD-ROM Quick Setup Guide Drum Unit Assembly AC Power Cord (including User's Guide) -
Page 9: Control Panel
QSG-Step1.fm Page 3 Tuesday, April 26, 2005 10:32 AM Control Panel Toner - LED indicates when the Toner is low or empty. Drum - LED indicates when the Drum is nearing end of life. Paper - LED indicates when there is Cover open or a paper jam. Ready - LED indicates when the printer is ready or if Data is remaining. - Page 10 QSG-Step1.fm Page 3 Tuesday, April 26, 2005 10:32 AM Control Panel Toner - LED indicates when the Toner is low or empty. Drum - LED indicates when the Drum is nearing end of life. Paper - LED indicates when there is Cover open or a paper jam. Ready - LED indicates when the printer is ready or if Data is remaining.
- Page 11 QSG-Step1.fm Page 3 Tuesday, April 26, 2005 10:32 AM Control Panel Toner - LED indicates when the Toner is low or empty. Drum - LED indicates when the Drum is nearing end of life. Paper - LED indicates when there is Cover open or a paper jam. Ready - LED indicates when the printer is ready or if Data is remaining.
- Page 12 QSG_Eng.book Page 3 Tuesday, April 26, 2005 11:03 AM Control Panel Toner - LED indicates when the Toner is low or empty. Drum - LED indicates when the Drum is nearing end of life. Paper - LED indicates when there is Cover open or a paper jam. Ready - LED indicates when the printer is ready or if Data is remaining.
-
Page 13: Supplied Cd-Rom
QSG_Eng.book Page 4 Tuesday, April 26, 2005 11:03 AM Supplied CD-ROM You can find a variety of information on the CD-ROM. ® Mac OS ® Mac OS 10.2.4 or 9.1 to 9.2 greater Users Users The screens in this section are based on DocuPrint 204A in the Windows 2000 environment. -
Page 14: Step 1
QSG_Eng.book Page 5 Tuesday, April 26, 2005 11:03 AM Step 1 Setting Up Your Printer Insert the CD-ROM into the CD-ROM Drive ® ® For Macintosh Users For Windows Users IMPORTANT IMPORTANT Do NOT connect the interface cable. Do NOT connect the interface cable. You will be prompted to connect the interface You will be prompted to connect the interface cable during the driver installation. -
Page 15: Install The Drum Unit Assembly
QSG_Eng.book Page 6 Tuesday, April 26, 2005 11:03 AM Step 1 Setting Up Your Printer Install the Drum Unit Assembly Rock it from side to side several times to CAUTION distribute the toner evenly inside the Be sure to switch off and unplug the machine assembly. -
Page 16: Load Paper In The Paper Tray
QSG_Eng.book Page 7 Tuesday, April 26, 2005 11:03 AM Load Paper in the Paper Tray Pull the paper tray completely out of the Fan the stack of paper well to avoid paper printer. jams and misfeeds. Put paper in the paper tray. Check that the paper is flat in the tray and below the maximum paper mark. -
Page 17: Print A Test Page
QSG_Eng.book Page 8 Tuesday, April 26, 2005 11:03 AM Step 1 Setting Up Your Printer Print a Test Page Press the Go button. The printer prints a IMPORTANT test page. Do NOT connect the interface cable. Check that the test page has printed You will be prompted to connect the interface correctly. -
Page 18: Step 2 Installing The Print Driver
QSG_Eng.book Page 9 Tuesday, April 26, 2005 11:03 AM Step 2 Installing the Print Driver Follow the instructions on this page for your operating system and interface cable. ® ® The screens for Windows in this Quick Setup Guide are based on Windows 2000. -
Page 19: For Usb Interface Cable Users (Windows 98/Me/2000/Xp Users)
QSG_Eng.book Page 10 Tuesday, April 26, 2005 11:03 AM Step 2 Installing the Driver ® For USB Interface Cable Users (Windows 98/Me/2000/XP Users) Installing the driver and connecting the printer to your PC Select the USB cable. The screens in this section are based on DocuPrint 204A in the Windows 2000 environment. - Page 20 QSG_Eng.book Page 11 Tuesday, April 26, 2005 11:03 AM Click the Finish button. Setting your printer as the default printer ® (For Windows 2000/XP users only) Click Start and then Printers. ® For Windows 98/Me users: The Setup is now complete. ®...
-
Page 21: For Parallel Interface Cable Users
QSG_Eng.book Page 12 Tuesday, April 26, 2005 11:03 AM Step 2 Installing the Driver For Parallel Interface Cable Users Connecting the printer to your PC and installing the driver Click Install Print Driver on the Menu Read the license agreement carefully. screen. -
Page 22: For Network Interface Cable Users (Docuprint 204A Users)
Read the license agreement carefully. Then follow the on-screen instructions. Select the Network interface. Select Fuji Xerox Peer-to-Peer Network Printer, and then click the Next button. Turn off the printer power switch. Connect the network interface cable to the printer, and then connect it to a free port on your hub. - Page 23 QSG_Eng.book Page 14 Tuesday, April 26, 2005 11:03 AM Step 2 Installing the Driver For Network Interface Cable Users (DocuPrint 204A Users) For LPR Users: Click the Finish button. Select Search the network for devices and choose from a list of discovered devices (Recommended).
-
Page 24: For Network Shared Printer Users
QSG_Eng.book Page 15 Tuesday, April 26, 2005 11:03 AM For Network Shared Printer Users If you are going to connect to a shared printer on your network, we recommend that you ask your system administrator about the queue or share information of the printer prior to installation. Installing the driver and selecting the appropriate printer queue or 'share name' Click Install Print Driver on the Menu... -
Page 25: For Usb Interface Cable Users
Macintosh, and then connect it to the printer. Do not connect the USB cable to the keyboard USB Port or a non-powered USB Hub. For DocuPrint 203A users: Select the USB interface. Follow the on screen instructions, and restart your ® Macintosh Make sure the printer power switch is on. - Page 26 QSG_Eng.book Page 17 Tuesday, April 26, 2005 11:03 AM Open the Printer Setup Utility icon. From the Printer Setup Utility menu, select Quit Printer Setup Utility. Click Add. The setup is now complete. Select USB. Select the appropriate printer, and then click the Add button.
- Page 27 QSG_Eng.book Page 18 Tuesday, April 26, 2005 11:03 AM Step 2 Installing the Driver For USB Interface Cable Users ® For Mac OS 9.1 to 9.2 Users Connecting the printer to your Macintosh & installing the driver Insert the CD-ROM into your CD-ROM Connect the USB interface cable to your drive.
-
Page 28: For Network Interface Cable Users (Docuprint 204A Users)
QSG_Eng.book Page 19 Tuesday, April 26, 2005 11:03 AM For Network Interface Cable Users (DocuPrint 204A Users) ® For Mac OS X 10.2.4 or greater Users Connecting the printer to your Macintosh & installing the driver Click Install Print Driver on the Menu Turn on the printer power switch. -
Page 29: For Network Interface Cable Users
QSG_Eng.book Page 20 Tuesday, April 26, 2005 11:03 AM Step 2 Installing the Driver For Network Interface Cable Users Double-click the Printer Setup Utility icon. Select FX DocuPrint 204A, and then click the Add button. Click Add. If there is more than one of the same model printer (DocuPrint 204A) connected on your network, the Ethernet address (MAC address) will be displayed after the model... - Page 30 QSG_Eng.book Page 21 Tuesday, April 26, 2005 11:03 AM ® For Mac OS 9.1 to 9.2 Users Connecting the printer to your Macintosh & installing the driver Turn off the printer power switch. Double-click the Print Driver Installer icon to install the print driver. Follow the on-screen instructions.
-
Page 31: For Administrators (Docuprint 204A Users)
QSG_Eng.book Page 22 Tuesday, April 26, 2005 11:03 AM For Administrators (DocuPrint 204A Users) Installing the BRAdmin Professional ® Configuration Utility (Windows Users Only) The BRAdmin Professional utility is designed to manage your network connected devices. Insert the CD-ROM into your CD-ROM Click BRAdmin Professional. -
Page 32: Web Browser
QSG_Eng.book Page 23 Tuesday, April 26, 2005 11:03 AM Web browser The print server is equipped with a web server that allows you to monitor its status or change some of its configuration settings, using HTTP (Hyper Text Transfer Protocol). The User Name is 'admin' and the default Password is 'access'. -
Page 33: Other Information
QSG_Eng.book Page 24 Tuesday, April 26, 2005 11:03 AM Other Information Shipment of the Printer If for any reason you must ship your Printer, carefully package the Printer to avoid any damage during transit. We recommend that you save and use the original packaging. The Printer should also be adequately insured with the carrier. -
Page 34: Consumables
QSG_Eng.book Page 25 Tuesday, April 26, 2005 11:03 AM Consumables When the time comes to replace consumables, an error will be indicated by the LED’s on the Control Panel. For more information about the consumables for your printer, visit http://www.fxprinters.com or contact your local re-seller. - Page 35 QSG_Eng.book Page 26 Tuesday, April 26, 2005 11:03 AM...
- Page 36 QSG_Eng.book Page 27 Tuesday, April 26, 2005 11:03 AM Quick Setup Guide Fuji Xerox Co., Ltd. (Edition 1) MT3175E2-1 Human Interface & Design Development May 2005 © Copyright 2005 by Fuji Xerox Co., Ltd.
- Page 37 QSG_Eng.book Page 28 Tuesday, April 26, 2005 11:03 AM LM4799001 Printed in China...