Ricoh AFICIO 1035 Copy Reference Manual
Ricoh all in one printer user manual
Hide thumbs
Also See for AFICIO 1035:
- Manual (12 pages) ,
- Brochure (6 pages) ,
- Operating instructions manual (84 pages)

Related Manuals for Ricoh AFICIO 1035


Summary of Contents for Ricoh AFICIO 1035
-
Page 1: Operating Instructions
1035/1045 Operating Instructions Copy Reference Zdsh000j.eps Read this manual carefully before you use this product and keep it handy for future reference. For safety, please follow the instructions in this manual. - Page 2 Phone: +34-(0)93-295-7600 Italy RICOH ITALIA SpA Via della Metallurgia 12, 37139 Verona Phone: +39-045-8181500 Hong Kong RICOH HONG KONG LTD. 21/F., Tai Yau Building, 181, Johnston Road, Wan Chai, Hong Kong Phone: +852-2862-2888 Singapore RICOH ASIA PACIFIC PTE.LTD. 260 Orchard Road,...
- Page 3 For good copy quality, Ricoh recommends that you use genuine Ricoh toner. Ricoh shall not be responsible for any damage or expense that might result from the use of parts other than genuine Ricoh parts in your Ricoh office product.
- Page 4 In accordance with IEC 60417, this machine uses the following symbols for the main power switch: a means POWER ON. c means STAND BY. Copyright © 2001 Ricoh Co., Ltd.
-
Page 5: Safety Information
Safety Information When using your equipment, the following safety precautions should always be followed. Safety During Operation In this manual, the following important symbols are used: R WARNING: Indicates a potentially hazardous situation which, if instructions are not followed, could result in death or serious injury. R CAUTION: Indicates a potentially hazardous situation which, if instructions are not followed, may result in minor or moderate injury or damage to property. - Page 6 R CAUTION: • Protect the equipment from dampness or wet weather, such as rain, snow, and so on. • Unplug the power cord from the wall outlet before you move the equipment. While moving the equipment, you should take care that the power cord will not be damaged under the equipment.
-
Page 7: How To Read This Manual
How to Read this Manual Symbols In this manual, the following symbols are used: R WARNING: This symbol indicates a potentially hazardous situation that might result in death or serious injury when you misuse the machine without following the in- structions under this symbol. -
Page 8: Table Of Contents
TABLE OF CONTENTS Machine Types... 1 What You Can Do with This Machine (Copy Mode)... 2 Guide To Components ... 5 Output Tray Guide... 7 Options ... 8 Control Panel ... 9 Display Panel ... 11 Displays and Key Operations... 11 Function List Based on Options ... - Page 9 2. Copying Basic Procedure ... 27 Setting Originals... 29 Setting Originals on the Exposure Glass ... 29 Setting Originals in the Document Feeder ... 30 Original Orientation ... 30 Setting Special Originals ... 31 Mixed Size mode... 32 Setting Custom Size Originals ... 33 Basic Functions...
- Page 10 Duplex... 82 1 Sided → 2 Sided ... 82 2 Sided → 2 Sided ... 83 Combine ... 85 1 Sided 2 Pages → Combine 1 Side... 86 1 Sided 4 Pages → Combine 1 Side... 87 1 Sided 8 Pages → Combine 1 Side... 88 1 Sided 4 Pages →...
- Page 11 3. Document Server Overview... 145 Process ... 146 Features and Benefits ... 147 On Demand Printing... 147 File Merge Printing ... 149 Facsimile Resend... 151 Operation from a Computer ... 152 Scanning Originals... 153 Scanning in Document Server mode ... 153 Scanning in Copy mode ...
- Page 12 d Adding Staples ... 192 1000-Sheet Finisher... 192 2 Tray Finisher ... 194 e Removing Jammed Staples... 196 1000-Sheet Finisher... 196 2 Tray Finisher ... 198 y Removing Punch Waste... 200 5. User Tools (Copy/Document Server Features) Accessing the User Tools (Copy/Document Server Features) ... 201 Exiting From the User Tools...
- Page 13 6. REMARKS Do's And Don'ts... 229 Where to Put Your Machine... 230 Machine Environment ... 230 Moving... 230 Power Connection... 231 Access to the Machine ... 231 Maintaining Your Machine ... 232 Cleaning the Exposure Glass... 232 Cleaning the Platen Cover ... 232 Cleaning the Document Feeder ...
-
Page 15: Machine Types
Machine Types This machine comes in two models which vary by copy speed. To make sure which model you have, see the inside front cover. Copy speed Type 1 35 copies/minute (A4K, 8 " × 11"K) Type 2 45 copies/minute (A4K, 8 "... -
Page 16: What You Can Do With This Machine (Copy Mode)
What You Can Do with This Machine (Copy Mode) Positive/Negative... -
Page 17: Document Server
Document Server *1 Optional 2 Tray finisher is reguired. *2 Optional Bridge unit and optional finisher are reguired. Series/Book Front & Back 1 Sided & Booklet 2 Sided & Booklet 2 Sided & Magazine 1 Sided & Magazine... -
Page 18: Directional Magnification
“Selecting Original Type Setting” ⇒ ⇒ ⇒ ⇒ P.36 “Adjusting Copy Image Density” ⇒ ⇒ ⇒ ⇒ P.35 “Setting Special Originals” ⇒ ⇒ ⇒ ⇒ P.31 “Image Repeat” ⇒ ⇒ ⇒ ⇒ P.109 “Double Copies” ⇒ ⇒ ⇒ ⇒ P.110 “Centering”... -
Page 19: Guide To Components
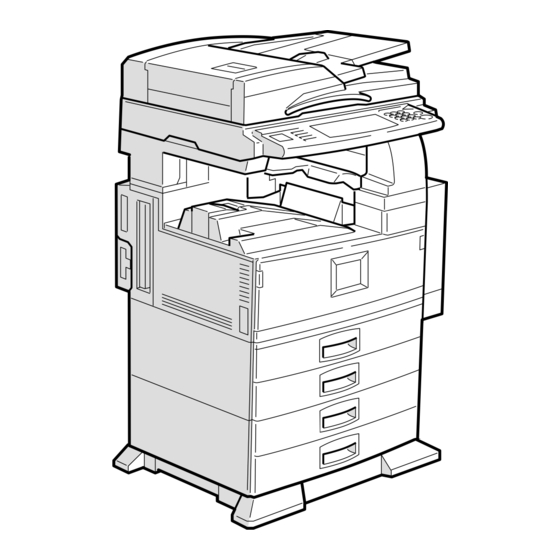
Guide To Components Document Feeder (ADF) The document feeder automatically feeds a stack of originals one by one. Exposure glass Place originals here face down for copy- ing. ⇒ P.18 “Originals” Internal tray Copied paper is delivered here face down. Main power switch If the machine does not operate after turning on the operation switch, check if the main... -
Page 20: Ventilation Hole
Bypass tray Use when copying onto OHP transparen- cies, adhesive labels, translucent paper, postcards, and custom size paper. Ventilation hole Prevents overheating. Do not obstruct the ventilation hole by placing an object near it or leaning an object against it. If the machine overheats, a fault might oc- cur. -
Page 21: Output Tray Guide
Output Tray Guide When copying onto OHP transparencies and translucent paper, raise the guide. This prevents copies from being curled when delivered. ❖ ❖ ❖ ❖ To copy onto normal paper and thick paper Slide the guide in the direction of the arrow. ❖... -
Page 22: Options
Options 1000-Sheet Finisher Sorts, stacks, and staples copies. External tray If you selected this as the output tray, copied paper is delivered here face down. Platen cover Lower this cover over originals for copy- ing. Document feeder (ADF) ⇒ ⇒ ⇒ ⇒ P.30 Insert a stack of originals here. -
Page 23: Control Panel
Control Panel Screen Contrast knob Adjusts the brightness of the display pan- Indicators These indicators show errors or the status of the machine. ⇒ P.165 “Troubleshoot- ing”. { { { { User Tools/Counter} } } } key • User Tools Press to change the default settings and conditions to meet your require- ments. -
Page 24: Number Keys
{ { { { Clear/Stop} } } } key • Clear Press to delete a number entered. • Stop Press to stop a copy job in progress. { { { { #} } } } key Press to enter a value. Number keys Use to enter the desired number of copies and data for selected modes. -
Page 25: Display Panel
Display Panel The display panel shows the status of the machine, error messages and function menus. Important ❒ Do not apply a strong shock or force of about 30 N (about 3 kgf) or more to the display panel. If you do, the display might be damaged. Note ❒... - Page 26 Shows the available functions. Press a function name to display its menu. For example, press the [Re- duce/Enlarge] key to bring up the Re- duce/Enlarge menu. ❖ ❖ ❖ ❖ Function menu Items you can select. ❖ ❖ ❖ ❖ Document Server initial display Operational status and messages.
-
Page 27: Function List Based On Options
Function List Based on Options The functions that are available to you depend on your machine configuration and which options you have. See the table below. ❍…Available ×…Not available Mixed Sizes Mode Custom Size Originals Original Orientation (Standard Orientation) Auto Image Density Manual Image Density Auto Paper Select Manual Paper Select... - Page 28 Copying Book Originals Image Repeat Double Copies Centering Positive/Negative Border Erase/Center Erase Margin Adjustment Background Numbering Preset Stamp User Stamp Date Stamp/Page Numbering Cover/Front/Back Cover/Slip Sheet Sort Shift Sort Rotate Sort Shift Stack Staple Punch Store File Set the paper of the same size KL in the paper trays. You can use this function when “Rotate Sort”...
-
Page 29: Basics
Turning On the Power To turn the machine on, press the op- eration switch. Note ❒ This machine automatically enters Energy Saver mode or turns itself off if you do not use the machine for a while. P.28 “Auto Off” and “Timer Setting”... -
Page 30: Turning On The Power
Basics Turning On the Power Press the operation switch to make the On indicator goes on. The display panel will come on. Note ❒ If the power is not turned on when the operation switch is pressed, check if the main pow- er switch is on. -
Page 31: Changing Modes
Changing Modes You can use this machine not only as a copier, but also as a fax, printer, docu- ment server and scanner as well. Press the {Copy}, {Facsimile}, {Printer}, {Scan- ner} or {Document Server} key to use that function. Limitation ❒... -
Page 32: Originals
Basics Originals Sizes and Weights of Recommended Originals ❖ ❖ ❖ ❖ Metric version Where Original Is Set Exposure glass Document feeder ❖ ❖ ❖ ❖ Inch version Where Original Is Set Exposure glass Document feeder Note ❒ The number of originals that can be set in the document feeder is about 80. ❒... -
Page 33: Sizes Detectable By The Auto Paper Select
• Originals with indexes, tags, or other projecting parts • Sticky originals such as translucent paper • Thin originals that have low stiffness • Thick originals such as postcards • Originals of inappropriate weight • Bound originals such as books •... -
Page 34: Missing Image Area
Basics Missing Image Area ❖ ❖ ❖ ❖ Exposure glass Reference position Horizontal size ❖ ❖ ❖ ❖ Document feeder Limitation ❒ Even if you correctly set originals in the document feeder or on the exposure glass, 3mm (0.1") margins on all four sides of the original might not be copied. ❒... -
Page 35: Copy Paper
Copy Paper Recommended Paper Sizes and Types The following limitations apply to each tray: Metric Version Tray 1 A3L, B4L, A4KL, Tray 2 B5KL, <A5L>, <11" × 17"L>, <8 <8 <8" × 13"L>, <8 <8 <8 <11" × 14"L>, <7 <8"... - Page 36 Basics Tray 3 Tray 4 OPTION Bypass Standard *2 *3 *4 Tray Size Custom size Large Capacity Tray *1 *4 (LCT) (OPTION) The paper tray fence is fixed. If you wish to change the size of paper set in this tray, contact your service representative.
- Page 37 Important ❒ If you use damp or curled paper, a misfeed might occur. In this case, try turn- ing over the paper stack in the paper tray. If there is no improvement, change to paper with less curl. Note ❒ When you use the bypass tray, it is recommended to set the copy paper direc- tion to L.
-
Page 38: Direction-Fixed Paper Or 2-Sided Paper
Basics Direction-fixed paper or 2-sided paper The direction-fixed (top to bottom) or 2-sided paper (letterhead paper, punched paper, or copied paper, e.g.) might not be printed correctly depending on how the originals and paper are set in place. Set "Letterhead setting" of system set- tings and then set the original and paper as shown below. -
Page 39: Non-Recommended Paper
Non-recommended Paper R CAUTION: • Do not use aluminum foil, carbon paper, or similar conductive paper to avoid a fire or equipment failure. Important ❒ Do not use any of the following kinds of paper or a fault might occur. •... -
Page 40: Toner
Basics Toner Handling Toner R WARNING: • Do not incinerate used toner or toner containers. Toner dust might ig- nite when exposed to an open flame. Dispose of used toner containers in accordance with local regulations for plastics. R CAUTION: •... -
Page 41: Copying
Basic Procedure Make sure that the machine is in Copy mode. If the machine is not in Copy mode, press the {Copy} key. When the machine is set for the user code, enter the user code with the number keys and then press the { { { { #} } } } key. -
Page 42: Auto Off
Copying - System Reset The machine returns to its initial con- dition automatically when your job is finished, after a certain period of time. This function is called “System Reset”. Note ❒ You can change the System Reset time. ⇒ “System Reset Timer” in “System Settings manual”. -
Page 43: Setting Originals
Setting Originals Limitation ❒ Set originals after correction fluid and ink has completely dried. Not taking this precaution could mark the exposure glass and cause marks to be copied. Note ❒ Basically originals aligned to the rear left corner. However, some copy functions may produce different results de- pending on the direction of the originals. -
Page 44: Setting Originals In The Document Feeder
Copying Setting Originals in the Document Feeder Note ❒ The last page should be on the bot- tom. ❒ Do not stack originals beyond the limit mark on the side fence of the document feeder. ❒ The original might become dirty if it is written with a pencil or similar tools. -
Page 45: Setting Special Originals
90° Turn When you want to copy A3K, B4K or 11" × 17"K size originals, set your original in the landscape orientation and then press the key. The machine rotates the original image and you can make copies as you wish. This is useful for copying large originals with the Staple, Punch, Duplex, Com- bine or Stamp functions. -
Page 46: Mixed Size Mode
Copying Press the [OK] key. Set your originals, then press the { { { { Start} } } } key. After all the previously set origi- nals are fed, set the next originals. The second and subsequent origi- nals can be fed automatically with- out pressing the {Start} key. -
Page 47: Setting Custom Size Originals
Press the [Special Original] key. Press the [Mixed size] key. Press the [OK] key. Align the rear and left edges of the originals as shown in the il- lustration. B4 A3 1: Set into the document feeder. 2: Vertical size Adjust the guide to the widest original size. - Page 48 Copying Enter the vertical size of the origi- nal with the Number keys, then press the [#] key. Press the [OK] key. Set your originals, then press the { { { { Start} } } } key.
-
Page 49: Basic Functions
Basic Functions The following basic functions are ex- plained in this section. ❖ ❖ ❖ ❖ Adjusting Copy Image Density Auto and Manual Image Density ❖ ❖ ❖ ❖ Selecting Original Type Setting Text, Text·Photo, Photo, Pale, Gen- eration Copy ❖... -
Page 50: Selecting Original Type Setting
Copying Auto Image Density Make sure that the [Auto Image Den- sity] key is selected. Note ❒ If the [Auto Image Density] key is not selected, press the [Auto Im- age Density] key. ❒ If you do not wish to set any other functions, press the {Start} key to start copying. - Page 51 ❖ ❖ ❖ ❖ Pale Select this mode for originals that have lighter lines written in pencil, or for faint copied slips. The faint lines will be clearly copied. ❖ ❖ ❖ ❖ Generation Copy If your originals are copies (gener- ation copies), the copy image can be reproduced sharply and clearly.
-
Page 52: Selecting Copy Paper
Copying Selecting Copy Paper There are two ways to select copy paper: ❖ ❖ ❖ ❖ Auto Paper Select The machine selects a suitable size of copy paper automatically based on the original size and the reproduction ratio. ⇒ P.40 “Rotated copy”. ❖... - Page 53 Auto Paper Select Make sure that the [Auto Paper Select] key is selected. Note ❒ If the [Auto Paper Select] key is not selected, press the [Auto Paper Select] key. ❒ If you do not wish to set any other functions, press the {Start} key to start copying.
-
Page 54: Rotated Copy
Copying - Rotated copy If the direction in which your original is set (landscape or portrait) is different from that of the paper you are copying onto, this function rotates the original im- age by 90° and fits it on the copy paper. This function works when Auto Paper Select or Auto Reduce/Enlarge is selected. -
Page 55: Auto Reduce/Enlarge
Auto Reduce/Enlarge The machine can choose an appropri- ate reproduction ratio based on the paper and original sizes you select. Limitation ❒ You cannot use the bypass tray with this function. Note ❒ When you use Auto Reduce/En- large, see the following table for possible original sizes and direc- tions: ❖... -
Page 56: Sort/Stack/Staple
Copying Sort/Stack/Staple The machine can scan your originals into memory and automatically sort the copies. ❖ ❖ ❖ ❖ Sort • Sort • Rotate Sort • Shift sort (the optional finisher and the optional Bridge unit are equired) ❖ ❖ ❖ ❖ Stack •... -
Page 57: Sort
❖ ❖ ❖ ❖ Inch version " × 14"L or larger: 250 Inter- • 8 nal tray sheets (20 lb.) " × 11K or smaller: 500 • 8 sheets (20 lb.) Inter- 125 sheets (20 lb.) nal tray 2 (1 bin tray) Extar- 125 sheets (20 lb.) - Page 58 Copying ❒ The paper sizes that can be used in the Rotate Sort function are as follows: Metric version Inch version ❒ To use the Rotate Sort function, two paper trays identical in size and different in direction (KL) are required. Reference For the paper capacity of the op- tional finishers, ⇒...
-
Page 59: Stack
❖ ❖ ❖ ❖ When the 2 Tray Finisher is installed Note ❒ When the optional finisher is in- stalled, use the User Tools to display [Rotate Sort]. ⇒ “Select Stack Function” in P.226 “Input/ Output”. Enter the number of copy sets with the number keys. - Page 60 Copying Note ❒ The paper sizes that can be used in the Stack function are as follows: 1000-Sheet Finisher Metric A3L, B4L, version A4KL, B5KL, A5KL 11" × 17"L, Inch " × 14"L, version " × 11"K L, 5 "KL Reference For the maximum tray capacity of the optional finisher, ⇒...
-
Page 61: Staple
Staple The optional finisher and the bridge unit are required to use this function. Each copy set can be stapled together. Limitation ❒ You cannot use the following paper in this function: • Postcards • Translucent paper • OHP transparencies •... - Page 62 Copying ❖ ❖ ❖ ❖ Inch version With 1000-Sheet Finisher 11" × 17"L, 8 Paper size Stapler • 8 capacity (20 lb.) • 8 (20 lb.) Shift tray 1,000 sheets (20 lb.) capacity " × 11"K) Depending on the number of sheets to be stapled and whether sheets have punched holes or not, the maximum tray capacity might be reduced.
- Page 63 ❖ ❖ ❖ ❖ 1000-sheet Finisher When your machine is equipped with the 1000-sheet finisher, the stapling po- sition will be fixed to “Top Slant”. STAPLEBE Note ❒ Original images are not rotated. ❖ ❖ ❖ ❖ 2 Tray Finisher STAPLEAE STAPLEBE STAPLECE...
- Page 64 Copying STAPLEEE Available staple positions except A3, B4, size of paper. Note ❒ You cannot change stapling positions during copying. ❒ When the original image is rotated, the stapling direction turns by 90°. ❒ By setting orientation of papers and originals, “Blank part will appear. Check orientation.”...
- Page 65 Select one of the stapling positions. ❖ ❖ ❖ ❖ 1000-Sheet Finisher ❖ ❖ ❖ ❖ 2 Tray Finisher Note ❒ When you select the stapling position, Sort mode is automatically selected. Reference ⇒ P.48 “Stapling position and original setting” Enter the number of copy sets with the number keys.
-
Page 66: To Stop Scanning Temporarily
Copying When setting an original on the exposure glass or in the document feeder using Batch mode Reference ⇒ P.31 “Batch mode”. A Set the original, then press the { { { { Start} } } } key. Note ❒ Start with the first page to be copied. B Set the next original. -
Page 67: To Remove The Paper From The Staple Unit
Press the { { { { Start} } } } key. The scanned pages are delivered to the tray. Then, the image data in memory is cleared. Remove the copies and continue copying by following the instruc- tions on the display. To Remove the Paper from the Staple Unit If you cancel the stapling copy job in... -
Page 68: Punch
Copying Punch The optional 2 tray finisher and the bridge unit are required to use this function. This function is used to make punch holes in copies. ❖ ❖ ❖ ❖ 2 holes ❖ ❖ ❖ ❖ 3 holes ❖ ❖ ❖ ❖ 4 holes... - Page 69 Note ❒ When using Punch and Combine, Double Copies, or Auto Reduce/Enlarge, the message "Blank part will appear. Check orientation." may appear because of the orientation of the original and the copy paper. If this occurs, change the orientation of the copy paper. ❒...
- Page 70 Copying 2 holes 3 holes 4 holes ❒ Punchable paper sizes are as follows: With 2 Tray Finisher Punch kit type 2 & 4 holes type 4 holes type 2 & 3 holes type ❒ Since punch holes are made in each copy, the punch hole positions vary slightly.
- Page 71 Reference If the punch waste box fills up, ⇒ P.200 “ y Removing Punch Waste”. Select the Punch position. Note ❒ When stapling copies, also select a stapling position. ⇒ P.47 “Staple”. Enter the number of copy sets with the number keys. Note ❒...
-
Page 72: Copying From The Bypass Tray
Copying Copying from the Bypass Tray Use the bypass tray to copy onto OHP transparencies, adhesive labels, trans- lucent paper, postcards, and copy pa- per that cannot be set in the paper tray. Note ❒ The machine can automatically de- tect the following sizes as standard size copy paper: Metric... - Page 73 Note ❒ The face side of the paper set is copied on. ❒ Do not stack paper over the lim- it mark, otherwise a skew image or paper misfeeds might occur. ❒ If the beeper is turned off, light- ly insert the copy paper until it stops.
-
Page 74: When Copying Onto Ohp Transparencies Or Thick Paper
Copying B Press the [Custom Size] key. C Press the [Vertical mm] key and enter the vertical size of the pa- per with the number keys, then press the [#] key. Note ❒ To change the number en- tered, press the [Clear] or {Clear/Stop} key and enter the new number. - Page 75 Lightly insert the OHP transpar- encies or thick paper face down until the beeper sounds. The k indicator on the display au- tomatically goes on. Important ❒ When you set an OHP transpar- ency, make sure that its front and back faces are properly po- sitioned.
-
Page 76: Programs
Copying Programs You can store frequently used copy job settings in machine memory, and recall them for future use. ❖ ❖ ❖ ❖ Storing Your Settings You can store your settings you frequently use. ❖ ❖ ❖ ❖ Deleting A Program You can delete a stored program. -
Page 77: Deleting A Program
Note ❒ If you do not wish to enter the program name, go to step F. ❒ You can register up to 40 char- acters. ❒ To change the name entered, press the [Backspace], [Delete] or {Clear/Stop} key and enter new letters. -
Page 78: Recalling A Program
Copying Note ❒ To cancel the deletion, press the [No] key. Recalling a Program Press the { { { { Program} } } } key. Press the [Recall] key. Press the program number you want to recall. The stored settings are displayed. Note ❒... -
Page 79: Job Preset
Job Preset If a long copy job is in progress and you do not wish to wait for it to finish, you can use this function to set up the next one copy job in advance. When the current copy job is finished, your copy job will be started automatically. -
Page 80: Other Functions
Copying Other Functions Energy Saver Mode If you do not operate the machine for a certain period after copying, or when you press the {Energy Saver} key, the display disappears and the machine enters Energy Saver mode. When you press the {Energy Saver} key again, the machine returns to the ready condition. -
Page 81: Original Beeper
When copying is complete, re- move your originals and copies. Press the { { { { Interrupt} } } } key again. The Interrupt indicator goes off. The previous copy job settings will be restored and the machine will continue copying from where it left off. - Page 82 Copying Press the [Change Quantity] key. Enter the number of copy sets with the number keys, then press the { { { { #} } } } key. Note ❒ The number of sets you can en- ter differs depending on the timing of pressing the {Clear/ Stop} key.
-
Page 83: Preset Reduce/Enlarge
Preset Reduce/Enlarge You can select a preset ratio for copy- ing. Note ❒ You can select one of 12 preset ra- tios (5 enlargement ratios, 7 reduc- tion ratios). ❒ Use “Create Margin” to reduce the image to 93% of its original size with the centre as reference. -
Page 84: Create Margin Mode
Copying Ratio (%) 50 (reduce area by Press the [Reduce/Enlarge] key. Note ❒ To select a preset ratio on the in- itial display, directly press the shortcut reduce/enlarge key and go to step D. Press the [Enlarge] or [Reduce] key. Select a ratio. -
Page 85: Zoom
Zoom You can change the reproduction ra- tio in 1% steps. Note ❒ The following ratios can be select- • Metric version: 25 – 400% • Inch version: 25 – 400% ❒ You can select a ratio regardless of the size of an original or copy pa- per. - Page 86 Copying B Enter the desired ratio with the number keys. Note ❒ To change the ratio entered, press the [Clear] or {Clear/ Stop} key and enter the new ratio. C Press the [#] key. D Press the [OK] key. Set your originals, then press the { { { { Start} } } } key.
-
Page 87: Size Magnification
Size Magnification This function calculates an enlarge- ment or reduction ratio based upon the lengths of the original and copy. Preparation Measure and specify the lengths of the original and copy by compar- ing “A” with “a.” Limitation ❒ If the calculated ratio is over the maximum or under the minimum ratio, it is corrected within the range of the ratio automatically. - Page 88 Copying Enter the length of the copy with the number keys and press the [#] key. Note ❒ To change the length entered, press the [Clear] or {Clear/Stop} key and enter the new length. ❒ To change the length after pressing the [#] key, select [Orig- inal] or [Copy] and enter the de- sired length.
-
Page 89: Directional Magnification (%)
Directional Magnification (%) Copies can be reduced or enlarged at different reproduction ratios horizon- tally and vertically. Note ❒ The following ratios can be select- • Metric version: 25 – 400% • Inch version: 25 – 400% ❒ You can select a ratio regardless of the size of an original or copy pa- per. - Page 90 Copying C Press the [Vertical] key. D Enter the desired ratio with the number keys, followed by the [#] key. E Press the [OK] key. To specify a ratio with the [n] and [o] keys A Press the [With n B Press the [Horizontal] key.
-
Page 91: Directional Size Magnification (Mm)
Directional Size Magnification (mm) The suitable reproduction ratios will be automatically selected when you enter the horizontal and vertical lengths of the original and copy im- age you require. 1: Horizontal original size 2: Vertical original size 3: Horizontal copy size 4: Vertical copy size Preparation Specify the vertical and horizontal... - Page 92 Copying Press the [Dir.Size Mag mm] key. Enter the horizontal size of the original with the number keys, then press the [#] key. Note ❒ To change the value entered, press the [Clear] or {Clear/Stop} key and enter the new value. Enter the horizontal size of the copy with the number keys, then press the [#] key.
-
Page 93: Duplex/Combine/Series
Duplex/Combine/Series You can make copies in a variety of formats by combining the following modes: • 1 Sided/2 Sided originals • 1 Sided/2 Sided copies • Duplex • Combine • Book • Series Press [Dup./Combine/Series] check your originals. And select [1 Sided] or [2 Sided] for the origi- nals. -
Page 94: Original Direction And Completed Copies
Copying Original Direction and Completed Copies The resulting copy image will differ according to the direction in which you set your original (lengthwise K or widthwise L). Note ❒ The illustrations show the direc- tions of copied images on the front and back, not the directions of de- livery. - Page 95 Press the [Orientation] key. Select an original orientation and a copy orientation. Press the [OK] key. Duplex/Combine/Series...
-
Page 96: Duplex
Copying Duplex This function can be used in two ways: ❖ ❖ ❖ ❖ 1 Sided → → → → 2 Sided This mode makes two-sided copies from one-sided originals. ❖ ❖ ❖ ❖ 2 Sided → → → → 2 Sided This mode makes two-sided copies from two-sided originals. -
Page 97: Sided → 2 Sided
Press the [1 Sided] key for original, then press the [2 Sided] key for copy. Note ❒ To change the copy orientation to “Top to Bottom”, press the [Orientation] key and select [Top to Bottom]. ⇒ P.80 “Specifying Orientation of Bound Originals”. Press the [OK] key. - Page 98 Copying When setting an original on the exposure glass or in the document feeder using Batch mode Reference ⇒ P.31 “Batch mode”. A Set the original, then press the { { { { Start} } } } key. Note ❒ Start with the first page to be copied.
-
Page 99: Combine
Combine You can combine two or more origi- nals into one copy. 1 Sided Combine mode is for 1-sided copies, and 2 Sid- ed Combine mode for 2-sided copies. This function can be used in twelve ways: ❖ ❖ ❖ ❖ 1 Sided 2 Pages → → → → Combine 1 Side Copies two 1-sided originals to one side of a sheet. -
Page 100: Sided 2 Pages → Combine 1 Side
Copying ❒ When making copies in Combine mode, the border of each original can be automatically erased by 3mm, 0.1". ⇒ “Erase Original Shadow in Combine” in P.216 “Ed- ”. ❒ If the number of originals placed is less than the number specified for combining, the last page is copied blank as shown in the illustration. -
Page 101: Sided 4 Pages → Combine 1 Side
Press the [Dup./Combine/Series] key. Press the [1 Sided] key for the orig- inal, then press the [Combine 1 Side] key for the copy. Press the [2 Originals] key, then press the [OK] key. Select the paper. Set your originals, then press the { { { { Start} } } } key. -
Page 102: Sided 8 Pages → Combine 1 Side
Copying Press the [4 Originals] key, then press the [OK] key. Select the paper. Set your originals, then press the { { { { Start} } } } key. 1 Sided 8 Pages → → → → Combine 1 Side Copies eight 1-sided originals togeth- er to one side of a sheet. -
Page 103: Sided 4 Pages → Combine 2 Side
1 Sided 4 Pages → → → → Combine 2 Side Copies four 1-sided originals to the two-page spread on both sides of a sheet. Press the [Dup./Combine/Series] key. Press the [1 Sided] key for the orig- inal, then press the [Combine 2 Side] key for the copy. -
Page 104: Sided 8 Pages → Combine 2 Side
Copying 1 Sided 8 Pages → → → → Combine 2 Side Copies eight 1-sided originals togeth- er to both sides of a sheet. Front Back Press the [Dup./Combine/Series] key. Press the [1 Sided] key for the orig- inal, then press the [Combine 2 Side] key for the copy. -
Page 105: Sided 16 Pages → Combine 2 Side
1 Sided 16 Pages → → → → Combine 2 Side Copies sixteen 1-sided originals to- gether to both sides of a sheet. 1 2 3 4 5 6 7 8 9 10 11 12 13 14 15 16 Front Back Press the [Dup./Combine/Series] key. -
Page 106: Sided 2 Pages → Combine 1 Side
Copying 2 Sided 2 Pages → → → → Combine 1 Side Copies one 2-sided original to one side of a sheet. Press the [Dup./Combine/Series] key. Press the [2 Sided] key for the orig- inal, then press the [Combine 1 Side] key for the copy. -
Page 107: Sided 4 Pages → Combine 1 Side
2 Sided 4 Pages → → → → Combine 1 Side Copies two 2-sided originals to one side of a sheet. Press the [Dup./Combine/Series] key. Press the [2 Sided] key for the orig- inal, then press the [Combine 1 Side] key for the copy. Press the [4 Pages] key, then press the [OK] key. -
Page 108: Sided 8 Pages → Combine 1 Side
Copying 2 Sided 8 Pages → → → → Combine 1 Side Copies four 2-sided originals to one side of a sheet. Press the [Dup./Combine/Series] key. Press the [2 Pages] key for the orig- inal, then press the [Combine 1 Side] key for the copy. -
Page 109: Sided 4 Pages → Combine 2 Side
2 Sided 4 Pages → → → → Combine 2 Side Copies two 2-sided originals together to both sides of a sheet. Press the [Dup./Combine/Series] key. Press the [2 Sided] key for the orig- inal, then press the [Combine 2 Side] key for the copy. -
Page 110: Sided 8 Pages → Combine 2 Side
Copying 2 Sided 8 Pages → → → → Combine 2 Side Copies four 2-sided originals together to both sides of a sheet. Front Back Press the [Dup./Combine/Series] key. Press the [2 Sided] key for the orig- inal, then press the [Combine 2 Side] key for the copy. -
Page 111: Sided 16 Pages → Combine 2 Side
2 Sided 16 Pages → → → → Combine 2 Side Copies eight 2-sided originals togeth- er to both sides of a sheet. 1 2 3 4 5 6 7 8 9 10 11 12 13 14 15 16 Front Back Press the [Dup./Combine/Series] key. -
Page 112: Series/Book
Copying Series/Book Series copies are made by separately copying the front and back of a 2-sid- ed original or the two facing pages of a spread original onto two sheets of paper. A book is made by copying two or more originals in page order. The following types of Series and Book modes can be used: ❖... - Page 113 Press the [Dup./Combine/Series] key. Press the [Series/Book] key. Make sure that the [Series] key is selected. Press the [Book→ → → → 1 Sided] key, then press the [OK] key. Press the [OK] key. Make sure that the [Auto Paper Se- lect] key is selected.
- Page 114 Copying Press the [Dup./Combine/Series] key. Press the [Series/Book] key. Make sure that the [Series] key is selected. Press the [Book→ → → → 2 Sided] key, then press the [OK] key. Press the [OK] key Select the paper. Set your originals, then press the { { { { Start} } } } key.
- Page 115 Press the [Dup./Combine/Series] key. Press the [Series/Book] key. Make sure that the [Series] key is selected. Press the [Front & Back → → → → 2 Sided] key, then press the [OK] key. Press the [OK] key. Select the paper. Set your originals, then press the { { { { Start} } } } key.
-
Page 116: Copying Book Originals
Copying Copying Book Originals Limitation ❒ You cannot use the bypass tray with this function. Note ❒ The machine sets the reproduction ratio automatically to meet the pa- per size and copies the originals to- gether onto the paper. ❒ The machine uses ratios in the range of 25 to 400%. - Page 117 How to fold copies to make a booklet Open to Left Open to Right Press the [Dup./Combine/Series] key. Press the [Series/Book] key. Press the [Book] key. Press the [1 Sided → → → → Booklet] key, then press the [OK] key. GCBOOK2E Press the [OK] key.
- Page 118 Copying 2 Sided → → → → Booklet Make 2 sided originals to copies in page order for a folded booklet as shown in the following illustrations: ❖ ❖ ❖ ❖ Open to Left ❖ ❖ ❖ ❖ Open to Right Important ❒...
- Page 119 Press the [Series/Book] key. Press the [Book] key. Press the [2 Sided → → → → Booklet] key, then press the [OK] key. Press the [OK] key. Select the paper. Set your originals, then press the { { { { Start} } } } key. Note ❒...
- Page 120 Copying ❒ If the calculated ratio is under the available minimum ratio, it will be adjusted to the minimum ratio. However, with some ratios, parts of the image might not be copied. ❒ If the number of originals scanned is less than a multiple of 4, the last page is copied blank.
- Page 121 Set your originals, then press the { { { { Start} } } } key. Note ❒ When placing one original on the exposure glass or in the doc- ument feeder in Batch mode, press the {#} key after all origi- nals are scanned.
- Page 122 Copying How to fold and unfold copies to make a magazine ❖ ❖ ❖ ❖ Open to Left ❖ ❖ ❖ ❖ Open to Right Press the [Dup./Combine/Series] key. Press the [Series/Book] key. Press the [Book] key. GCBOOK5E Press the [2 Sided → → → → Magazine] key, then press the [OK] key.
-
Page 123: Edit Image
Edit Image Image Repeat The original image is copied repeat- edly. Note ❒ The number of repeated images depends on the original size, copy paper size, and reproduction ratio. See the following table: ❖ ❖ ❖ ❖ Original: A5K K /Copy paper: A4K L /Copy paper or Original: A5L 4 repeats (71%) -
Page 124: Double Copies
Copying Press the [OK] key. Set your original, then press the { { { { Start} } } } key. Double Copies One original image is copied twice on one copy as shown in the illustration. Limitation ❒ The following originals cannot be detected properly on the exposure glass. -
Page 125: Centering
Press the [Double Copies] key. Press the [OK] key. Press the [OK] key. Select the paper. Set your originals, then press the { { { { Start} } } } key. Centering You can make copies by moving the image to the centre of the copy paper. Limitation ❒... -
Page 126: Positive/Negative
Copying Press the [Centering] key. Press the [OK] key. Press the [OK] key. Set your originals, then press the { { { { Start} } } } key. Positive/Negative If your original is black and white, copy images are inverted. Press the [Edit/Stamp] key. -
Page 127: Erase
Erase This function erases the centre and/ or all four sides of the original image. This is useful for avoiding shadows on the copy image caused by the bound originals, such as books. This function can be used in three ways: ❖... -
Page 128: Border Erase
Copying Border Erase This function erases the edge mar- gins. You can set the same margin width for all four sides, or you can set different margin widths for each side. Note ❒ If you want to erase the centre mar- gin too, use the Centre/Border function. -
Page 129: Center Erase
B Press the key for the border you wish to change and set an erase border width with the n ] and [o o ] keys. Note ❒ To change the value entered, press the [n] and [o] keys and enter the new value. C Press the [OK] key. -
Page 130: Center/Border Erase
Copying Center/Border Erase This mode erases both the centre and edge margins. You can set the same margin width for all four sides and centre, or you can set different margin widths for each. Press the [Edit/Stamp] key. Press the [Erase] key. Press the [Center/Border] key. - Page 131 Selecting [Diff. Width] A Press the [Diff. Width] key. B Press the key for the part you wish to change and set an erase margin width with the [n o ] keys. Note ❒ To change the value entered, press the [n] and [o] keys and enter the new value.
-
Page 132: Margin Adjustment
Copying Margin Adjustment You can shift the image left, right, top or bottom to make a binding margin. Limitation ❒ If you set the margin too wide, ar- eas you do not want to delete might be erased. Note ❒ You can change the width of the binding margin as follows: Metric 0 –... - Page 133 Set a binding margin for a front page. Press the [← ← ← ← ] and [→ → → → ] keys when setting the left and right margins, and the [↓ ↓ ↓ ↓ ] and [↑ ↑ ↑ ↑ ] keys when setting the top and bottom margins.
-
Page 134: Stamp
Copying Stamp This function prints stamp on the copies. Stamp modes are as follows: ❖ ❖ ❖ ❖ Background Numbering This function prints numbers on the background of copies. ❖ ❖ ❖ ❖ Preset Stamp This function prints preset messag- es on copies. -
Page 135: Preset Stamp
Press the [Background Numbering] key. Enter the number to start count- ing from with the number keys. Then press the [OK] key. Note ❒ The number can be set from 1 to 999. ❒ To change the entered number, press the [Clear] or {Clear/Stop} key and enter the new number. - Page 136 Copying ❒ You can choose the default settings for the position, size and density of the stamp with the User Tools. ⇒ “Stamp Position”, “Stamp For- mat” in P.221 “Preset Stamp ❒ You can choose the default settings for the print page with the User Tools.
-
Page 137: User Stamp
Change the stamp position, size or density. If you do not wish to change, go to step G. To change the stamp position, size or density A Press the [Change] key. B Select the desired position, size and density. C Press the [OK] key. After you specified all the desired settings, press the [OK] key. - Page 138 Copying ❒ The relationship between the di- rection in which you set the origi- n a l a n d s t a m p O r i e n t a t i o n / Position is as follows: ❒...
-
Page 139: Program/Delete User Stamp
B Select the desired position. C Press the [OK] key. After you specified all the desired settings, press the [OK] key. Note ❒ To cancel the settings, press the [Cancel] key. Press the [OK] key. Set your originals, then press the { { { { Start} } } } key. - Page 140 Copying Press the [Program/Delete Stamp] key. To program the User Stamp A Press the [Program] key. B Press the stamp number (1 – 4) you want to program. Note ❒ Stamp numbers with m al- ready have settings in them. ❒...
-
Page 141: Date Stamp
F Press the [Vertical] key, and en- ter the vertical size in the same way as step E E E E . G Set the user stamp on the expo- sure glass, and then press the [Start Scanning] key. Note ❒... - Page 142 Copying ❒ You can change the Date Stamp settings with the User Tools. ⇒ P.223 “Date Stamp”. ❒ The font and size of the Date Stamp can be changed with the User Tools. ⇒ “Font” and “Size” in P.223 “Date Stamp”. ❒...
- Page 143 Press the [Date Stamp] key. Press the [All Pages] or [1st Page on- ly] to select the print page. To change the style of date A Press the [Change Format] key. B Select the format of date. C Press the [OK] key. To change the stamp position A Press the [Change] key.
-
Page 144: Page Numbering
Copying Page Numbering Use this function to print page num- bers on your copies. There are six types of Page Numbering (n is the to- tal number of pages in your original): • P1,P2,…Pn • 1/n,2/n,...n/n • -1-,-2-,...-n- • P.1,P.2,...P.n •... - Page 145 ❒ If you combine this function with the Duplex (Top to Top) function, you can change the setting to stamp on the back side in the same position as the front side. ⇒ “Du- plex Back Page Stamping Position” in P.224 “Page Numbering ❒...
- Page 146 Copying Select the format. To change the stamp position, press the [Change] key. If you do not wish to change the stamp position, go to step G. Select the stamp position, then press the [OK] key. To change the first printing page a n d s ta r t n u m b e r , p r es s t h e [Change] key.
- Page 147 E Press the [Last Number] key, then enter the page number at which to stop numbering with the number keys. Note ❒ If you wish to print onto the last page, press the [to the end] key and go to step J. F Press the { { { { #} } } } key.
- Page 148 Copying H Press the { { { { #} } } } key. I Press the [OK] key. If you selected (1-1, 1-2,…) A Press the [First Printing Page] key, then enter the original sheet number from which to s t a r t n u m b e r i n g w i t h t h e number keys.
-
Page 149: Cover/Slip Sheet
Cover/Slip Sheet Using this function, you can add or insert cover or paper designate. There are four types in this function: ❖ ❖ ❖ ❖ Front Cover The first page of your originals is copied on a specific paper sheet for covers. -
Page 150: Front/Back Covers
Copying ❒ In “Cover” of the User Tools (Sys- tem Settings), if you selected “Mode Selected” for “Tray Dis- play” setting, the machine refers to the settings in “Cover” about whether the front and back covers are copied single-sided (“1 Sided Only”) or double-sided (“Duplex Copy”). - Page 151 Note ❒ You can specify whether to make a copy on a cover sheet. If you select [Copy], the first and last pages will be copied on the cover sheets. If you select [Blank], a cover sheet will just be inserted before the first copy and another sheet after the last copy.
-
Page 152: Designate
Copying Designate Use this function to have certain pag- es of your original copied onto slip sheets. Preparation Before using this function, set the special paper tray for slip sheets. ⇒ “Slip Sheet 1”, “Slip Sheet 2” in the System Settings manual. Limitation ❒... - Page 153 When you wish to finish specify- ing page location, press the [OK] key. This display shows example set- tings. Note ❒ To change the number entered, enter the new number in the same way as steps C to G. Select the paper tray containing the non-slip sheet paper.
- Page 154 Copying Press the [Desig./Chapter] key. Press the [Chapter] key. Enter the page location of the first page of the first chapter with the number keys. Then, press the { { { { #} } } } key. Note ❒ To change the value entered, press the [Clear] or {Clear/Stop} key and enter the new value.
-
Page 155: Slip Sheets
Slip Sheets Every time the original's page chang- es, a slip sheet is inserted. This func- tion can be used to insert a slip sheet automatically between each OHP transparency copied or used as a stack function. You can also copy onto the inserted slip sheets. - Page 156 Copying Select [Copy] or [Blank], followed by the [OK] key. Select the paper tray containing the non-slip sheet paper. When using OHP transparencies, open the bypass tray. Set your originals, then press the { { { { Start} } } } key.
-
Page 157: Combination Chart
Combination Chart The combination chart given below shows which modes can be used together. When you read the chart, see the following table: ❍ means that these modes can be used together. means that these modes cannot be used together. The mode after you select will be the mode you're working in. - Page 158 Copying...
-
Page 159: Document Server
Overview The Document Server enables you to save documents in the machine memory and then edit and print them as you want. There are three ways to save documents. • Scanning from the document feeder • Scanning from the exposure glass •... -
Page 160: Process
Document Server Process Prepare the documents you want to save by copying, fax transmitting, scan- ning, and PC data. Save the documents. • The documents are saved in the machine memory. Print the documents, send fax, and transfer the documents and the data to •... -
Page 161: Features And Benefits
Features and Benefits On Demand Printing Use to print any saved document as required. ❖ ❖ ❖ ❖ Your current situation might be… • When you need to print multiple sets of documents 2-sided and stapled to- gether, you normally print the originals, make duplex copies and then sta- ple them together manually. - Page 162 Document Server ❖ ❖ ❖ ❖ With the Document Server If you save your document in the Document Server, you can print it out at any time with the necessary print settings, such as duplex and stapling. Your doc- uments will not be confused with those of others in the exit tray. You can store fax documents, document data so that you can print them whenever necessary.
-
Page 163: File Merge Printing
File Merge Printing You can combine multiple scanned documents to print them in one set. ❖ ❖ ❖ ❖ Your current situation might be… You want to combine several originals that are different in density, size, and paper weight, e.g. You can merge documents that were created with different applications or that were created separately on different computers. - Page 164 Document Server ❖ ❖ ❖ ❖ With the Document Server Set the print order to print documents together. Merge and print fax documents, document data sent, and originals that have been scanned. Merge documents created with different applications or created on different computers.
-
Page 165: Facsimile Resend
Facsimile Resend You can print or resend a sent document received by fax. This is useful when you want to send a large document that needs to be sent several times, since you do not have to scan the document each time. ❖... -
Page 166: Operation From A Computer
Document Server Operation from a Computer If you install Desk Top Binder V2 Professional or Desk Top Binder V2 Lite on your computer you can check the display of electronic data, select the finish set- tings and print it. You can also delete data stored in the Document Server. In ad- dition, you can also export documents stored in the Document Server as a file on your computer. -
Page 167: Scanning Originals
Scanning Originals You can scan the originals you want to save in the Document Server using the control panel of the machine. The orig- inals can be set either on the exposure glass or into the document feeder. The saved documents will automati- cally be named in the order of scan- ning as “COPY0001”, “COPY0002”…. - Page 168 Document Server B Enter the new file name using the letter keys on the display panel. Reference For details on entering char- acters, refer to "Entering Text Characters" in the System Settings manual. C Press the [OK] key. To set the user name A Press the [User Name] key.
- Page 169 Reference For details, see the explanations of each function in this manual. Press the { { { { Start} } } } key. The document is saved in the Doc- ument Server. The saved docu- ments are displayed on the “Select Files to Print”...
-
Page 170: Scanning In Copy Mode
Document Server Scanning in Copy mode Press the { { { { Copy} } } } key. Copy display appears. Press the [Stored File] key. Enter a file name, user name, or password if neccessary. Reference For details about settings, ⇒ “Scanning in Document Server mode”... -
Page 171: Printing Saved Documents
Printing Saved Documents You can print any of the documents saved in the Document Server. Follow these steps to select a docu- ment and print it out. Press the { { { { Document Server} } } } key. The “Select Files to Print” display appears. - Page 172 Document Server If you need to change any of the print settings, press the [Print Set- tings] key. The “Print Settings” display ap- pears. Note ❒ The print settings remain in the machine after printing. ❒ The print settings of the docu- ment you select first are applied to the merged documents.
-
Page 173: Sample Printing
Sample Printing If you print multiple sets using the Sort function, you can check if the print order or the print settings are correct by printing out only the first set using the {Sample Copy} key. Limitation ❒ This function can be used only when the Sort function has been turned on. -
Page 174: Searching Saved Documents
Document Server Searching Saved Documents You can use either the [Search by File Name] or [Search by User Name] keys to search for documents stored on the document server. You can also list the stored documents in the order you prefer. -
Page 175: To Check The Details Of Stored Documents
To Check the Details of Stored Documents Select the document for which you want detailed information. Press the [Detail] key. The detailed information about the document is displayed. Note ❒ If you have selected several doc- uments, use the [U U U U ] [T T T T ] keys to view the details of each docu- ment. -
Page 176: Deleting Saved Documents
Document Server Deleting Saved Documents You should delete any of the saved documents using the control panel of the machine. This section describes how to delete saved documents. Important ❒ You can save up to 3,000 docu- ments in the Document Server. No more documents can be saved, when there are 3,000 documents in the Document Server. - Page 177 Press the [Delete File] key. A confirmation dialog box ap- pears. Press the [Delete] key to delete it. Note ❒ To cancel the delete operation, press the [Do not Delete] key. Deleting Saved Documents...
- Page 178 Document Server...
-
Page 179: Troubleshooting
If Your Machine Does Not Operate as You Want General Machine Status Please wait. Cannot detect original size. Check original orientation. Check paper size. Rotate Sort is not available with this image size. Cannot punch paper of this size. It is over stapling capacity. 4. - Page 180 Troubleshooting Machine Status Hole punch receptacle is full. Open the door as shown and empty receptacle. Cannot staple paper of this size. Duplex is not avilable with this paper size. Maximum number of sets is *. The number of copies exceeds Document Server Machine Status Scanned pages exceeded max.
-
Page 181: Document Server
Document Server Problem You forgot your password. You cannot find out what is saved in a file. Memory becomes full frequently. You want to check the print result before mak- ing a large print run. You want to save a document which cannot be deleted automatically. -
Page 182: Display
Troubleshooting Display Problem The display panel is off. Nothing happens when the operation switch is turned on. Problem/Cause The screen contrast knob is turned to the dark position. The machine is in Energy Sav- er mode. The operation switch is turned off. -
Page 183: If You Cannot Make Clear Copies
If You Cannot Make Clear Copies Problem Copies appear dirty. The reverse side of an original image is copied. A shadow appears on copies if you use pasted originals. The same copy area is dirty whenever making copies. Copies are too light. Parts of the image are not cop- ied. -
Page 184: If You Cannot Make Copies As You Want
Troubleshooting If You Cannot Make Copies As You Want General Problem Copies are not stapled. Staples are wrongly posi- tioned. Misfeeds occur frequently. You cannot combine several functions. When sorting, the pages are divided into two blocks. Cause There are jammed staples in the stapler. -
Page 185: Adjust Image
Adjust Image Problem In Double Copies mode, parts of the original image are not copied. In Border, Center, or Center/ Border mode, parts of the original image are not copied. In Margin Adjustment mode, parts of the original image are not copied. -
Page 186: Combine
Troubleshooting Combine Problem You cannot make a book from a booklet or magazine by fold- ing copies. Parts of the image are not cop- ied. Order of copies is not correct. Cause Combine Original Booklet Format or Combine Original Magazine Format is not cor- rect. -
Page 187: Duplex
Duplex Problem Order of copies is not correct. Orientation of copies (Top to Top, or Top to Bottom) is not correct. If You Cannot Make Copies As You Want Cause You set originals in the incor- rect order. You set originals in an incor- rect direction or the orienta- tion setting is incorrect. -
Page 188: When Memory Is Full
Troubleshooting When Memory Is Full Limitation ❒ If memory is full on either the master unit or sub-unit, Interrupt Copy will not be available. Note ❒ If you set “Memory Full Auto Scan Restart”of the User Tools to “Yes”, the memory overflow message will not be displayed, but make Connect Copy for the scanned original automatically. -
Page 189: B Loading Paper
B Loading Paper Note ❒ If you want to change the paper size of tray 1-2 ⇒ P.188 “Changing the Paper Size”. Reference Regarding paper types and sizes, ⇒ P.21 “Copy Paper”. Loading Paper in Tray 1or 2 Pull out the paper tray until it stops. -
Page 190: Loading Paper In Tray 3 Or 4
Troubleshooting Push the paper tray in until it stops. Loading Paper in Tray 3 or 4 Pull out the paper tray until it stops. Remove the back fence. Important ❒ Do not stack paper over the lim- it mark. ❒ Make sure that the paper stack is flush with the right side fence. -
Page 191: Loading Paper In The Large Capacity Tray
Loading Paper in the Large Capacity Tray Press the key if it is not lit. The key blinks while the bottom plate is moving down. When the key stops blinking and lights up, open the top cover. Note ❒ Make sure no paper sheet is in- volved in the feeding paper of the Large Capacity Tray, Re- move the sheet, if any. -
Page 192: D Adding Toner
Troubleshooting D Adding Toner When D is displayed, it is time to supply toner. R WARNING: • Do not incinerate used toner or toner containers. Toner dust might ig- nite when exposed to an open flame. Dispose of used toner containers in accordance with local regulations for plastics. - Page 193 Toner2 Toner3 Toner4 Toner5 • 3: Push the green lever, and then gently pull out the holder. • 4: Press the toner bottle backward to raise its head, and then gently pull out the bot- tle. • 5: Hold a new bottle horizontally and shake it 5 or 6 times.
- Page 194 Troubleshooting • 8: Push the holder until it clicks. • 9: Push down the green lever. • 10: Close the front cover of the machine. Toner6...
-
Page 195: Clearing Misfeeds
x Clearing Misfeeds R CAUTION: • The fusing section of this equipment might be very hot. You should be very careful that you don't touch this section when removing the misfed paper. Important ❒ When clearing misfeeds, do not turn off the operation switch. If you do, your copy settings are cleared. - Page 196 Troubleshooting...
- Page 197 x Clearing Misfeeds...
- Page 198 Troubleshooting...
- Page 199 x Clearing Misfeeds...
- Page 200 Troubleshooting...
- Page 201 x Clearing Misfeeds...
-
Page 202: Changing The Paper Size
Troubleshooting Changing the Paper Size Important ❒ If you wish to change the paper size set in the optional large capac- ity tray (LCT), contact your service representative. ❒ Be sure to select paper size with the user tools. Otherwise, misfeeds might occur. - Page 203 While pressing the release lever, adjust the side fences. Square the paper and load it into the tray. Important ❒ Do not stack paper over the lim- it mark. ❒ Make sure that the paper stack is flused with the right side fence.
- Page 204 Troubleshooting To adjust the paper size to one not available with the paper size selector A Set the paper size selector to the p p mark on the left. B Press the { { { { User Tools/Counter} } } } key.
- Page 205 Re-position the side fences to the paper size you want to use. Fasten the fences with screws. Square the paper and load it into the tray. Important ❒ Do not stack paper over the lim- it mark. Changing the Paper Size Note ❒...
-
Page 206: Adding Staples
Troubleshooting d Adding Staples R CAUTION: • Our products are engineered to meet high standards of quality and function- ality, and we recommend that you only use the expendable supplies availa- ble at an authorized dealer. Important ❒ If you use a staple cartridge other than that recommended, staple failure or staple jams might occur. - Page 207 • 4: Push in the new refill until it clicks. fin104EE • 5: Pull out the ribbon. fin105EE • 6: Reinstall the cartridge. fin106EE • 7: Close the front cover. fin107EE d Adding Staples...
-
Page 208: Tray Finisher
Troubleshooting 2 Tray Finisher • 1: Open the front cover of the finisher. • 2: Hold the green lever and pull out the cartridge gently. • 3: Hold the both sides of the cartridge. • 4: Pull up the upper unit of the cartridge. •... - Page 209 d Adding Staples • 7: Hold down the upper unit to the car- tridge gently. • 8: Pull out the ribbon. • 9: Hold the green lever and reinstall the cartridge until it clicks. • 10: Close the front cover of the finisher.
-
Page 210: Removing Jammed Staples
Troubleshooting e Removing Jammed Staples Note ❒ Staples might be jammed because of curled copies. In this case, try turning the copy paper over in the tray. If there is no improvement, change the copy pa- per with less curls. ❒... - Page 211 • 4: Remove the jammed staples. fin111EE • 5: Reinstall the cartridge. fin112EE • 6: Close the front cover. fin113EE e Removing Jammed Staples...
-
Page 212: Tray Finisher
Troubleshooting 2 Tray Finisher • 1: Open the front cover of the finisher. • 2: Hold the green lever and pull out the cartridge gently. • 3: Pull up the knob of the cartridge. • 4: Take out all staples slid from the car- tridge. - Page 213 e Removing Jammed Staples • 6: Hold the green lever and reinstall the cartridge until it clicks. • 7: Close the front cover of the finisher.
-
Page 214: Removing Punch Waste
Troubleshooting y Removing Punch Waste Note ❒ While “Hole punch receptacle is full.” is displayed, you cannot use the Punch function. Open the front cover of the 2 Tray finisher. Pull out the punch waste box and remove punch waste. Reinstall the punch waste box. -
Page 215: User Tools (Copy/Document Server Features)
Document Server Features) Accessing the User Tools (Copy/ Document Server Features) This section is for the key operators in charge of this machine. You can change or set the machine's default settings. Preparation After using the User Tools, be sure to exit from the User Tools. -
Page 216: Exiting From The User Tools
User Tools (Copy/Document Server Features) Exiting From the User Tools After changing the User Tools set- tings, press the [Exit] key on the User Tools Main Menu. Changing the User Tools is com- pleted, and the machine is ready for copying. Note ❒... - Page 217 Accessing the User Tools (Copy/Document Server Features)
-
Page 218: User Tools Menu (Copier/Document Server Features)
User Tools (Copy/Document Server Features) User Tools Menu (Copier/Document Server Features) - Page 219 User Tools Menu (Copier/Document Server Features)
-
Page 220: General Features
User Tools (Copy/Document Server Features) General Features ❖ ❖ ❖ ❖ Auto Paper Select Priority As a default setting, Auto Paper Select is selected. You can cancel this setting. Note ❒ Default: Yes ❖ ❖ ❖ ❖ Auto Tray Switching If you load paper of the same size in two or more trays, the machine automat- ically shifts to another tray when the tray in use runs out of paper (when Auto Paper Select is selected.) This function is called “Auto Tray Switching”. - Page 221 ❖ ❖ ❖ ❖ Original Mode Display You can choose whether the original modes are shown on the initial display. Note ❒ Default: Display ❒ If you choose “Hide”, the display is shown as below. ❖ ❖ ❖ ❖ Auto Image Density Priority You can turn the Auto Image Density on or off for each of the original types (Text, Text/Photo, Photo, Pale, and Generation Copy).
- Page 222 User Tools (Copy/Document Server Features) • Text/Photo When there are photo(s) and text on the original, determine whether the photo or text takes priority. Note ❒ Default: Normal ❒ [Custom Setting] is the value set during service setup. ❒ [Normal] achieves a good balance between text and photos. •...
-
Page 223: General Features 2 / 4
General Features ❖ ❖ ❖ ❖ Duplex Mode Priority You can select the type of the Duplex function effective when the machine is turned on, Energy Saver mode is off, or Auto Reset is on. Note ❒ Default: • Metric version: 1 Sided → 1 Sided •... - Page 224 User Tools (Copy/Document Server Features) ❖ ❖ ❖ ❖ Job End Call You can choose whether or not the beeper sounds when copying is complete. If the "Panel Tone" of the User Tools (System Settings) settings is "Off", the machine beeps to notify you that the machine did not complete a job for rea- sons such as copying was interrupted, the paper tray ran out of paper or a pa- per jam occurred.
-
Page 225: General Features
General Features ❖ ❖ ❖ ❖ Copy Function Key: F1-F5 You can register frequently used functions in Function Keys F1 to F5. Note ❒ Default: • Copy Function Key: F1: 1 Sided → 2 Sided:T to T • Copy Function Key: F2: 2 Sided:T to T → 2 Sided:T to T •... -
Page 226: General Features
User Tools (Copy/Document Server Features) General Features ❖ ❖ ❖ ❖ Document Server Storage Key: F1–F5 You can reqister frequently used functions in Function keys F1 to F5. You can also change the registered functions. Note ❒ Default • Document Server Storage Key: F1: 2 Sided Original Top to Top •... -
Page 227: Reproduction Ratio
Reproduction Ratio ❖ ❖ ❖ ❖ Shortcut R/E You can register up to three frequently used Reduce/Enlarge ratios other than the fixed Reduce/Enlarge ratio and have them shown on the initial dis- play. You can also change the registered Reduce/Enlarge ratios. If no Reduce/Enlarge ratio has been set when selecting [Shortcut R/E 1], [Short- cut R/E 2], or [Shortcut R/E 3], enter the desired Reduce/Enlarge ratio using the number keys. -
Page 228: Reproduction Ratio 2 / 2
User Tools (Copy/Document Server Features) Reproduction Ratio ❖ ❖ ❖ ❖ Reduce 1-6 You can customize the reduction ratios available when you press the [Reduce/ Enlarge] key followed by the [Reduce] key. Note ❒ Default: • Metric version: • Reduce 1: 25% •... - Page 229 Reproduction Ratio ❖ ❖ ❖ ❖ R/E Priority Specify which Reduce, Enlarge or Input Ratio is shown on the display panel with priority when the [Reduce/Enlarge] key is pressed. Note ❒ Default: Reduce...
-
Page 230: Edit 1 / 2
User Tools (Copy/Document Server Features) Edit ❖ ❖ ❖ ❖ Front Margin: Left/Right You can specify left and right margins on the front side of copies in Margin Adjust mode. Note ❒ Default: • Metric version: Left 5mm • Inch version: Left 0.2" ❖... - Page 231 ❖ ❖ ❖ ❖ 1 sided→ → → → 2 sided Auto Margin:T to T In 1 sided → 2 sided Duplex mode, you can specify whether to automatically set the margins on the back side. The margin is set to the same value of “Back Margin: Left/Right”. Note ❒...
-
Page 232: Edit
User Tools (Copy/Document Server Features) Edit ❖ ❖ ❖ ❖ Image Repeat Separation Line You can select a separation line in Image Repeat mode from None, Solid, Bro- ken A, Broken B, or Crop Marks. • None • Solid • Broken A •... - Page 233 • Broken A • Broken B • Crop Marks Note ❒ Default: None ❖ ❖ ❖ ❖ Separation Line in Combine You can select a separation line in Combine mode from None, Solid, Broken A, Broken B, or Crop Marks. •...
- Page 234 User Tools (Copy/Document Server Features) ❖ ❖ ❖ ❖ Front Cover Copy in Combine You can specify whether to make a combined copy on the front cover sheet when you select Front Cover copy mode. Note ❒ Default: Combine ❖ ❖ ❖ ❖ Designated Slip Sheet Copy in Combine You can specify whether to make a combined copy on the inserted slip sheets in Desig./Chapter Copy mode.
-
Page 235: Stamp
Stamp Background Numbering ❖ ❖ ❖ ❖ Size You can set the size of the numbers. Note ❒ Default: Normal • Small • Normal • Large ❖ ❖ ❖ ❖ Density You can set the density of the numbers. Note ❒... -
Page 236: User Stamp
User Tools (Copy/Document Server Features) • Inch Version: • Position: Top right • Top Margin: 1.0" • Right Margin: 1.0" ❖ ❖ ❖ ❖ Stamp Format You can adjust the size, density and print page for the stamp. • Size You can set the size of the stamp. -
Page 237: Date Stamp
• Inch version: • Position: Top right • Top Margin: 1.0" • Right Margin: 1.0" ❖ ❖ ❖ ❖ Stamp Format You can adjust the print page for User Stamp 1 to 4 you registered. Note ❒ Default: All Pages Date Stamp ❖... -
Page 238: Page Numbering
User Tools (Copy/Document Server Features) ❖ ❖ ❖ ❖ Stamp Setting You can select whether the date is printed on the first page or all pages. Note ❒ Default: All Pages ❖ ❖ ❖ ❖ Size You can set the Date Stamp size. Note ❒... - Page 239 ❖ ❖ ❖ ❖ Duplex Back Page Stamping Position You can set the position of the duplex back page number that is printed in Du- plex mode. Note ❒ Default: Opposite Position ❖ ❖ ❖ ❖ Page Numbering in Combine You can set how the pages are numbered when you use the Combine function and Page Numbering function together.
-
Page 240: Input/Output
User Tools (Copy/Document Server Features) Input/Output ❖ ❖ ❖ ❖ Switch to Batch (SADF) You can select Batch mode or SADF mode when you press the Special Origi- nal key. ❖ ❖ ❖ ❖ SADF Auto Reset When you set one original at a time in the document feeder, the Auto Feed indicator lights for a selected time after an original is fed to show that the doc- ument feeder is ready for another original. - Page 241 ❖ ❖ ❖ ❖ Select Stack Function Specify which Stack or Rotate Sort is shown on the initial display with prior- ity. Note ❒ Default: Stack ❒ The optional finisher or booklet finisher is required to use this function. ❖ ❖ ❖ ❖ Select Stapling Position Specify which Top 2 staples or Bottom is shown on the initial display with pri- ority.
- Page 242 User Tools (Copy/Document Server Features)
-
Page 243: Remarks
Do's And Don'ts R CAUTION: • Unplug the power cord from the wall outlet before you move the equipment. While moving the equipment, you should take care that the power cord will not be damaged under the equipment. Important ❒ If you want to unplug the power cord or turn off the main power switch, make sure that the remain- ing memory space indicates 100%... -
Page 244: Where To Put Your Machine
REMARKS Where to Put Your Machine Machine Environment Your machine's location should be carefully chosen because environ- mental conditions greatly affect its performance. Optimum environmental conditions R CAUTION: • Keep the equipment away from humidity and dust. Otherwise a fire or an electric shock might oc- cur. -
Page 245: Power Connection
Limitation ❒ Carefully move the machine, If not, the machine might be dam- aged or stored file might be delet- ❒ Do not take off the holding stand. ❒ Avoid any strong shocking to the machine, the hard disk might be damaged, and stored files will be deleted. -
Page 246: Maintaining Your Machine
REMARKS Maintaining Your Machine If the exposure glass, platen cover, or document feeder belt is dirty, you might not be able to make copies as you want. Clean them if you find them dirty. ❖ ❖ ❖ ❖ Cleaning the machine Wipe the machine with a soft, damp cloth. -
Page 247: Specification
Mainframe ❖ ❖ ❖ ❖ Configuration: Desktop ❖ ❖ ❖ ❖ Photosensitivity type: OPC drum (Φ100) ❖ ❖ ❖ ❖ Original scanning: One-dimensional solid scanning system through CCD ❖ ❖ ❖ ❖ Copy process: Dry electrostatic transfer system ❖ ❖ ❖ ❖ Development: Dry two-component magnetic brush development system ❖... - Page 248 Specification ❖ ❖ ❖ ❖ Copy paper size: • Trays: A3L – A5L, 11" × 17"L – 5 • Bypass: A3L – A6L, 11" × 17"L – 5 • Bypass (custom size): Vertical: 100 – 297mm, 4.0" – 11.7" Horizontal: 148 – 600mm, 5.9" – 23.6" •...
- Page 249 ❖ ❖ ❖ ❖ Reproduction ratio: Preset reproduction ratios: Enlargement Full Size Reduction Zoom: From 25 to 400% in 1% steps. ❖ ❖ ❖ ❖ Maximum continuous copy run: 999 sheets ❖ ❖ ❖ ❖ Copy paper capacity: • Tray 1, 2: 500 sheets (80g/m •...
- Page 250 Specification ❖ ❖ ❖ ❖ Dimensions (W × × × × D × × × × H up to exposure glass): Type 1, 2: 670 × 650 × 720mm, 26.4" × 25.6" × 28.3" ❖ ❖ ❖ ❖ Space for mainframe (W × × × × D): •...
-
Page 251: Document Feeder (Option)
Document Feeder (Option) ❖ ❖ ❖ ❖ Mode: ADF mode, Batch mode, Mixed Size mode, Custom Size originals mode ❖ ❖ ❖ ❖ Original size: • A3L – B6KL (2 sided original are impossible for B6KL) • 11" × 17"L – 5 "... -
Page 252: 1000-Sheet Finisher (Option)
Specification 1000-Sheet Finisher (Option) ❖ ❖ ❖ ❖ Paper size: A3L, B4L, A4KL, B5KL, A5KL, B6L, A6L, 11" × 17"L, 8 " × 11"KL, 5 ❖ ❖ ❖ ❖ Paper weight: 52 – 157g/m , 14 – 42 lb. ❖ ❖ ❖ ❖ Stack capacity: •... -
Page 253: Tray Finisher (Option)
2 Tray Finisher (Option) Finisher Shift Tray 1: ❖ ❖ ❖ ❖ Paper size: A3L, B4L, A4KL, B5KL, A5KL, B6L, A6L, 11" × 17"L, 8 " × 11"KL, 5 " × 8 ❖ ❖ ❖ ❖ Paper weight: 52 – 157g/m , 14 –... - Page 254 Specification ❖ ❖ ❖ ❖ Staple position: • 1 staple – 3 positions • 2 staples – 1 position ❖ ❖ ❖ ❖ Power consumption: Less than 60W (power is supplied from the main frame.) ❖ ❖ ❖ ❖ Dimensions (W × × × × D × × × × H): 680 ×...
-
Page 255: Punch Kit (Option)
Punch Kit (Option) ❖ ❖ ❖ ❖ Paper size • 2 holes: A3L – A5KL, 11" × 17"L, 8 • 3 holes: A3L, B4L, A4K, B5K, 11" × 17"L, 8 • 4 holes: • Metric version: A3L, B4L, A4K, B5K, 11" × 17"L, 8 •... -
Page 256: Internal Tray 2 (1 Bin Tray) (Option)
Specification Internal tray 2 (1 bin tray) (Option) ❖ ❖ ❖ ❖ Number of bins: ❖ ❖ ❖ ❖ Available paper size: A3L, B4L, B5KL, A5L, 11" × 17"L, 8 " × 8 " L ❖ ❖ ❖ ❖ Paper capacity: 125 sheets (80g/m ❖... -
Page 257: Extarnal Tray (Option)
Extarnal Tray (Option) ❖ ❖ ❖ ❖ Dimensions (W × × × × D × × × × H): 265 × 395 × 65mm, 10.4" × 15.5" × 2.5" ❖ ❖ ❖ ❖ Weight: Approx. 600 g, 1.3 lb Note ❒... -
Page 258: Large Capacity Tray (Lct) (Option)
Specification Large Capacity Tray (LCT) (Option) ❖ ❖ ❖ ❖ Paper size: " × 11"K A4K, 8 ❖ ❖ ❖ ❖ Paper weight: 60 – 105g/m , 16 – 24 lb. ❖ ❖ ❖ ❖ Paper capacity: 1,500 sheets (80g/m ❖... -
Page 259: Paper Tray Unit (Option)
Paper tray unit (Option) ❖ ❖ ❖ ❖ Copy paper weight: 60 – 105g/m (16 – 28 lb.) ❖ ❖ ❖ ❖ Available paper size: A3L, B4L, A4KL, B5KL, A5L, 11" × 17"L, 8 " × 11"KL, 5 " × 8 8"... -
Page 260: Index
INDEX 1000-Sheet Finisher , 8 1000-sheet finisher , 238 2 Tray Finisher , 8 2 Tray finisher , 239 Access to the Machine , 231 Adding Staples , 192 Adding Toner , 178 Auto Off , 28 Auto Reduce/Enlarge , 41 Back Cover , 135 , 136 Background Numbering , 120 Basic functions , 35... - Page 261 Image Density , 35 , 36 Image Repeat , 109 Indicators , 9 Internal tray , 5 Internal tray 2 (1 bin tray) , 8 Interrupt Copy , 66 Interrupt key , 9 Job Preset , 65 Large Capacity Tray (LCT) , 8 , 244 Loading Paper , 175 Large Capacity Tray (LCT) , 177 Tray 1 or 2 , 175...
- Page 262 Safety information , i Sample Copy , 67 Sample Copy key , 9 Screen Contrast knob , 9 Series Copies , 98 Setting Custom Size Originals , 33 Slip Sheets , 135 , 141 Sort , 42 Sorting copies into sets , 43 Specification , 233 Document Feeder , 237 Extarnal Tray , 243...
- Page 263 MEMO...
- Page 264 MEMO B004...