
Related Manuals for Sundance Spas Hamilton


Summary of Contents for Sundance Spas Hamilton
- Page 1 P.N.:6530-607E Rev. A 780™ Series Owner's manual Hamilton ™ Chelsee ® Bristol ™ Hanover ™ Montclair ™ Dover ™...
- Page 2 Attention New Spa Owner! Congratulations on the purchase of your new Sundance ® 780 Series spa! The following is a list of automated functions and maintenance recommendations for your new spa. Automated functions have been listed below in an attempt to suppress any operational concerns you may have during startup and the first 24 hours of ownership! Maintenance recommendations are listed in an attempt to stress their importance in protecting your new spa.
-
Page 3: Table Of Contents
10.5 Programming the CLEARRAY® Timer ........34 10.6 Programming the Water Refresh Timer ........35 10.7 Programming the Time............... 35 10.8 Programming the Date ............... 36 10.9 Programming the Temperature Format ........36 © Sundance Spas, Inc. All Rights Reserved... - Page 4 10.10 Programming the Language ............36 10.11 Programming the Lock Feature ..........37 10.12 Resetting the Wi-Fi Connection (optional feature for 50Hz models only) ..............37 11.0 Spa Maintenance..............38 11.1 Cleaning The Filter ..............38 11.2 Draining And Refilling..............40 11.3 Pillow Care .................
- Page 5 (for a 3-wire 120V 60Hz connection) ......... 55 15.2 North American Dover Convertible Circuit Diagram (for a 4-wire 240V 60Hz connection) ......56 15.3 North American Bristol/Chelsee/Hamilton/Hanover/ Montclair Circuit Diagram ............57 16.0 Dip Switch Settings and Wiring ..........58 17.0 Optional BLUEWAVE®...
-
Page 7: Important Spa Owner Information
780 Series Important Spa Owner Information ® Your new Sundance 780 Series spa is constructed to the highest standards and is capable of providing many years of trouble-free use. However, because heat retentive materials are utilized to insulate the spa for efficient operation, an uncovered acrylic spa surface and wall fittings directly exposed to sunlight and high temperatures for an extended period are subject to permanent damage or discoloration. -
Page 8: Important Safety Instructions For All Spa Owners
780 Series Important Safety Instructions for all Spa Owners READ AND FOLLOW ALL INSTRUCTIONS CAREFULLY! This spa was manufactured to meet the standards and specifications outlined in the “Virginia Graeme Baker Pool and Spa Safety Act” (VGB Safety Act). When installing and using this spa, basic safety precautions should always be followed, including: DANGER: RISK OF SEVERE INJURY OR DROWNING! - Page 9 780 Series DANGER: RISK OF SEVERE INJURY FROM ELECTRIC SHOCK OR DEATH FROM ELECTROCUTION! • Install the spa at least 5 feet (1.5m), from all metal surfaces. As an alternative, a spa may be installed within 5 feet of metal surfaces if each metal surface is permanently connected (bonded) by a minimum No.
- Page 10 780 Series • The Consumer Products Safety Commission/USA has stated that the water temperature in a spa should not exceed 104°F (40°C). • Always test the spa water temperature before entering the spa. The user should measure the water temperature with an accurate thermometer since the tolerance of water temperature-regulating devices may vary as much as +/- 5°F (2°C).
- Page 11 780 Series WARNING: TO DECREASE RISK OF INFECTION OR DISEASE! • To reduce the risk of contracting a waterborne illness (e.g. an infection, bacteria or virus) and/or respiratory ailments, maintain water chemistry within the parameters listed on the inside cover of this manual and consult with a licensed engineer regarding proper ventilation if installed indoors or in an enclosed area.
-
Page 12: Entrapment Risk
780 Series Hot Tub Safety Literature To ensure you have a safe and enjoyable hot tub experience, learn all you can about hot tub safety and emergency procedures. Especially useful are the brochures listed below: • Children Aren’t Waterproof • Pool and Spa Emergency Procedures For Infants and Children •... - Page 13 780 Series DANGER: RISK OF SEVERE INJURY OR DROWNING! Hair entrapment: May occur if hair is entangled, knotted or snagged in a drain suction or skimmer assembly. This has been reported in persons who when submerge themselves underwater, allowing hair to come close and/or within the reach of the suction fittings, suction covers or skimmer assembly.
-
Page 14: Hyperthermia
For additional or replacement Warning Signs please contact your local Sundance spas dealer and reference item number #6530-082. Important Additional Safety Instructions When using this electrical equipment, basic safety precautions should always be followed, including the following: 1. -
Page 15: General Electrical Safety Instructions
Sundance dealer or local building department should you have any questions regarding your installation. Proper grounding is extremely important. Sundance spas are equipped with a current collector system. A pressure wire connector is provided on the surface of the control box, located outside the equipment door... -
Page 16: Choosing A Location
780 Series Choosing A Location IMPORTANT: Because of the combined weight of the spa, water and users, it is extremely important that the base upon which the spa rests be smooth, flat, level and capable of uniformly supporting this weight, without shifting or settling, for the entire time the spa is in place. -
Page 17: Indoor Location
780 Series • The overall enhancement of your environment. It is preferable not to place the spa under an unguttered roof overhang since run-off water will shorten the life expectancy of the spa cover. • For spas that are to rest on balconies, roofs or other platforms not specifically tied into main structural support, consult a professional Structural Engineer with experience in this type of application. -
Page 18: Power Requirements
780 Series • SUFFICIENT ACCESS: In the unlikely event that you should ever need to access or gain entry to any portion of the spa for servicing, it is highly recommended that you plan your indoor installation to provide full access to the entire spa. •... -
Page 19: Electrical Wiring Instructions
2. Dedicated 240V Power Bristol/Chelsee/Hamilton/Hanover/Montclair Models: These spas must be permanently connected (hard-wired) to the power supply. No plug-in connections or extension cords are to be used in conjunction with the operation of these spas. - Page 20 780 Series 3. The power supplied to this spa must be a dedicated circuit with no other appliances or lights sharing the power provided by the circuit. 4. To determine the current, voltage and wire size required, refer to Section 5.0 “Power Requirements” (pages 12-13). •...
- Page 21 780 Series Figure A Equipment Area Note: Equipment location (such as pumps, sanitizing system, drain, heater etc.) varies by model. 9. CLEARRAY® (Ultraviolet) Water 1. Control Box Purification System 2. Power Supply Entrance(s) 10. Drain valve 3. 1-Speed Pump 11. Optional SmartTub™ System 4.
- Page 22 780 Series Figure C 240V 60 Hz Models STEP LIGHT (OPTIONAL) F3 0.125A 240V Red Black Green Page 16...
- Page 23 780 Series Figure D 120V/240V 60 Hz Convertible Models STEP LIGHT (OPTIONAL) F3 0.125A 240V Wht Black Green Green 240 VAC 4-Wire connection 60 Hz 120 VAC 3-Wire connection 60 Hz 120V 3-WIRE CONNECTION 120V 120V Jumper Wires 120V 120V FROM 240V 240V...
-
Page 24: Spa Fill Up Procedure
780 Series Spa Fill Up Procedure For best results, read each step in its entirety before proceeding with that step. Make sure all drains are closed before you begin. 1. Prepare The Spa For Filling • Clear all debris from the spa. (Although the spa shell has been polished at the factory, you may want to treat it with a specially formulated spa cleaner.) Consult your dealer for additional information prior to filling spa. - Page 25 780 Series 5. Add Start-Up Chemicals Add the spa water chemicals as recommended by your Sundance dealer. See Section titled “Water Quality Maintenance” (page 45) for general guidance. WARNING: RISK OF POISONING OR DEATH. Never leave chemicals opened and accessible to anyone. Use chemicals according to the vendors instructions.
- Page 26 Chelsee ......400 Gal (1,514 L) ......10.0 oz Dover ......... 230 Gal (871 L) ........6.0 oz Hamilton ......393 Gal (1,488 L) ......10.0 oz Hanover ......355 Gal (1,344 L) ........ 9.0 oz Montclair ......310 Gal (1,173 L) ........ 8.0 oz *Use average fill volume for chemical maintenance 10.
- Page 27 780 Series WARNING: BECAUSE OF THE RISK OF INHALING CHEMICAL VAPORS. • To decrease the risk of injury, drowning or entrapment, never leave your hot tub unattended for any reason while the cover is open and accessible, especially to small children and animals! •...
- Page 28 780 Series 15. Establish a sanitizer reading no less than 1.0 ppm free chlorine or 2.0 ppm bromine, then allow the hot tub to set undisturbed for 8 hours. Retest water after 8 hours to determine if sanitizer levels are stable. If sanitizer levels are stable, your spa is ready for use. To ensure healthy water conditions, always maintain a constant sanitizer reading within the levels recommended on the inside cover of this manual.
-
Page 29: Control Functions
780 Series Control Functions Control Panel A. LCD Display: Can display current water temperature (default CLEARRAY display), water temperature set point, selected menu functions, 2 Pump Panel Shown and error messages. B. Warmer ( ) Button: Increases water temperature set point. Increments of 1 °F or 0.5 °C. -
Page 30: General Spa Features And Controls
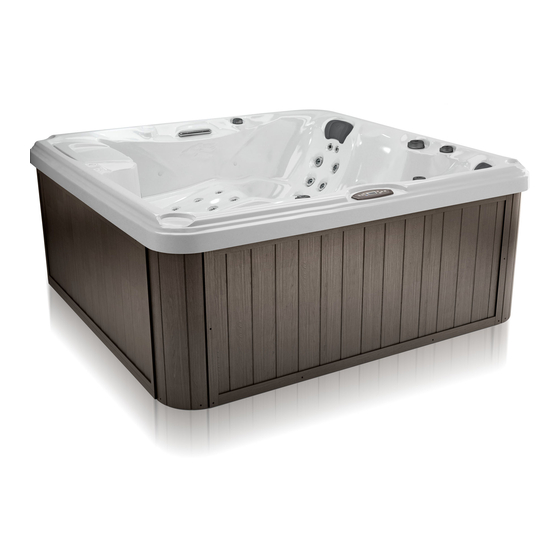
780 Series General Spa Features And Controls Hamilton model illustrated - Jet locations and features will vary by model. Spa features subject to change without notice. Control Panel 12. Waterfall Control (On/Off) Filter Lid and Filter Cartridge 13. Mini-Vortex Jets (8) Air Controls with lights (3) 14. -
Page 31: Operating Instructions
780 Series Operating Instructions The hot tub control system has automatic functions that operate upon start-up and normal operation to protect the system. Upon the first power up, the readout displays the following information: 1. Control panel displays all lit indicators, permitting visual inspection of all display segments and indicator lights for proper operation. -
Page 32: Completing Your Registration
780 Series Keep a record of your serial number and passcode for any future reference. Write that information below. Serial Number: Passcode: Completing Your Registration Once the hot tub is registered online, you will continue the process at the hot tub control panel. You will need to enter the serial number and pass- code given when you registered online. -
Page 33: Activate Jets Pumps
780 Series WARNING: RISK OF HYPERTHERMIA (OVER-HEATING) CAUSING SEVERE INJURY, BURNS, WELTS OR DEATH! Water temperature in excess of 104°F (40°C) may be injurious to your health. A. Press and hold the WARMER ( ) button then; B. Press and hold the JETS 1 ( ) button at CLEARRAY the same time for 2 seconds. -
Page 34: Air Controls
780 Series Air Controls Certain jet systems have their own air control. Each control introduces air into the water lines that supply specific jet groups. Simply rotate any air control knob clockwise to open, or counterclockwise to close. Note: To minimize heat loss, close all air controls when spa is not in use. Certain jets may not draw air while the jets pump is running in low speed;... -
Page 35: Waterfall Operation
Turn waterfall control valve counterclockwise to increase waterfall output. Turn control valve clockwise to decrease or turn off waterfall output. For the Hamilton, Chelsee, Bristol, Hanover and Montclair models: the waterfall is on whenever the circulation pump is running. For the Dover model: the waterfall is on when jets pump 1 is on. - Page 36 780 Series • Maintenance is made easy by alerts sent to your phone. • Diagnostic alerts are sent to you and your dealer when attention is required. A. Pairing process 1. Download the SmartTub™ app from the Google Play store or Apple App store.
-
Page 37: Menu Features And Programming Instructions
780 Series 10.0 Menu Features and Programming Instructions Your hot tub is equipped with menus that allow you to program additional features. By continually pressing the Menu ( ) button you will cycle through the menus as follows (Figure 10.0a): Current temperature (Main Menu) Primary Filtration (page 31) Secondary Filtration (page 32) -
Page 38: Secondary Filtration Menu
780 Series A. Programming the Primary Filtration Cycle To change the programmed Primary Filtration Cycle: Note: If no button is pressed within 5 seconds of each selection the screen will revert back to the Main Menu and the current settings will remain active. 1. -
Page 39: Programming The Heating Mode
10.3 Programming the Heating Mode Your Sundance Spas hot tub is equipped with 3 modes of heating. An automatic mode called “AUTO,” where the hot tub’s temperature is maintained at all times. An energy saving heating cycle called “ECO.” A mode that will only activate the heater during the daytime called “DAY”... -
Page 40: Programming The Change Filter Timer
780 Series 10.4 Programming the Change Filter Timer A programmable filter timer can be set to remind you when to clean or replace the filters. • The default setting is for 180 days. • The timer range is from OFF to 180 days, in increments of 10 days. -
Page 41: Programming The Water Refresh Timer
780 Series 10.6 Programming the Water Refresh Timer A programmable water refresh timer can be set to remind you when to when it is time to drain and refill your hot tub. • The default setting is for 180 days. •... -
Page 42: Programming The Date
780 Series 10.8 Programming the Date To program the date, follow the steps below: Note: If no button is pressed within 5 seconds of each selection the screen will revert back to the Main Menu and the current settings will remain active. -
Page 43: Programming The Lock Feature
780 Series 10.11 Programming the Lock Feature You can prevent users from changing certain features of the hot tub. It is important to realize that after either mode is enabled, there is no physical pad lock indicator on the topside control panel display to inform the user that either mode is active. -
Page 44: Spa Maintenance
780 Series 11.0 Spa Maintenance Proper and regular maintenance of your spa will help it retain its beauty and performance. Your authorized Sundance dealer can supply you with all the information, supplies and accessory products you will need to accomplish this. DANGER: RISK OF SEVERE INJURY OR DROWNING BY ENTRAPMENT! - Page 45 780 Series DANGER: TURN POWER TO Spa OFF! TO DECREASE RISK OF DEATH, DROWNING, OR ENTRAPMENT, NEVER OPERATE Spa WHEN FILTER IS NOT PROPERLY INSTALLED OR IF SKIMMER ASSEMBLY IS DAMAGED OR ALTERED! Refer to the filter cleaning/replacement procedure: TURN POWER TO HOT TUB OFF! Replace! Filter DO NOT...
-
Page 46: Draining And Refilling
780 Series Periodically, the polyester mesh (pleated) filter will need a more thorough cleaning to remove imbedded oils and minerals. For this, we suggest cleaning as illustrated above (step D), followed by soaking the filter overnight in a plastic container filled with a solution of water and a specially formulated filter cleanser available from your Sundance dealer. -
Page 47: Pillow Care
780 Series Draining Procedures: 1. Turn off power to spa at breaker. 2. Locate and remove the front synthetic cabinet door (page 44). The door is located directly below the control panel. 3. Locate drain hose line attached to the 2 x 4 wood slat, Figure A. -
Page 48: Cleaning The Spa Interior
6. Use only recommended cover lift systems. 7. Use only chemicals and cleaners recommended by Sundance Spas. 8. Remember to keep spa covered when not in use. Maintaining proper water levels assures efficient operation and efficient electrical usage. -
Page 49: Winterizing
780 Series CAUTION: Never spray cabinet with a garden hose for any reason since this action may induce an electrical short in the spa’s electrical equipment. 11.7 Winterizing Your Sundance spa is designed to automatically protect itself against freezing when operating properly. During periods of severe freezing temperatures, you should check periodically to be certain that the electrical supply to the spa has not been interrupted. -
Page 50: Restarting Your Spa In Cold Weather
780 Series 9. Loosen hose clamp at bottom of CLEARRAY® system and pull hose off of CLEARRAY fitting (twist the hose back and forth while pulling downward). Tip hose down and allow to drain, then reinstall hose and clamp. Remove the cover of the CLEARRAY system to access the UV bulb and quartz tube. -
Page 51: Water Quality Maintenance
For specific guidance on maintaining water quality, consult your Authorized Sundance Spas dealer who can recommend appropriate chemical products for sanitizing and maintaining your hot tub. WARNING:... -
Page 52: Ph Control
780 Series 12.1 pH Control pH is a measure of relative acidity or alkalinity of water and is measured on a scale of 0 to 14. The midpoint of 7 is said to be neutral, above which is alkaline and below which is acidic. In spa water, it is very important to maintain a slightly alkaline condition of 7.4 to 7.6 pH. -
Page 53: Clearray® Bulb Replacement And Quartz Tube Maintenance
780 Series The ballast is the power supply for the purification system; it has two LED indicator lights the green indicating incoming power flow and the red indicating the system is properly working. CLEARRAY is standard for all models. After a year the bulb must be replaced. If the UV timer has been programmed correctly a message will appear on the LCD display when the time allotted has expired. - Page 54 780 Series WARNING: ALLOW BULB TO COOL DOWN PRIOR TO REMOVING FROM QUARTZ TUBE. DANGER: NEVER LOOK AT THE LIT BULB. THIS CAN CAUSE SEVERE EYE DAMAGE OR BLINDNESS. UV bulb replacement and quartz tube maintenance: Note: Location of CLEARRAY System and connection may vary by model.
- Page 55 780 Series 9. Replacing quartz tube: Remove the black O-ring from the old quartz tube and place it on the new tube. Place the new quartz tube (8) into the water chamber (12) with the domed end first making sure it is inserted and seated inside the quartz end holder.
-
Page 56: Error Conditions/Error Messages
Open sensor (heater is disabled) or shorted sensor (hot tub is deactivated). The high-limit temperature sensor is not functioning. Contact your authorized Sundance Spas dealer or qualified service technician. The display will alternate between “SN--1”, scrolling message “HI-LIMIT SENSOR ERROR” and the current water temperature. -
Page 57: Panel Displays Sn--2
The display will alternate between the current temperature reading and the scrolling message “CHANGE CLEARRAY BULB” as long as the error exists. The countdown timer for the UV bulb needs to be reset (page 34). A new UV bulb can be purchased from a local Sundance Spas dealer. 13.7 Panel Displays Change Filter The filter change timer has expired. -
Page 58: Panel Displays Fl--3
ENTER HOT TUB! Water temperature has reached 112°F (44°C). The circulation pump has activated to circulate water through heater. Contact your authorized Sundance Spas dealer or qualified service technician. The display will alternate between “*OH*” and the current water temperature. -
Page 59: Troubleshooting Procedures
780 Series 14.0 Troubleshooting Procedures In the event your Sundance Spas hot tub is not working the way it should, please first review all the installation and operating instructions in this manual and check for messages on the panel display. If you are still not satisfied it is working properly, please follow the appropriate troubleshooting instructions below. -
Page 60: Poor Jet Action
We build the best spas in the industry. Nonetheless, we are always striving to improve the quality and features of our products. Your input as a Sundance Spas hot tub owner is a cherished part of this process. If you have any comments or suggestions, or if you wish to be informed on any new products for your hot tub, please write to us. -
Page 61: Circuit Board Diagrams
780 Series 15.0 Circuit Board Diagrams 15.1 North American Dover Convertible Circuit Diagram (for a 3-wire 120V 60Hz connection) This wiring diagram is used for all North American 120 VAC (60 Hz) convertible power models. BLUEWAVE STEREO (OPTIONAL) BRIDGE (OPTIONAL) FLOW LIGHTING SENSOR... -
Page 62: North American Dover Convertible Circuit Diagram (For A 4-Wire 240V 60Hz Connection)
780 Series 15.2 North American Dover Convertible Circuit Diagram (for a 4-wire 240V 60Hz connection) This wiring diagram is used for all North American 240V 60 Hz convertible power models. Dedicated 240V models must be permanently connected (hard-wired) to the power supply. Note: 240 VAC 4-wire connection enhances heater output from 1kW to 4kW. -
Page 63: North American Bristol/Chelsee/Hamilton/Hanover/Montclair Circuit Diagram
780 Series 15.3 North American Bristol/Chelsee/Hamilton/Hanover/Montclair Circuit Diagram This wiring diagram is used for all North American 240 VAC (60 Hz) dedicated power models. BLUEWAVE STEREO (OPTIONAL) FLOW SENSOR CLEARRAY CONTROL BRIDGE PANEL (OPTIONAL) INDICATOR WATER LIGHT LIGHTING SENSOR EXPANSION... -
Page 64: Dip Switch Settings And Wiring
780 Series 16.0 Dip Switch Settings and Wiring The dip switches are at the S1 location on the board. A. 2-pump models 240V DOMESTIC DIP SWITCH SETTINGS S1 LOCATION (factory default) DIP SWITCH NUMBER BREAKER OFF OFF OFF OFF OFF OFF OFF OFF OFF OFF 50A* OFF OFF ON OFF OFF OFF OFF OFF OFF OFF... -
Page 65: Optional Bluewave® Hot Tub Stereo System
780 Series 17.0 Optional BLUEWAVE® Hot tub Stereo System To start enjoying your new stereo receiver, please read the following operation instructions in their entirety. 30-pin 3.5 mm cable Connector USB connector 1. Media Locker Handle Slide the handle to lock and unlock the protective door. 2. -
Page 66: Pairing The Remote And Stereo
780 Series WARNING: RISK OF ELECTRICAL SHOCK HAZARD EXISTS AND EQUIPMENT DAMAGE! Never install or remove electrical devices (e.g. Apple device/MP3/USB/AUX/ Bluetooth) while hands are wet or while sitting partially or fully immersed in the spa! CAUTION: Never leave electrical devices in the Media Locker when spa is not is use to prevent damage from outdoor elements! Never spray Media Locker with a pressurized water hose for any reason! Damage to the... - Page 67 780 Series 2. Treble Setting: Press the Audio button 2 times to access the treble setting. The LCD display will change to “TRE 0,” Figure E Figure E. Press the Up button to adjust the setting to a maximum of +5. Press the Down button to adjust the setting down to Note: The default setting is “0.”...
-
Page 68: Wireless Remote Control Functions
780 Series 9. Stereo Setting: Press the Audio button 9 times to access the Stereo setting. The LCD display will change to Figure M “STEREO,” Figure M. Press the Up button to select either Stereo or Mono. 17.3 Wireless Remote Control Functions A wireless radio frequency (RF) remote control is supplied on all spas with the optional audio system. - Page 69 780 Series Button Operation Power Button: Press once to turn remote “ON” (remote LCD display will read “No Link.”); Press second time to turn stereo “ON” (remote LCD display will read “Welcome”); Press a third time to place the stereo in “Standby” mode. Audio Button: Allows access to most of the stereo sound functions.
-
Page 70: Electronic Device Connections And Functions
780 Series 17.4 Electronic Device Connections and Functions IMPORTANT REMOTE NOTICE: • If stereo unit is “ON” (blue light is illuminated on the stereo power button) then press the power button on the remote once. • If stereo unit is in “Standby” (red light is illuminated on the stereo power button) then press the power button on the remote once to activate the remote (remote LCD display will read “NO LINK”). - Page 71 780 Series CAUTION RISK OF ELECTRICAL SHOCK OR EQUIPMENT DAMAGE! Never install, remove or operate any electrical device (e.g. Apple device/MP3/USB/AUX/Bluetooth) while hands are wet or while sitting partially or fully immersed in the spa! Note: The DRM (Digital Rights Management) Files cannot be played on this deck.
-
Page 72: Wireless Remote Battery Replacement Procedure
780 Series F. Connecting Your Bluetooth Device: 1. Turn power ON to the stereo unit. 2. From your Bluetooth device, make sure the Bluetooth setting is ON. 3. Follow the pairing instructions for your Bluetooth device and connect to the “BLUEWAVE” device that appears on your screen. 4. -
Page 73: Bluewave Spa Stereo System Specifications
780 Series OPEN CLOSED 5. Reinstall the battery cover, using the coin rotate the door to the Close position (Figure E). Fig. E Note: Remote unit is water resistant not waterproof. Although it is designed for use while in the spa, it should never be left in the spa while the cover is on and spa is not in use. -
Page 74: Stereo Cautions
780 Series 17.7 Stereo Cautions DANGER RISK OF SHOCK OR “CAUTION - Risk of Electric Shock. Do not ELECTROCUTION! leave compartment door open.” “CAUTION - Risk of Electric Shock. Replace components only with identical components.” 3. “Do not operate the audio/video controls while inside in the spa.”...