Advertisement
Quick Links
Advertisement

Related Manuals for PURE 9040MTH


Summary of Contents for PURE 9040MTH
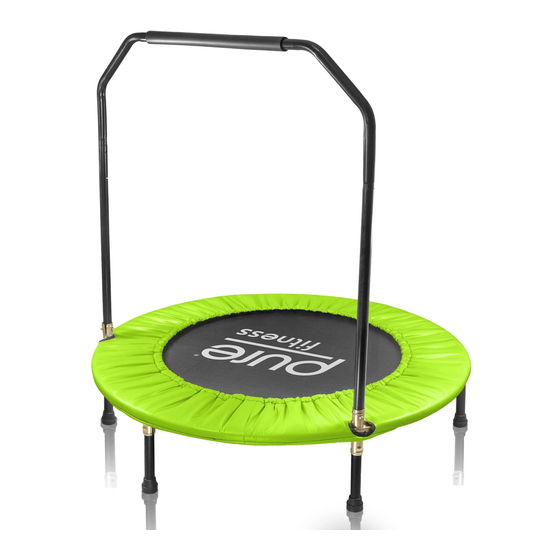
- Page 1 40” MINI TRAMPOLINE WITH HANDRAIL MODEL# 9040MTH PRODUCT MANUAL - VERSION 08.17.08 FOR AGES: WEIGHT LIMIT: TO BUILD: TOOLS NEEDED: 100 Kgs CUSTOMER SERVICE GQBrands.com CustomerService@GQBrands.com 1-866-498-5269 4401 Samuell Blvd, Ste 150, Mesquite, TX 75149...
-
Page 2: Customer Service Information
CUSTOMER SERVICE INFORMATION Thank you for purchasing: 40” MINI TRAMPOLINE WITH HANDRAIL MODEL# 9040MTH At GQBrands®, we want all of our customers to be completely To order these parts, or if you have any other questions or concerns satisfied with their purchase. Take time to review the contents of the... -
Page 3: Limited Warranty
Keep on • ALWAYS secure the trampoline against a level surface. unauthorized and unsupervised use. MODEL# 9040MTH... -
Page 4: Parts List
PARTS LIST Frame Jumping Mat Spring T-Section Piece Cross-Section Piece 40mm Carriage Bolt W-Hook 50mm Carriage Bolt 10 - 11 - 12 - Washer Frame Pad Leg with Cap 13 - Straight Pole 14 - Handle Bar with Foam Grip 15 - U-Shaped Bracket GQBrands.com... - Page 5 Make sure that the spring ends are facing up, and the logo printed on the Jumping Mat is facing the floor. T-Section Locations Identify all openings on the Frame Pad. There are four sections with 1 opening (A), and two sections with 2 openings (B). MODEL# 9040MTH...
- Page 6 ASSEMBLY INSTRUCTIONS STEP 2: Parts: 8x T-Section Pieces (Part 5) 4x 40mm Square Neck Bolts (Part 7) 4x Nuts (Part 9) 4x U-Shaped Bracket (Part 15) Locate the (A) openings in the frame (Shown in Page 5) to begin installing the T-Sections Pieces into the Frame.
- Page 7 Repeat this process to assemble the second Cross-Section on the Frame. NOTE: x2 Units x2 Units Make sure Bolt is fully inserted and the Nut is not fully tightened. This will help inserting the Legs in Step 6. Tighten Loosely MODEL# 9040MTH...
- Page 8 ASSEMBLY INSTRUCTIONS STEP 4: Parts: 1x Frame Pad (Part 11) A. Flip the Assembled Frame in order to place the Frame Pad (11). (11) Make sure to locate all six loops in the Frame Pad, two of them should have two openings assigned for the Cross-Section Pieces.
- Page 9 (10) B. Repeat this process until all legs in T-Sections are installed properly and securely. NOTE: Do not Tighten any Nuts from the Cross- Section Pieces. Doing so will make it difficult to install the Straight Poles. Tighten MODEL# 9040MTH...
- Page 10 ASSEMBLY INSTRUCTIONS STEP 8: Parts: 2x Straight Pole (Part 13) Facing Facing 2x 40mm Square Neck Bolts (Part 7) Center Center 2x Nuts (Part 9) 2x Washers (Part 10) A. Insert x2 Straight Poles (13) into the upper openings of the Cross-Sections. NOTE: Straight poles upper openings must face the center of the trampoline.
- Page 11 IMPORTANT: Handle Bar must be snapped on the same height for both openings. Failure to do this will cause the Poles to bend, snap, or break. Failure to do so may result in injury to the user. MODEL# 9040MTH...
- Page 12 NOTES CUSTOMER SERVICE GQBrands® 1-866-498-5269 CustomerService@GQBrands.com 4401 Samuell Blvd, Ste 150 Mesquite, TX 75149 GQBrands.com CustomerService@GQBrands.com 1-866-498-5269...