Table of Contents
Advertisement
Quick Links
Advertisement
Table of Contents

Related Manuals for Star Trac 7270


Summary of Contents for Star Trac 7270
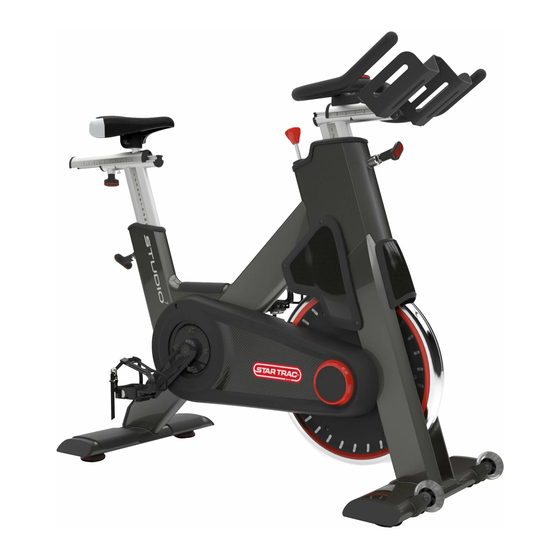
- Page 1 ® Star Trac Studio Series Group Cycle Bikes OWNER’S MANUAL...
-
Page 2: Table Of Contents
Checking and Adjusting Belt Tension on the Studio 5 and Studio 7 ............20 Replacing Worn Brake Pads on the Studio 3, Studio 5, and Studio 7 ............23 CONTACT INFORMATION ...................... 26 Star Trac Studio Series Group Cycle Bikes Owner’s Manual |... -
Page 3: Introduction
INTRODUCTION This manual will acquaint you with the operation, safety, and maintenance of your Star Trac Studio series group cycling bike. 7270 – Star Trac Studio 3 7280 – Star Trac Studio 5 7290 – Star Trac Studio 7 ... -
Page 4: Warning
13. Listen to your body, ride at your own pace, and set your machine’s resistance at the level that feels right for you. 14. Keep children and pets away from the machine whenever it's in use. Star Trac Studio Series Group Cycle Bikes Owner’s Manual |... -
Page 5: Star Trac Studio
19. Focus on form, posture and making smooth transitions between movements. 20. Do not use the machine without proper footwear. Never operate the machine with bare feet. SAVE THESE INSTRUCTIONS Star Trac Studio Series Group Cycle Bikes Owner’s Manual |... -
Page 6: Emergency Stop
EMERGENCY STOP Push down on red knob to stop flywheel Star Trac Studio Series Group Cycle Bikes Owner’s Manual |... -
Page 7: Safety Instructions
SAFETY INSTRUCTIONS This section includes precautions and fitness safeguards for the installation and use of the Star Trac Studio series bikes. Please read this section carefully before installing or using your equipment. CAUTION: Before using this product, it is essential to read this ENTIRE owner’s manual and ALL Assembly Instructions. -
Page 8: Precautions
Do perform regular preventive maintenance as recommended by the manufacturer. instructed in the manual. Do reduce pedal/crank speed in a controlled manner – this unit is not equipped with a free- wheel. Star Trac Studio Series Group Cycle Bikes Owner’s Manual |... -
Page 9: Before Using The Product
BEFORE USING YOUR PRODUCT Find and read the warning label on your Star Trac Studio bike (pointed out in the picture below) before using your bike. Be sure to replace the warning label if it is damaged, illegible, or missing. Contact customer support to order new labels. -
Page 10: Testing Equipment After Assembly
When you have completed testing the machine, tip the it forward using the handlebars, roll it on a smooth surface to the final location where it will be used, and adjust the leveling feet so the machine is stable. Star Trac Studio Series Group Cycle Bikes Owner’s Manual |... -
Page 11: Operating Instructions
Loosen the handlebar height tension handle by turning the handle counterclockwise. Raise or lower the handlebar to the desired height, then tighten the tension handle by turning clockwise. Be sure to tighten firmly. Star Trac Studio Series Group Cycle Bikes Owner’s Manual |... -
Page 12: Pedal Strap Adjustment
The front of the shoe may not completely fill the toe cage. Note: The pedal straps should be adjusted to hold the foot snugly in the pedal. Star Trac Studio Series Group Cycle Bikes Owner’s Manual |... -
Page 13: Resistance Control
Position the seat height so that when the crank arm is at the 6 o’clock position (pedal at the bottom of the pedal stroke), and the sole of your foot is parallel to the ground, there is a 27 to 37 degree bend in your leg, as shown to the below. Star Trac Studio Series Group Cycle Bikes Owner’s Manual |... - Page 14 Riders should always avoid positions that require them to round their shoulders or lock their elbows. Foot Position Star Trac Studio Series Group Cycle Bikes Owner’s Manual |...
- Page 15 (axle) of the pedals. As you pedal, concentrate on keeping your feet flat, which enables a more powerful pedal stroke. The front of the shoe may not completely fill the toe cage. Star Trac Studio Series Group Cycle Bikes Owner’s Manual |...
-
Page 16: Training Information
Increase the resistance by turning the push brake system knob clockwise (+) until the pedals come to a complete stop. Push down on the push brake system knob until the pedals come to a complete stop. Star Trac Studio Series Group Cycle Bikes Owner’s Manual |... -
Page 17: Maintenance
Perform regularly scheduled preventive maintenance in order to maintain equipment in serviceable condition. Note: Pedals are wear items that need to be inspected routinely and replaced at least every 2 years. Star Trac Studio Series Group Cycle Bikes Owner’s Manual |... - Page 18 Use water with a non-abrasive soap, car wash soap, or bike Clean and seal frame cleaner soap to clean. Wipe with water and dry. Seal with wax or bike polish. Star Trac Studio Series Group Cycle Bikes Owner’s Manual |...
-
Page 19: Adjusting Chain Tension On The Studio 3
2. Using an 18 mm open end wrench or socket and socket wrench, loosen the axle nuts on both sides of the flywheel. 3. Using a 10mm open end wrench, loosen the lock nuts on the chain adjustment screws. Star Trac Studio Series Group Cycle Bikes Owner’s Manual |... -
Page 20: Checking And Adjusting Belt Tension On The Studio 5 And Studio 7
IMPORTANT: Improper belt adjustment will cause premature wear and may void the warranty. IMPORTANT: Do not lubricate the belt. Lubricating the belt can damage the belt and cause the belt to slip, and may void the warranty. Star Trac Studio Series Group Cycle Bikes Owner’s Manual |... - Page 21 3. Remove the round rubber disc from the red ring on the flywheel. 4. Remove the three screws holding the outer belt guard in place, and remove the belt guard. Star Trac Studio Series Group Cycle Bikes Owner’s Manual |...
- Page 22 8. In the rare event of the belt being stretched beyond adjustment, replace the belt. Contact Star Trac customer support for directions on how to replace a belt.
-
Page 23: Replacing Worn Brake Pads On The Studio 3, Studio 5, And Studio 7
2. Remove the bottom screw on each side of the brake pad that holds the links to the top of the brake pad. 3. Flip the links up out of the way of the brake pad. Star Trac Studio Series Group Cycle Bikes Owner’s Manual |... - Page 24 4. Remove the front plastic fender by removing the screw holding it in place and sliding it up. 5. Remove the two screws holding the brake pivot plate to the frame. 6. Rotate the front plate so that it is horizontal. Star Trac Studio Series Group Cycle Bikes Owner’s Manual |...
- Page 25 8. Remove the screw and nut holding the brake to the assembly, replace brake pad, and reinstall the screws. 9. Reinstall brake assembly, front fender, brake cartridge mechanism links, and side fenders. Star Trac Studio Series Group Cycle Bikes Owner’s Manual |...
-
Page 26: Contact Information
To find the serial number on your machine, refer to the Safety Warning Label information page. Please record the following information for future reference. Serial Number Date of Purchase Document Number 620-8349 Rev A. October, 2015 Star Trac Studio Series Group Cycle Bikes Owner’s Manual |...