Endress+Hauser Proservo NMS5 Operating Instruction
Intelligent tank gauge
Hide thumbs
Also See for Proservo NMS5:
- Technical information (38 pages) ,
- Operating instructions manual (162 pages)
Table of Contents
Advertisement
Quick Links
Download this manual
See also:
Technical Information
Advertisement
Table of Contents
Troubleshooting

Related Manuals for Endress+Hauser Proservo NMS5


Summary of Contents for Endress+Hauser Proservo NMS5
- Page 1 BA00401G/08/EN/08.16 Products Solutions Services 71328078 Operating Instruction Proservo NMS5 Intelligent Tank Gauge...
-
Page 2: Table Of Contents
Table of contents Proservo NMS5 Table of contents Safety instructions ......3 Commissioning ......60 Designated use . -
Page 3: Safety Instructions
Proservo NMS5 Safety instructions Designated use Proservo NMS5 of intelligent tank gauge is designed for high-accuracy liquid level measurement in storage and process applications. NMS5 performs the tank inventory management, loss control, total cost saving, and safe operation. NMS5 is designed for the purpose of single or multi-task installations, converting a wide range of mea- surement functions. -
Page 4: Operational Safety
• Observe the certification requirements as well as national and local regulations. WARNING Changes or modifications other than those expressly approved by Endress+Hauser are strictly prohib- ited. Unauthorized modifications can cause malfunction or damage, resulting in serious injury or death. -
Page 5: Notes On Safety Conventions And Symbols
1 Safety instructions Proservo NMS5 Notes on safety conventions and symbols To highlight safety-relevant or alternative operating procedures in this manual, the following conven- tions have been used, each indicated by a corresponding symbol on the left. Symbol Meaning DANGER! DANGER This symbol alerts you to a dangerous situation. -
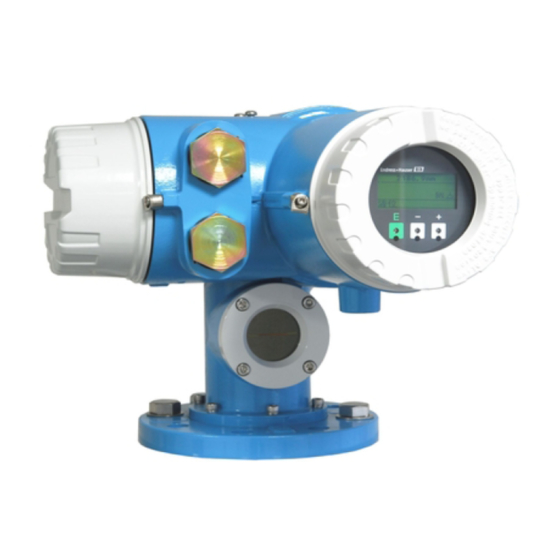
Page 6: Identification
2 Identification Proservo NMS5 Identification Device designation 2.1.1 Nameplate The following technical data are given on the instrument nameplate: Type code Order code PROSERVO NMS53 0044 Serial number Order code Power supply specification Ser. no. Measuring range Supply Displacer weight... - Page 7 2 Identification Proservo NMS5 Type code Order code PROSERVO NMS53 Serial number 0044 Order code Power supply specification Ser. no. Measuring range Supply Displacer weight Displacer diameter Measuring range Displacer weight Measuring wire diameter Displacer dia. Density measurement lower limit Measure wire dia.
- Page 8 2 Identification Proservo NMS5 Type code Order code PROSERVO NMS53 Serial number Order code Input rating Ser. no. Input rated Signal input specification Signal output specification Input XA version number Output Relay contact rated 30 V AC, 2A; 42 V DC, 2A, 60 W.
- Page 9 2 Identification Proservo NMS5 Type code Order code PROSERVO NMS53 Serial number Order code Input rating Ser. no. Input rated Signal input specification Signal output specification Input Measuring rage Output Relay contact rated 30 V AC, 2A; 42 V DC, 2A, 60 W.
- Page 10 2 Identification Proservo NMS5 Type code Order code PROSERVO NMS53 0044 Serial number Order code Power supply specification Ser. no. Measuring range Supply Displacer weight Displacer diameter Measuring range Measuring wire diameter Displacer weight Displacer dia. Density measurement lower limit Measure wire dia.
- Page 11 2 Identification Proservo NMS5 Type code Order code PROSERVO NMS53 0044 Serial number Order code Power supply specification Ser. no. Measuring range Supply Displacer weight Displacer diameter Measuring range Displacer weight Measuring wire diameter Displacer dia. Density measurement lower limit Measure wire dia.
- Page 12 2 Identification Proservo NMS5 Type code Order code PROSERVO NMS53 0044 Serial number Order code Power supply specification Ser. no. Measuring range Supply Displacer weight Measuring range Displacer diameter Displacer weight Measuring wire diameter Displacer dia. Measure wire dia. Density measurement lower limit...
-
Page 13: Order Information
2 Identification Proservo NMS5 Order Information Drum Housing Pressure Rating; Material: 0… 200mbar/20kPa/2.9psi; Alu 0… 200mbar/20kPa/2.9psi; stainless ste> 0… 5.88bar/588kPa/85.28psi; Alu 0… 5.88bar/588kPa/85.28psi; stainless steel 0… 24.5bar/2.45MPa/355.34psi; stainless steel Special version, TSP-no. to be spec. Approval: Weather proof, IP 67 NEMA 4X TIIS Ex d IIB T4 FM XP Cl. - Page 14 2 Identification Proservo NMS5 Output 2: Not selected 4 x relay SPST 2 x 4-20mA 4 x relay SPST, 2 x 4 - 20mA 2 x relay SPST, Overspill prevention TÜV 4 x relay SPST, 1 x 4 - 20mA Special version, TSP-no.
- Page 15 2 Identification Proservo NMS5 Displacer: N Cylindrical 30 mm, SUS316 Cylindrical 40 mm, SUS316 D Cylindrical 50 mm, SUS316 W Cylindrical 30 mm, PTFE V Cylindrical 40 mm, PTFE U Cylindrical 50 mm, PTFE Cylindrical 50 mm, AIloy C Conical 50 mm, PTFE...
-
Page 16: Scope Of Delivery
The device complies with the applicable standards and regulations as listed in the EC declaration of conformity and thus complies with the statutory require- ments of the EC directives. Endress+Hauser confirms the successful testing of the device by affixing to it the CE mark. -
Page 17: Installation
3 Installation Proservo NMS5 Installation Incoming acceptance, transport, and storage 3.1.1 Incoming acceptance Check the packing and contents for any signs of damage. Check the shipment, and make sure that nothing is missing and that the items match your order. -
Page 18: Terms Related To Tank Measurements
3 Installation Proservo NMS5 Terms related to tank measurements NMS5 Reference line Dip-point offset Measurement hatch (Dipping reference) Nozzle Upper limit stop level Upper limit alarm Ullage level Liquid level Gauge reference length Tank height Liquid depth (Innage level) Upper layer... -
Page 19: Design And Dimensions
3 Installation Proservo NMS5 Design and dimensions NMS5 - 1/ NMS5 - 4 338 (13.31) 301 (11.85) Max. 39.7 (1.56) Travel distance of displacer 34.6 (1.36) for 28m (93.33ft) 8 Holes flange Wire Ø0.15 (0.0059) Displacer position at top of tank (center of flange) 39.7 (1.56) for 36 (120ft) -
Page 20: Necessary Tools For Installation
3 Installation Proservo NMS5 Necessary tools for installation The following tools are required when installing NMS5. 17 (0.669) and size matched with flange size Box end wrench 350 (13.78) Crescent wrench Allen wrench (Hex key) 3 (0.118)/5 (0.196) Screw driver... -
Page 21: Displacer And Measuring Wire
4 Displacer and measuring wire Proservo NMS5 Displacer and measuring wire Shape, diameter, and material 4.1.1 Displacer There are several types of displacer available for NMS5. • The standard type has cylindrical shape and a diameter of 50 mm. Diameters from 30 to 50 mm are optional. -
Page 22: Installation
5 Installation Proservo NMS5 Installation Type of tanks Depending on the type of tank and application, different installation procedures are recommended for NMS5. Type of tanks Without guide system With stilling well With guide wires fixed roof tank Floating roof tank... - Page 23 5 Installation Proservo NMS5 • A stilling well is required in a floating roof tank and a covered floating roof tank. • Guide wires cannot be installed in a floating roof tank. When the measuring wire is exposed to free space, it may break due to an external shock.
-
Page 24: Type Of Tank Installation
5 Installation Proservo NMS5 Type of tank installation Figure 16: Typical tank installation Fixed roof tank High pressure tank Floating roof tank with stilling well NMS5 Ball valve Measuring wire Displacer Stilling well Prothermo NMT539 Endress+Hauser... -
Page 25: Mounting Without Guide System
5 Installation Proservo NMS5 Mounting without guide system NMS5 is mounted on a nozzle of the tank roof without a guide system. Sufficient clearance inside the nozzle is necessary to allow the displacer to move without hitting the inner walls. -
Page 26: Mounting With A Stilling Well
5 Installation Proservo NMS5 Mounting with a stilling well The stilling well diameter that is required to protect the measuring wire without disturbing its opera- tion varies depending on the tank height. The stilling well could either be of constant diameter, or nar- rower at its upper part and wider at its lower part. - Page 27 5 Installation Proservo NMS5 p (Lx) Figure 19: Mounting with asymmetric stilling well Front view Side view Length from the center of the calibration window to the upper part of the stilling well Length from the center of the calibration window to the bottom of the stilling well...
- Page 28 5 Installation Proservo NMS5 Symbol Description P (Lx) Longitudinal wire position from the center of the flange Radial direction offset Safety factor recommended; 5.0mm (0.20 in) Feature: 070 Descriptions 0-47m: SUS316L, 0.15mm 6 mm (0.24 in) The following graph shows the lateral shift of the displacer depending on the measured distance for the different wire drums.
- Page 29 5 Installation Proservo NMS5 p (Lx) (mm) (in) -1.4 -1.3 -1.2 -1.1 -1.0 -0.9 -0.8 -0.7 -0.6 -0.5 -0.4 -0.3 -0.2 -0.1 0.0 0.1 0.2 0.3 2000 4000 6000 8000 10000 12000 14000 16000 18000 20000 22000 24000 1000 26000...
- Page 30 5 Installation Proservo NMS5 Lower Diameter of stilling well The dimension of D has to be the larger value of the dimensions D and D . See the graph above. Concentric pipe dimension Dimension Description Formula (Example) Example Symbol 68.1mm (2.68in)
-
Page 31: Mounting Nms5 With Guide Wire
5 Installation Proservo NMS5 Mounting NMS5 with guide wire It is also possible to guide the displacer by a guide wire to prevent swinging. Figure 21: Mounting with guide wire, unit of measurement: mm (in) Description Calibration chamber Spring and sleeve... - Page 32 5 Installation Proservo NMS5 Description Welding point Ring, SUS316 Flange Guide wire installation procedure Install NMS5 [1] on the reducer plate. Perform calibration steps before the displacer [3] is attached to the guide wires. • Make sure that the displacer does not touch the guide wires during calibration. This could be done by mounting the NMS5 to the reducer plate [2] prior to fitting the guide wires [4].
-
Page 33: Alignment Of Nms5
5 Installation Proservo NMS5 Alignment of NMS5 5.6.1 Flange Confirm that the size of the nozzle and the flange is matched prior to mounting NMS5 on the tank. The flange size and the rating of NMS5 vary depending on the customer’s specifications. -
Page 34: Electrostatic Charge
5 Installation Proservo NMS5 -90° 90° -45° 45° 0° Figure 24: Recommended position for mounting NMS5 and minimum measuring level Inlet pipe Tank nozzle • Before pouring liquid into the tank, confirm that liquid flowing through the inlet of the pipe will not contact the displacer directly. -
Page 35: Mounting Of The Device
5 Installation Proservo NMS5 Mounting of the device The NMS5 is delivered in two different packing styles depending on the mounting method of the dis- placer. • For the all-in-one method, the displacer is mounted on the measuring wire of NMS5. - Page 36 5 Installation Proservo NMS5 5.8.2 Installation for all-in-one method As NMS5 is protected by some packaging materials, remove them as follows prior to mounting NMS5. Figure 25: All-in-one method Fixing band Displacer holder Tape Wire drum stopper Drum housing cover...
- Page 37 5 Installation Proservo NMS5 5.8.3 Displacer shipped separately It is necessary to install the displacer on the measuring wire inside NMS5. Figure Procedure 1. Put NMS5 on the blocks or a pedestal. 2. Confirm that there is enough space under NMS5.
- Page 38 5 Installation Proservo NMS5 Figure Procedure 18. Mount NMS5 on the tank nozzle [1]. 19. Confirm that the displacer does not touch the inner wall of the nozzle. 20. Turn on the power. 21. Perform drum calibration. For calibration, refer to "12 Adjustment".
- Page 39 5 Installation Proservo NMS5 5.8.4 Installation through the calibration window In the case of a 50 mm (1.97 in) diameter displacer, the displacer can be installed through the calibration window. It is only possible to install the following displacers through the calibration window: 50 mm SUS, 50 mm alloy C, 50 mm PTFE, Except 0.15mm, SUS measuring wire...
- Page 40 5 Installation Proservo NMS5 Figure Procedure 14. Hold the wire drum [1] up and place the displacer [2] into the calibration window. 15. Remove the wire drum from the drum housing and unwind the measuring wire approximately 500 mm (19.69 in).
- Page 41 5 Installation Proservo NMS5 5.8.5 Displacer ground wire installation Depending on the application and Ex requirements, electrical grounding of the displacer is required. There are different procedures depending on the displacer type, which are described below. Standard displacer installation Mount the displacer [3] on the wire ring [1].
- Page 42 5 Installation Proservo NMS5 4. 5. 10 (0.39) Figure 38: PTFE displacer installation; dimensions mm (in) PFA covered ring Wire insertion slot Displacer Screw hole Ground wire Endress+Hauser...
-
Page 43: Wiring
6 Wiring Proservo NMS5 Wiring Wiring connection The electrical connections of NMS5 are shown in "6.2 Terminal Assignment". CAUTION The power supply cable should have the following specifications: • PVC, PE, or equivalently isolated • 600 V insulation voltage or equivalent. -
Page 44: Terminal Assignment
6 Wiring Proservo NMS5 Terminal assignment 6.2.1 V1 Serial Signal, Modbus RS485, HART, Enraf BPM 4 to 20mA Power supply Alarm contact Channel 2 AC 85 to 264V 50/60Hz DC 20 to 62V Port_A + Alarm contact AC 20 to 55V... - Page 45 Normally the combination of WM550 and analog 4 to 20mA is prohibited. Contact Endress+Hauser representatives if needed. NOTICE ・ Terminals 4 & 5 and 24 & 25 for HART devices are inter - connected on Explosion proof (Ex d) certified version.
- Page 46 6 Wiring Proservo NMS5 6.2.3 Mark/Space Power supply Mark/Space Alarm contact AC 85 to 264V 50/60Hz Port_A + DC 20 to 62V local HART Alarm contact AC 20 to 55V port_A - Alarm contact Port_B+ Non IS HART to NMT...
-
Page 47: Input And Output
6 Wiring Proservo NMS5 Using the external operation switch, ensure that the settings of the system are the same as shown in the following logic setting table. This will allow user to input operation signals. (Hoist-CTR1)(Stop-CTR2) CTR 1 CTR 2... -
Page 48: Temperature Input System
6 Wiring Proservo NMS5 Temperature input system There are two types of temperature input method and two types of Ex protection system as Ex d or Ex [ia] in NMS5. 6.3.1 Ex d NMT input + HART input Ex d HART sensor and NMT53x Ex d are connected in this system. - Page 49 6 Wiring Proservo NMS5 6.3.3 Ex ia NMT input + HART input Ex d HART sensor and NMT53x Ex ia are connected in this system, excluding TIIS specification. HART sensor Ex d Terminal module TCB CPU module Ex d HART...
-
Page 50: Operation
7 Operation Proservo NMS5 Operation Touch control and programming matrix 7.1.1 Display and operating elements Display During normal operation, NMS5 has an illuminated LCD that shows the level, the temperature, and the status of the device at "HOME" position. For the display of the other data and the programming of the parameters for operation, NMS5 uses a convenient programming matrix. - Page 51 7 Operation Proservo NMS5 Measured Value 1 Measured Value 1 Measured Value 2 Measured Value 2 Operation Operation More Function 3 Calibration More Function 3 Device Data Level Data Contact Output 4 Calibration Analog Out Adjustment Parts Data Input Signal Auto Wire Calib.
- Page 52 7 Operation Proservo NMS5 Functions • Access to the programming matrix (touch the key for 3 seconds or more). • Return to HOME position (touch the key for 3 seconds or more). • Move the status horizontally in the function group to select functions.
-
Page 53: Home Position
7 Operation Proservo NMS5 HOME position After turning on the power, LCD shows the current data on HOME position. 14964.3mm 0.0ºC LEVEL Figure 50: HOME position The letters A, B, C and D stand for the areas where information on measured values and status of the... - Page 54 7 Operation Proservo NMS5 Displacer Symbol Meaning Status Balance The displacer is resting on the liquid surface or interface and in balanced status. Temporary Balance Automatic weight calibration is being carried out. T - B Unbalance Up The displacer is being hoisted and in unbalanced status.
-
Page 55: Access Code
7 Operation Proservo NMS5 Access code The access code is to ensure the confidentiality of the setup data. Three security levels are available along with access codes. Security Level Access Code None For Operator For Engineer 51/530/777 The higher levels include the lower ones. e.g. If access code 50 is specified for a function, then code 51 also enables editing. - Page 56 7 Operation Proservo NMS5 7.4.2 New operation status The following table shows the new operation status, which is available when "NEW NMS STATUS", matrix position GVH272, is selected to "ENABLED". Code Meaning NMS Display No definition Displacer at reference position...
-
Page 57: Operation Of Displacer
7 Operation Proservo NMS5 Operation of displacer The operation of the displacer for level, bottom level, interface level, and density measurement is pos- sible by touch control. Item Procedure Remarks 1. Select function groupGVH020 OPERA- • Set access code to 50. -
Page 58: Calculation Of Level And Densities
7 Operation Proservo NMS5 Calculation of level and densities The section specifies the formula used by NMS5 to calculate levels and densities. Measuring Wire Tension T Density Negligible Measured Displacer Weight W Upper Liquid Measured Displacer Weight Wu Displacer Balance... - Page 59 7 Operation Proservo NMS5 Densities The upper, middle, and bottom densities are calculated by the following formulas. • Upper density (Pu) and density profile W - W ρ • Middle density (Pm) ρ ρ • Bottom density (Pb) ρ ρ...
-
Page 60: Commissioning
8 Commissioning Proservo NMS5 Commissioning Initial settings All of the initial settings are required for NMS5 in most case. However, depending on NMS5 specifica- tion, some settings may not be required. Set Access code 51 at GVH039 before applying the initial set- tings. - Page 61 8 Commissioning Proservo NMS5 Dip point offset (Difference between the dipping hole height and the reference line of the calibration window) Tank height Figure 57: Tank height 8.1.4 Upper and lower stop (GVH161/162) Upper and Lower Stop determine the highest and lowest point of displacer movement. These data are set to 16000mm and 0mm respectively at factory prior to delivery.
- Page 62 8 Commissioning Proservo NMS5 8.1.6 Proactive safety function (GVH157/158/159) Matrix Setting Service Mode: default = OFF. Select OFF if GVH158 Prosafety = ON. Select ON only when performing maintenance on NMS5. GVH157 WARNING Selecting ON disables the Proactive Safety function! Access code 530 Prosafety: default = ON.
- Page 63 Device at Alarm Select type of output for alarm 8.1.8 Contact relay alarm output (GVH240 to 247) When specified and ordered from Endress+Hauser, NMS5 is equipped with contact relay alarm output hardware installed. Function settings may be changed as follows: Function Setting Select Relay Select relay number from 1, 2, 3 or 4.
-
Page 64: Settings For Nmt 53X Connections
8 Commissioning Proservo NMS5 Settings for NMT 53x connections The following settings are required to display NMT 539 data on NMS5 screens. Item Procedure Remarks 1. In Static Matrix "MORE FUNCTION", invoke GVH030 "MATRIX OF" and select "SERVICE". 2. Invoke the Dynamic Matrix GVH362 "CONNECTION NMT"... -
Page 65: Settings For Connection To Nrf560
8 Commissioning Proservo NMS5 Settings for connection to NRF560 To connect NRF560, NMS5 requires the following settings. CAUTION Turn on the power to NMS5 first. Item Procedure Remarks 1. In Static Matrix "MORE FUNCTION", invoke • Set access code 51. -
Page 66: Liquid Level Calibration
8 Commissioning Proservo NMS5 Liquid level calibration 8.4.1 Opened tank Preparation Select LEVEL at GVH020 Operation. The displacer will descend to the liquid surface and balance. When "BAL" is displayed, the displacer stopped moving. When measuring the liquid level manually, use an approved method. - Page 67 8 Commissioning Proservo NMS5 8.4.2 Closed tank Level calibration procedure for closed tank CAUTION Closed tanks (e.g. LPG) cannot be hand-dipped. Follow the procedure shown below. Figure 63: Level calibration Check the NMS parameter Matrix Item GVH005 UPPER DENSITY GVH340 WIRE DRUM CIRC.
- Page 68 8 Commissioning Proservo NMS5 Calculate the displacer balance position. • In case of Ø50mm standard displacer, balance volume(GVH343) is reference value (a half of displace volume) • The balance point is 45mm from the bottom of the tank. Refer to Appendix "14.3 Displacer".
-
Page 69: Remote Communications
8 Commissioning Proservo NMS5 Remote communications 8.5.1 Digital output The desired loop address for most digital protocols can be set at GVH285 (Address). The allowable range for setting varies depending on the protocol installed in NMS5. The range has 0-9, 00-FF (FF is fixed for MIC protocol), or 1-247 for Modbus. - Page 70 8 Commissioning Proservo NMS5 8.5.3 Mark/Space(M/S) communication board setting Jumper Setting Jumper settings for M/S communication board Jumper Function Default condition J3 (Mode) Use EPROM [IC4]->short Short J3 (Reset) Reset Open J3 (WD) Watch dog setting Short Polling address setting...
- Page 71 8 Commissioning Proservo NMS5 8.5.4 ENRAF BPM communication board (COM-3) setting COM-3 Jumper setting Jumper Function Default Condition ROM type setting 1-2 short: 27C4096 JP1 (Mode) 2-3 short 2-3 short: 27C1024 1-2 open CPU mode setting (Fixed) 3-4 short JP2 (Reset)
-
Page 72: Analog Output
8 Commissioning Proservo NMS5 8.5.5 Analog output Setting of analog output 4-20mA is available when ordered from Endress+Hauser. NMS5 is delivered with analog output hardware installed. For the following matrix parameter settings, Access code 51, is required. Matrix GVH Item... - Page 73 8 Commissioning Proservo NMS5 8.5.6 Contact relay alarm output The specification of alarm for output contact relay is delivered as a part of NMS5. This specification allows a maximum of 4 output contact relay settings. Set access code 51 in case of the following matrix parameters.
- Page 74 8 Commissioning Proservo NMS5 8.5.7 Relay logic Module name I/O - 3 Alarm output, Standard 4 relays with potential-free change-over contacts, freely assignable to (Order Code position 050= 1,2,3 or 5) measured value Switch points and switching hysteresis freely adjustable, residual cur-...
-
Page 75: Density And Density Profile Measurements
Spot measurement for up to 3 liquid phases is an option that is available when ordered from Endress+Hauser. The following preconditions are required in order to assure safe and accurate operation. • NMS5 must be configured for Spot density measurement as ordered from Endress+Hauser. For information regarding upgrading your NMS5, contact Endress+Hauser representatives. Density values: •... - Page 76 Access Code 51 is required to edit parameters. • NMS5 must be configured for Spot & Profile density measurement as ordered from Endress+Hauser. Contact Endress+Hauser for the information regarding upgrading NMS5.
- Page 77 8 Commissioning Proservo NMS5 • A. Tank profile for up to 16 points for total liquid height GVH840 Ope Select: Select 1: Tank Profile. • B. Tank profile for upper phase liquid only GVH840 Ope Select: Select 2: I/F Profile.
- Page 78 8 Commissioning Proservo NMS5 GVH841 OPE. POINT Item Procedure Remarks 1. Select GVH841 "OPE POINT " to determine • Set access code to 51. Default value is 2 Matrix Group: TANK PROFILE number of density measuring points. points and selectable up to 16 points.
- Page 79 8 Commissioning Proservo NMS5 GVH846 LIQ. WAIT TIME Item Procedure Remarks 1. Select GVH846 "LIQ. WAIT TIME" to deter- • Set access code to 51. A small turbulence Matrix Group : TANK PROFILE mine the displacer weight calibration interval made by the movement of displacer itself between each measuring point in the liquid.
- Page 80 8 Commissioning Proservo NMS5 Operation of tank profile (density profile) measurement After all the initial settings are completed, the actual operation can be proceeded by one simple com- mand. The operation status regarding this function is displayed at GVH850 and the liquid level condi- tion is also displayed at GVH851.
- Page 81 8 Commissioning Proservo NMS5 Density profile operation diagram Nozzle First displacer weight calculation line (Approximately 500 (19.69) from liquid level) 8 points of air weight measurement (within 300 (11.81) circumference of wire drum) Liquid level No. 1 Measuring point No. 2 Measuring point Interface profile No.
-
Page 82: Interface Measurement
8 Commissioning Proservo NMS5 Interface measurement NMS5 can measure interface levels via the following operations. • Upper Interface Level: returns the level data for the interface between top 2 liquid phases. Displacer remains at interface level in UPPER INTERFACE operation. -
Page 83: Sealing Of Nms5
8 Commissioning Proservo NMS5 Sealing of NMS5 NMS5 can be sealed, and data can be made unchangeable for custody transfer purposes as follows. Sealing of NMS5 procedure Set OPE. DENSITY at GVH278 as the liquid density (if the density is expected to change during operation, set the average value.). -
Page 84: Maintenance
Repairs The Endress+Hauser repair policy is based on the fact that the measuring devices have a modular design and that customers are able to undertake repairs themselves. Spare parts are contained in cor- responding kits along with their related replacement instructions. -
Page 85: Accessories
10 Accessories Proservo NMS5 Accessories 10.1 Calibration chamber NHC4HP: high pressure version NHC4LP: low pressure version The following figure shows dimensions of NHC4LP, 10K 150A RF, SUS304 version. For the other spec- ifications, contact Endress + Hauser representatives. 222.5 (8.76) -
Page 86: Ball Valve Nhv4A
10 Accessories Proservo NMS5 10.3 Ball valve NHV4A NHV4A: Standard ball valve with ASME flanges NHV4J: Standard ball valve with JIS flanges The following figure shows dimensions of NHV4J, 10K 150A RF, SUS304 version. For the other spec- ifications, contact Endress + Hauser representatives. -
Page 87: Diagnosis And Troubleshooting
11 Diagnosis and troubleshooting Proservo NMS5 Diagnosis and troubleshooting NMS5 has a superb self-diagnosis function which monitors its operation. If an error is occurred, the corresponding message is displayed on the LCD. The selected matrix position and the error message are displayed every few seconds alternatively. -
Page 88: Error And Status Messages
11 Diagnosis and troubleshooting Proservo NMS5 11.2 Error and status messages Message Cause Remedy Error Code -49.5 ºC Indication of shorted element in NMT Check GVH450 through GVH459 to see element. temperature sensor 358.0 ºC Element is not enabled, or not installed Check GVH482 Total number of elements in NMT temperature sensor . - Page 89 11 Diagnosis and troubleshooting Proservo NMS5 Message Cause Remedy Error Code RAM FAILURE CPU RAM failure ROM ERROR EEPROM Consult E+H Service. SIFA ERROR Error between communication board Replace the CPU board. Consult E+H service. and CPU board for digital output.
-
Page 90: Alarm History Display
11 Diagnosis and troubleshooting Proservo NMS5 11.3 Alarm history display Item Procedure Remarks Bring up Static Matrix GVH034 (ALARM CONTACT)." 0 3 4 ALARM CONTACT MORE FUNCTION Figure 84: Device data Figure 85: LCD (Display) Previous static matrix records are sequentially displayed in Static Matrix screen GVH035, starting with the latest record. -
Page 91: Flowcharts For Diagnostics And Troubleshooting
11 Diagnosis and troubleshooting Proservo NMS5 11.5 Flowcharts for diagnostics and troubleshooting Diagnostic : ADJ A, I or Z COUNTER Diagnostic : -49.5ºC Meaning: Meaning: (Level display) Level adjustment is required Shorted element in NMT ADJ(A, I, Z) COUNTER at calender time by automatic temperature -49.5 ºC... - Page 92 11 Diagnosis and troubleshooting Proservo NMS5 Diagnostic : DISPL CALIB ERROR Diagnostic : BELOW BOT. POINT Meaning: Meaning: Display shows Liquid level is positioned at Displacer weight exceeds Data is flashing the lowest point. Due to below allowable range, which disable 358.0ºC.
- Page 93 11 Diagnosis and troubleshooting Proservo NMS5 Diagnostic : LOCAL ERROR NRF Diagnostic : LOCAL ERROR DEV1(2) Meaning: Meaning: HART communication error An error arose in NRF tank Local Error Device 1 or 2 Local Error: NRF arose in HART sensor 1 or 2.
- Page 94 11 Diagnosis and troubleshooting Proservo NMS5 Diagnostic : MPU: START ACT Diagnostic : ROM ERROR Meaning: Meaning: CPU ROM fetch error ROM Error MPU: START ACT Power supply is turned off YYMMDDhhmm TT ## and on at the recorded YYMMDDhhmm TT ## calender time.
- Page 95 11 Diagnosis and troubleshooting Proservo NMS5 Diagnostic : TEMP. COM. SHORT Diagnostic : UNDERTENTION Meaning: Meaning: Malfunction of NMT Data is flashing. Undertention Measured weight is smaller temperature element than the setting at GVH163 common wiring Stop the gauge operation.
- Page 96 11 Diagnosis and troubleshooting Proservo NMS5 Diagnostic : Calibration unsuccessful Diagnostic : No response to OPERATION After calibration, measured value shows 0.0g at GVH370. GVH020 = LEVEL, GVH021 LEVEL 0.0g Level Operation Not Level Operation Measured Weight GVH020 GVH021 Input correct values for...
-
Page 97: Setting After Parts Replacement
11 Diagnosis and troubleshooting Proservo NMS5 11.6 Setting after parts replacement After any part of NMS5 is replaced, and before starting NMS5 calibration, specify the data on the fol- lowing equipment. • Circumferential length of wire drum (indicated on face of wire drum) •... -
Page 98: Intelligent Function
The measuring device must be returned if repairs or a factory calibration are required, or if the wrong measuring device has been ordered or delivered. According to legal regulations, Endress+Hauser, as an ISO-certified company, is required to follow certain procedures when handling returned products that are in contact with medium. -
Page 99: Software History
11 Diagnosis and troubleshooting Proservo NMS5 11.10 Software History Documentation Software Version / Date Software Changes Changes V2.13, from 9.96 Original Release BA001N/08/en/09.98 V2.20, from 10.97 T2:TCB-2, Modified V1: R&S command BA001N/08/en/11.97 V4.06, from 04.98 HART master, T4:TCB-4 V4.06, from 04.98 HART master T&W, T4:TCB-4... -
Page 100: Adjustment
12 Adjustment Proservo NMS5 Adjustment 12.1 Sensor calibration After exchanging CPU module, detector unit, wire drum, measuring wire (all or part), it is necessary to adjust the hall sensors and make new weight table calibration. Move the displacer to the side of calibration window or the maintenance chamber window (top of the tank) or put the displacer on a work bench so that the displacer can be touched. - Page 101 12 Adjustment Proservo NMS5 If No, return the displacer to the original position at GVH741 • If |Wa2 - Wa1 |<9900, increase Index Count. • If |Wa2 - Wa1 |>11000, decrease Index Count. • Repeat the procedure above until |Wa2 - Wa1 | = 10000 (+/-100).
- Page 102 12 Adjustment Proservo NMS5 16. Adjust B Zero Sensor Count = 11000 (+/- 100) at GVH742. 17. Adjust to |Wa2 - Wa1| = 10000 (+/-100) at GVH42. (Ex Wa1=11000) 31XX 11000 ADJ. B ZERO (Ex Wa2=21000) 31XX 21000 ADJ. B ZERO Figure 93: Sensor calibration 5 This completes the hall sensor adjustment.
-
Page 103: Weight Calibration
12 Adjustment Proservo NMS5 12.2 Weight calibration Weight table calibration must be done after completing hall sensor adjustment. The calibration proce- dures will vary depending on the measurement specifications. When NMS5 is only for level measure- ment, use 12.2.1 Weight Calibration (Standard) procedure. When NMS5 is for level, density, and inter- face measurement, use 12.2.2 Weight Calibration (Density) procedure. - Page 104 12 Adjustment Proservo NMS5 Item Procedure Remark 13. GVH373 "Weight Calibration" shows OFF • Always enter N = -. 14. Check the weight calibration at GVH370=GVH342 +/- 2.0 grams? WEIGHT CALIB. 15. If not, adjust sensor or calibrate the weight Figure 98: Calibration 5-A again.
- Page 105 12 Adjustment Proservo NMS5 Item Procedure Remark 12. Remove the 50xg wight from the displace and mount the displacer on the wire. • Calibration starts automatically, 13. Press "E" at Displacer set: ok?. which takes approximately 10 14. Press "E" and "+" keys together at "Displacer on: E & "+".
-
Page 106: Technical Data
13 Technical data Proservo NMS5 Technical data Items Descriptions Measuring Range 0 to 16, 22, 26, 36, or 47m depending on material specification (47m or more can be ordered depending on conditions.) Density Limits 0.430 to 2.000 g/cm (g/ml) (430 to 2000 kg/m Accuracy Level: +/- 0.7mm (0.027 inch) - Page 107 13 Technical data Proservo NMS5 Items Descriptions Color Body: blue (RAL5012); Covers: white (RAL7035) Supplementary Documentation Technical Information (TI00452G) Installation Instruction (BA00401G) Safety Instruction (XA00578G: ATEX, XA00582G: IECEx EX421-439: FM, EX540-742: CSA, XA10257G: NEPSI) Functional Safety Manual (SD00337G) Under reference condition Difference of product densities at least 0.100 g/cm...
-
Page 108: Matrix
14 Matrix Proservo NMS5 Matrix 14.1 Programming Matrix Endress+Hauser... - Page 109 14 Matrix Proservo NMS5 Endress+Hauser...
- Page 110 14 Matrix Proservo NMS5 Endress+Hauser...
- Page 111 14 Matrix Proservo NMS5 Endress+Hauser...
- Page 112 14 Matrix Proservo NMS5 Endress+Hauser...
- Page 113 14 Matrix Proservo NMS5 Endress+Hauser...
- Page 114 14 Matrix Proservo NMS5 Endress+Hauser...
- Page 115 14 Matrix Proservo NMS5 Endress+Hauser...
- Page 116 14 Matrix Proservo NMS5 Endress+Hauser...
- Page 117 14 Matrix Proservo NMS5 Endress+Hauser...
-
Page 118: Description Of Programming Matrix
14 Matrix Proservo NMS5 14.2 Description of Programming Matrix Endress+Hauser... - Page 119 14 Matrix Proservo NMS5 Endress+Hauser...
- Page 120 14 Matrix Proservo NMS5 Endress+Hauser...
- Page 121 14 Matrix Proservo NMS5 Endress+Hauser...
- Page 122 14 Matrix Proservo NMS5 Endress+Hauser...
- Page 123 14 Matrix Proservo NMS5 Endress+Hauser...
- Page 124 14 Matrix Proservo NMS5 Endress+Hauser...
- Page 125 14 Matrix Proservo NMS5 Endress+Hauser...
- Page 126 14 Matrix Proservo NMS5 Endress+Hauser...
- Page 127 14 Matrix Proservo NMS5 Endress+Hauser...
- Page 128 14 Matrix Proservo NMS5 Endress+Hauser...
- Page 129 14 Matrix Proservo NMS5 Endress+Hauser...
- Page 130 14 Matrix Proservo NMS5 Endress+Hauser...
- Page 131 14 Matrix Proservo NMS5 Endress+Hauser...
- Page 132 14 Matrix Proservo NMS5 Endress+Hauser...
- Page 133 14 Matrix Proservo NMS5 Endress+Hauser...
- Page 134 14 Matrix Proservo NMS5 Endress+Hauser...
- Page 135 14 Matrix Proservo NMS5 Endress+Hauser...
- Page 136 14 Matrix Proservo NMS5 Endress+Hauser...
- Page 137 14 Matrix Proservo NMS5 Endress+Hauser...
- Page 138 14 Matrix Proservo NMS5 Endress+Hauser...
- Page 139 14 Matrix Proservo NMS5 Endress+Hauser...
- Page 140 14 Matrix Proservo NMS5 Endress+Hauser...
- Page 141 14 Matrix Proservo NMS5 Endress+Hauser...
- Page 142 14 Matrix Proservo NMS5 Endress+Hauser...
- Page 143 14 Matrix Proservo NMS5 Endress+Hauser...
- Page 144 14 Matrix Proservo NMS5 Endress+Hauser...
- Page 145 14 Matrix Proservo NMS5 Endress+Hauser...
- Page 146 14 Matrix Proservo NMS5 Endress+Hauser...
- Page 147 14 Matrix Proservo NMS5 Endress+Hauser...
- Page 148 14 Matrix Proservo NMS5 Endress+Hauser...
- Page 149 14 Matrix Proservo NMS5 Endress+Hauser...
- Page 150 14 Matrix Proservo NMS5 Endress+Hauser...
- Page 151 14 Matrix Proservo NMS5 Endress+Hauser...
- Page 152 14 Matrix Proservo NMS5 Endress+Hauser...
- Page 153 14 Matrix Proservo NMS5 Endress+Hauser...
-
Page 154: Appendix
15 Appendix Proservo NMS5 Appendix 15.1 RS 485 MODBUS (COM- 5) terminator Terminator switch setting procedure RS- 485 Communication Module until 2008 Set all slide switch (four bits) turn to ON when termination is required. Terminator Switch OFF Terminator Switch ON... - Page 155 15 Appendix Proservo NMS5 Set piano type switch S1-1, S2-3, S2-4 to ON (UP) when termination is required. Figure 105: COM-5 RS-485 communication module Endress+Hauser...
-
Page 156: Measurement Wire Replacement
15 Appendix Proservo NMS5 15.2 Measurement wire replacement Procedure for winding wire onto wire drum Prepare a box with approx. 300mm(w) × 300mm(d) × 50mm(h) for wire storing. Take out the measurement wire from the plastic bag. Put the wire into the box without twisting. - Page 157 15 Appendix Proservo NMS5 Fixing wire procedure Put the wire drum on the desk and fix the wire by masking tape remaining 500mm wire. Masking tape Figure 107: Wire and wire drum, unit of measurement: mm (in) Wind the wire toward the wire drum 2 times around the ring.
- Page 158 15 Appendix Proservo NMS5 15.2.1 Displacers Actual draft position may change slightly with tank parameters. Ø30 SUS cylindrical Ø30 PTFE cylindrical Ø11 (0.43) Draft point Draft point Ø30(1.18) Ø30(1.18) Ø40 SUS cylindrical Ø40 PTFE cylindrical Ø11 (0.43) Draft point Draft point Ø40 (1.57)
- Page 159 15 Appendix Proservo NMS5 Ø50 SUS cylindrical Ø50 AlloyC cylindrical Draft point Draft point Ø50.8 (2) Ø50.8 (2) Ø50 PTFE cylindrical Ø50 PTFE conical Ø11 (0.43) Ø11 (0.43) Draft point Draft point Ø50.8 (2) Ø 50 Figure 110: Dimension of Displacer 2, Unit of Measurement: mm (in) Ø50 SUS...
- Page 160 15 Appendix Proservo NMS5 Ø70 SUS conical NMi-W&M Draft point Ø 70 (2.76) Ø110 SUS conical PTB-W&M Draft point Ø110 (4.33) Figure 111: Dimension of displacer 3, unit of measurement: mm (in) Item Ø70 SUS conical NMi W&M Ø110 SUS conical PTB W&M...
- Page 161 www.addresses.endress.com...