Table of Contents
Advertisement
This Manual is prepared for the use of trained Vulcan Service
Technicians and should not be used by those not properly
qualified.
This manual is not intended to be all encompassing. If you have
not attended a Vulcan Service School for this product, you should
read, in its entirety, the repair procedure you wish to perform to
determine if you have the necessary tools, instruments and skills
required to perform the procedure. Procedures for which you do
not have the necessary tools, instruments and skills should be
performed by a trained Vulcan Service Technician.
The reproduction, transfer, sale or other use of this Manual,
without the express written consent of Vulcan, is prohibited.
This manual has been provided to you by ITW Food Equipment
Group LLC ("ITW FEG") without charge and remains the property
of ITW FEG, and by accepting this manual you agree that you will
return it to ITW FEG promptly upon its request for such return at
any time in the future.
A product of Vulcan-Hart
SERVICE MANUAL
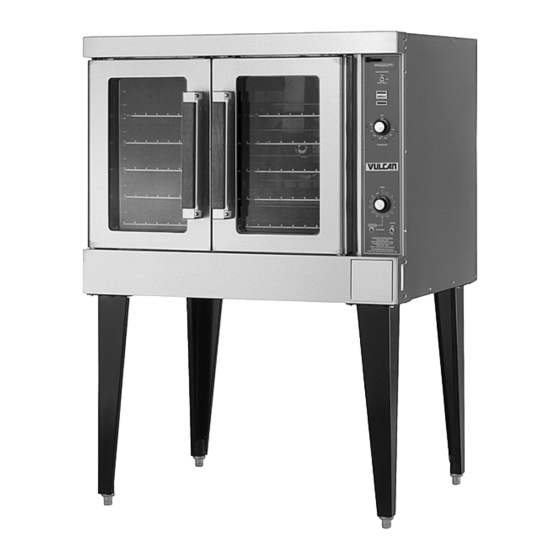
VC4E & VC6E Series Full Size
Electric Convection Ovens
VC4ES
VC4ED
VC4EC
VC6ES
VC6ED
VC6EC
- NOTICE -
3600 North Point Blvd Baltimore, MD 21222
ML-126743
ML-126744
ML-126745
ML-126746
ML-126747
ML-126748
F25105 Rev. B (0217)
Advertisement
Table of Contents

Related Manuals for Vulcan-Hart ML-126743


Summary of Contents for Vulcan-Hart ML-126743
- Page 1 ITW FEG, and by accepting this manual you agree that you will return it to ITW FEG promptly upon its request for such return at any time in the future. A product of Vulcan-Hart 3600 North Point Blvd Baltimore, MD 21222 F25105 Rev. B (0217)
-
Page 2: Table Of Contents
VC4E & VC6E Series Full Size Electric Convection Ovens TABLE OF CONTENTS SERVICE UPDATES ..................4 SERVICE UPDATES - VC4E / VC6E . - Page 3 VC4E & VC6E Series Full Size Electric Convection Ovens © VULCAN 2017 Page 3 of 64 F25105 Rev. B (0217)
-
Page 4: Service Updates
VC4E & VC6E Series Full Size Electric Convection Ovens - SERVICE UPDATES SERVICE UPDATES SERVICE UPDATES - VC4E / VC6E February 2017 Updated Data Module • SOLID STATE TEMPERATURE CONTROL CALIBRATION F25105 Rev. B (0217) Page 4 of 64... -
Page 5: General
VC4E & VC6E Series Full Size Electric Convection Ovens - GENERAL GENERAL any model unless the picture or illustration needs to INTRODUCTION be model specific. Procedures in this manual will apply to all models unless specified. Pictures and illustrations can be of FEATURES TEMPERATURE MODEL... -
Page 6: Specifications
VC4E & VC6E Series Full Size Electric Convection Ovens - GENERAL • VOM with A.C. current tester (Any quality VOM • Manometer with a sensitivity of at least 20,000 ohms per volt • Clamp on amp meter can be used) •... -
Page 7: Removal And Replacement Of Parts
VC4E & VC6E Series Full Size Electric Convection Ovens - REMOVAL AND REPLACEMENT OF PARTS REMOVAL AND REPLACEMENT OF PARTS COVERS AND PANELS Disconnect the electrical power to the machine and follow lockout / tagout procedures. There may be multiple circuits. Be sure all circuits are disconnected. -
Page 8: Control Panel Components
VC4E & VC6E Series Full Size Electric Convection Ovens - REMOVAL AND REPLACEMENT OF PARTS Remove the screws which secure the left side of the top front cover, bottom front cover and control panel. Remove the seven screws securing the left side panel. -
Page 9: Component Panel Components
VC4E & VC6E Series Full Size Electric Convection Ovens - REMOVAL AND REPLACEMENT OF PARTS Fig. 8 Fig. 7 COMPONENT PANEL COMPONENTS Disconnect the electrical power to the machine and follow lockout / tagout procedures. There may be multiple circuits. Be sure all circuits are disconnected. -
Page 10: Temperature Probe (Solid State Control)
VC4E & VC6E Series Full Size Electric Convection Ovens - REMOVAL AND REPLACEMENT OF PARTS Fig. 10 Fig. 11 Remove probe by pushing it through the oven wall and into the control panel area. NOTE: The hole in the oven cavity wall does not line up straight with the oven cavity outer shell, therefore the probe must be removed at an angle. - Page 11 VC4E & VC6E Series Full Size Electric Convection Ovens - REMOVAL AND REPLACEMENT OF PARTS Determine if the heating element to replace is on the left or right side in the oven cavity. The element locations from front to back are: Right side - R1, R2 &...
-
Page 12: Blower And Motor
VC4E & VC6E Series Full Size Electric Convection Ovens - REMOVAL AND REPLACEMENT OF PARTS If the element is on the right side: Blower Only - Loosen set screws on blower hub and using a bearing puller, remove Remove the top panel and pull back the blower from motor shaft. -
Page 13: Door Switch
VC4E & VC6E Series Full Size Electric Convection Ovens - REMOVAL AND REPLACEMENT OF PARTS DOOR SWITCH Disconnect the electrical power to the machine and follow lockout / tagout procedures. There may be multiple circuits. Be sure all circuits are disconnected. Remove the top front cover as outlined under COVERS AND PANELS. -
Page 14: Oven Doors And Bearings (Independent Doors)
VC4E & VC6E Series Full Size Electric Convection Ovens - REMOVAL AND REPLACEMENT OF PARTS Fig. 19 Independent doors: Remove the door handle then remove the outer door panel. Lift out the inner door panel and window assembly. NOTE: Left door only - remove door seal from the inside edge of the door. -
Page 15: Oven Doors (Simultaneous Doors)
VC4E & VC6E Series Full Size Electric Convection Ovens - REMOVAL AND REPLACEMENT OF PARTS Reverse procedure to install door assembly and check for proper adjustment as outlined under DOOR ADJUSTMENT and DOOR SWITCH ADJUSTMENT in SERVICE PROCEDURES AND ADJUSTMENTS. OVEN DOORS (SIMULTANEOUS DOORS) Fig. -
Page 16: Roller Latch Assembly (Independent Doors)
VC4E & VC6E Series Full Size Electric Convection Ovens - REMOVAL AND REPLACEMENT OF PARTS Fig. 26 NOTE: The door assembly is heavy and will drop down once the last screw is removed. If removing door assembly with-out assistance, use caution. Lift up on the door assembly and swing the right side out then move the assembly to the left to clear the slots in the upper door sill. -
Page 17: Door Catch Roller Assembly (Independent Doors)
VC4E & VC6E Series Full Size Electric Convection Ovens - REMOVAL AND REPLACEMENT OF PARTS Reverse procedure to install. MECHANICAL (KX) THERMOSTAT DOOR CATCH ROLLER ASSEMBLY (INDEPENDENT DOORS) Disconnect the electrical power to the machine and NOTE: For units with serial number starting with 48 follow lockout / tagout procedures. -
Page 18: Interior Lights
VC4E & VC6E Series Full Size Electric Convection Ovens - REMOVAL AND REPLACEMENT OF PARTS Fig. 33 Replace bulb then reverse the procedure to install. Lamp Assembly Remove the lens and bulb. Fig. 31 Remove the springs from the retaining tabs (2 Disconnect lead wires from high limit thermostat places) on the socket. -
Page 19: Cooling Fan
VC4E & VC6E Series Full Size Electric Convection Ovens - REMOVAL AND REPLACEMENT OF PARTS NOTE: The air deflector should be angled upwards COOLING FAN at approximately 30 degrees to properly direct the air flow. Disconnect the electrical power to the machine and follow lockout / tagout procedures. -
Page 20: Service Procedures And Adjustments
VC4E & VC6E Series Full Size Electric Convection Ovens - SERVICE PROCEDURES AND ADJUSTMENTS SERVICE PROCEDURES AND ADJUSTMENTS Certain procedures in this section require electrical test or measurements while power is applied to the machine. Exercise extreme caution at all times and follow Arc Flash procedures. - Page 21 VC4E & VC6E Series Full Size Electric Convection Ovens - SERVICE PROCEDURES AND ADJUSTMENTS Calculate differential by subtracting temperature indicated when lamp goes out from temperature indicated when lamp comes on. Differential = Heat lamp OFF - Heat lamp ON Example: 360°...
-
Page 22: Mechanical (Kx) Thermostat Calibration
VC4E & VC6E Series Full Size Electric Convection Ovens - SERVICE PROCEDURES AND ADJUSTMENTS Calculate the differential by subtracting the temperature indicated when heat lamp goes out from temperature indicated when heat lamp comes on. Differential - Heat lamp OFF - Heat lamp ON. Example: 360°... -
Page 23: Solid State Temperature Control Test
VC4E & VC6E Series Full Size Electric Convection Ovens - SERVICE PROCEDURES AND ADJUSTMENTS SOLID STATE TEMPERATURE CONTROL TEST Certain procedures in this section require electrical test or measurements while power is applied to the machine. Exercise extreme caution at all times and follow Arc Flash procedures. -
Page 24: Temperature Probe Test (Solid State Control)
VC4E & VC6E Series Full Size Electric Convection Ovens - SERVICE PROCEDURES AND ADJUSTMENTS Check for proper voltage across terminals COM AC to 120VAC or COM AC to 208-240VAC for Disconnect the power to the control. electrical power to the machine and follow lockout / tagout procedures. -
Page 25: Heating Element Test
VC4E & VC6E Series Full Size Electric Convection Ovens - SERVICE PROCEDURES AND ADJUSTMENTS TEMP (°F) OHMS * TEMP (°F) OHMS * Heating Element Values 3,016 AMPS PER KW PER OHMS PER ELEMENT 2,266 VOLT. LEAD ELEMENT ELEMENT 1,726 1 PH 3 PH 1,332 1,041... -
Page 26: Door Adjustment
VC4E & VC6E Series Full Size Electric Convection Ovens - SERVICE PROCEDURES AND ADJUSTMENTS Fig. 40 Reverse the procedure to install. DOOR ADJUSTMENT Check the doors to make sure they have an equal gap between them and that the vertical edge of the door is parallel to the vertical door seal. -
Page 27: Door Strike Adjustment (Independent Doors)
VC4E & VC6E Series Full Size Electric Convection Ovens - SERVICE PROCEDURES AND ADJUSTMENTS Move the door until proper alignment is achieved Replace roller latch if malfunctioning as then tighten the screws on the upper door outlined under ROLLER LATCH bearing hardware. -
Page 28: Door Switch Adjustment
VC4E & VC6E Series Full Size Electric Convection Ovens - SERVICE PROCEDURES AND ADJUSTMENTS Replace if bent and adjust as outlined in this Continue adjustment until proper door procedure. operation is achieved. Open and close the doors several times while observing the catch roller operation. -
Page 29: Door Chain Adjustment (Simulataneous Doors)
VC4E & VC6E Series Full Size Electric Convection Ovens - SERVICE PROCEDURES AND ADJUSTMENTS Fig. 46 Install the top front cover. Apply power to the oven and check for proper Fig. 47 operation. If right door does not lead the left door in closing: DOOR CHAIN ADJUSTMENT Loosen locknuts on both turnbuckles. - Page 30 VC4E & VC6E Series Full Size Electric Convection Ovens - SERVICE PROCEDURES AND ADJUSTMENTS If the oven is not heating or displaying the proper Changing the C_F, InP1, rL1 & rH1 temperature, the temperature probe may be parameters will default all menus to the factory malfunctioning.
-
Page 31: Computer Control Temperature Calibration
VC4E & VC6E Series Full Size Electric Convection Ovens - SERVICE PROCEDURES AND ADJUSTMENTS If the blower motor does not come on, If the set point temperature is other than proceed to step 3. 350°F, proceed to step 3 to change the temperature. -
Page 32: Computer Control Operational Test
VC4E & VC6E Series Full Size Electric Convection Ovens - SERVICE PROCEDURES AND ADJUSTMENTS If the above adjustment cannot be obtained: ALTERNATING ON DISPLAY MENU Turn the power switch OFF. PARAMETER DATA to Operation Mode Disconnect the electrical power to the machine and NOTE: While in the calibration mode, on all follow lockout / tagout procedures. - Page 33 VC4E & VC6E Series Full Size Electric Convection Ovens - SERVICE PROCEDURES AND ADJUSTMENTS #8 - Electronic beeper (external) At the end of the test, the control exits the sounds. calibration mode and returns to the Operation Mode. If the output tests are completed successfully, proceed to step 4.
-
Page 34: Electrical Operation
VC4E & VC6E Series Full Size Electric Convection Ovens - ELECTRICAL OPERATION ELECTRICAL OPERATION COMPONENT FUNCTION Power Switch (S1) ..Determines the mode of operation; ON, OFF, or COOL DOWN. Oven Light Switch Controls the oven cavity lights. (S2) . -
Page 35: Component Location
VC4E & VC6E Series Full Size Electric Convection Ovens - ELECTRICAL OPERATION Mechanical Regulates the oven cavity temperature by controlling 2CON to energize the heating Temperature Control elements when the control calls for heat (VC4ES/6ES only). KX thermostat ..Cooling Fan . - Page 36 VC4E & VC6E Series Full Size Electric Convection Ovens - ELECTRICAL OPERATION VC4ES/6ES with Mechanical KX thermostat - Plug, Socket and Components F25105 Rev. B (0217) Page 36 of 64...
- Page 37 VC4E & VC6E Series Full Size Electric Convection Ovens - ELECTRICAL OPERATION VC4ED/6ED with Solid State Control - Plug, Socket and Components Page 37 of 64 F25105 Rev. B (0217)
- Page 38 VC4E & VC6E Series Full Size Electric Convection Ovens - ELECTRICAL OPERATION VC4EC/6EC - Plug, Socket and Components (Roast & Hold Standard) F25105 Rev. B (0217) Page 38 of 64...
-
Page 39: Sequence Of Operation - Vc4Es, Vc6Es With Mechanical Kx Thermostat
VC4E & VC6E Series Full Size Electric Convection Ovens - ELECTRICAL OPERATION SEQUENCE OF OPERATION - SEQUENCE OF OPERATION - VC4ES, VC6ES with Mechanical KX VC4ED, VC6ED with Solid State Thermostat Temperature Control Refer to diagram 6962 for electrical sequence of Refer to diagram 6964 for electrical sequence of operation. -
Page 40: Sequence Of Operation - Vc4Ec, Vc6Ec (Computer Control)
VC4E & VC6E Series Full Size Electric Convection Ovens - ELECTRICAL OPERATION Power removed from heating Power is supplied to: elements and heating stops. "Cook" timer terminal 1. If a time is The oven will continue to cycle on the dialed, timer will operate and buzzer temperature control until the doors are opened or will sound when timer reaches zero. - Page 41 VC4E & VC6E Series Full Size Electric Convection Ovens - ELECTRICAL OPERATION Pin 3 (C3-3) on computer control (input Oven "Roast & Hold" light on the control comes "IN-2"). Oven cavity light switch (S2). Turns Convection fan will operate at Low speed, cavity lights ON/OFF;...
-
Page 42: Schematics And Wiring Diagrams
VC4E & VC6E Series Full Size Electric Convection Ovens - ELECTRICAL OPERATION Convection fan motor energized (High The oven will continue to operate in COOL speed). DOWN mode until the power switch (S1) is turned to the OFF or ON position. SCHEMATICS AND WIRING DIAGRAMS VC4ES, VC6ES with Mechanical (KX) Controls, 208-240V Schematics VC4ES, VC6ES with Mechanical (KX) Controls, 208-240V Wiring Diagram... - Page 43 VC4E & VC6E Series Full Size Electric Convection Ovens - ELECTRICAL OPERATION VC4ES, VC6ES with Mechanical (KX) Controls, 208-240V Page 43 of 64 F25105 Rev. B (0217)
- Page 44 VC4E & VC6E Series Full Size Electric Convection Ovens - ELECTRICAL OPERATION VC4ES, VC6ES with Mechanical (KX) Control, 208-240V F25105 Rev. B (0217) Page 44 of 64...
- Page 45 VC4E & VC6E Series Full Size Electric Convection Ovens - ELECTRICAL OPERATION Fig. 57 Page 45 of 64 F25105 Rev. B (0217)
- Page 46 VC4E & VC6E Series Full Size Electric Convection Ovens - ELECTRICAL OPERATION VC4ES, VC6ES with Mechanical (KX) Controls, 480V F25105 Rev. B (0217) Page 46 of 64...
- Page 47 VC4E & VC6E Series Full Size Electric Convection Ovens - ELECTRICAL OPERATION VC4ES, VC6ES with Mechanical (KX) Control, 480V Page 47 of 64 F25105 Rev. B (0217)
- Page 48 VC4E & VC6E Series Full Size Electric Convection Ovens - ELECTRICAL OPERATION Fig. 60 F25105 Rev. B (0217) Page 48 of 64...
- Page 49 VC4E & VC6E Series Full Size Electric Convection Ovens - ELECTRICAL OPERATION VC4ED, VC6ED with Solid State Temperature Control, 208-240V Schematic Page 49 of 64 F25105 Rev. B (0217)
- Page 50 VC4E & VC6E Series Full Size Electric Convection Ovens - ELECTRICAL OPERATION VC4ED, VC6ED with Solid State Temperature Control, 208-240V F25105 Rev. B (0217) Page 50 of 64...
- Page 51 VC4E & VC6E Series Full Size Electric Convection Ovens - ELECTRICAL OPERATION Fig. 63 Page 51 of 64 F25105 Rev. B (0217)
- Page 52 VC4E & VC6E Series Full Size Electric Convection Ovens - ELECTRICAL OPERATION VC4ED, VC6ED with Solid State Temperature Control, 480V F25105 Rev. B (0217) Page 52 of 64...
- Page 53 VC4E & VC6E Series Full Size Electric Convection Ovens - ELECTRICAL OPERATION VC4ED, VC6ED with Solid State Temperature Control, 480V Page 53 of 64 F25105 Rev. B (0217)
- Page 54 VC4E & VC6E Series Full Size Electric Convection Ovens - ELECTRICAL OPERATION Fig. 66 F25105 Rev. B (0217) Page 54 of 64...
- Page 55 VC4E & VC6E Series Full Size Electric Convection Ovens - ELECTRICAL OPERATION VC4EC, VC6EC Computer Control, 208-240V (Roast & Hold Standard) Page 55 of 64 F25105 Rev. B (0217)
- Page 56 VC4E & VC6E Series Full Size Electric Convection Ovens - ELECTRICAL OPERATION VC4EC, VC6EC Computer Control, 208-240V (Roast & Hold Standard) F25105 Rev. B (0217) Page 56 of 64...
- Page 57 VC4E & VC6E Series Full Size Electric Convection Ovens - ELECTRICAL OPERATION Fig. 69 Page 57 of 64 F25105 Rev. B (0217)
- Page 58 VC4E & VC6E Series Full Size Electric Convection Ovens - ELECTRICAL OPERATION VC4EC, VC6EC Computer Control, 480V (Roast & Hold Standard) F25105 Rev. B (0217) Page 58 of 64...
- Page 59 VC4E & VC6E Series Full Size Electric Convection Ovens - ELECTRICAL OPERATION VC4EC, VC6EC Computer Control, 480V (Roast & Hold Standard) Page 59 of 64 F25105 Rev. B (0217)
- Page 60 VC4E & VC6E Series Full Size Electric Convection Ovens - ELECTRICAL OPERATION Fig. 72 F25105 Rev. B (0217) Page 60 of 64...
-
Page 61: Troubleshooting
VC4E & VC6E Series Full Size Electric Convection Ovens - TROUBLESHOOTING TROUBLESHOOTING Certain procedures in this section require electrical test or measurements while power is applied to the machine. Exercise extreme caution at all times. If test points are not easily accessible, disconnect power and follow lockout / tagout procedures, attach test equipment and reapply power to the test. -
Page 62: Computer Control Models Only
VC4E & VC6E Series Full Size Electric Convection Ovens - TROUBLESHOOTING SYMPTOMS POSSIBLE CAUSES High ambient temperatures. Intermittent operation problems. Wiring connections loose. Cooling fan malfunction. Main circuit breaker OPEN. Control circuit fuses OPEN. No power to oven controls. Power switch (S1) inoperative. Transformer (T2) inoperative (480V only). - Page 63 VC4E & VC6E Series Full Size Electric Convection Ovens - TROUBLESHOOTING SYMPTOM POSSIBLE CAUSES Line voltage incorrect. Power switch (S1) malfunction. Fan speed switch (S3) malfunction. Solid sate relay (SSR) malfunction. See SOLID Blower motor doesn’t run with power switch in "ON" or STATE RELAY TEST under COMPUTER "COOL DOWN"...
- Page 64 VC4E & VC6E Series Full Size Electric Convection Ovens - TROUBLESHOOTING CODE & PROBLEM PROBABLE CAUSE SOLUTION • Check the InP1 setup parameter. Verify it matches your sensor. Er07 - Zone 1 A/D overflow error Open sensor • Check sensor and connections for a reversed or open sensor.