Advertisement
Customer's operating and assembly instructions
FOR YOUR SAFETY.
IF YOU SMELL GAS:
1. Shut off gas to the appliance.
2. Extinguish any open flame.
3. Open hood.
4. If odour continues,
immediately call your gas
supplier or fire department.
P
N
. P80140004A
ART
O
FOR YOUR SAFETY.
1. Do not store or use
petrol or other flammable
vapours and liquids in the
vicinity of this or any other
appliance.
2. A gas cylinder not connected
for use must not be stored
in the vicinity of this or any
other appliance.
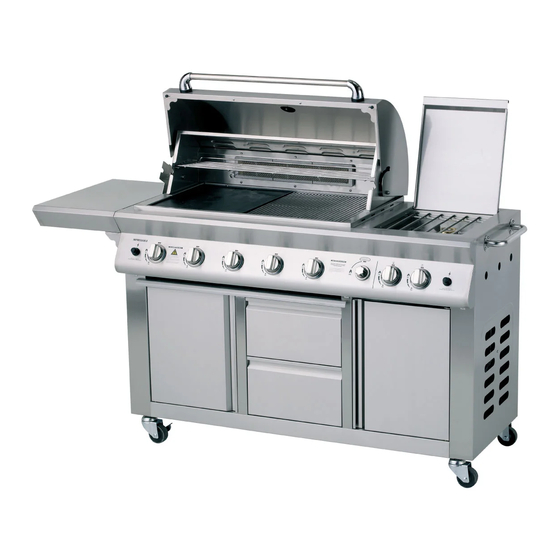
These instructions are a guide
to assembling and using the
Impressor 8
(Australia)
Elite
(New Zealand)
barbecue.
Please read carefully, and
retain for future reference.
Only to be used outdoors.
Illustration may vary from barbecue
contained in carton.
Advertisement
Table of Contents

Related Manuals for Rinnai Impressor 8


Summary of Contents for Rinnai Impressor 8
- Page 1 Customer’s operating and assembly instructions These instructions are a guide FOR YOUR SAFETY. to assembling and using the FOR YOUR SAFETY. Impressor 8 (Australia) 1. Do not store or use IF YOU SMELL GAS: Elite petrol or other flammable (New Zealand) 1.
- Page 2 G E N E R A L I N F O R M A T TABLE OF CONTENTS GENERAL While it is possible for one person to assemble the General Information barbecue, we recommend asking for the assistance of Safety Instructions another person when manoeuvring some of the larger Pre-Assembly Instructions or heavier pieces.
-
Page 3: Specifications
G E N E R A L I N F O R M A T GAS INSTALLATION CODES HOSE AND REGULATOR SAFETY Australian Gas Association Certificate No. 6468. NEVER OPERATE THIS BARBECUE Barbecues must be used in accordance with the WITHOUT A REGULATOR. -
Page 4: Protect Children
CHECKING FOR GAS LEAKS READ CAREFULLY BEFORE ASSEMBLING AND OPERATING NEVER TEST FOR LEAKS WITH AN OPEN FLAME. YOUR BARBECUE. Prior to first use, and at the beginning of each new season (or, if using bottled gas, whenever gas cylinder is changed), you LOCATION OF YOUR BARBECUE must check for gas leaks. -
Page 5: Parts Diagram
This diagram is provided to assist you identify parts if replacement is necessary. Contact your place of purchase or the manufacturer to enquire about parts, availability and or service. 72 (LPG only) 73 (LPG only) -
Page 6: Parts List
Ref. Description Part No. Ref. Description Part No. Stainless steel hood P00117356A Injector for side burner Stainless steel hood trim plate P0011435EA P06522001A Hood side panel – left P00105347U P06522002A Hood side panel – right P00106347U Gas tube for rotisserie burner P03717033A Temperature gauge P00601171B... - Page 7 The following information is a breakdown of the hardware pack. It explains which fittings are used during the various stages of assembly. Ref. Component Qty. Purpose of Component H005 " x " Phillips-head screw Install castor to castor seats of bottom shelf H030 "...
- Page 8 Install trolley side panels to the bottom panel. ASSEMBLING THE BARBECUE TROLLEY Align the holes on trolley side panels with the threaded holes at the corners of trolley bottom Turn over the trolley bottom panel on floor. Install panel. Tighten securely by using 8 of the "...
- Page 9 Before installing the door bracket to the inside of 10. Install the division panel to the trolley. Align the 2 front trolley side panels, check and ensure door threaded holes on the decorative inside plate and 2 stops for magnets on the door bracket are located holes on the trolley rear panel with the holes on the front side.
- Page 10 A S S E M B L Y 13. Place the axle on bottom of the left door panel to 16. Follow the steps 1 to 5 of the installing the left the door axle bracket-left bottom. See diagram 8B. cabinet door to install the right cabinet door.
- Page 11 Open the front doors of cabinet. Remove fastening INSTALLING SIDE SHELF band from fuel gauge display wire plug ‘A’ that is AND TROLLEY SIDE HANDLE behind the heat shield of the control panel. Place the wire plug ‘A’ through the slot in side of Remove the white protective film from the stainless right trolley side panel as shown in diagram 10.
- Page 12 FUEL GAUGE DISPLAY INSTALLATION FUEL GAUGE DISPLAY OPERATING IMPORTANT: Before installing batteries be sure the gas NOTE: Cylinder must be positioned in tray for fuel cylinder is not mounted in the cylinder pull-out tray. gauge display check Open the front doors of cabinet. Pull out the gas Press the ‘CHECK’...
-
Page 13: Gas Installation
G A S I N S T A L L A T I O N Attach the cylinder connection device of regulator ENSURING BURNER CONTROLS ARE OFF and hose assembly to cylinder valve outlet. IMPORTANT: Before connecting and disconnecting Open the gas cylinder valve fully to allow gas to barbecue to gas source, make sure all burner controls flow. - Page 14 Adjust the gap using needle nose pliers. DO NOT MAIN BURNER ELECTRODE CHECK adjust the gap by hand or touch the white ceramic electrode insulator. Using one set of needle nose pliers, Before placing the cooking components into your securely hold the electrode as shown above. With barbecue body, ensure that the spark electrode tip is another set of pliers, gently bend the tip end of properly positioned within each gas collector box (a wide...
- Page 15 INSTALLING COOKING COMPONENTS INSTALLING PULL-OUT GREASE TRAY Check and ensure that each burner is properly located Place heat shield into pull-out grease draining tray. The over each orifice prior to installing the flametamer. heat shield must be present and centred for your safety. Slide the pull-out grease draining tray into the tracks on The flametamer is designed to reduce flaring.
-
Page 16: Operation
NOW YOUR BARBECUE IS READY TO USE MANUAL IGNITION Before first use and at the beginning of each barbecue If for some reason, igniters fail to produce a spark at the season: electrode, barbecue can be lit carefully with a match. Please read Safety, Lighting and Operating To light barbecue with a match, refer previous Instructions carefully. - Page 17 SIDE BURNER IGNITION OPERATING PROCEDURE Open side burner lid before attempting to light BURN-OFF side burner. Before cooking on your barbecue for the first time, Set control knobs to ‘OFF’ and open the gas cylinder burn-off any residual oils or foreign matter from the valve.
-
Page 18: Rotisserie Cooking
BARBECUING WITH THE HOOD DOWN GUIDE TO ROTISSERIE COOKING WITH THE ROTISSERIE BURNER NEVER USE ANY BURNER, OR ROTISSERIE COOKING COMBINATION OF BURNERS ON ‘HI’ WHEN COOKING WITH THE HOOD Rotisserie cooking produces foods that are moist, DOWN. flavourful and attractive. The rotisserie system is most commonly used for cooking meat or poultry and is Cooking with the hood in the closed position helps to designed to cook food from the rotisserie burner using... -
Page 19: Fault Finding
into mounting bracket at bottom of barbecue body. ROTISSERIE Replace cotter pins. Replace cooking components, fat/grease draining tray. Rotisserie is available as an optional extra from your place of purchase. d) Misalignment of igniter on burner CORRECTION: Check for proper position of electrode tip. -
Page 20: Maintenance
CARE AND MAINTENANCE CLEANING THE BURNER TUBES AND BURNER PORTS (TO PREVENT FLASH-BACK) As with all appliances, proper care and maintenance will keep them in top operating condition and prolong their To reduce the chance of flash-back, the procedure below life. - Page 21 ANNUAL CLEANING OF BARBECUE BODY CARE FOR STAINLESS STEEL SURFACE Burning-off the barbecue after cooking will keep it The stainless steel over time will be affected by ‘tea staining’ (the brown discolouration of some stainless steel). ready for instant use, however, once a year you should give the entire barbecue a thorough cleaning to keep it Tea staining can be reduced by washing the surface in top operating condition.
- Page 22 The following diagrams are examples of outdoor areas. The same principles apply to shaded areas.
- Page 23 0800 RINNAI (0800 746624). All personal information collected through this request is primarily for purposes of enquiry warranty information. From time to time Rinnai may be running special product promotional or product servicing offers. If you would like to receive any informational on these offers please tick...
- Page 24 (Cost of a local call. Higher from mobile or public phones). Our service network personnel are fully trained and Internet: www.rinnai.com.au equipped to give the best service on your Rinnai appliance. e-mail: enquiry@rinnai.com.au If your barbecue needs service please ring one of the Head Office contact numbers on this page.