Table of Contents
Advertisement
> Before Start
> Part Names
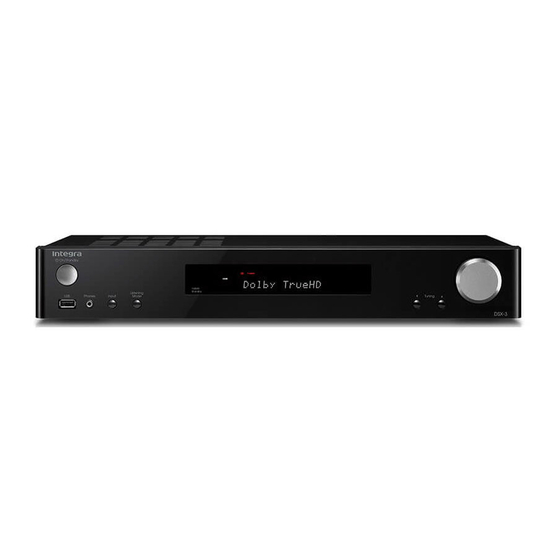
AV Receiver
DSX-3
Instruction
Manual
> Install
> Initial Setup
> Playback
Advanced Setup | Firmware Update | Others
Before Start
What's in the box .................................................................... 2
Part Names
Front Panel ............................................................................. 3
Rear Panel .............................................................................. 4
Remote Controller .................................................................. 5
Display .................................................................................... 6
Install
1. Connect the Speakers ........................................................ 7
2. Connect the TV ................................................................. 10
3. Connect the HDMI AV Components ..................................11
4. Connect the Audio Components ....................................... 12
5. Connect Other Cables ...................................................... 13
Initial Setup with Auto Start-up Wizard ................................. 14
Playback
AV Component Playback ...................................................... 17
Internet Radio ....................................................................... 18
Spotify ................................................................................... 20
Music Server ......................................................................... 21
USB Storage Device ............................................................. 23
®
................................................................................ 25
®
Playback ...................................................... 26
Listening to the FM Radio ..................................................... 27
Listening Modes ................................................................... 28
Quick Menu .......................................................................... 46
Other Functions .................................................................... 48
Setup Menu ........................................................................... 49
Control Function Settings ...................................................... 62
Firmware Update .................................................................. 63
Troubleshooting .................................................................... 66
General Specifications .......................................................... 71
About HDMI .......................................................................... 73
License and Trademark Information ..................................... 74
Advertisement
Table of Contents

Related Manuals for Integra DSX-3


Summary of Contents for Integra DSX-3
-
Page 1: Table Of Contents
> Playback Advanced Setup | Firmware Update | Others Before Start What's in the box ..............2 AV Receiver Part Names DSX-3 Front Panel ................3 Rear Panel ................4 Remote Controller ..............5 Display ..................6 Install 1. Connect the Speakers ............7 Instruction 2. -
Page 2: What's In The Box
> Before Start > Part Names > Install > Initial Setup > Playback Advanced Setup | Firmware Update | Others What's in the box Before Start Main unit (1) Power cord (1) 0 Connect speakers with 4 Ω to 8 Ω impedance. 0 The power cord must be connected only after all other cable connections are completed. -
Page 3: Front Panel
> Before Start > Part Names > Install > Initial Setup > Playback Advanced Setup | Firmware Update | Others Front Panel Part Names 1. Í On/Standby button: Turns the unit on or into standby mode. 2. -
Page 4: Rear Panel
> Before Start > Part Names > Install > Initial Setup > Playback Advanced Setup | Firmware Update | Others Rear Panel 90° 180° 1. TUNER FM 75Ω jack: Connect the supplied antenna. 2. -
Page 5: Remote Controller
> Before Start > Part Names > Install > Initial Setup > Playback Advanced Setup | Firmware Update | Others Remote Controller 1. Í button: Turns the unit on or into standby mode. 2. Input selector buttons: Switches the input to be played. ... -
Page 6: Display
> Before Start > Part Names > Install > Initial Setup > Playback Advanced Setup | Firmware Update | Others Display Neo:6 1. Lights in the following conditions. 7. Flashes when muting is on. HDMI: HDMI signals are input and selected. -
Page 7: Connect The Speakers
> Before Start > Part Names > Install > Initial Setup > Playback Advanced Setup | Firmware Update | Others 1. Connect the Speakers Install Install the speakers Front speakers output front stereo sound and a center speaker outputs center sound such as dialogs and vocals. Surround speakers create back sound field. - Page 8 > Before Start > Part Names > Install > Initial Setup > Playback Advanced Setup | Firmware Update | Others 1/2˝ (12 mm) Powered FRONT FRONT CENTER SURROUND SURROUND Subwoofer Connect the speakers connected. To connect a powered subwoofer, use a subwoofer cable and connect to the SUBWOOFER PRE Refer to the illustration to connect the speaker system.
- Page 9 > Before Start > Part Names > Install > Initial Setup > Playback Advanced Setup | Firmware Update | Others Make sure the exposed wires of the speakers do not stick out of the speaker terminals when connecting. If the exposed wires of the speakers touch the rear panel or the + and –...
-
Page 10: Connect The Tv
> Before Start > Part Names > Install > Initial Setup > Playback Advanced Setup | Firmware Update | Others 2. Connect the TV To ARC TV For a TV that supports the ARC (Audio Return Channel) P73) feature, use an HDMI cable and connect according to illustration "a". -
Page 11: Connect The Hdmi Av Components
> Before Start > Part Names > Install > Initial Setup > Playback Advanced Setup | Firmware Update | Others 3. Connect the HDMI AV Components BD/DVD GAME Streaming media Cable/Satellite player set-top box This is an example of connection with an AV component HDM I OUT e.g. -
Page 12: Connect The Audio Components
> Before Start > Part Names > Install > Initial Setup > Playback Advanced Setup | Firmware Update | Others 4. Connect the Audio Components Connecting a CD player Use a digital coaxial cable to connect a CD player to the DIGITAL IN COAXIAL jack. -
Page 13: Connect Other Cables
> Before Start > Part Names > Install > Initial Setup > Playback Advanced Setup | Firmware Update | Others 5. Connect Other Cables Antenna Hookup Connect the supplied FM indoor antenna to the TUNER FM 75Ω terminal. Move the FM indoor antenna around while playing the radio to find the position with the best reception. -
Page 14: Initial Setup
> Before Start > Part Names > Install > Initial Setup > Playback Advanced Setup | Firmware Update | Others Initial Setup with Auto Start-up Wizard Initial Setup Initial Setup starts automatically 1. Switch the input on the TV to that assigned to the unit. 2. - Page 15 > Before Start > Part Names > Install > Initial Setup > Playback Advanced Setup | Firmware Update | Others 1. AccuEQ Room Calibration 0 To cancel AccuEQ Room Calibration partway through, disconnect the speaker setup microphone. AccuEQ Room Calibration Place the supplied speaker setup microphone in the 2.
- Page 16 > Before Start > Part Names > Install > Initial Setup > Playback Advanced Setup | Firmware Update | Others 3. Network Connection 4. Audio Return Channel Set up Wi-Fi connection with an access point such as a If you have connected a TV that supports ARC, select wireless LAN router.
-
Page 17: Av Component Playback
> Before Start > Part Names > Install > Initial Setup > Playback Advanced Setup | Firmware Update | Others AV Component Playback Playback Basic operations Play an AV component or TV connected to this unit with an HDMI cable or other cable. 1. -
Page 18: Internet Radio
Please write down this code. Go to an Internet connected computer and point your browser to www.pandora.com/ integra. Enter your activation code and then follow the instructions to create your Pandora account and your personalized Pandora stations. You can create your stations by entering your favorite tracks and artists when prompted. - Page 19 > Before Start > Part Names > Install > Initial Setup > Playback Advanced Setup | Firmware Update | Others like it. (I don't like this track) : Give a track "thumbs-down" and Pandora will ban that track from the current station. Automatically find stations matching your preferences based on genre, specific artists, and songs, and delete those stations you don't need.
-
Page 20: Spotify
(c) This button lets you start repeat or random playback. Pressing this button repeatedly cycles through the repeat modes. (d) Pressed during play this button pauses playback. Pressed while paused, and it restarts play. (e) This button plays the next track. Integra DSX-3 XXXX... -
Page 21: Music Server
> Before Start > Part Names > Install > Initial Setup > Playback Advanced Setup | Firmware Update | Others Music Server there may be differences in the names of items you can It is possible to stream music files stored on PCs or NAS devices connected to the same network as this unit. - Page 22 > Before Start > Part Names > Install > Initial Setup > Playback Advanced Setup | Firmware Update | Others 6. Adjust the volume using the volume bar on the "Play to" 0 Quantization bit: 8 bit, 16 bit, 24 bit The following remote controller operations are also possible.
-
Page 23: Usb Storage Device
> Before Start > Part Names > Install > Initial Setup > Playback Advanced Setup | Firmware Update | Others USB Storage Device Basic play Play music files on a USB storage device. 1. Switch the input on the TV to that assigned to the unit. 2. - Page 24 > Before Start > Part Names > Install > Initial Setup > Playback Advanced Setup | Firmware Update | Others USB Storage Device Requirements 0 Supported bitrates: Between 8 kbps and 320 kbps and DSD (.dsf/.dff/.DSF/.DFF): VBR. 0 Supported formats: DSF/DSDIFF 0 Note that operation is not guaranteed with all USB 0 Supported sampling rates: 2.8 MHz, 5.6 MHz storage devices.
-
Page 25: Airplay
Setup menu displayed set "5. Hardware" – "Power iPhone Management" – "Network Standby" to "Off". Integra DSX-3 XXX 0 Due to the characteristics of AirPlay wireless technology, the sound produced on this unit may slightly be behind the sound played on the AirPlay-enabled device. -
Page 26: Bluetooth Playback
2. Enable (turn on) the BLUETOOTH function of the BLUETOOTH enabled device, then select this unit from amongst the devices displayed. If a password is Integra DSX-3 XXX requested, enter "0000". 0 To connect another BLUETOOTH enabled device, press and hold the button until "Now Pairing..."... -
Page 27: Listening To The Fm Radio
> Before Start > Part Names > Install > Initial Setup > Playback Advanced Setup | Firmware Update | Others Listening to the FM Radio Tuning Automatically the frequency step for your area. Note that when this setting is changed, all radio presets are deleted. 1. -
Page 28: Listening Modes
> Before Start > Part Names > Install > Initial Setup > Playback Advanced Setup | Firmware Update | Others Listening Modes Selecting Listening Modes Input source & volume Select the optimum listening mode for movies, TV, music, and games by repeatedly pressing the Movie/TV, Music, and Game buttons. - Page 29 > Before Start > Part Names > Install > Initial Setup > Playback Advanced Setup | Firmware Update | Others Listening Mode Effects This mode faithfully reproduces the sound design recorded channels such as the surround back channel added for a in the Dolby Atmos audio format.
- Page 30 > Before Start > Part Names > Install > Initial Setup > Playback Advanced Setup | Firmware Update | Others cable and set audio output on the player to bitstream These listening modes allow you to expand the playback output. output.
- Page 31 > Before Start > Part Names > Install > Initial Setup > Playback Advanced Setup | Firmware Update | Others listener's left and right ears. Selectable listening modes atmosphere to Orchestra mode. TV Logic Game-Sports You can select a variety of listening modes to suit the audio Suitable for TV shows produced in a TV studio.
- Page 32 > Before Start > Part Names > Install > Initial Setup > Playback Advanced Setup | Firmware Update | Others Movie/TV button Input Format Listening Mode Input Format Listening Mode This is a list of listening modes you can select according to Direct Multich PCM Direct...
- Page 33 > Before Start > Part Names > Install > Initial Setup > Playback Advanced Setup | Firmware Update | Others Input Format Listening Mode Input Format Listening Mode Input Format Listening Mode Direct Dolby D Direct Dolby D+ Direct Dolby D Dolby D+ *...
- Page 34 > Before Start > Part Names > Install > Initial Setup > Playback Advanced Setup | Firmware Update | Others Input Format Listening Mode Input Format Listening Mode Input Format Listening Mode Dolby TrueHD Direct Direct DTS 96/24 Direct Dolby TrueHD DTS 96/24 *...
- Page 35 > Before Start > Part Names > Install > Initial Setup > Playback Advanced Setup | Firmware Update | Others Input Format Listening Mode Input Format Listening Mode Input Format Listening Mode DTS Express Direct DTS-HD HR Direct DTS-HD MSTR Direct DTS Express DTS-HD HR...
- Page 36 > Before Start > Part Names > Install > Initial Setup > Playback Advanced Setup | Firmware Update | Others Music button Input Format Listening Mode Input Format Listening Mode This is a list of listening modes you can select according to Direct Multich PCM Direct...
- Page 37 > Before Start > Part Names > Install > Initial Setup > Playback Advanced Setup | Firmware Update | Others Input Format Listening Mode Input Format Listening Mode Input Format Listening Mode Dolby D Direct Direct Dolby Atmos Direct Stereo Stereo Stereo Dolby D...
- Page 38 > Before Start > Part Names > Install > Initial Setup > Playback Advanced Setup | Firmware Update | Others Input Format Listening Mode Input Format Listening Mode Input Format Listening Mode Dolby D+ Direct Dolby TrueHD Direct Direct Stereo Stereo Stereo Dolby D+...
- Page 39 > Before Start > Part Names > Install > Initial Setup > Playback Advanced Setup | Firmware Update | Others Input Format Listening Mode Input Format Listening Mode Input Format Listening Mode DTS 96/24 Direct DTS Express Direct DTS-HD HR Direct Stereo Stereo...
- Page 40 > Before Start > Part Names > Install > Initial Setup > Playback Advanced Setup | Firmware Update | Others Game button Input Format Listening Mode Input Format Listening Mode This is a list of listening modes you can select according to DTS-HD MSTR Direct DTS:X...
- Page 41 > Before Start > Part Names > Install > Initial Setup > Playback Advanced Setup | Firmware Update | Others Input Format Listening Mode Input Format Listening Mode Input Format Listening Mode Direct Multich PCM Direct Direct Music files (except DSD/ Dolby Surround Multich *...
- Page 42 > Before Start > Part Names > Install > Initial Setup > Playback Advanced Setup | Firmware Update | Others Input Format Listening Mode Input Format Listening Mode Input Format Listening Mode Dolby Atmos Direct Dolby D Direct Dolby D+ Direct Dolby Atmos Dolby D...
- Page 43 > Before Start > Part Names > Install > Initial Setup > Playback Advanced Setup | Firmware Update | Others Input Format Listening Mode Input Format Listening Mode Input Format Listening Mode Dolby TrueHD Direct Direct DTS 96/24 Direct Dolby TrueHD DTS 96/24 *...
- Page 44 > Before Start > Part Names > Install > Initial Setup > Playback Advanced Setup | Firmware Update | Others Input Format Listening Mode Input Format Listening Mode Input Format Listening Mode DTS Express Direct DTS-HD HR Direct DTS-HD MSTR Direct DTS Express DTS-HD HR...
- Page 45 > Before Start > Part Names > Install > Initial Setup > Playback Advanced Setup | Firmware Update | Others Input Format Listening Mode DTS:X Direct DTS:X Game-RPG * 1 Game-Action * 1 Game-Rock * 1 Game-Sports * 1 AllCh Stereo *...
-
Page 46: Quick Menu
> Before Start > Part Names > Install > Initial Setup > Playback Advanced Setup | Firmware Update | Others Quick Menu ■ AccuEQ By pressing the Q button on the remote controller during play, you can adjust frequently used settings, such as the AccuEQ Room Calibration: Enable or disable the sound quality, using on-screen menus. - Page 47 > Before Start > Part Names > Install > Initial Setup > Playback Advanced Setup | Firmware Update | Others version of firmware. when you need to reduce the volume while watching a movie late night. You can enjoy the effect only when playing On firmware version before Dolby Atmos support Dolby series and DTS series input signals.
-
Page 48: Other Functions
> Before Start > Part Names > Install > Initial Setup > Playback Advanced Setup | Firmware Update | Others Other Functions Playing audio and video from separate sources It is possible to play audio and video from different sources. For example, you can play audio from the CD player and video from the BD/DVD player. -
Page 49: Advanced Setup
> Before Start > Part Names > Install > Initial Setup > Playback Advanced Setup | Firmware Update | Others Setup Menu Advanced Setup The unit allows you to configure advanced settings to provide you with an even better experience. 1. - Page 50 > Before Start > Part Names > Install > Initial Setup > Playback Advanced Setup | Firmware Update | Others "HDMI 1 (HDCP 2.2)" to "HDMI 4 (HDCP 2.2)": Assign a desired Impose OSD Set whether or not to display the information on the TV when the HDMI IN jack to the CD input selector.
- Page 51 > Before Start > Part Names > Install > Initial Setup > Playback Advanced Setup | Firmware Update | Others 2. Speaker 0 Supported sampling rates for PCM signals (stereo, mono) from a digital input are 32kHz, 44.1kHz, 48kHz, 88.2kHz, 96kHz/16bit, 20bit, and 24bit. You can make changes to the connection environment of the speakers and change the ■...
- Page 52 > Before Start > Part Names > Install > Initial Setup > Playback Advanced Setup | Firmware Update | Others Surround Select the crossover frequency from "40Hz" to "200Hz" to start Surround Left Specify the distance between each speaker and the listening outputting frequencies for each channel.
-
Page 53: Audio Adjust
> Before Start > Part Names > Install > Initial Setup > Playback Advanced Setup | Firmware Update | Others ■ 5. Equalizer Settings 3. Audio Adjust You can adjust the output volume of the range of each connected speaker. You can adjust ■... - Page 54 > Before Start > Part Names > Install > Initial Setup > Playback Advanced Setup | Firmware Update | Others ■ 3. DTS 4. Source 0 We plan to provide support for the DTS:X audio format through firmware updates for this ■...
- Page 55 > Before Start > Part Names > Install > Initial Setup > Playback Advanced Setup | Firmware Update | Others ■ Audio Select PCM Fixed Mode Select whether to fix input signals to PCM (except multi-channel Select the priority for input selection when multiple audio sources are connected to one input PCM) when you have selected "HDMI", "COAXIAL", or selector, such as connections to both the "BD/DVD"...
- Page 56 > Before Start > Part Names > Install > Initial Setup > Playback Advanced Setup | Firmware Update | Others 5. Hardware HDMI Standby When this is set to anything other than "Off", you can play the Through video and audio of an HDMI connected player on the TV even if ■...
- Page 57 > Before Start > Part Names > Install > Initial Setup > Playback Advanced Setup | Firmware Update | Others ■ 2. Network Audio TV Out You can enjoy audio through the speakers of the TV while this 0 When LAN is configured with a DHCP, set "DHCP" to "Enable" to configure the setting unit is on.
- Page 58 This is set to Integra DSX-3 ****** at the time of over the network. Select "Yes" if you agree to our collecting this purchase.
- Page 59 > Before Start > Part Names > Install > Initial Setup > Playback Advanced Setup | Firmware Update | Others ■ 3. Bluetooth Status Displays the status of the BLUETOOTH enabled device connected to the unit. Bluetooth Select whether or not to use the BLUETOOTH function. "Ready": Not paired "On (Default Value)": Enables connection with a BLUETOOTH "Pairing": Paired...
- Page 60 > Before Start > Part Names > Install > Initial Setup > Playback Advanced Setup | Firmware Update | Others 6. Miscellaneous USB Power Out at Devices connected to the USB port are supplied with electricity Standby even when this unit is in standby mode when this function is ■...
- Page 61 > Before Start > Part Names > Install > Initial Setup > Playback Advanced Setup | Firmware Update | Others ■ 5. Load Default Load Default Reset the unit to return the settings to the status at the time of shipment.
-
Page 62: Control Function Settings
> Before Start > Part Names > Install > Initial Setup > Playback Advanced Setup | Firmware Update | Others Control Function Settings You can enable the control functions between the unit and external devices. Special devices or cable connections are necessary to enable the functions. -
Page 63: Firmware Update
> Before Start > Part Names > Install > Initial Setup > Playback Advanced Setup | Firmware Update | Others Firmware Update Firmware Update Update function of this unit How to update firmware Updating the Firmware via Network This unit has functionality to update the firmware (the There are two methods for updating the firmware: via 0 Check that the unit is turned on, and the connection to system software) over a network or by the USB port. - Page 64 > Before Start > Part Names > Install > Initial Setup > Playback Advanced Setup | Firmware Update | Others supported. 4. Press Enter with "Update" selected to start update. 0 During the update, the TV screen may go black –...
- Page 65 > Before Start > Part Names > Install > Initial Setup > Playback Advanced Setup | Firmware Update | Others 0 Do not use Í on the remote controller. If an error message is displayed: When an error occurs, "*-** Error!" is displayed on the display of this unit. ("*" represents an alphanumeric character.) Check the following: 0 *...
-
Page 66: Troubleshooting
> Before Start > Part Names > Install > Initial Setup > Playback Advanced Setup | Firmware Update | Others Troubleshooting Others Before starting the procedure to the status at the time of shipment may solve the problem. ■ Audio Your settings will also be initialized when you reset, so note Problems may be solved by simply turning the power on/off 0 Make sure that the speaker setup microphone is not still... - Page 67 > Before Start > Part Names > Install > Initial Setup > Playback Advanced Setup | Firmware Update | Others ■ Listening Modes DTS signal. In such cases, you may hear noise. A speaker produces no sound 0 Make sure that the polarity of the speaker cables ( + / − ) 0 Playing DTS program material, using the pause, fast 0 To enjoy digital surround playback, such as Dolby Digital, is correct, and that no bare wires are in contact with the...
- Page 68 > Before Start > Part Names > Install > Initial Setup > Playback Advanced Setup | Firmware Update | Others ■ BLUETOOTH function Images flicker between the BLUETOOTH enabled device and this unit. 0 It is possible that the resolution of the player is not 0 Try plugging/unplugging the power of the unit and try compatible with the TV's resolution.
- Page 69 > Before Start > Part Names > Install > Initial Setup > Playback Advanced Setup | Firmware Update | Others connection may not be possible as the metal can effect Cannot access the network server LAN router and the unit, check the wireless LAN router 0 This unit needs to be connected to the same router as power-on status, and try reboot of the wireless LAN on the radio wave.
- Page 70 > Before Start > Part Names > Install > Initial Setup > Playback Advanced Setup | Firmware Update | Others ■ Others Strange noises can be heard from this unit 0 If you have connected another unit to the same wall outlet as this unit, this noise may be an effect from the other unit.
-
Page 71: General Specifications
> Before Start > Part Names > Install > Initial Setup > Playback Advanced Setup | Firmware Update | Others General Specifications Amplifier (Audio) section Network Section 16 W (No-sound) 2 W (HDMI Standby Through) Rated Output Power (FTC) Ethernet LAN 2 W (Network Standby) With 4 ohm loads, both channels driven, from 1 kHz;... - Page 72 > Before Start > Part Names > Install > Initial Setup > Playback Advanced Setup | Firmware Update | Others Audio Outputs Analog SUBWOOFER PRE OUT Speaker Outputs FRONT L/R, CENTER, SURROUND L/R, SUBWOOFER Phones Phones (Front, φ3.5 mm) Others USB: 1 (Front, Ver.2.0, 5 V/1 A) Ethernet: 1 Setup Mic: 1...
-
Page 73: About Hdmi
> Before Start > Part Names > Install > Initial Setup > Playback Advanced Setup | Firmware Update | Others About HDMI Compatible functions 4K: This unit supports 4K (3840 2160p) and 4K SMPTE (4096 2160p) video signals. HDMI (High Definition Multimedia Interface) is a digital interface standard for connecting TVs, projectors, Blu-ray LipSync: This setting automatically corrects any Disc/DVD players, set-top boxes, and other video... -
Page 74: License And Trademark Information
> Before Start > Part Names > Install > Initial Setup > Playback Advanced Setup | Firmware Update | Others License and Trademark Information AirPlay works with iPhone, iPad, and iPod touch with iOS 4.3.3 or later, Mac with OS X Mountain Lion or later, and PC with iTunes 10.2.2 or later. Manufactured under license from Dolby Laboratories. - Page 75 18 Park Way, Upper Saddle River, N.J. 07458, U.S.A. Tel: 800-225-1946, 201-818-9200 Fax: 201-785-2650 http://www.integrahometheater.com <Germany> Gutenbergstrasse 3, 82178 Puchheim, Germany Tel: +49-8142-4401-0 Fax: +49-8142-4208-213 http://www.integra.eu <PRC> 302, Building 1, 20 North Chaling Rd., Xuhui District, Shanghai, China 200032, Tel: +86-21-52131366 Fax: +86-21-52130396 http://www.integra.com.cn F1609-0 (C) Copyright 2016 Onkyo &...