
Related Manuals for Integra DTR-60.6


Summary of Contents for Integra DTR-60.6
- Page 1 DTR-60.6 Basic Manual Advanced Manual found here http://integraworldwide.com/manual/dtr606/adv/en.html...
- Page 2 Before Start About the Basic Manual Features Supplied Accessories The Basic Manual leads you through the fundamental steps Equipped with 9 channel amplifier Indoor FM antenna --- (1) to enjoy the AV Receiver from connections to TV, speaker Supports playback in Dolby Atmos format which provides system and playback components, to necessary functions 360-degree placement and movement of sounds for playback.
- Page 3 Step 1: Connections Personal computer HDMI HDMI To use the ARC function, connect to the ARC HDMI cable compatible HDMI jack of the TV and make an appropriate setting on the unit. See "2nd Step : Source Connection" of "Step 2: Setting Up". HDMI HDMI HDMI...
- Page 4 Step 1: Connections Use a composite video cable to connect a TV with The unit supports the HDMI Through function that allows Audio signal connection transmission from players to the TV even if the unit is in composite video input jack or a player with composite Digital connection: Use a digital optical cable standby.
- Page 5 Step 1: Connections Although Height 1 speakers can Using Dolby Enabled Speakers Connecting speakers enhance surround effects, we recommend you to add Height 2 speakers in order to ensure full effects. Speaker layout Install Height speakers such as Front High and Rear High speakers on the upper part of the front or rear wall.
- Page 6 Step 1: Connections Ceiling speakers, etc. are used for maximizing effects in & Dolby Atmos or Dolby Surround listening mode. Install Surround R Surround back R Surround back L Surround L Top Front speakers midway between the position just above the listening position and the position just above the front speakers.
- Page 7 Step 1: Connections Connecting the Subwoofer When using commercially available banana plugs: tighten Network Connection the speaker terminals to the end and then insert the banana Up to four subwoofers with built-in power amplifier can plugs. Do not insert the cable core directly into the hole for You can enjoy Internet radio and DLNA by connecting the be connected to the subwoofer jacks.
- Page 8 Step 2: Setting Up Important: When the unit is turned on for the first time, the You cannot return to the previous screen during speaker Making the Initial Setup with the Setup Wizard setup wizard of the section 2 will automatically be launched. setup, even if you press Return.
- Page 9 Height 2 Speakers Type Not Use displayed, disconnect the microphone. Source Connection The following CEC-compatible devices are found; REAR PANEL Do you wish to turn on the CEC link? Integra DHS-8.8 2nd Step : Source Connection SURROUND WIDE BACK FRONT R FRONT L...
- Page 10 Remote Mode button and in the keyboard screen, enter the first three characters of the brand name of the device you are going to program (e.g., "INT" for Integra) and search for the remote control code. The guidance will also explain how to set the remote controller.
- Page 11 Step 3: Playing Back Remote Controller Parts Name Playing the player and TV zReceiver button: Turns the unit on or into standby mode. Remote Mode/Input Selector button: Switches the input to be played. Cursor buttons and Enter button: Moves the cursor and confirms the selection.
- Page 12 Step 3: Playing Back Listening Modes Adjusting Sound Quality: It is possible to enhance Listening to AM/FM Radio or moderate the low and high pitched ranges of front speakers. Press Tone on the main unit several times to You can select a listening mode from various options such select the desired setting from "Bass", "Treble", and "Phase as Dolby Digital, Dolby Atmos and DTS.
- Page 13 Step 3: Playing Back Network Service: Select to use Internet radio services Using the Home menu Using Quick Setup menu and the DLNA function. When you connect the unit to the network and press Enter, the network service screen will be displayed on the TV.
- Page 14 Step 3: Playing Back The speakers cannot be adjusted if they have been Speaker Layout: You can give priority to surround back Video: set to "No" or "None" in "Speaker Configuration". speakers, height 1/2 speakers or wide speakers when Monitor Out: The video input signals input to the unit "Subwoofer 2 Level"...
- Page 15 Step 3: Playing Back connected to the analog audio input jacks ( ) of the unit, Change the setting: Press Receiver and then Home on Using the multi-zone function the "NET" or "USB" source, and the AM/FM broadcasting. the remote controller, select "Setup" - "1.Input/Output When you connect a CD player or such other player without HDMI Assign"...
- Page 16 Step 3: Playing Back Listening to Music in a Separate Room To control on the main unit: Press Zone2 or Zone3 and within 8 seconds, press the input selector button of the input to be played in a separate room. To play the same source in the c.
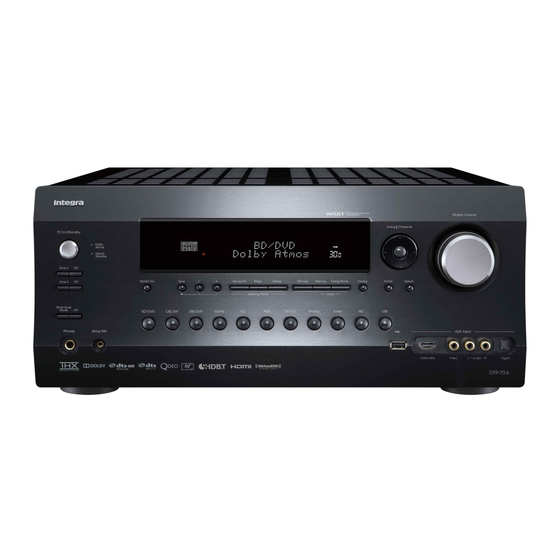
- Page 17 (Australian models) Front Panel zOn/Standby button: Turns the unit on or into standby Listening Mode buttons: Allows you to select the Return button: Returns the display to the previous state. mode. listening mode. Master Volume: Allows you to adjust the volume. Hybrid Standby indicator: Lights if the unit enters Dimmer button (North American model): Switches the Zone 2 button, Zone 3 button and Off button:...
- Page 18 USB port: A USB storage device is connected so that music files stored in it can be played. AUX Input HDMI/MHL jacks: An HD video camera or MHL-enabled mobile device is connected. It is possible to send video and audio of an MHL-enabled mobile device.
- Page 19 Rear Panel PRE OUT jacks: A power amplifier or subwoofer with DIGITAL IN COAXIAL/OPTICAL jacks: Digital audio ZONE 2 OUT V jack: Video signals of the player are signals are input. output to the connected TV in the separate room. built-in amplifier is connected.
-
Page 20: Troubleshooting
Troubleshooting HDMI control does not function correctly. Resetting the unit Before starting the procedure Set the CEC link function of the unit to on. It is also Problems may be solved by simply turning the power Resetting the unit to the status at the time of shipment may necessary to make the HDMI linked system setting on on/off or disconnecting/connecting the power cord, solve the problem. -
Page 21: Specifications
Specifications Amplifier Section Network Section Audio Inputs Digital Rated Output Power Ethernet LAN OPTICAL 1 (GAME), 2 (TV/CD), AUX INPUT DIGITAL (front) All channels: 135 watts minimum continuous power per channel, 8 10BASE-T/100BASE-TX COAXIAL 1 (BD/DVD), 2 (CBL/SAT), 3 (STB/DVR) ohm loads, 2 channels driven from 20 Hz to 20 kHz, with a maximum Analog total harmonic distortion of 0.08% (FTC) -
Page 22: License And Trademark Information
License and Trademark Information Manufactured under license from Dolby Laboratories. Dolby, Dolby Atmos, HDBaseT™ and the HDBaseT Alliance logo are trademarks of the HDBaseT Dolby Surround, Surround EX and the double-D symbol are trademarks of Alliance. Dolby Laboratories. “MHL, the MHL Logo, and Mobile High-Definition Link are trademarks or registered trademarks of MHL LLC in the United States and other counties.”... - Page 23 DISCLAIMER Through this device you are able to link to other services or websites which are not under the control of any company which has designed, manufactured or distributed/have distributed this device, and its affiliates (collectively, “Company”). We have no control over the nature, content and availability of those services.
- Page 24 Integra Division of Integra Division of Integra Division of 1301, 555 Tower, No.555 West NanJin Road, Jin an, Kitahama Chuo Bldg, 2-2-22 Kitahama, Chuo-ku, 18 park Way, Upper Saddle River, N.J. 07458, U.S.A. Tel: 800-225-1946, 201-818-9200 Fax: 201-785-2650 Shanghai, OSAKA 541-0041, JAPAN http://www.integrahometheater.com...