Table of Contents
Advertisement
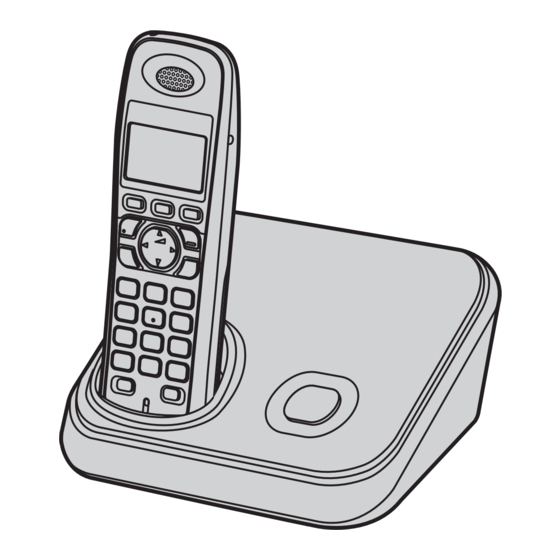
Model shown is KX-TG4381NZ.
This unit is compatible with Caller ID. You must subscribe to the appropriate
service offered by your service provider/telephone company.
Charge the batteries for about 7 hours before initial use.
Please read these operating instructions before using the unit and save
them for future reference.
Operating Instructions
5.8 GHz Digital Cordless Phone
Model No.
Model No.
5.8 GHz Digital Cordless
Model No.
Model No.
KX-TG4381NZ
with 2 Handsets
KX-TG4382NZ
Answering System
KX-TG4391NZ
with 2 Handsets
KX-TG4392NZ
Advertisement
Table of Contents

Related Manuals for Panasonic KX-TG4381NZ


Summary of Contents for Panasonic KX-TG4381NZ
-
Page 1: Operating Instructions
Model shown is KX-TG4381NZ. This unit is compatible with Caller ID. You must subscribe to the appropriate service offered by your service provider/telephone company. Charge the batteries for about 7 hours before initial use. Please read these operating instructions before using the unit and save them for future reference. -
Page 2: Table Of Contents
Table of Contents Introduction Product information ....3 Accessory information ... . . 5 For your safety ....6 Important safety instructions . -
Page 3: Introduction
Product information Thank you for purchasing a Panasonic digital cordless phone. L The suffix (NZ) in the following model numbers will be omitted in these instructions: KX-TG4381NZ/KX-TG4382NZ/KX-TG4391NZ/KX-TG4392NZ L References in these operating instructions to the charger and multiple handsets are for KX-TG4382/KX-TG4392 only. - Page 4 Introduction Feature differences Model No. Answering system KX-TG4381 KX-TG4382 KX-TG4391 KX-TG4392 *1 Intercom calls can be made between the handset and base unit. *2 Intercom calls can be made between the handsets. Intercom | ⇔ N – – – – N ⇔...
-
Page 5: Accessory Information
*2 The handset cover comes attached to the handset. Replacement battery information L Please contact your nearest Panasonic dealer for sales information. L Replace batteries only with a nickel metal hydride (Ni-MH) type of battery. This model requires 2 AAA (R03) batteries for every handset. For best performance, we recommend using Panasonic rechargeable batteries (Order No. -
Page 6: For Your Safety
Introduction For your safety To prevent severe injury and loss of life/property, read this section carefully before using the product to ensure proper and safe operation of your product. WARNING Power connection L Use only the power source marked on the product. - Page 7 L Never touch uninsulated telephone wires or terminals unless the telephone line has been disconnected at the network interface. L Use caution when installing or modifying telephone lines. L The AC adaptor is used as the main disconnect device. Ensure that the AC outlet is installed near the product and is easily accessible.
-
Page 8: Important Safety Instructions
SAVE THESE INSTRUCTIONS For best performance Base unit location/avoiding noise The base unit and other compatible Panasonic units use radio waves to communicate with each other. L For maximum coverage and noise- free communications, place your base unit: – at a convenient, high, and central... - Page 9 L When you leave the product unused for a long period of time, unplug the product from the power outlet. L The product should be kept away from heat sources such as heaters, kitchen stoves, etc. It should not be placed in rooms where the temperature is less than 5 °C or greater than 40 °C.
-
Page 10: Preparation
Preparation Controls Base unit ■ KX-TG4381/KX-TG4382 A Charge contacts B {LOCATOR} ■ KX-TG4391/KX-TG4392 A B C D E A Charge contacts B Speaker C {■} (STOP) D {ERASE} E {GREETING REC} (Recording) F {GREETING CHECK} G {^} (VOL.: Volume up) {V} (VOL.: Volume down) {7} (Repeat) {8} (Skip) - Page 11 Handset KX-TG4381 KX-TG4382/ KX-TG4391/ KX-TG4392 A Speaker B {MENU} C Soft keys D Headset socket E {C} (TALK) F {s} (SP-PHONE: Speakerphone) G Dial keypad H {RECALL} {CALL WAIT} I Charge indicator Ringer indicator Message indicator J Receiver K Display L {OFF} M Navigator key ({^}/{V}/{<}/{>}) ? (Volume: {^}/{V})
-
Page 12: Display
(C). Base unit L Use only the supplied Panasonic AC adaptor PQLV207AL. L Use only the supplied telephone line cord. Using another telephone line cord may not allow the unit to work properly. -
Page 13: Battery Installation And Replacement
AAA (R03) size. – Do NOT use Alkaline/Manganese/Ni-Cd batteries. – We recommend using the Panasonic rechargeable batteries noted on page 5, 7. Press the notch on the handset cover firmly, and slide it in the direction of the arrow. -
Page 14: Battery Charge
L KX-TG4391/KX-TG4392 The batteries need to be charged if the handset beeps while you are engaged in a call or operating the answering system remotely. Panasonic Ni-MH battery performance (supplied batteries) Operation In continuous Not in use (standby) -
Page 15: Symbols Used In These Operating Instructions
L The battery level may not be displayed correctly after you replace the batteries. In this case, place the handset on the base unit or charger and let it charge for at least 7 hours. Symbols used in these operating instructions Symbol Meaning The words in the... -
Page 16: Belt Clip
Preparation Belt clip You can hang the handset on your belt or pocket using the supplied belt clip. To attach the belt clip To remove the belt clip Headset (optional) Connecting a headset to the handset allows for hands-free conversations. Note: L Only telecommunications compliance labelled headset should be plugged... -
Page 17: Making/Answering Calls
Making calls Lift the handset and dial the phone number. L To correct a digit, press {Clear}. Press {C} or {Call}. When you finish talking, press {OFF} or place the handset on the base unit or charger. Using the speakerphone Dial the phone number, and press {s}. -
Page 18: Call Waiting
Making/Answering Calls Adjusting the handset ringer volume Press {^} or {V} repeatedly to select the desired volume while the handset is ringing for an incoming call. Note: L You can also program the handset ringer volume beforehand (page 24). Temporary handset ringer off While the handset is ringing for a call, you can turn the ringer off temporarily by pressing {OFF}. -
Page 19: Handset Clarity Booster
the 2nd caller’s information is displayed after you hear the call waiting tone on the handset. Press {CALL WAIT} to answer the 2nd call. To switch between calls, press {CALL WAIT}. Note: L Please contact your service provider/telephone company for details and availability of this service in your area. -
Page 20: Phonebook
Phonebook Phonebook The phonebook allows you to make calls without having to dial manually. You can add 50 names and phone numbers to the phonebook. Important: L KX-TG4382/KX-TG4392: If you add entries on one handset, the entries can be shared on another handset. Only 1 person can access the phonebook at a time. -
Page 21: Editing Entries
Searching by first character (alphabetically) {Phonebook} i {Search} Press the dial key ({0} – {9}, {*}, or {#}) which contains the character you are searching for (page 20). L Press the same dial key repeatedly to display the first entry corresponding to each character located on that dial key. -
Page 22: Programming
Programming Programmable settings You can customise the unit by programming the following features using the handset. To access the features, there are 2 methods: – scrolling through the display menus (page 22) – using the direct commands (page 24) L Mainly the direct command method is used in these operating instructions. Programming by scrolling through the display menus {MENU} Press {V} or {^} to select the desired main menu. - Page 23 Main menu Sub-menu 1 Initial setting Set answering (KX-TG4391/ KX-TG4392) Voice Mail Message alert LCD contrast Key tone Auto talk Set area code Set tel line Registration *1 If you program these settings using one of the handsets, you do not need to program the same item using another handset.
- Page 24 Programming Programming using the direct commands {MENU} i {#} Enter the desired feature code. Enter the desired setting code. i {Save} L This step may vary depending on the feature being programmed. L To exit the operation, press {OFF}. Note: L In the following table, <...
- Page 25 Feature Feature code {3}{3}{1} Store VM access# {2}{2}{6} Time adjustment (Caller ID subscribers only) {3}{3}{0} V.M. access For the answering system (KX-TG4391/KX-TG4392) Feature Feature code {3}{0}{0} Message play {3}{0}{5} Recording time {3}{0}{6} Remote code {2}{1}{1} Ring count *1 If “System setting” column is checked, you do not need to program the same item using another handset.
-
Page 26: Special Instructions For Programmable Settings
Programming Special instructions for programmable settings Night mode Night mode allows you to select a span of time during which the handset will not ring for outside calls. This feature is useful for instances when you do not want to be disturbed, for example, while sleeping. - Page 27 Note: L To stop the alarm, press any dial key or place the handset on the base unit or charger. L When the handset is in use, the alarm will not sound until the handset is in standby mode. L If you select “Once”, the setting changes to “Off”...
-
Page 28: Caller Id Service
Caller ID Service Using Caller ID service Important: L This unit is Caller ID compatible. To use Caller ID features, you must subscribe to Caller ID service. Contact your service provider/telephone company for details. For all local and national incoming calls, your display will show the area code (e.g. -
Page 29: Caller List
L The ringer may be changed after the 2nd ring. Find the desired item (page 20). i {Option} {V}/{^}: “Ringer ID” i {Select} {V}/{^}: Select the desired setting. {Save} i {OFF} Note: L When you assign the ringer ID to an entry in the phonebook using one handset, it is applied for another handset. -
Page 30: Storing Caller Information Into The Phonebook
Caller ID Service Editing a caller’s phone number before calling back You can edit a phone number in the caller list. {View CID} {V}/{^}: Select the desired entry. i {Select} i {Edit} Add or erase digits to the beginning of the number as necessary. L To add a digit, press the desired dial key. -
Page 31: Answering System
Answering system Available for: KX-TG4391/KX-TG4392 The answering system can answer and record calls for you when you are unavailable to answer the phone. You can also set the unit to play a greeting message but not to record caller messages. Select “Greeting only”... -
Page 32: Listening To Messages Using The Base Unit
Answering System Recording your greeting message You can record your own greeting message (2 minutes max.). {GREETING REC} Within 10 seconds, press {GREETING REC} again. After the base unit beeps, speak clearly about 20 cm away from the MIC. Press {■} (STOP) to stop recording. Using a pre-recorded greeting message If you erase or do not record your own... -
Page 33: Listening To Messages Using The Handset
Listening to messages using the handset When new messages have been recorded: – “New message” is displayed. – The message indicator on the handset flashes slowly if the message alert feature is turned on (page 36). {MENU} {V}/{^}: “Message play” i {Select} L If new messages have been recorded, the handset plays back... -
Page 34: Remote Operation
Answering System Remote operation Using a touch-tone phone, you can call your phone number from outside and access the unit to listen to messages or change answering system settings. The unit’s voice guidance prompts you to press certain dial keys to perform different operations. -
Page 35: Answering System Settings
*2 To resume operation, enter a remote command within 15 seconds, or the voice guidance starts. Turning on the answering system remotely If the answering system is off, you can turn it on remotely. Dial your phone number. Let the phone ring 15 times. L The greeting message is played back. -
Page 36: Message Alert
Answering System your service provider/telephone company. Note: L This service can capture messages while the user is on a dial-up Internet connection. Caller’s recording time You can change the maximum message recording time allotted to each caller. You can also select “Greeting only” which sets the unit to greet callers but not record messages. -
Page 37: Voice Mail Service
Voice mail service For Telecom Call Minder or TelstraClear Message Mailbox service subscribers To receive Call Minder or Message Mailbox messages, please note the following: “Call Minder” and “Message Mailbox” are automatic answering services offered by your service provider/ telephone company. After you subscribe to this service, your service provider/telephone company’s voice mail system will answer calls for you... - Page 38 Voice Mail Service Follow the pre-recorded instructions. When finished, press {OFF}. Note: L If {VM} is not displayed, the voice mail access number has not been stored. Store the number (page 37). L If the handset still indicates there are new messages even after you have listened to all new messages, turn it off by pressing and holding {OFF}...
-
Page 39: Intercom/Locator
Intercom Intercom calls can be made between the following units: – between handsets (KX-TG4382) – between the handset and base unit (KX-TG4391) – between handsets, or between the handset and base unit (KX-TG4392) Note: L If you receive an outside call while talking on the intercom, you hear 2 tones. -
Page 40: Handset Locator
Intercom/Locator During an outside call, press {INTERCOM} to put the call on hold. Press the right soft key. Wait for the paged party to answer. L If the paged party does not answer, press {C} to return to the outside call. To complete the transfer: Press {OFF}. -
Page 41: Useful Information
Wall mounting Base unit Lead the telephone line cord through the hole in the wall mounting adaptor in the direction of the arrow. Tuck the telephone line cord inside the wall mounting adaptor (A). Connect the AC adaptor cord and telephone line cord (B). - Page 42 Useful Information Connect the telephone line cord. Drive the screws (not included) into the wall. Mount the unit, and then slide it down. Connect the AC adaptor to power outlet (page 12). (220–240V AC, 50/60 Hz) To single-line telephone socket To remove the wall mounting adaptor While pushing down the release levers (A), remove the adaptor (B).
-
Page 43: Error Messages
Error messages If the unit detects a problem, one of the following messages is shown on the display. Display message Cause/solution L The called handset Busy L Another handset is in use and the system is busy. Try L The handset you are using is too far from the base unit. System is busy. -
Page 44: Troubleshooting
Useful Information Troubleshooting If you still have difficulties after following the instructions in this section, disconnect the base unit’s AC adaptor, then reconnect the base unit’s AC adaptor. Remove the batteries from the handset, and then insert the batteries into the handset again. General use Problem The unit does not work. - Page 45 Battery recharge Problem The handset beeps and/or 7 flashes. I fully charged the batteries, but 7 still flashes or 8 is displayed. I fully charged the batteries, but the operating time seems to be shorter. Making/answering calls, intercom Problem Noise is heard, sound cuts in and out.
- Page 46 L If your unit is connected to any additional telephone equipment such as a Caller ID box or cordless telephone line socket, plug the unit directly into the wall socket. L Your unit is connected to a telephone line with DSL/ADSL (JetStream) service.
- Page 47 Answering system (KX-TG4391/KX-TG4392) Problem The unit does not record new messages. I cannot operate the answering system. I cannot operate the answering system remotely. While recording a greeting message or listening to messages, the unit rings and recording stops. Cause/solution L The answering system is turned off.
- Page 48 Press {MENU} i {#}{1}{3}{1} i {3}{3}{5} i {OK} i {1} or {2} (The handset number which you want to cancel). Try to re-register it again. L If the above remedy does not solve the problem, contact your nearest Panasonic service centre.
-
Page 49: Dial Lock
Dial lock Important: L Anyone can turn off the dial lock using the following method. Be sure to keep these operating instructions in a safe place in order to prevent unauthorised persons from using your phone without permission. Problem I cannot remember the dial lock password. -
Page 50: Specifications
Useful Information Specifications General Operating environment Frequency Base unit Dimensions Mass (Weight) Power consumption RF Transmission power Power supply Handset Dimensions Mass (Weight) RF Transmission power Power supply Charger (KX-TG4382/KX-TG4392) Dimensions Mass (Weight) Power consumption Power supply Note: L Design and specifications are subject to change without notice. L The illustrations in these instructions may vary slightly from the actual product. -
Page 51: Index
Index Alarm: 26 Answering calls: 17 Answering system Call screening: 31 Erasing messages: 32, 33, 34 Greeting only: 36 Listening to messages: 32, 33, 34 Number of rings: 35 Recording time: 36 Remote access code: 34 Remote operation: 34 Ring count: 35 Toll saver: 35 Turning on/off: 31, 33, 35 Area code: 29... - Page 52 1-62, 4-chome, Minoshima, Hakata-ku, Fukuoka 812-8531, Japan Copyright: This material is copyrighted by Panasonic Communications Co., Ltd., and may be reproduced for internal use only. All other reproduction, in whole or in part, is prohibited without the written consent of Panasonic Communications Co., Ltd.