Table of Contents

Related Manuals for E-FLITE Ascent 450 BL Park Glider PNP


Summary of Contents for E-FLITE Ascent 450 BL Park Glider PNP
-
Page 1: Specifications
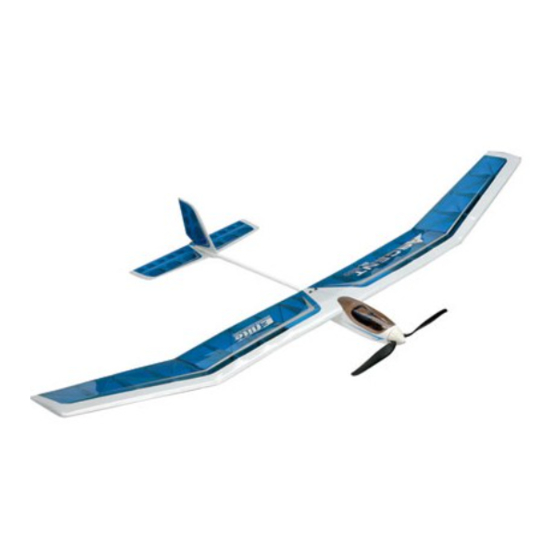
Ascent 450 BL Park Glider PNP Assembly Manual Specifications Wingspan: 54 in (1370mm) Wing Area: 330 sq in (21.4 sq dm) Length: 32 in (825mm) Weight w/ Battery: 18–19 oz (510–540 kg) Weight w/o Battery: 14–15 oz (400–425 kg) -
Page 2: Table Of Contents
™ 450 BL Park Glider. Introduction ................. 2 E-flite’s Ascent offers the modeler a PNP (Plug and Play) electric Using the Manual ..............2 park glider that is pre-built to a high level of craftsmanship. It Contents of Kit/Parts Layout ..........3 is unique in that it comes with the electric motor and folding Battery and Charger Selection.......... -
Page 3: Contents Of Kit/Parts Layout
Paper towels EFLC3005 Celectra ™ 1- to 3-cell Li-Po Charger Sandpaper EFLC505 1–5S Balancing Li-Po Charger Adhesives Covering Colors Medium CA Threadlock 6-Minute Epoxy (HAN8000) HANU973 Lite White HANU954 Transparent Blue HANU964 Lite Clear HANU881 Silver E-flite Ascent PNP Assembly Manual... -
Page 4: Optional Accessories
Horizon. Return of any goods by Purchaser must be approved in writing by Horizon before shipment. E-flite Ascent PNP Assembly Manual... -
Page 5: Damage Limits
Provided warranty conditions have been met, your Product will be repaired or replaced free of charge. Repair or replacement decisions are at the sole discretion of Horizon Hobby. E-flite Ascent PNP Assembly Manual... -
Page 6: Safety, Precautions, And Warnings
Please call 877-504-0233 with any questions or concerns regarding this product or warranty. • Moisture causes damage to electronics. Avoid water exposure to all equipment not specifically designed and protected for this purpose. E-flite Ascent PNP Assembly Manual... -
Page 7: Wing Assembly
The tube will slide in roughly half of its length. 3. Slide the dowels at the leading edge into the holes in the fuselage as shown. E-flite Ascent PNP Assembly Manual... -
Page 8: Stabilizer/Elevator Installation
5. Use two 4-40 x 1/2-inch socket head screws and two #4 washers to secure the wing to the fuselage. Use a 3/32-inch ball driver to tighten the screws. E-flite Ascent PNP Assembly Manual... - Page 9 Carefully adjust the stabilizer until both measurements are equal. 3. Use painter's tape to secure the stabilizer to the fuselage. E-flite Ascent PNP Assembly Manual...
- Page 10 6. Remove the stabilizer from the fuselage. Use a hobby knife with a new #11 blade to remove the covering from inside the lines drawn in the previous step. E-flite Ascent PNP Assembly Manual...
-
Page 11: Fin/Rudder Installation
Use painter's tape to keep the stabilizer tight against the fuselage until the epoxy fully cures. You may use rubbing alcohol and paper towels to clean up any epoxy that has squeezed out during assembly. E-flite Ascent PNP Assembly Manual... - Page 12 3. Use a felt-tipped pen to trace the outline of the fin on Hint: Use tape to outline the area to sand to prevent the top of the fuselage. removing paint from the surrounding area. E-flite Ascent PNP Assembly Manual...
- Page 13 Cutting too deep will 7. Use a square to check the alignment between the weaken the fin and could cause it to fail in flight. stabilizer and fin. E-flite Ascent PNP Assembly Manual...
- Page 14 You may remove the covering from inside the lines drawn in use rubbing alcohol and paper towels to clean up any the previous step. squeeze out during this procedure. E-flite Ascent PNP Assembly Manual...
-
Page 15: Receiver Installation
Receiver Hook and loop tape Motor battery Fuselage assembly Required Tools and Adhesives Phillips screwdriver: #1 1. Use a #1 Phillips screwdriver to remove the two screws that secure the canopy to the fuselage. E-flite Ascent PNP Assembly Manual... - Page 16 Center the rudder stick and trim. After centering the rudder, use a #1 Phillips screwdriver to tighten the screw that secures the rudder pushrod wire. Once complete with the rudder, check the elevator centering as well. E-flite Ascent PNP Assembly Manual...
-
Page 17: Control Throws
Reverse the direction of the servo at the transmitter if necessary. The recommended Center of Gravity (CG) location for the Ascent 450 BL Park Glider PNP is 1–1 -inch (25–38mm) 2. Check the movement of the elevator with the radio ... -
Page 18: Range Test Your Radio
Check all the control horns, servo horns, and clevises to make sure they are secure and in good condition. Replace any items that would be considered questionable. Failure of any of these components in flight would mean the loss of your aircraft. E-flite Ascent PNP Assembly Manual... -
Page 19: Glide Testing Your Ascent Pnp
50 feet away. If the Ascent pitches nose down, the CG is too far back and you have a nose-heavy condition. Remove some weight from the nose. If the Ascent pitches nose up sharply, and E-flite Ascent PNP Assembly Manual... -
Page 20: Thermal Soaring
Nature generates thermals by the sun heating darker ground or objects more than lighter colored surfaces. The dark object absorbs the sun's heat becoming warm and thus warming the air above it. E-flite Ascent PNP Assembly Manual... - Page 21 There are several ways of entering a thermal. One is to continue the thermal-induced turn for 270 degrees. If the thermal is on your right, turn left for 270 degrees and enter at a right angle to the original flight path. Thermal Form (Bubble) E-flite Ascent PNP Assembly Manual...
- Page 22 (thermal core). When you have found the core of lift, tighten the turns to stay within the core of highest lift. As you gain experience, you will find it easier to locate thermals and track their progress. E-flite Ascent PNP Assembly Manual...
-
Page 23: In-Flight Adjustments For Performance And Conditions
Center of These three speeds are what we call airspeeds, not ground Gravity speeds (the aircraft's speed across the ground). Thus the airspeed Horizon of the plane is relative to the air mass surrounding it. E-flite Ascent PNP Assembly Manual... - Page 24 Ascent's attitude at this speed. Remember you will be flying slightly faster, at a lower pitch attitude as compared to minimum The more you learn how to trim your Ascent for optimum sink speed. performance, the more fun you can have chasing thermals! E-flite Ascent PNP Assembly Manual...
-
Page 25: 2008 Official Ama National Model Aircraft Safety Code
Only personnel involved with flying the aircraft are allowed at or in front of the flight line. Intentional flying behind the flight line is prohibited. E-flite Ascent PNP Assembly Manual... - Page 26 E-flite Ascent PNP Assembly Manual...
- Page 27 E-flite Ascent PNP Assembly Manual...
- Page 28 © 2008 Horizon Hobby, Inc. 4105 Fieldstone Road Champaign, Illinois 61822 (877) 504-0233 horizonhobby.com E-fliteRC.com 13398...