Table of Contents
Advertisement
Quick Links
Advertisement
Table of Contents

Related Manuals for Planet vrt-420n


Summary of Contents for Planet vrt-420n
- Page 1 802.11N VPN Broadband Router VRT-420N...
-
Page 2: Federal Communication Commission Interference Statement
Copyright Copyright 2011 by PLANET Technology Corp. All rights reserved. No part of this publication may be reproduced, transmitted, transcribed, stored in a retrieval system, or translated into any language or computer language, in any form or by any means, electronic, mechanical, magnetic, optical, chemical, manual or otherwise, without the prior written permission of PLANET. - Page 3 This subsection does not apply for the geographical area Norway Implemented within a radius of 20 km from the centre of Ny-Ålesund Russian None Only for indoor applications Federation Revision User’s Manual for PLANET 802.11n VPN Broadband Router Model: VRT-420N Rev: 1.0 (June 2011)
-
Page 4: Table Of Contents
TABLE OF CONTENTS CHAPTER 1 INTRODUCTION......................6 ......................6 ACKAGE ONTENTS .........................6 EATURES ........................7 PECIFICATION CHAPTER 2 HARDWARE INSTALLATION / NETWORK SETUP ..........9 ..........................9 UTLOOK ....................10 ARDWARE NSTALLATION ......................12 ETWORK ETUP CHAPTER 3 WEB LOGIN ......................14 CHAPTER 4 SETUP ........................16 ..........................16 ETUP 4.1.1 WAN..........................16 4.1.2... - Page 5 /DHCP ........................64 .......................64 URRENT ..........................65 CHAPTER 9 LOGOUT........................67 ..........................67 OGOUT CHAPTER 10 TROUBLESHOOTING................... 68...
-
Page 6: Chapter 1 Introduction
Chapter 1 Introduction Thank you for purchasing VRT-420N. This manual guides you on how to install and properly use the VRT-420N in order to take full advantage of its features. Package Contents VRT-420N x 1 Antenna Ethernet Cable x 1 ... -
Page 7: Specification
Max WDS mode link cloud is set up to 4 sets. Multiple SSID (Two SSID )and hidden SSID broadcasting Specification Product 802.11n VPN Broadband Router Model VRT-420N Hardware Standard IEEE 802.11b/g, 802.11n Draft 2.0, IEEE802.3u 11b mode: DSSS Signal Type 11g mode: OFDM 11n mode: OFDM, MIMO 802.11b: DBPSK, DQPSK, CCK... - Page 8 Session 15000 MPLANETum Clients Virtual Host Port forwarding rule Built-in NAT Firewall MAC / IP/ Port Filtering Security Content Filtering SPI Firewall support Password protection for system management Web-based configuration System status monitoring includes Active DHCP Client, Security Log and Management Device/Connection Status Web-based GUI for and Wizard setup for easily configuration...
-
Page 9: Chapter 2 Hardware Installation / Network Setup
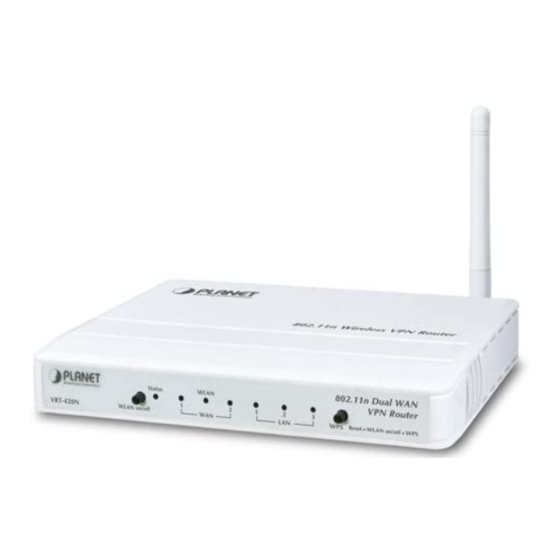
Chapter 2 Hardware Installation / Network Setup Please follow the below instruction to build the wireless network connection between VRT-420N and your computers. Outlook Front Panel WLAN ON/OFF & WPS Button Active Time WLAN On/Off Press for less than 3 seconds for disable wireless configuration... -
Page 10: Hardware Installation
2. Adjust the antennas of VRT-420N. Try to adjust them to a position that can best cover your wireless network. The antenna’s position will enhance the receiving sensitivity. - Page 11 3. Connect all of your network devices to LAN port of VRT-420N. Connect all your computers, network devices (network-enabled consumer devices other than computers, like game console, or switch / hub).Connect one of the LAN ports on VRT-420N to your LAN switch/hub or a computer with a RJ-45 cable.
-
Page 12: Network Setup
Network Setup After you install your VRT-420N, the TCP/IP settings should be set to obtain an IP address from a DHCP server (VRT-420N) automatically. To verify your IP address, please follow the steps below: Click on Start > Run. In the run box type “cmd” and click OK. (Windows Vista users type cmd in the Start .Search box.)At the... - Page 13 LAN IP address on your router. Example: If LAN IP address of VRT-420N is 192.168.0.1, make your IP address 192.168.0.X where X is a number between 2 and 99. Make sure that the number you choose is not in use on the network. Set Default Gateway the same as the LAN IP address of your router (192.168.0.1).
-
Page 14: Chapter 3 Web Login
Chapter 3 Web Login We suggest manage the VRT-420N. In the browser IE version 7 or later version. VRT-420N with an assigned IP address allows you to monitor and configure via web browser (e.g., MS Internet Explorer or Netscape). Open your web browser. -
Page 16: Chapter 4 Setup
Chapter 4 Setup This section describes the basic configuration of the VRT-420N and allows you to connect to Internet easily. Setup 4.1.1WAN The WAN Settings screen allows you to specify the type of Internet connection. The WAN settings offer the following selections for the router’s WAN port, Dynamic IP, Static IP, PPPoE, VPN client and WISP. - Page 17 If you choose the VPN Client option, you will see the following PPTP and L2TP settings information.
- Page 18 Select PPTP if your ISP requires the PPTP protocol to connect to the Internet. Your ISP should provide all the information required in this section.
-
Page 19: Wan Advance
In this WISP mode, the wireless client will connect to ISP access point. The NAT is enabled and PCs in Ethernet ports share the same IP to ISP through wireless LAN. You must set the WAN port to WISP mode first and connect to the ISP AP in Site-Survey page. - Page 20 Parameters Description Detection Interval Load balance detection interval. (seconds) Connection mode Choose Always on/Backup to define this WAN is for load balance always on, or just for backup. Backup WAN None Load Balance Weight The priority is set from 1 to 10. “1” indicates the lowest priority, and “10” indicates the highest.
-
Page 21: Lan
whether the connection is still connected. If custom host is chosen, the system will generate an ARP broadcast request to detect whether the connection is still connected. Custom Detection Host Enter the IP address or domain name of the host to be detected. 4.1.3LAN The LAN Port screen below allows you to specify a private IP address for your router’s LAN interface. - Page 22 Configure Security Settings following the instructions below. Routing Choose Enable/Disable to enable/disable routing policy. Add Routing Rule Click on [Add] tab. You will see the following screen. Configure the Routing rule following the instructions below. Parameters Description Sequence Number This defines the sequence of the Routing rules. If a packet fits the conditions set by the Routing rules, the packet will then be sorted according to the first Routing rule from the top of the list.
- Page 23 Internal IP Range Set up the internal IP range for this ACL rule. External IP Range Set up the external IP range for this ACL rule. Protocol Set up the protocol (TCP or UDP) for the ACL to be enabled. Service Port Range Set up the Service Port Range (e.g., HTTP is TCP/80) for the ACL to be enabled.
-
Page 24: Dhcp Server
After configuration complete, please click “Save Settings” button to save the configuration. Then you will see a screen to prompt you the settings are saving successfully. You may press “Confirm” for configure other settings or “Save Settings” to restart VRT-420N with new configuration. 4.1.6DDNS DDNS allows you to map the static domain name to a dynamic IP address. - Page 25 Parameters Description DDNS Service Enable/Disable the DDNS function of this router. DDNS Type Select a DDNS service provider. The default setting is “DynDNS”. User name Your static domain name that use DDNS. Password The password you set for the DDNS service account above. Host Name The account that your DDNS service provider assigned to you.
-
Page 26: Mac Address Clone
Wireless 4.2.1Basic Multiple SSIDs (VRT-420N Max support the five SSID) allow the ability for separate security mode and key settings to be set by users for both convenience and increased protection. Users are able to configure their network devices to access the first SSID with the WPA2 PSK (Pre-Shared Key) and secret key, whilst share the second SSID with WEP and the periodically changed key for visitors. -
Page 27: Wireless Security Mode Wep
4.2.2Wireless security mode WEP When you select 64-bit or 128-bit WEP key, you have to enter WEP keys to encrypt data. You can generate the key by yourself. You can enter four WEP keys and select one of them as default key. Then the access point will just allow the clients that with the same encryption keys connected. -
Page 28: Wireless Security Mode Wpa Psk/Wpa2 Psk
4.2.3Wireless security mode WPA PSK/WPA2 PSK Wi-Fi Protected Access (WPA) is an advanced security standard. You can use a pre-shared key to authenticate wireless stations and encrypt data during communication. It uses TKIP or CCMP (AES) or Mixed mode (TKIP+AES) to change the encryption key frequently. So the encryption key is not easy to be broken by hackers. -
Page 29: Advance
4.2.5Advance... - Page 30 Region Choose the region you are currently located. Fragmentation Enter the fragmentation bytes. The default value is 2346 bytes. Enter the RTS seconds. The default value is 2347 seconds. DTim Enter the DTim seconds. The default value is 1. Beacon Interval Enter the interval to send a beacon.
-
Page 31: Wds
4.2.6WDS WDS (Wireless Distributed System) enables the wireless bridging amongst several wireless devices. The bridged devices are identified by the WDS MAC addresses. *Please make sure of the following settings in order to allow WDS to work effectively: (1) WDS bridged devices must use the same radio channel. (2) WDS bridged devices must use the same encryption mode and encryption keys. - Page 32 Parameter Description Universal Repeater Enable/Disable the Universal Repeater Mode function of this router. Mode In “Universal Repeater mode”, this device can act as a station to connect to Target SSID a Root AP. You should enter the SSID of the Root AP here. Target BSSID Please assign the root AP MAC address.
-
Page 33: Chapter 5 Security
Protection, the resources in the server will be easily consumed completely. This will then consequently result in the dysfunction of the server. VRT-420N is able to detect TCP SYN DoS attacks and limits the resource consumption by lowering the incoming request rate by fast recycling the resource. -
Page 34: Access Control
ICMP Redirect Protection Check to enable ICMP Redirect Protection. Uncheck to disable ICMP Redirect Protection. An ICMP redirect message is a way to change the existing routing path. Generally, ICMP redirect packets should not be sent, and so when there is the occurrence that ICMP redirect packets are sent, it is important to note that it is very likely to be used as a means for a network attack. -
Page 35: Mac Access Control
Service Port Range Keep it blank (All complies) Action DENY MAC Access Control The Time Zone allows VRT-420N to allocate its time on the settings configured here; it will affect log display functions such as Security Log and Firewall settings. - Page 36 1.Click on [Security] – [Access Control] tab. You will see the following screen. 2.Configure ACL Settings following the instructions below. 3.Click on [Add] tab. You will see the following screen.
-
Page 37: Opendns
Sequence Number This defines the sequence (priority) of all the MAC ACL actions. Rule Name Name of the MAC access rule. Set up the MAC Address to which you would like to enable the MAC ACL action. Action Choose ALLOW/DENY to ALLOW/DENY ACL Enable Enable/Disable this MAC access rule Static ARP Enable... -
Page 38: Web Filter
1. Click on [Security] – [OpenDNS] tab. You will see the following screen. 2. Configure OpenDNS Settings following the instructions below. OpenDNS Service Choose Enable/Disable to enable/disable OpenDNS OpenDNS Username Enter OpenDNS user name. OpenDNS Password Enter OpenDNS password. Choose Enable/Disable to enable/disable the data flow redirect to the DNS Query Redirection to OpenDNS Server. - Page 39 1. Click on [Security] – [Web Filtering] tab. You will see the following screen. 2. Configure Web Filtering Settings following the instructions below. Web Filtering Choose Enable/Disable to enable/disable Web Filtering ActiveX Filtering Choose Enable/Disable to enable/disable ActiveX Filtering Java/JavaScript Filtering Choose Enable/Disable to enable/disable Java/JavaScript Filtering Proxy Filtering Choose Enable/Disable to enable/disable Proxy Filtering...
- Page 40 Added Web Filtering Rules 3. Click on [Add] tab. You will see the following screen. 4. Configure Web Filtering Settings following the instructions below Sequence Number This defines the sequence (priority) of all the Web Filtering rules. Rule Enable Choose Enable/Disable to enable/disable Web Filtering rule Filter Keyword Enter the Keyword Filter Type...
-
Page 41: Vpn Pptp
VPN PPTP VPN / PPTP Settings 1. Click on [Security] – [VPN / PPTP] tab. You will see the following screen. -
Page 42: Vpn Ipsec
2. Configure PPTP Settings following the instructions below. PPTP Choose Enable/Disable to enable/disable L2TP. Enter MTU value. The default value is 1482 bytes. VPN Start IP Address Enter the VPN start IP address. The default value is 192.168.39.1. Max VPN Clients Enter the max VPN clients. - Page 43 After add the option, you will see the following settings. After enable the Advance option, you will see the following settings.
- Page 44 Click on [Security] – [VPN / IPsec] tab. You will see the following screen. Configure IPsec Settings following the instructions below. IPsec Select Enable/Disable to enable/disable IPsec.
- Page 45 Configure [Add - IPsec] Settings following the instructions below. Sequence Number This defines the sequence of the IPsec rules. Connection Name Name of the IPsec rule. Rule Enable Enable/Disable this IPsec rule VPN Mode Net-to-Net or Road Warrior Local External Interface Choose the external WAN for the local VPN gateway.
-
Page 46: Bwm Qos
BWM QoS The Bandwidth Management System in VRT-420N provides Static Bandwidth Management (SBM) feature to control the packet flow through the router in order to meet the service of quality. SBM provides users or groups with the option to allocate a fixed amount of bandwidth... - Page 47 Bandwidth Settings: Please adjust your bandwidth type according to your bandwidth (download/upload) subscribed from your ISP. Due to the unstable nature of network bandwidth supported by ISP, users are recommended to reserve a portion of bandwidth for buffering usage, and QoS would then arrange the reserved bandwidth under heavy traffic.
- Page 48 Add Bandwidth Management Group Rules Click on [Add] tab. You will see the following screen. Configure [Add SBM] Settings following the instructions below. Sequence Number This defines the sequence of the SBM rules. If a packet fits the conditions set by the SBM rules, the packet will then be sorted according to the first SBM rule from the top of the list.
- Page 49 If a user needs to reverse some bandwidth for a specified application, such as VoIP, one can have the following configuration to reserve a 25Kbps/25Kbps bandwidth for VoIP application. Rule Name PLANET Rule Enable Check the box to enable this rule...
-
Page 50: Chapter 6 Application Settings
Furthermore, users can specify an internal port range associated in a port range forwarding rule. When VRT-420N receives an external request to access any one of the configured external ports, it will redirect the request to the corresponding internal server and change its destination port to one of the internal ports specified. - Page 51 Click on [App] – [Port Range Forward] tab. You will see the following screen. Configure [DMZ] Settings following the instructions below Select Enable to enable DMZ function. Select Disable to disable DMZ function. Enter the IP address of a particular host in your LAN which will receive all the DMZ IP Address packets originally going to the WAN port / Public IP address above.
-
Page 52: Virtual Host
Add Port Range Forwarding Rule Click on [Add] tab. You will see the following screen. Configure [Add Port Range Forwarding Rule] Settings following the instructions below This defines the sequences (priorities) of the port forwarding rules. If a packet fits Sequence Number the conditions setup by the port forwarding rules, the packet will then be forwarded according to the 1st rule from the top of the list. -
Page 53: Stream Vpn
After enable the “add and modify” the function, WEB UI will show the following information. Sequence Number Please key the number Rule Name Please key the Name Rule Enable Enable/Disable the Rule External Interface Choice the interface for this rule. External IP Address Please key the WAN Port IP address Mapped LAN IP Address... -
Page 54: Upnp / Nat Pmp
You can enhance your media streaming quality by enabling RTSP, MSS, and H.323 protocols. Moreover, VPN Pass-through functionality can also be enabled. Click on [App] – [Streaming / VPN] tab. You will see the following screen. Configure [Streaming] Settings following the instructions below. RTSP Select Enable/Disable to enable/disable RTSP Select Enable/Disable to enable/disable MMS... - Page 55 Configure [UPnP] Settings following the instructions below UPnP Select Enable/Disable to enable/disable UPnP NAT-PMP Select Enable/Disable to enable/disable NAT-PMP UPnP Port Enter the number for UPnP port.
-
Page 56: Chapter 7 Administrator
Chapter 7 Administrator Management Click on [Admin] – [Management] tab. You will see the following screen. -
Page 57: System Utility
Configure [Administration Interface] Settings based on the instructions listed below. Language Select the language of administration Interface you wish to use. Maximum input is 36 alphanumeric characters (case sensitive) * Please change the administrator’s password if the remote Administrator Password management is enabled. -
Page 59: Time
Using the [ping] tool based on the instructions listed below Interface Select the interface that use to ping to, ie. WAN1,WAN2, LAN. Target Host Enter the IP address to ping to Number of Packets Specify the number of the ICMP packets to send out Ping Press the tab to start the “ping”... - Page 60 Configure [Time] Settings based on the instructions listed below Time Synchronization Select Enable/Disable to enable/disable Time Synchronization Select Time Server according to your location. You can choose from Time Server Automatic, Asia, Europe, North America, South America, or Africa. Select Time Zone according to your location. (Daylight Saving Time has Time Zone been calculated and included in the selection).
- Page 61 Minutes 0-59...
-
Page 62: Chapter 8 Status
Chapter 8 Status Router Click on [Status] – [Router] tab. You will see the following screen. -
Page 63: Wireless Network
Router Information Model Name Product model name is shown. Firmware Version The firmware version this device is running. Current Time Current system time MAC Address MAC Address IP Address Internal IP Address Subnet Mask The number of subnet mask in the internal network DHCP Service DHCP service enabled or disabled DHCP Start IP Address... -
Page 64: User/Dhcp
MAC Address MAC Address Connection Type The current connection type (PPPoE, Static IP, and DHCP) IP Address WAN IP Address Subnet Mask Number of subnet mask. Gateway IP address of the gateway User/DHCP Click on [Status] – [DHCP] tab. You will see the following screen. Name DHCP client name IP Address... -
Page 65: Log
IP Address IP address assigned by Static ARP matching MAC Address MAC address in the Static ARP matching ARP Type Static or dynamic Click on [Status] – [Log] tab. You will see the following screen. - Page 66 Log Server Setting: Syslog server Enable/Disable Sys log feature. Remote IP Remote Sys-log server address Address Protocol What protocol you want to use for TCP/UDP. Remote port Sys-log remote port.
-
Page 67: Chapter 9 Logout
Chapter 9 Logout Logout To logout the VRT-420N... -
Page 68: Chapter 10 Troubleshooting
Chapter 10 Troubleshooting If you found VRT-420N is working improperly or stop responding to you, please kindly read this troubleshooting first. Some problems can be solved by you within very short time! Please contacts with your local dealer if below methods are failed. - Page 69 4. Try to know what computers do on your local network. If someone’s transferring big files, other people will think Internet is really slow. 5. If this never happens before, call you Internet service provider to know if there is something wrong with their network.
- Page 70 *Model Number: VRT-420N *Produced by: Manufacturer‘s Name: Planet Technology Corp. Manufacturer‘s Address: 10F., No.96, Minquan Rd., Xindian Dist., New Taipei City 231, Taiwan (R.O.C.) is herewith confirmed to comply with the requirements set out in the Council Directive on the 99/5/EC R&TTE.
- Page 71 Directiva ΑΠΑΙΤΗΣΕΙΣ ΚΑΙ ΤΙΣ ΛΟΙΠΕΣ 1999/5/CE. ΣΧΕΤΙΚΕΣ ΔΙΑΤΑΞΕΙΣ ΤΗΣ ΟΔΗΓΙΑΣ 1999/5/ΕΚ Español Por medio de la presente, PLANET Technology Slovensky Výrobca PLANET Technology Corporation, týmto Corporation, declara que Product Wi-Fi cumple deklaruje, že táto Product Wi-Fi je v súlade so con los requisitos esenciales y cualesquiera otras základnými požiadavkami a ďalšími relevantnými...