
Related Manuals for Smooth Fitness SMB-XBIKE


Summary of Contents for Smooth Fitness SMB-XBIKE
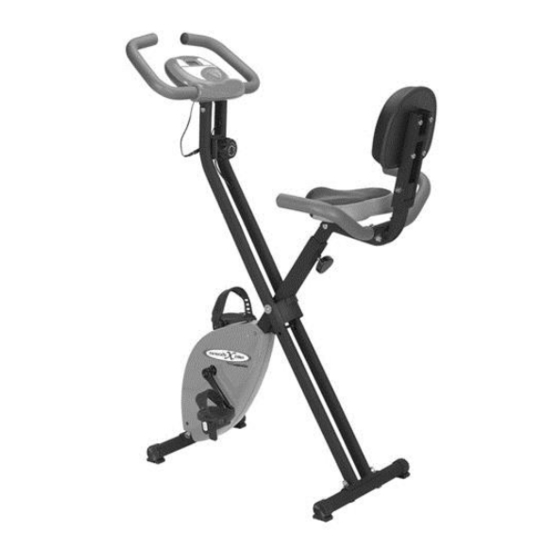
- Page 1 OWNER’S MANUAL CAUTION: THE MAXIMUM USER WEIGHT LIMIT ON THIS PRODUCT SHOULD NOT EXCEED 136KG / 300LBS The Product May Vary Slightly From the Picture Shown Above VER-021114 MADE IN CHINA...
- Page 2 Seat Cushion Disclosure ALL NEW MATERIALS Consisting of: PP+PU+FOAM Date of Manufacture: 2014.02 Model # SMB-XBIKE Lot # DD6321-1...
- Page 3 “S AFETY NSTRUCTION” WARNING: To reduce the risk of serious injury, read the following safety instructions before using the item . Read all warnings posted on the equipment. 2. Read this Owner's Manual and follow it carefully before using the equipment. Make sure that it is properly assembled and tightened before use.
- Page 4 Too often, our busy lifestyles limit our time and Smooth XBIKE Thank you for choosing the . We opportunity to exercise. This equipment provides a take great pride in producing this quality product and convenient and simple way to get your body in shape hope it will provide many hours of quality exercise to and achieve a happier and healthier lifestyle.
- Page 5 “H ARDWARE DENTIFICATION HART” Unpack the box in a clear area. Review the Hardware Kit List below. This chart is provided to help identify the hardware used in the assembly process. Place the washers, the ends of the bolts, or screws on the circles to check for the correct diameter.
- Page 6 “A SSEMBLY OOLS” THE FOLLOWING TOOLS ARE INCLUDED FOR ASSEMBLY: Wrench ALLEN WRENCH “A SSEMBLY NSTRUCTIONS” – TEP1 Base Support Frame Assembly 4x #10 4x #9 4x #12 1. Unpack the Smooth XBIKE from the shipping carton and remove the packing materials.
- Page 7 “A SSEMBLY NSTRUCTIONS” – TEP2 Seat Assembly 3x #22 3x #16 1. Attach the seat to the seat post. The seat studs will insert through the seat post holes 2. Secure the seat to the seat post using 2×M8 flat washers (22) and 3x M8 Nylock nuts (16).
- Page 8 “A SSEMBLY NSTRUCTIONS” – TEP3 Seat Installation and Handlebar Assembly Seat Adjuster Knob 1. Insert the seat adjustment knob into the mainframe by turning the knob 5 times clockwise. 2. After threading the adjustment knob in to the mainframe, pull the knob outward while inserting the seat post into the mainframe.
- Page 9 “A SSEMBLY NSTRUCTIONS – TEP4 Console Assembly 4x #4 2x #5 2x #6 1. Insert the console frame into the bike main frame as pictured on the left. 2. Align the bolt holes in the main frame with the bolt holes in the console frame. 3.
- Page 10 SSEMBLY NSTRUCTIONS” – TEP5 Pedal Assembly RIGHT SIDE LEFT SIDE 1. Using your hands, thread the Left Pedal 2. Using your hands, thread the COUNTER-CLOCKWISE onto Right Pedal CLOCKWISE onto the the LEFT crank arm. After the RIGHT crank arm. After the pedal is pedal is hand tightened use the hand tightened use the supplied supplied wrench to completely...
- Page 11 “A SSEMBLY NSTRUCTIONS” – TEP6 Battery Installation Note: The computer monitor will not function without 2 AA batteries. 1. Open the battery door on the back of the computer 2. Insert the batteries in the direction shown on the left. 3.
- Page 12 “S NSTALLATION and DJUSTMENT” Warning: Do not use the Smooth XBIKE without verifying that the seat is locked in place. Before moving or using the bike, pull upward on the seat to verify it cannot be removed 1. Turn the seat adjustment 2.
- Page 13 NFOLDING the MOOTH BIKE Open the frame of the bike by Place the locking pin in the first Remove the frame locking pin pulling the upper portion of the pin hole, to lock the frame in from the first locking position. bike outward.
- Page 14 “C OMPUTER ISPLAY” Note:The computer will not function without 2 AA batteries. Scan: This function allows the computer to scan through each workout data readout automatiallly(Time, Speed, Distance, Odometer (ODO) Pulse, Calories) To enable the scan function press the selection button (I) until the selection symbol (H) is pointing at scan. Time: Displays the time spent during your workout.To view the time press the selection button (I) until the selection symbol (H) is pointing at time.
- Page 15 “C OMPUTER ISPLAY” Workout Data Ranges Time 00:00 to 99:59 Min Speed 0.0 to 999.9MPH Distance 0.00 to 999.9Mi Calories 0 to 9999 Cal Pulse 40 to 240 BPM “C OMPUTER ISPLAY PERATION” Selecting the Data on the Display Press the selection button to display the preferred data reading. The selection symbol will highlight the current data being displayed.
- Page 16 XPLODED IAGRAM”...
- Page 17 “P IST” Item Name Q'TY XB-1 Seat pad XB-2 Computer XB-3 Handlebar XB-4 Bolt M6X12 XB-5 Curved washer M6 XB-6 Flat washer M6 XB-7 Main frame XB-8 Pedal(right)1/2-20 with strap XB-13 Pedal(left)1/2-20 with strap XB-9 Curved washer M8 XB-10 Carriage bolt M8*50 XB-11F Front support XB-11R...
- Page 18 In order for this warranty to be valid, all Smooth Fitness exercise equipment must be stored and used in a fully finished and livable room within the residence (not including an indoor swimming pool room).
- Page 19 Customer Service Toll Free ·· 855-663-5643...