Table of Contents
Advertisement
Quick Links
Download this manual
See also:
Installation Manual
Advertisement
Table of Contents

Related Manuals for SATO LP 100R


Summary of Contents for SATO LP 100R
- Page 1 LP 100R Laser Printer Operator’s Guide Part No. 9855063 April 2014...
- Page 2 February, 2009 Initial release Rev 1 April, 2014 USB Support Copyright © 2009 SATO America, Inc. ALL RIGHTS RESERVED No part of this work may be reproduced or copied in any form without the express written consent of: SATO America, Inc.
-
Page 3: Table Of Contents
LP 100R Laser Printer Operator's Guide Table of Contents Table of Contents Chapter 1: General Information Notice ..................... 1-2 Trademarks ..................... 1-2 Liability Disclaimer ................... 1-3 Regulatory Notices ................... 1-4 FCC Regulations ................... 1-4 Manufacturer’s Instructions ................ 1-5 User’s Responsibility ................1-5 DHHS (Department of Health and Human Services) ........ - Page 4 LP 100R Laser Printer Operator's Guide Table of Contents Form End Sensor ................2-11 Tractor Unit ..................2-11 Suction Brake Unit ................2-12 Right Edge Forms Guide ..............2-12 Web Guide ..................2-12 Main Circuit Breaker ................2-12 Chapter 3: Printer Operation Overview ....................
- Page 5 LP 100R Laser Printer Operator's Guide Table of Contents Chapter 4: Printer Maintenance Maintenance .................... 4-2 Cleaning Tools ..................4-2 Life and Cleaning Interval ................4-3 Changing Consumables ................. 4-3 Toner Removal ..................4-3 Fuser Unit Cleaning ................. 4-4 Charger Cleaning ..................4-5 AIDC Sensor Cleaning ................
- Page 6 LP 100R Laser Printer Operator's Guide Table of Contents Emulation Errors ..................5-23 Kodescript™ Errors ................5-23 Kodescriptplus Status and Error Codes ..........5-24 Codes 01-15 ................. 5-24 Codes 16-50 ................. 5-24 Codes 51-80 ................. 5-24 Codes 81-99 ................5-24 KodescriptPlus Status Messages .............
- Page 7 LP 100R Laser Printer Operator's Guide Table of Contents Cancel Job On Jam Function ..............6-34 Cancel Job On Jam Function Access ............6-34 Disabled/Enabled (Cancel Job On Jam) ..........6-35 Prompt (Cancel Job On Jam) ..............6-36 Cancel Job On Field Error Function ............6-37 Cancel Job On Field Error Function Access ..........
- Page 8 LP 100R Laser Printer Operator's Guide Table of Contents Horizontal Adjustment ............... 6-83 When a Print Job Is in Progress ............6-83 When the Printer Is Idle ..............6-86 Image Density ................... 6-87 Material Type..................6-89 Orientation ..................6-91 Emulation ..................
- Page 9 LP 100R Laser Printer Operator's Guide Table of Contents System Program ..................B-27 Installing the System Program ............. B-27 Copying the System Program ............... B-30 System Menu ..................B-33 Installing the Updated System Menu ............. B-33 Copying the Updated System Menu ............B-36 User's Configuration file ................
- Page 10 Precautions When Operating the Printer ............G-5 Moving the Printer ................... G-5 Appendix H: Default Passwords Default Passwords ................... H-2 Appendix I: End-User License Agreement End-User License Agreement for SATO Controller Software ......I-2 Rev: 1 Page viii April, 2014 of viii pages...
-
Page 11: Chapter 1: General Information
LP 100R Laser Printer Operator's Guide Chapter 1: General Information Chapter 1: General Information Notice ..................... 1-2 Trademarks ..................... 1-2 Liability Disclaimer ................... 1-3 Regulatory Notices ................... 1-4 FCC Regulations ................... 1-4 Manufacturer’s Instructions ................ 1-5 User’s Responsibility ................1-5 DHHS (Department of Health and Human Services) ........ -
Page 12: Notice
All rights are reserved for devices, circuits, techniques, software, and names appearing in this publication. SATO America, Inc. ("SATO"), also reserves the right to make changes to this publication and to the equipment described herein without notice. Considerable effort has been made to ensure that this publication is free of inaccuracies and omissions. -
Page 13: Liability Disclaimer
Chapter 1: General Information Liability Disclaimer SATO America, Inc., products are warranted in accordance with the terms of the applicable SATO product specification. Product performance is affected by system configuration, software, the application, customer data, and operator control of the system, among other factors. -
Page 14: Regulatory Notices
LP 100R Laser Printer Operator's Guide Chapter 1: General Information Regulatory Notices FCC Regulations This equipment generates and uses radio frequency and, if not installed in accordance with the instruction manual, may cause interference to radio and television reception. The equipment has been tested and found to comply within... -
Page 15: Manufacturer's Instructions
If this equipment does cause interference to radio or television reception (which as specified can be determined by turning the printer off and on), SATO encourages the user to try to correct the interference by changing one of the following: Equipment orientation ... -
Page 16: Dhhs (Department Of Health And Human Services)
LP 100R Laser Printer Operator's Guide Chapter 1: General Information DHHS This printer is certified as a Class 1 Laser Product under the United States Department of Health and Human Services (DHHS) Radiation Standard according to the Radiation Control for Health and Safety Act of 1968. This means that the printer does not produce hazardous laser radiation. -
Page 17: Chapter 2: Printer Components
LP 100R Laser Printer Operator’s Guide Chapter 2: Printer Components Chapter 2: Printer Components Overview ....................2-2 Printer Components: Left-Side Front – View One ........... 2-3 Transfer Unit Cleaning Rod ..............2-4 Main Charger Unit Cleaning Rod ............. 2-4 Top Panel Switches ................2-4 Top Panel Switch LED Functions ............ -
Page 18: Overview
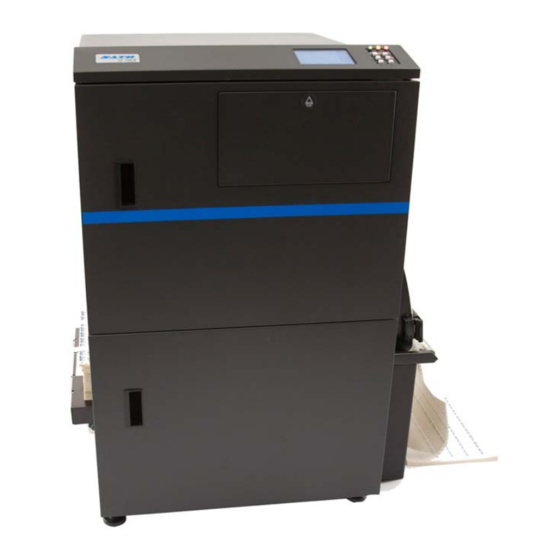
LP 100R Laser Printer Operator’s Guide Chapter 2: Printer Components Overview The LP 100R laser printer is designed to work with office computers in a wide variety of business applications. The LP 100R, which employs the latest laser imaging dry electrophotographic technology, has a high-speed print capability of 3,300 lines per minute at 6 LPI on 18"... -
Page 19: Printer Components: Left-Side Front - View One
Transfer unit cleaning rod Burster unit (optional) Side panel switches Formatted: Font: 8 pt METO-Logic Controller Figure 2-1. Left-side front view of LP 100R laser printer. Components include: Transfer unit cleaning rod Main charger unit cleaning rod Top panel switches ... -
Page 20: Transfer Unit Cleaning Rod
LP 100R Laser Printer Operator’s Guide Chapter 2: Printer Components Transfer Unit Cleaning Rod Cleans the transfer unit wire when pulled outward and pushed inward. Transfers the printed image onto the forms. Main Charger Unit Cleaning Rod Cleans the main charger electrode when pulled outward and pushed inward. -
Page 21: Top Panel Switch Led Functions
LP 100R Laser Printer Operator’s Guide Chapter 2: Printer Components Top Panel Switch LED Functions Switch Description POWER LED Illuminates continuously as a solid green light when the (green) printer is powered up. Used to power up the printer. -
Page 22: Emergency Power Switch
LP 100R Laser Printer Operator’s Guide Chapter 2: Printer Components Emergency Power Switch Powers the printer down in emergency conditions. Fuser Unit Houses the fuser lamp, fuser filter, and associated fans. In the fuser unit, the fuser lamp flashes at fixed time intervals, which causes ... -
Page 23: Printer Components: Left-Side Front - View Two
Front door Toner fuser filter Swing guide (optional) Removable stacker table Adjustable foot Waste toner collecting bottle Figure 2-3. Left-side front view of LP 100R laser printer. Components include: Front door Toner bottle access cover EP holder ... -
Page 24: Front Door
LP 100R Laser Printer Operator’s Guide Chapter 2: Printer Components Front Door Protective cover for components housed in the front area of the printer. Causes an Interlock error if left open during processing. Toner Bottle Access Cover The cover swings down, providing access to the toner bottle, thereby allowing ... -
Page 25: Page Counter
LP 100R Laser Printer Operator’s Guide Chapter 2: Printer Components Page Counter Seven-digit counter that counts the number of pages processed in 11" increments. Service Cover Is reserved for use by service personnel. Left-Side Door Serves as a protective cover for the fuser unit. -
Page 26: Main Charger Unit
LP 100R Laser Printer Operator’s Guide Chapter 2: Printer Components Developer unit Main charger unit OPC cartridge unit Figure 2-5. Components accessed from the EP holder. The components accessed from the EP holder include: Main charger unit OPC cartridge unit ... -
Page 27: Printer Components: Right-Side Rear View
Suction brake unit Main circuit breaker Right edge forms guide Figure 2-6. Right-side rear view of LP 100R laser printer. Tractor Width Knob When rotated, adjusts the width of the tractor assembly to conform to the width of the documents to be printed. -
Page 28: Suction Brake Unit
LP 100R Laser Printer Operator’s Guide Chapter 2: Printer Components Suction Brake Unit Sets the proper tension on the documents to be printed predicated on their thickness (as set in the Configuration File). Right Edge Forms Guide Slides to the right, which adjusts the forms' width, thus preventing the forms from either coming off the suction brake or activating the form end sensor. -
Page 29: Chapter 3: Printer Operation
LP 100R Laser Printer Operator’s Guide Chapter 3: Printer Operation Chapter 3: Printer Operation Overview ....................3-2 End-User License Agreement ..............3-3 Power Up and Down Procedures ..............3-4 Power Up Procedures ................3-5 Power Down Procedures ................ 3-6 Normal Power Down ................. 3-6 Emergency Power Down .............. -
Page 30: Overview
Chapter 3: Printer Operation Overview This chapter defines the responsibilities associated with the LP 100R printer, some of which are assigned to the printer operator and some of which may be assigned to either the key operator or the supervisor. -
Page 31: End-User License Agreement
LP 100R Laser Printer Operator's Guide Chapter 3: Printer Operation End-User License Agreement Prior to using the printer for the first time, you must respond to an End-User License Agreement (EULA) that relates to the legal usage of the software loaded on the printer’s controller. -
Page 32: Power Up And Down Procedures
LP 100R Laser Printer Operator's Guide Chapter 3: Printer Operation Power Up and Down Procedures The printer is powered up through the use of the POWER LED switch located to the right of the TDU. Figure 3-2. POWER LED switch (circled) for powering up. -
Page 33: Power Up Procedures
LP 100R Laser Printer Operator's Guide Chapter 3: Printer Operation Power Up Procedures When power is applied to the printer, the POWER LED switch (see previous page) illuminates in green. 1. If the LED is not lit, press the POWER LED switch for approximately 1 second and release the switch. -
Page 34: Power Down Procedures
LP 100R Laser Printer Operator's Guide Chapter 3: Printer Operation Power Down Procedures Normal Power Down 1. Press the Off button (Soft Power switch) to initiate the power down cycle. See Figure 3-3. 2. When the Are you sure? prompt appears, do one of the following: If you wish to proceed with powering down, press the Enter button in the ... -
Page 35: Operator Responsibilities
Appendix C: Service/Technical Support for the time frame and procedures for scheduling preventive maintenance. Using the TDU/LP 100R menu system – The operator must be familiar with the TDU and its use in conjunction with the LP 100R menu system. -
Page 36: Supervisor Responsibilities
The Files procedures are included in the following appendices. Appendix A: Installing System Software This appendix explains how to install the operating software for the LP 100R and how to copy and/or install the various files used by the printer to control printer... - Page 37 The supervisor is ultimately responsible for the overall printer operation, including problem solving. If a problem occurs that the operator believes requires the assistance of a service representative, SATO recommends reviewing the problem with the operator prior to entering the request for service.
-
Page 38: System Start-Up Procedures
LP 100R Laser Printer Operator's Guide Chapter 3: Printer Operation System Start-up Procedures 1. If the POWER LED is not illuminated, press the POWER LED switch to power up the printer. (See Figure 3-2.) 2. If no paper stock has been loaded into the printer, the audible alarm sounds, and the following screen displays: Figure 3-6. -
Page 39: System Start-Up Screen Definitions
Figure 3-7. System start-up screen. System Start-up Screen Definitions Item Definition A. Mode of operation The LP 100R printer is operated under 4 different modes: Online Idle – When the printer is in the Online Idle mode, it is ready to accept print data from a host computer. - Page 40 F. Menu Press Menu to switch the printer from the Online Idle mode to the Offline Idle mode and provide access to the LP 100R menu system. See Menu System starting on page 3-14. G. Version Specifies the software revision level currently in use by the printer.
- Page 41 Press Feed to clear the stock from the printer. Document Loading Procedures starting on page 3-30. 7. If the configuration number and stock are both correct, see the LP 100R menu system procedures that follow. Rev: 1 Page 3-13...
-
Page 42: Menu System
LP 100R Laser Printer Operator's Guide Chapter 3: Printer Operation Menu System The complete LP 100R menu system, which is charted in Appendix E: The Menu System, provides a quick reference to both the menus that are available and to the options that are available within each menu. -
Page 43: Main Menu Options
LP 100R Laser Printer Operator's Guide Chapter 3: Printer Operation Main Menu Options 1. Press the Up or Down triangle to select the desired menu. 2. Press Enter. 3. If Express is selected, see Operator Express Menu starting on page 3-18. -
Page 44: Exit Menu System Options
LP 100R Laser Printer Operator's Guide Chapter 3: Printer Operation Exit Menu System Options When a key is pressed that causes the printer to exit the menu system, the following screen displays: Figure 3-9. Exit the menu system. Exit Menu System Buttons... -
Page 45: Advanced Menu
LP 100R Laser Printer Operator's Guide Chapter 3: Printer Operation Advanced Menu Selecting Advanced from the Main menu causes the following menu to display: Figure 3-10. Advanced Menu. Supervisor Menu The Supervisor menu includes the functions necessary for the creation and maintenance of the user files stored on the controller's hard drive. -
Page 46: Operator Express Menu
LP 100R Laser Printer Operator's Guide Chapter 3: Printer Operation Operator Express Menu Selecting Express from the Main menu causes the following menu to display: Figure 3-11. Operator Express menu. Operator Express Menu Buttons Button Function Home Press Home to return the system to the Exit Menu System screen. -
Page 47: Recall Configurations
LP 100R Laser Printer Operator's Guide Chapter 3: Printer Operation Recall Configurations The Recall Configurations function, which permits recalling active configurations from the controller, is accessed either by selecting Recall from the Exit Menu System screen, by selecting Recall Configurations from the Operator Express menu, or by selecting Recall from the System Start-up menu. -
Page 48: Modify Horizontal Fine Adjustment
LP 100R Laser Printer Operator's Guide Chapter 3: Printer Operation Modify Horizontal Fine Adjustment The Modify Horizontal Fine Adjustment function, which specifies the distance from the left side of the document to the start of the print area, is accessed either by selecting Horizontal Fine Adjustment from the Print Alignment menu or by selecting Horizontal Fine Adj. -
Page 49: Modify Vertical Fine Adjustment
LP 100R Laser Printer Operator's Guide Chapter 3: Printer Operation Modify Vertical Fine Adjustment The Modify Vertical Fine Adjustment function, which specifies the distance from the top of the form to the top of the print area, is accessed either by selecting Vertical Fine Adjustment from the Print Alignment menu or by selecting Vertical Fine Adj. -
Page 50: Print Configurations
LP 100R Laser Printer Operator's Guide Chapter 3: Printer Operation Print Configurations The Print Configurations function produces a printout of all of the configurations stored on the controller's hard drive. Note: The procedures that follow assume that the default 11" (height) by 14.5"... - Page 51 LP 100R Laser Printer Operator's Guide Chapter 3: Printer Operation Figure 3-15. Configuration page. Rev: 1 Page 3-23 April, 2014 of 32 pages...
-
Page 52: Print Time & Usage Report
LP 100R Laser Printer Operator's Guide Chapter 3: Printer Operation Print Time & Usage Report The Time & Usage report provides a quick summary of the need for maintenance on the LP 100R printer. Note: The procedures that follow assume that the default 11" (height) by 14.5"... - Page 53 LP 100R Laser Printer Operator's Guide Chapter 3: Printer Operation Figure 3-16. Time & Usage report. Rev: 1 Page 3-25 April, 2014 of 32 pages...
-
Page 54: Print Status Page
Chapter 3: Printer Operation Print Status Page The Status Page summarizes the operating parameters for the LP 100R printer. Note: The procedures that follow assume that the default 11" (height) by 14.5" (width) form size has been loaded into the printer. - Page 55 LP 100R Laser Printer Operator's Guide Chapter 3: Printer Operation Figure 3-17. Status Page. The individual settings/parameters included in the Status Page are defined in Chapter Rev: 1 Page 3-27 April, 2014 of 32 pages...
-
Page 56: Printer Cleaned
LP 100R Laser Printer Operator's Guide Chapter 3: Printer Operation Printer Cleaned Selecting the Printer Cleaned function from the Operator Express menu causes the following screen to display: Figure 3-18. Printer Cleaned. 1. Press the Up or Down triangle to select the desired response. -
Page 57: Page Flush
LP 100R Laser Printer Operator's Guide Chapter 3: Printer Operation Page Flush Selecting Page Flush from the Operator Express menu causes the following screen to display: Figure 3-19. Page Flush. 1. Press the Up or Down triangle to select the desired function. -
Page 58: Document Loading Procedures
LP 100R Laser Printer Operator's Guide Chapter 3: Printer Operation Document Loading Procedures 1. Open the lower tractor covers (A and B) and the form end sensor (C). 2. Load the stock on the left-side tractor (A) and close the cover. - Page 59 LP 100R Laser Printer Operator's Guide Chapter 3: Printer Operation 4. Load the stock on the right-side tractor (B) and close the cover. 5. Adjust the width between the tractors to accommodate the form by rotating the knob D. 6. Slide the suction brake (E) to the left until it touches the right edge of the paper stock.
- Page 60 LP 100R Laser Printer Operator's Guide Chapter 3: Printer Operation 7. Raise the tractor unit by lifting the tractor unit handle. 8. Press the LOAD switch (F), which advances the stock into the printer, lining it up in the top-of-form position.
- Page 61 LP 100R Laser Printer Operator's Guide Chapter 4: Printer Maintenance Chapter 4: Printer Maintenance Maintenance .................... 4-2 Cleaning Tools ..................4-2 Life and Cleaning Interval ................4-3 Changing Consumables ................. 4-3 Toner Removal ..................4-3 Fuser Unit Cleaning .................. 4-4 Charger Cleaning ..................
-
Page 62: Chapter 4: Printer Maintenance
LP 100R Laser Printer Operator's Guide Chapter 4: Printer Maintenance Maintenance Because the printer is used almost continuously, paper dust and toner may build up on the surfaces inside the printer. To keep the printer in the optimum condition at all times, the interior surfaces of the printer must periodically be cleaned. -
Page 63: Life And Cleaning Interval
Changing Consumables The LP 100R informs you of the need to change consumables based on the number of pages run on the particular consumable. There are two levels of warnings: When 90% of the life of a consumable has been reached, the printer displays ... -
Page 64: Fuser Unit Cleaning
LP 100R Laser Printer Operator's Guide Chapter 4: Printer Maintenance Fuser Unit Cleaning 1. Open the left-side door. 2. Remove the fuser filter. 3. Loosen the 2 fixing screws and open the fusing unit by holding the handle. Fixing screws 4. -
Page 65: Charger Cleaning
LP 100R Laser Printer Operator's Guide Chapter 4: Printer Maintenance Charger Cleaning 1. Open the front door. 2. Pull out the main charger cleaning lever (top) slowly as far as it will come. Note: When pulling out or inserting the charger cleaning lever, use caution to avoid bending it. - Page 66 LP 100R Laser Printer Operator's Guide Chapter 4: Printer Maintenance 5. Pull out the transfer/separator charger cleaning lever (bottom) slowly as far as it will come. Note: When pulling out or inserting the transfer/separator lever, use caution to avoid bending it.
-
Page 67: Aidc Sensor Cleaning
LP 100R Laser Printer Operator's Guide Chapter 4: Printer Maintenance AIDC Sensor Cleaning 1. Open the front door. 2. Pull out the EP holder slowly as far as it will come. 3. Remove the main charger unit by lifting up the developing unit side approximately 30 degrees (marked A). - Page 68 LP 100R Laser Printer Operator's Guide Chapter 4: Printer Maintenance 5. Remove the developer unit (marked C). Developer unit (C) Note: To avoid damaging the OPC drum, make sure to remove components in this order: a. OPC cartridge b. Developer unit 6.
- Page 69 LP 100R Laser Printer Operator's Guide Chapter 4: Printer Maintenance 8. Re-install the OPC cartridge to its original position. OPC cartridge Note: To avoid damaging the OPC drum, make sure to re-install components in this order: a. Developer unit b. OPC cartridge 9.
-
Page 70: Daily Maintenance
LP 100R Laser Printer Operator's Guide Chapter 4: Printer Maintenance Daily Maintenance To use the printer safely and in optimum condition at all times, clean the following parts daily. AIDC Sensor Cleaning AIDC sensor Use a dry cotton swab or other suitable material to clean the AIDC sensor. -
Page 71: User-Replaceable Consumables
LP 100R Laser Printer Operator's Guide Chapter 4: Printer Maintenance User-Replaceable Consumables table on the following page shows user-replaceable consumables for the LP 100R. For each item, the table shows the expected frequency of replacement and the message that appears on the TDU display when you need to replace that item. -
Page 72: Expected Life Of User-Replaceable Consumables
LP 100R Laser Printer Operator's Guide Chapter 4: Printer Maintenance Expected Life of User-Replaceable Consumables Part Name/Number Expected life Message (pages) Toner bottle 20,000/per Toner Near Empty (9855011) 2 Bottles per case bottle Toner Empty Waste toner collecting bottle 80,000... -
Page 73: Touch Display Unit
LP 100R Laser Printer Operator's Guide Chapter 4: Printer Maintenance Touch Display Unit The TDU display on the LP 100R shows status, warning, or error messages when a printer component needs to be replaced. Figure 4-2 shows a status message. Status message Figure 4-2. -
Page 74: Printer Consumable Supplies
LP 100R Laser Printer Operator's Guide Chapter 4: Printer Maintenance Printer status Current configuration Form size Warning message Current software rev. level Figure 4-3. Warning message. You should check the TDU display for warning messages whenever you change forms. Printer Consumable Supplies... -
Page 75: Toner Bottle Replacement
LP 100R Laser Printer Operator's Guide Chapter 4: Printer Maintenance Toner Bottle Replacement If the Toner Near Empty warning message is displayed, it indicates that the toner bottle needs to be replaced, which can be done without stopping the printer. - Page 76 LP 100R Laser Printer Operator's Guide Chapter 4: Printer Maintenance 5. With the Up indicator on the toner bottle facing upward, insert the bottle into the toner bottle holder. Verify that the line on the toner bottle and the mark on the toner bottle holder are aligned with one another.
-
Page 77: Waste Toner Collecting Bottle Replacement
LP 100R Laser Printer Operator's Guide Chapter 4: Printer Maintenance Waste Toner Collecting Bottle Replacement When the waste toner collecting bottle becomes full, replace it by means of the following procedure: 1. Open the front door. 2. Remove the waste toner collecting bottle and tighten the cap so as not to spill the toner inside. -
Page 78: Opc Drum/Opc Cartridge Replacement
LP 100R Laser Printer Operator's Guide Chapter 4: Printer Maintenance OPC Drum/OPC Cartridge Replacement 1. Open the front door. 2. Pull out the EP holder slowly as far as it will come. 3. Remove the main charger unit by rotating and swinging up the developer unit side approximately 30 degrees (position A). - Page 79 LP 100R Laser Printer Operator's Guide Chapter 4: Printer Maintenance 5. Remove the OPC drum. drum Cleaning pad 6. Install the new OPC drum. drum Note: To avoid damages, do not touch the OPC drum. (Handle only by the ...
- Page 80 LP 100R Laser Printer Operator's Guide Chapter 4: Printer Maintenance 8. Re-install the main charger unit into its original position. 9. Press in the EP holder to the original position. 10. Close the front door. Rev: 1 Page 4-20 April, 2014...
-
Page 81: Cleaning Blade Replacement
LP 100R Laser Printer Operator's Guide Chapter 4: Printer Maintenance Cleaning Blade Replacement 1. Open the front door. 2. Pull out the EP holder slowly as far as it will come. 3. Remove the main charger unit by lifting up the developing unit side approximately 30 degrees (position A). - Page 82 LP 100R Laser Printer Operator's Guide Chapter 4: Printer Maintenance 5. Remove the OPC drum. drum Cleaning pad Note: To avoid damages, do not touch the OPC drum. Use the supplied cleaning pad or other suitable item to shield the OPC ...
- Page 83 LP 100R Laser Printer Operator's Guide Chapter 4: Printer Maintenance 8. Re-install the OPC drum. drum Note: To avoid damages, do not touch the OPC drum. Use the supplied cleaning pad or other suitable item to shield the PC drum.
- Page 84 LP 100R Laser Printer Operator's Guide Chapter 4: Printer Maintenance 11. Slide in the EP holder into its original position. 12. Close the front door. Rev: 1 Page 4-24 April, 2014 of 24 pages...
-
Page 85: Chapter 5: Problem Solving
LP 100R Laser Printer Operator's Guide Chapter 5: Problem Solving Chapter 5: Problem Solving Introduction .................... 5-2 Audible Alarm ..................5-3 Safety Considerations ................5-3 Paper Jams ..................... 5-4 Paper Jams – General ................5-4 Paper Jams – In the Tractor Unit ............5-5 Paper Jams –... -
Page 86: Introduction
Introduction This chapter explains how to clear paper jams and resolve other common problems related to the LP 100R. It also provides a list of the status and error codes that can be displayed on the touch display unit (TDU). -
Page 87: Audible Alarm
LP 100R Laser Printer Operator's Guide Chapter 5: Problem Solving Component Source of to be the problem checked Error code Figure 5-2. Graphic error message II. Note: The specific component to be checked is included in this display. Audible Alarm Most printer errors will cause the audible alarm to sound until the error is cleared. -
Page 88: Paper Jams
LP 100R Laser Printer Operator's Guide Chapter 5: Problem Solving Paper Jams Paper Jams – General The following schematic indicates the path taken by documents as they are fed through the printer and the general areas where document jams can occur. -
Page 89: Paper Jams - In The Tractor Unit
LP 100R Laser Printer Operator's Guide Chapter 5: Problem Solving Paper Jams – In the Tractor Unit 1. Separate the undamaged and crumpled documents from one another at the perforation. 2. Press down on the tractor unit with both hands. - Page 90 LP 100R Laser Printer Operator's Guide Chapter 5: Problem Solving 4. If the jam occurred at the exiting end of the tractor unit, separate the last usable printed page at the perforation, allowing it to drop onto the stacker table.
-
Page 91: Paper Jams - At The Fusing And Exit Areas
LP 100R Laser Printer Operator's Guide Chapter 5: Problem Solving Paper Jams – At the Fusing and Exit Areas 8. Press down on the tractor unit with both hands. 9. Open the lower tractor cover (and upper covers if used) and remove the documents from the belt. - Page 92 LP 100R Laser Printer Operator's Guide Chapter 5: Problem Solving 11. Open the left-side door. 12. Open the exit roller area. 13. If the burster unit is enabled, open the burster area. 14. Remove the toner fuser filter and open the transport roller.
- Page 93 LP 100R Laser Printer Operator's Guide Chapter 5: Problem Solving 15. Open the fuser unit. Note: When removing the form, do not contaminate the fusing glass with toner. Clean the fusing glass if it becomes contaminated. 16. Remove the jammed form.
- Page 94 LP 100R Laser Printer Operator's Guide Chapter 5: Problem Solving 17. Close all areas, and re-install the fusing toner filter. 18. Close the left-side door. 19. Close all open tractor covers. Raise the tractor unit by lifting up on the tractor unit handle.
-
Page 95: Interlock Errors
LP 100R Laser Printer Operator's Guide Chapter 5: Problem Solving Interlock Errors Interlock error messages, along with their recovery procedure are included as part of the graphic error messages. Error recovery from Interlock errors is automatic when the Interlock problem is resolved. -
Page 96: Print Quality Problems
LP 100R Laser Printer Operator's Guide Chapter 5: Problem Solving Print Quality Problems If a print image is ejected because of a printer problem, take the following actions. If these remedies do not restore the print image, contact your nearest dealer or representative for assistance. -
Page 97: Light Image
LP 100R Laser Printer Operator's Guide Chapter 5: Problem Solving Light Image Checking item Result Remedy Is the printing form damp? Replace Is the OPC drum exhausted in Replace service life? Is the image density setting Correct correct? Is the fusing glass dirty? -
Page 98: Background Haze
LP 100R Laser Printer Operator's Guide Chapter 5: Problem Solving Background Haze Checking item Result Remedy Is external light, such as the direct Shut off the external rays of the sun, entering the machine? light Is the OPC drum exhausted in service... -
Page 99: White Stripe
LP 100R Laser Printer Operator's Guide Chapter 5: Problem Solving White Stripe Checking item Result Remedy Is the image transfer charger clean? Clean or replace Is the OPC drum damaged, or is there Clean or replace foreign matter on the OPC drum? -
Page 100: Uneven Image Density
LP 100R Laser Printer Operator's Guide Chapter 5: Problem Solving Uneven Image Density Checking item Result Remedy Is the form damp? Replace Is the developing unit correctly set? Correct the setting Is the OPC cartridge correctly set? Correct the setting Note: When the label form is printed, paste may come out (and stick to the label form surface). -
Page 101: Warning Messages
Warning Messages Warning messages are displayed when specified maintenance functions are to be executed by either the printer operator or a SATO service representative. In most cases the printer will continue to run after displaying one of the following messages. To delay taking the suggested action, however, may cause some degradation of the print quality. -
Page 102: Error Messages Requiring Operator Intervention
LP 100R Laser Printer Operator's Guide Chapter 5: Problem Solving Error Messages Requiring Operator Intervention When displayed, the printer error messages listed below will require operator intervention. Code Message Suggested Action AIDC High Clean AIDC sensor (see page 4-7). ... - Page 103 LP 100R Laser Printer Operator's Guide Chapter 5: Problem Solving Error Messages Requiring Operator Intervention (cont'd) Code Message Suggested action Stacker Table Verify that the stacker table is locked into Unlocked position. No Toner Mark Clean AIDC sensor (see page 4-7).
-
Page 104: Printer Hardware Messages
LP 100R Laser Printer Operator's Guide Chapter 5: Problem Solving Printer Hardware Messages Some printer hardware problems may require entering a call for service. If this becomes necessary, be prepared to supply the applicable error code to the SATO service contact when making the call. - Page 105 LP 100R Laser Printer Operator's Guide Chapter 5: Problem Solving Printer Hardware Messages (cont'd) Code Message Suggested action Retraction Malfunction Separator Charger Short Suction Fan Malfunction Suction Motor Malfunction SOS Error Cycle power to the printer (by pressing and holding down the POWER LED for Transfer Charger Short 20 seconds) and retry.
-
Page 106: Controller Errors
LP 100R Laser Printer Operator's Guide Chapter 5: Problem Solving Controller Errors Message Explanation Out of Memory The printer has requested more memory than the operating system can provide at the present time. FIFO Underrun Fatal error. Call service. General Protection Fault. Fatal error. Write down the number at the bottom of the display screen (example: EIP= 000E4932) and notify service. -
Page 107: Emulation Errors
LP 100R Laser Printer Operator's Guide Chapter 5: Problem Solving Emulation Errors Kodescript™ Errors Code Description Explanation Not in Kodescript The printer controller received data before receiving Mode the Kodescript on (^PY^-) command. This error will clear when the (^PY^-) command is received. -
Page 108: Kodescriptplus Status And Error Codes
LP 100R Laser Printer Operator's Guide Chapter 5: Problem Solving KodescriptPlus™ Status and Error Codes All KodescriptPlus code numbers appear in the lower right corner of the printer’s display. In addition, an explanation of status and error codes will be sent to the monitor, COM2, or the display, as long as Field Check is set to on and the output is set to one of the above devices. -
Page 109: Kodescriptplus Status Messages
LP 100R Laser Printer Operator's Guide Chapter 5: Problem Solving KodescriptPlus Status Messages Code Description Explanation Start KodescriptPlus The METO-Logic Controller is being set to use KodescriptPlus emulation. Start Parsing Format The METO-Logic Controller is interpreting the KodescriptPlus page format. -
Page 110: Kodescriptplus Warnings
LP 100R Laser Printer Operator's Guide Chapter 5: Problem Solving KodescriptPlus Warnings Code Description Explanation Unknown/Unsupported Either an unknown or an unsupported Format KodescriptPlus Format command has been included in the KodescriptPlus command program. Unknown/Unsupported Either an unknown or unsupported Data command KodescriptPlus Data has been included in the KodescriptPlus program. - Page 111 LP 100R Laser Printer Operator's Guide Chapter 5: Problem Solving KodescriptPlus Warnings (cont'd) Code Description Explanation Incorrect bar code data The number of characters to be encoded in the bar length code exceeds the maximum number of characters permitted for that bar code.
-
Page 112: Kodescriptplus Errors
LP 100R Laser Printer Operator's Guide Chapter 5: Problem Solving KodescriptPlus Errors Code Description Explanation Excessive number of fields The number of defined fields exceeds the maximum number permitted (499). Excessive number of Hard The number of defined Hard Data fields exceeds the Data fields maximum number permitted (99). - Page 113 LP 100R Laser Printer Operator's Guide Chapter 5: Problem Solving KodescriptPlus Errors (cont'd) Code Description Explanation Link field data length. The amount of data supplied for a specific link field exceeds the amount of data specified. Field number being linked The program cannot find a field number that was to does not exist.
-
Page 114: Kodescriptplus Fatal Errors
LP 100R Laser Printer Operator's Guide Chapter 5: Problem Solving KodescriptPlus Fatal Errors Code Description Explanation Invalid Format command. The data includes an invalid Format command. Column Print command. The Column Print command (^Cnn^-) should be used in conjunction with the Horizontal Spread command (^Snniip^-). -
Page 115: Chapter 6: Supervisory Functions
LP 100R Laser Printer Operator's Guide Chapter 6: Supervisory Functions Chapter 6: Supervisory Functions Introduction .................... 6-4 Supervisor Menu ..................6-5 Supervisor Menu Access ................ 6-5 Test Prints Function .................. 6-9 Test Prints Function Access ..............6-9 ” Grid ..................6-10 Character Fill .................. - Page 116 LP 100R Laser Printer Operator's Guide Chapter 6: Supervisory Functions Password Enable Function Access ............6-39 Change Password Function ..............6-40 Change Password Function Access ............6-40 Time Function ..................6-42 Time Function Access ................6-42 System Time ..................6-44 Up-Time ...................
- Page 117 LP 100R Laser Printer Operator's Guide Chapter 6: Supervisory Functions Error Recovery ................. 6-103 Emulation Settings ................6-105 KodescriptPlus ................6-106 PCL5e Options ................6-108 Page Buffer Limit ................6-110 Resolution ..................6-112 EAS (Electronic Article Surveillance) ........... 6-114 Swing Mode (Optional Unit) ............... 6-116 Reverse Mode ..................
-
Page 118: Introduction
The print data, which includes information about the fonts, logos, and page format to be used, is sent to the LP 100R from a host computer. Configuration parameters, however, must be set in the TDU prior to initiating a print job. -
Page 119: Supervisor Menu
LP 100R Laser Printer Operator's Guide Chapter 6: Supervisory Functions Supervisor Menu Supervisor Menu Access 1. If the POWER LED is not green, press it for approximately 1 second and release. 2. Press Menu to display the Main Menu. 3. Select Advanced from the Main Menu. - Page 120 Figure 6-2. Supervisor Menu. 7. Each LP 100R menu includes a menu title and up to 5 selection items. 8. The Up and Down triangles indicate whether more selection items are available above or below the items displayed on the menu.
- Page 121 LP 100R Laser Printer Operator's Guide Chapter 6: Supervisory Functions Configuration – Enables you to recall a previously created configuration, store a new configuration (using a numeric identifier), remove an existing configuration (by removing the identifier without removing the configuration), or edit the currently active configuration.
- Page 122 LP 100R Laser Printer Operator's Guide Chapter 6: Supervisory Functions Define Overlay – This option is not available at the present time. Note: The printer should be in the Offline Idle mode when any of the supervisory functions are executed.
-
Page 123: Test Prints Function
LP 100R Laser Printer Operator's Guide Chapter 6: Supervisory Functions Test Prints Function This function allows you to evaluate print quality and test printer configurations before they are saved. Test Prints Function Access 1. When the Supervisor Menu displays, press either the Up or Down triangle to move the selection bar to the Test Prints function. -
Page 124: Grid Pattern
LP 100R Laser Printer Operator's Guide Chapter 6: Supervisory Functions ” Grid " Grid test pattern is a printout of a graph paper pattern of 0.1" squares using the current form size. This test page allows you to evaluate the print quality, verify the form size, and check the horizontal and vertical alignment for the current configuration. - Page 125 LP 100R Laser Printer Operator's Guide Chapter 6: Supervisory Functions Figure 6-5. ” Grid test pattern page. Rev: 1 Page 6-11 April, 2014 of 128 pages...
-
Page 126: Character Fill
LP 100R Laser Printer Operator's Guide Chapter 6: Supervisory Functions Character Fill The Character Fill test pattern selection prints a sliding alphanumeric character test in Courier font across the current form width and height, using the lines per inch and characters per inch settings for the printer. This selection lets you evaluate print quality and verify the operation of the printer’s PostScript... - Page 127 LP 100R Laser Printer Operator's Guide Chapter 6: Supervisory Functions Figure 6-7. Character Fill test pattern page. Rev: 1 Page 6-13 April, 2014 of 128 pages...
-
Page 128: Font Sampler
The page also shows the index number used by the LP 100R to track each font (on the left edge of the printout) and a sample of the font (on the right side of the printout). - Page 129 LP 100R Laser Printer Operator's Guide Chapter 6: Supervisory Functions When the page has printed, press Feed until the printed page is completely ejected from the printer. Figure 6-9. Font Sampler page. Rev: 1 Page 6-15 April, 2014 of 128 pages...
-
Page 130: Placement Test
LP 100R Laser Printer Operator's Guide Chapter 6: Supervisory Functions Placement Test The Placement Test pattern page prints an array of filled boxes on the current form size. You can use this test page to verify the correct positioning of the image on the form. - Page 131 LP 100R Laser Printer Operator's Guide Chapter 6: Supervisory Functions Figure 6-11. Placement Test pattern. Rev: 1 Page 6-17 April, 2014 of 128 pages...
-
Page 132: Page Coverage
To get an accurate reading for page coverage, make sure you send an entire page of print data. The maximum page coverage supported by the LP 100R printer is 20%. Note: The Display Page Coverage function should be executed only when the printer is in the Online Print mode, and a print job is in progress. - Page 133 LP 100R Laser Printer Operator's Guide Chapter 6: Supervisory Functions 5. Press Enter, which causes the Advanced Menu to display. 6. Press the Up or Down triangle to move the selection bar to the Supervisor function. 7. Press Enter, which causes the following screen to display: Figure 6-13.
- Page 134 LP 100R Laser Printer Operator's Guide Chapter 6: Supervisory Functions 10. Press the Up or Down triangle on the Test Prints menu to move the selection bar to the Page Coverage function. 11. Press Enter, which causes the following screen to display: Figure 6-14.
-
Page 135: User Files
LP 100R Laser Printer Operator's Guide Chapter 6: Supervisory Functions User Files The User Files function prints a list of the user-installed files on the hard drive of the printer, including files in both the archive and active directories. Note: The User Files can not be printed while a print job is in progress. - Page 136 LP 100R Laser Printer Operator's Guide Chapter 6: Supervisory Functions Figure 6-16. User Files printout. Rev: 1 Page 6-22 April, 2014 of 128 pages...
-
Page 137: Font Detail
LP 100R Laser Printer Operator's Guide Chapter 6: Supervisory Functions Font Detail The Font Detail selection prints a sample of every character available when the Symbol Set and Primary Font are used in conjunction with one another. This can be very helpful when you want to verify the symbols that can be printed in the higher ASCII character set. - Page 138 LP 100R Laser Printer Operator's Guide Chapter 6: Supervisory Functions Figure 6-18. Print Font Detail screen. Rev: 1 Page 6-24 April, 2014 of 128 pages...
-
Page 139: Interface Setup Function
Interface Setup Function Access The Interface Setup menu, which controls the operation of communications interfaces, displays all interfaces supported by the LP 100R printer regardless of whether each interface is installed. If you configure an interface that is not installed, the change will not affect the operation of the printer; but if that interface is installed at a later date, it may not work correctly. -
Page 140: Rs-232 Interface
LP 100R Laser Printer Operator's Guide Chapter 6: Supervisory Functions RS-232 Interface The serial port is a service aid and not intended for data transmission to the printer. Parallel Interface You can use this menu to modify the settings for the high-speed Parallel Interface. -
Page 141: Parallel Interface Data Transfer Rate Modification
LP 100R Laser Printer Operator's Guide Chapter 6: Supervisory Functions Parallel Interface Data Transfer Rate Modification Ta, Tb, and Tc Each of these options specifies time intervals (in microseconds) affecting the data transfer rate for the Parallel Interface. For a Parallel Interface connection that supports faster data transfers, you can specify smaller values for these fields. -
Page 142: Ethernet Setup
LP 100R Laser Printer Operator's Guide Chapter 6: Supervisory Functions Ethernet Setup Note: The Ethernet settings can not be changed when a print job is in progress. 1. Press the Up or Down triangle on the Interface Setup menu to move the selection bar to the Ethernet function. -
Page 143: Enable Ethernet (Enable/Disable Ethernet)
LP 100R Laser Printer Operator's Guide Chapter 6: Supervisory Functions Enable Ethernet (Enable/Disable Ethernet) All computers on Ethernet networks share a common medium using an access method known as Carrier Sense Multiple Access with Collision Detect (CSMA/CD), which determines when a computer is free to transmit data to the access medium. -
Page 144: Host Protocol
LP 100R Laser Printer Operator's Guide Chapter 6: Supervisory Functions Host Protocol Static Routing – Requires the network administrator to manually enter the Static IP routing information including the Static IP Address, Subnet Mask, and Gateway Address. Dynamic Host Configuration Protocol (DHCP) – Enables computers to ... -
Page 145: Job Trace Enable/Disable
LP 100R Laser Printer Operator's Guide Chapter 6: Supervisory Functions Job Trace Enable/Disable When Job Trace is enabled, whatever print job goes into the printer’s print server will be archived into a directory that is File Transfer Protocol (FTP) accessible. -
Page 146: Files Function
LP 100R Laser Printer Operator's Guide Chapter 6: Supervisory Functions Files Function This function enables you to manipulate fonts, logos, and formats stored on the printer’s hard drive. Files Function Access 1. When the Supervisor Menu displays, press either the Up or Down triangle to move the selection bar to the Files function. -
Page 147: Reset Function
LP 100R Laser Printer Operator's Guide Chapter 6: Supervisory Functions Reset Function This option resets the printer and the METO-Logic Controller. Note: The Reset menu has been included in this section only as a point of reference. Its use is limited to service personnel when troubleshooting a potential printer problem. -
Page 148: Cancel Job On Jam Function
LP 100R Laser Printer Operator's Guide Chapter 6: Supervisory Functions Cancel Job On Jam Function The Cancel Job On Jam function defines the corrective options available if a jam occurs during processing. Cancel Job On Jam Function Access Note: Cancel Job On Jam settings can not be changed when a print job is in progress. -
Page 149: Disabled/Enabled (Cancel Job On Jam)
LP 100R Laser Printer Operator's Guide Chapter 6: Supervisory Functions Disabled/Enabled (Cancel Job On Jam) This causes the balance of the job to be printed (if Disabled is selected) or canceled (if Enabled is selected) when the jam has been cleared. -
Page 150: Prompt (Cancel Job On Jam)
LP 100R Laser Printer Operator's Guide Chapter 6: Supervisory Functions Prompt (Cancel Job On Jam) This function allows you to selectively determine, on a job-by-job basis, whether to cancel the balance of the job or print the balance of the job when the jam has been cleared. -
Page 151: Cancel Job On Field Error Function
LP 100R Laser Printer Operator's Guide Chapter 6: Supervisory Functions Cancel Job On Field Error Function The Cancel Job On Field Error function defines the corrective options available in the event a field error is detected during processing. Cancel Job On Field Error Function Access Note: Cancel Job On Field Error settings can not be changed when a print job is in progress. -
Page 152: Prompt (Cancel Job On Field Error)
LP 100R Laser Printer Operator's Guide Chapter 6: Supervisory Functions 1. The audible alarm will sound indicating that a field error has been detected. 2. The system returns to the Main Menu and indicates, in the upper left, that it is in the Offline Print mode. -
Page 153: Password Enable Function
LP 100R Laser Printer Operator's Guide Chapter 6: Supervisory Functions Password Enable Function The Password Enable function allows you to either initiate or terminate password protection. If password protection is enabled, access to the Supervisor Menu is inhibited until a valid password is entered. -
Page 154: Change Password Function
LP 100R Laser Printer Operator's Guide Chapter 6: Supervisory Functions 3. Press the Up or Down triangle to move the selection bar to the desired status, either Disabled or Enabled. 4. Press Enter, which stores the status selected and returns the system to the Supervisor Menu. - Page 155 LP 100R Laser Printer Operator's Guide Chapter 6: Supervisory Functions 3. Enter the current password and press Enter, which causes the following screen to display: Figure 6-29. New Password. 4. Enter the new password and press Enter, which causes the following screen to display: Figure 6-30.
-
Page 156: Time Function
LP 100R Laser Printer Operator's Guide Chapter 6: Supervisory Functions Time Function The Time menu allows you to select the time configuration that is most compatible with your system requirements. Note: Time settings can not be changed when a print job is in progress. - Page 157 LP 100R Laser Printer Operator's Guide Chapter 6: Supervisory Functions Up-Time – The length of time that power to the printer has been turned on, expressed as either HH:MM:SS if less than 24 hours, or DDD:HH:MM if more than 24 hours.
-
Page 158: System Time
LP 100R Laser Printer Operator's Guide Chapter 6: Supervisory Functions System Time This sets the system time clock as HH:MM:SS, with the HH position expressed in military time (i.e., 1:00 . through midnight is displayed as 13:00–24:00). 1. Press the Up or Down triangle on the Supervisor Menu to move the selection bar to the Time function. -
Page 159: Up-Time
LP 100R Laser Printer Operator's Guide Chapter 6: Supervisory Functions Up-Time The sets the up-time clock to the length of time that power to the printer has been turned on. It is expressed as either HH:MM:SS if less than 24 hours, or DDD:HH:MM if more than 24 hours. -
Page 160: Set Time
LP 100R Laser Printer Operator's Guide Chapter 6: Supervisory Functions Set Time This allows you to change the System Time to either an earlier or later time. 1. Press the Up or Down triangle on the Supervisor Menu to move the selection bar to the Up-Time function. - Page 161 LP 100R Laser Printer Operator's Guide Chapter 6: Supervisory Functions 5. Each segment of System Time (HH:MM:SS) is set by: a. Pressing the Down triangle to change the time segments to an earlier time or pressing the Up triangle to change the time segments to a later time.
-
Page 162: Set Time Zone
LP 100R Laser Printer Operator's Guide Chapter 6: Supervisory Functions Set Time Zone This allows you to set the GMT (Greenwich Mean Time) to the applicable GMT Offset Time. 1. Press the Up or Down triangle on the Supervisor Menu to move the selection bar to the Time function. -
Page 163: Standard Time Zones
LP 100R Laser Printer Operator's Guide Chapter 6: Supervisory Functions Standard Time Zones Civilian GMT: Greenwich Mean Universal UTC: Universal Coordinate WET: Western European East of Greenwich Time Zone West of Greenwich Time Zone Civilian Civilian CET: Central European WAT: West Africa... -
Page 164: Daylight Saving
LP 100R Laser Printer Operator's Guide Chapter 6: Supervisory Functions Daylight Saving This allows the automatic start and discontinuance of Daylight Savings Time when the System Time is in effect. Note: The Daylight Saving function does not work in conjunction with GMT Time. - Page 165 LP 100R Laser Printer Operator's Guide Chapter 6: Supervisory Functions 5. If Daylight Saving Time is not to be used: a. Press the Up or Down triangle to move the selection bar to Disabled. b. Press Enter, which inhibits Daylight Saving Time and returns the system to the Supervisor Menu.
-
Page 166: Network Time Setting Function
LP 100R Laser Printer Operator's Guide Chapter 6: Supervisory Functions Network Time Setting Function The Network Time Setting function defines whether the METO-Logic Controller is to use the Local System Time, or whether it is to synchronize the time with a Time Server. -
Page 167: Network Time Enable (Select Local System Time)
LP 100R Laser Printer Operator's Guide Chapter 6: Supervisory Functions Network Time Enable (Select Local System Time) This allows you to specify whether or not the Local System Time will be used. 1. Press the Up or Down triangle on the Network Time Setting menu to move the selection bar to the Net Time Enable function. -
Page 168: Network Time Enable (Select Server Time)
LP 100R Laser Printer Operator's Guide Chapter 6: Supervisory Functions Network Time Enable (Select Server Time) This permits changing the Server Time IP address if Server Time will be used. 1. Press the Up or Down triangle on the Network Time Setting menu to move the selection bar to the Network Time Enable function. -
Page 169: Time Server (Enter/Change Time Server Ip Address)
LP 100R Laser Printer Operator's Guide Chapter 6: Supervisory Functions Time Server (Enter/Change Time Server IP Address) 1. When the Supervisor Menu displays, press the Up or Down triangle to move the selection bar to the Network Time Setting function. - Page 170 LP 100R Laser Printer Operator's Guide Chapter 6: Supervisory Functions 4. Press Enter, which causes the following screen to display: Figure 6-45. Time Server. 5. Enter the desired IP address. 6. If the IP address entered is valid, a Synchronization Successful message displays, and the system returns to the Network Time menu.
-
Page 171: Configuration Procedures
Chapter 6: Supervisory Functions Configuration Procedures Configuration Introduction You can use the LP 100R TDU to create up to 999 printer configurations, each identified by a numeric value from 001 to 999. The factory default configuration is identified as Configuration 000. -
Page 172: Status Page
LP 100R Laser Printer Operator's Guide Chapter 6: Supervisory Functions Status Page The Status Page defines the parameters of the configuration currently loaded in the printer as indicated in the example that follows: Figure 6-46. Status Page. Note: See Print Status Page in Chapter 3 for the procedures required to print the METO-Logic Status Page. -
Page 173: Stored And Default Configuration
LP 100R Laser Printer Operator's Guide Chapter 6: Supervisory Functions Stored and Default Configuration The Stored and Default Configuration defines the functional elements of each configuration, including the Default Configuration, stored on the printer hard drive. Figure 6-47. Default Configuration. -
Page 174: Configuration Function Menu
LP 100R Laser Printer Operator's Guide Chapter 6: Supervisory Functions Configuration Function Menu The Configuration function on the Supervisor menu is where you recall a previously created configuration, store a new configuration (using a numeric identifier), remove an existing configuration (by removing the identifier without removing the configuration), or edit the currently active configuration. -
Page 175: Recall Configuration
LP 100R Laser Printer Operator's Guide Chapter 6: Supervisory Functions Recall Configuration The Recall function is used to load a stored configuration into the printer. Once loaded, the configuration can be used to print the related documents, or it can be modified for subsequent use. - Page 176 LP 100R Laser Printer Operator's Guide Chapter 6: Supervisory Functions 6. When Enter is pressed, a Recalling ... Adjusting Image Density message displays followed by an Adjusting Resolution message. 7. After both messages have been displayed, the system returns to the Configuration menu.
-
Page 177: Store Configuration
LP 100R Laser Printer Operator's Guide Chapter 6: Supervisory Functions Store Configuration The Store setting is used to either store a new configuration on the printer’s hard drive or store updates to an existing configuration already stored on the printer’s hard drive. - Page 178 LP 100R Laser Printer Operator's Guide Chapter 6: Supervisory Functions 3. If updates to the current configuration are to be stored: a. Press Enter, which causes the audible alarm to sound and the following screen to display: Figure 6-51. Overwrite Configuration screen.
- Page 179 LP 100R Laser Printer Operator's Guide Chapter 6: Supervisory Functions 4. If a new configuration is to be stored: a. Enter the desired configuration number on the numeric keypad. b. Press Enter, which causes the audible alarm to sound and the following screen to display: Figure 6-52.
-
Page 180: Remove Configuration
LP 100R Laser Printer Operator's Guide Chapter 6: Supervisory Functions Remove Configuration The Remove setting lets you remove a configuration. Note: A stored Print Configuration can not be removed when a print job is in progress. 1. Press the Up or Down triangle on the Configuration menu to move the selection bar to the Remove function. - Page 181 LP 100R Laser Printer Operator's Guide Chapter 6: Supervisory Functions 4. Press Enter, which causes the audible alarm to sound and the following screen to display: Figure 6-54. Remove Configuration. 5. If Enter is pressed, the configuration is deleted from the printer’s hard drive, and the system returns to the Configuration menu.
-
Page 182: Edit
LP 100R Laser Printer Operator's Guide Chapter 6: Supervisory Functions Edit The Edit function provides access to the Printer Setup menu (see the next page), which contains functions that let you execute or modify an existing configuration or specify a new configuration. -
Page 183: Printer Setup Menu
LP 100R Laser Printer Operator's Guide Chapter 6: Supervisory Functions Printer Setup Menu This menu lets you execute or modify an existing configuration or specify a new configuration. Printer Setup Menu Access 1. Press the Up or Down triangle on the Configuration menu to move the selection bar to the Edit function. - Page 184 LP 100R Laser Printer Operator's Guide Chapter 6: Supervisory Functions 3. The following functions can be selected from this menu: Form Height Print Width Lines Per Inch Characters Per Inch Vertical Adjustment Horizontal Adjustment ...
-
Page 185: Form Height
LP 100R Laser Printer Operator's Guide Chapter 6: Supervisory Functions Form Height The Form Height setting specifies, in inches, the height of the document to be printed. Note: The Form Height setting can not be changed when a print job is in progress. - Page 186 LP 100R Laser Printer Operator's Guide Chapter 6: Supervisory Functions 4. The height can be increased or decreased in 2 different ways: Enter the new height on the numeric keypad and then press Enter. Move the Up or Down triangle (to increase or decrease the height) and ...
-
Page 187: Print Width
LP 100R Laser Printer Operator's Guide Chapter 6: Supervisory Functions Print Width The Print Width setting specifies, in inches, the print width of the document to be printed. Note: The Print Width setting can not be changed when a print job is in progress. - Page 188 LP 100R Laser Printer Operator's Guide Chapter 6: Supervisory Functions 4. The print width can be increased or decreased in 2 different ways: Enter the new print width on the numeric keypad and then press Enter. Move the Up or Down triangle (to increase or decrease the print width) ...
-
Page 189: Lines Per Inch
LP 100R Laser Printer Operator's Guide Chapter 6: Supervisory Functions Lines Per Inch The Lines Per Inch setting specifies, in text lines, the number of lines per inch and character height per line to be printed on the document. Note: The Lines Per Inch setting can not be changed when a print job is in progress. - Page 190 LP 100R Laser Printer Operator's Guide Chapter 6: Supervisory Functions 3. The number of lines per inch can be increased in 0.1000” increments, from a minimum of 0.1000” to a maximum of 20.0000”. 4. The number of lines per inch can be increased or decreased in 2 different...
-
Page 191: Characters Per Inch
LP 100R Laser Printer Operator's Guide Chapter 6: Supervisory Functions Characters Per Inch The Characters Per Inch setting specifies the character width and horizontal spacing to be used by the printer. Increasing the number of characters to be printed per inch causes a corresponding decrease in character width. - Page 192 LP 100R Laser Printer Operator's Guide Chapter 6: Supervisory Functions 3. The number of characters per inch can be increased in 0.1000” increments, from a minimum of 0.1000” to a maximum of 30.0000”. 4. The number of characters per inch can be increased or decreased in 2 different...
-
Page 193: Vertical Adjustment
LP 100R Laser Printer Operator's Guide Chapter 6: Supervisory Functions Vertical Adjustment The Vertical Adjustment setting specifies the distance from the top of the form to the top of the print area in either inches, mm, 7200/inch, scan lines, or DPI (dots per inch) as defined by the Unit Field. - Page 194 LP 100R Laser Printer Operator's Guide Chapter 6: Supervisory Functions 2. Press Align, which causes the following Print Alignment menu to display: Figure 6-61. Print Alignment menu. 3. Press the Up or Down triangle on the Printer Setup menu to move the selection bar to the Vertical Fine Adjustment function.
- Page 195 LP 100R Laser Printer Operator's Guide Chapter 6: Supervisory Functions Note: The Vertical Adjustment can not be changed on the Default Configuration. 5. The Vertical Adjustment can be increased or decreased in 2 ways: Enter the new adjustment on the numeric keypad and then press Enter.
-
Page 196: When The Printer Is Idle
LP 100R Laser Printer Operator's Guide Chapter 6: Supervisory Functions When the Printer Is Idle 1. Press the Up or Down triangle on the Printer Setup menu to move the selection bar to the Vertical Adjustment function. 2. Press Enter, which causes the following Vertical Adjustment screen to display:... -
Page 197: Horizontal Adjustment
LP 100R Laser Printer Operator's Guide Chapter 6: Supervisory Functions Horizontal Adjustment The Horizontal Adjustment setting specifies the distance from the left edge of the document to the start of the print area either in inches, mm, 7200/inch, or DPI as defined by the Unit field. - Page 198 LP 100R Laser Printer Operator's Guide Chapter 6: Supervisory Functions 2. Press Align, which causes the following Print Alignment menu to display: Figure 6-65. Print Alignment menu. 3. Press the Up or Down triangle on the Printer Setup menu to move the selection bar to the Horizontal Fine Adjustment function.
- Page 199 LP 100R Laser Printer Operator's Guide Chapter 6: Supervisory Functions Note: The Horizontal Adjustment can not be changed on the Default Configuration. 5. The Horizontal Adjustment can be increased or decreased in 2 different ways: Enter the new adjustment on the numeric keypad and then press Enter.
-
Page 200: When The Printer Is Idle
LP 100R Laser Printer Operator's Guide Chapter 6: Supervisory Functions When the Printer Is Idle 1. Press the Up or Down triangle on the Printer Setup menu to move the selection bar to the Horizontal Adjustment function. 2. Press Enter, which causes the following Horizontal Adjustment screen to... -
Page 201: Image Density
LP 100R Laser Printer Operator's Guide Chapter 6: Supervisory Functions Image Density The Image Density setting specifies the relative darkness of the image produced by the printer. The higher the value specified, the darker the image. Note: The Image Density setting can not be changed when a print job is in progress. - Page 202 LP 100R Laser Printer Operator's Guide Chapter 6: Supervisory Functions 3. Press the Up or Down triangle to move the selection bar to the desired density. 4. Press Enter to save the density selected. Note: Pressing Enter after any Printer Setup function has been executed saves the ...
-
Page 203: Material Type
LP 100R Laser Printer Operator's Guide Chapter 6: Supervisory Functions Material Type The Material Type setting defines the type of material to be used by the printer. The type used affects the energy applied in transferring the print image to the output documents. - Page 204 LP 100R Laser Printer Operator's Guide Chapter 6: Supervisory Functions 3. Press the Up or Down triangle to move the selection bar to the desired Material Type. 4. Press Enter to save the type selected. Note: Pressing Enter after any Printer Setup function has been executed saves the ...
-
Page 205: Orientation
LP 100R Laser Printer Operator's Guide Chapter 6: Supervisory Functions Orientation The Orientation setting specifies, in clockwise rotation, the image as it is to be printed on the document. Note: The Orientation setting can not be changed when a print job is in progress. - Page 206 LP 100R Laser Printer Operator's Guide Chapter 6: Supervisory Functions 3. Press the Up or Down triangle to move the selection bar to the Orientation desired. 4. Press Enter to save the Orientation selected. Note: Pressing Enter after any Printer Setup function has been executed saves the ...
-
Page 207: Emulation
LP 100R Laser Printer Operator's Guide Chapter 6: Supervisory Functions Emulation The Emulation setting is the interpretation of the commands contained in the data stream received by the Data Communication Port. Note: The Emulation setting can not be changed when a print job is in progress. - Page 208 LP 100R Laser Printer Operator's Guide Chapter 6: Supervisory Functions Note: • Brackets ( [ ] ) around a specific Emulation indicate that it is the Default Configuration Emulation. • An arrow () pointing to a specific page Emulation indicates that it is the type assigned to the currently displayed configuration.
-
Page 209: Primary Font
LP 100R Laser Printer Operator's Guide Chapter 6: Supervisory Functions Primary Font The Primary Font setting specifies the Primary Font that will be used by the printer for print data that does not specify a font. Note: The Primary Font setting can not be changed when a print job is in progress. - Page 210 LP 100R Laser Printer Operator's Guide Chapter 6: Supervisory Functions 3. Press the Up or Down triangle to move the selection bar to the Primary Font desired. 4. Press Enter to save the font selected. Note: Pressing Enter after any Printer Setup function has been executed saves the ...
-
Page 211: Auxiliary Font
LP 100R Laser Printer Operator's Guide Chapter 6: Supervisory Functions Auxiliary Font The Auxiliary Font specifies the font to be used for print data which is to be different than that specified by the primary Print Font. Note: The Auxiliary Font setting can not be changed when a print job is in progress. - Page 212 LP 100R Laser Printer Operator's Guide Chapter 6: Supervisory Functions 3. Press the Up or Down triangle to move the selection bar to the Auxiliary Font desired. 4. Press Enter to save the font selected. Note: Pressing Enter after any Printer Setup function has been executed saves the ...
-
Page 213: Symbol Set
LP 100R Laser Printer Operator's Guide Chapter 6: Supervisory Functions Symbol Set The Symbol Set determines the Character Set used by the Printer Character data in the print stream. Executing the Font Detail option included as part of the Test Prints function will provide a graphic copy of the complete Character Set for the font printed. - Page 214 LP 100R Laser Printer Operator's Guide Chapter 6: Supervisory Functions 3. Press the Up or Down triangle to move the selection bar to the Symbol Set desired. 4. Press Enter to save the Symbol Set selected. Note: Pressing Enter after any Printer Setup function has been executed saves the ...
-
Page 215: Line Termination
LP 100R Laser Printer Operator's Guide Chapter 6: Supervisory Functions Line Termination The Line Termination setting specifies how the printer should interpret the end-of- line characters included in the print data it receives. This setting affects the printer only when the Line Printer or PCL5e Emulation is used. - Page 216 LP 100R Laser Printer Operator's Guide Chapter 6: Supervisory Functions 3. Press the Up or Down triangle to move the selection bar to the Line Termination desired. Note: If Smart Add is selected, the software automatically inserts a CR/LF after 80 characters.
-
Page 217: Error Recovery
LP 100R Laser Printer Operator's Guide Chapter 6: Supervisory Functions Error Recovery The Error Recovery setting indicates whether the printer should try to reprint a page that was not successfully printed (e.g., because of a paper jam). Note: The Error Recovery setting can not be changed when a print job is in progress. - Page 218 LP 100R Laser Printer Operator's Guide Chapter 6: Supervisory Functions 3. Press the Up or Down triangle to move the selection bar to the Error Recovery mode desired. 4. Press Enter to save the Error Recovery mode selected. Note: Pressing Enter after any Printer Setup function has been executed saves the ...
-
Page 219: Emulation Settings
LP 100R Laser Printer Operator's Guide Chapter 6: Supervisory Functions Emulation Settings The Emulation settings contain the parameters specific to each emulation and tell the printer how to interpret the content of these parameters as they appear in the print data stream. -
Page 220: Kodescriptplus
LP 100R Laser Printer Operator's Guide Chapter 6: Supervisory Functions KodescriptPlus 1. Press the Up or Down triangle on the Emulation Settings menu to move the selection bar to the KodescriptPlus function. 2. Press Enter, which causes the following menu to display: Figure 6-78. - Page 221 LP 100R Laser Printer Operator's Guide Chapter 6: Supervisory Functions Control Characters (Kodescript and KodescriptPlus Emulation) Control Characters CTRL: ^5a Default: ^5e Field ID FNIN: [ 5b Default: [ 5b End of Format FEND: ] 5f Default: ] 5d...
-
Page 222: Pcl5E Options
LP 100R Laser Printer Operator's Guide Chapter 6: Supervisory Functions PCL5e Options 1. Press the Up or Down triangle on the Emulation Settings menu to move the selection bar to the to the PCL5e function. 2. Press Enter, which causes the following menu to display: Figure 6-79. - Page 223 LP 100R Laser Printer Operator's Guide Chapter 6: Supervisory Functions Scan Direction – Indicates the print orientation available to the PCL5e Emulation: Style Orientation Portrait No rotation Landscape 90º rotation (clockwise) Reverse portrait 180º rotation (clockwise) Reverse landscape 270º rotation (clockwise)
-
Page 224: Page Buffer Limit
LP 100R Laser Printer Operator's Guide Chapter 6: Supervisory Functions Page Buffer Limit The Page Buffer Limit setting defines the number of pages that can be stored for reprinting if an error occurs during document processing. The number of pages that can be stored is based on the page size of the documents and the amount of memory available. - Page 225 LP 100R Laser Printer Operator's Guide Chapter 6: Supervisory Functions 3. The following page numbers can be selected from the Page Buffer Limit screen: Note: • Brackets ( [ ] ) around a specific Page Buffer Limit indicate that it is the Default Configuration Page Buffer Limit.
-
Page 226: Resolution
LP 100R Laser Printer Operator's Guide Chapter 6: Supervisory Functions Resolution The Resolution setting specifies, in DPI, the print resolution to be used by the printer. Note: The Resolution setting can not be changed when a print job is in progress. - Page 227 LP 100R Laser Printer Operator's Guide Chapter 6: Supervisory Functions Note: Pressing Enter after any Printer Setup function has been executed saves the function. However, it does not store the function. When the configuration completes, press Back until the Store Configuration ...
-
Page 228: Eas (Electronic Article Surveillance)
LP 100R Laser Printer Operator's Guide Chapter 6: Supervisory Functions EAS (Electronic Article Surveillance) When enabled, the Electronic Article Surveillance (EAS) setting changes the energy used to transfer the printed image to documents that contain metal. Note: The EAS setting can not be changed when a print job is in progress. - Page 229 LP 100R Laser Printer Operator's Guide Chapter 6: Supervisory Functions Note: Pressing Enter after any Printer Setup function has been executed saves the function. However, it does not store the function. When the configuration completes, press Back until the Store Configuration ...
-
Page 230: Swing Mode (Optional Unit)
LP 100R Laser Printer Operator's Guide Chapter 6: Supervisory Functions Swing Mode (Optional Unit) The swing guide assists the smooth fanfolding of continuous forms as they are fed out of the printer. It is accessed by means of the Swing Mode screen. The swing guide can NOT be used with a page length that is less than 7"... - Page 231 LP 100R Laser Printer Operator's Guide Chapter 6: Supervisory Functions Note: Brackets ( [ ] ) around a Swing Mode indicate that it is the Default Swing Mode Configuration. An arrow () pointing to a specific Swing Mode indicates that it is the ...
-
Page 232: Reverse Mode
LP 100R Laser Printer Operator's Guide Chapter 6: Supervisory Functions Reverse Mode The Reverse setting, when Enabled, feeds blank forms ejected from the printer at the end of a print job back into the printer to minimize wasting unprinted tag/label stock. - Page 233 LP 100R Laser Printer Operator's Guide Chapter 6: Supervisory Functions Note: Brackets ( [ ] ) around a specific Reverse Mode indicate that it is the Default Reverse Mode setting. An arrow () pointing to a specific Reverse Mode indicates that it is the ...
-
Page 234: Burster Mode (Optional Component)
LP 100R Laser Printer Operator's Guide Chapter 6: Supervisory Functions Burster Mode (Optional Component) If the Burster Mode is Enabled, when it receives the Cut command at the end of the print job it will automatically cut the last printed page (at the end of page perforation) and then drop it onto the stacker table. - Page 235 LP 100R Laser Printer Operator's Guide Chapter 6: Supervisory Functions 3. Press the Up or Down triangle to move the selection bar to the Burster Mode setting. 4. Press Enter to save the Burster Mode setting selected. Note: Pressing Enter after any Printer Setup function has been executed saves the ...
-
Page 236: Roll To Roll Mode
LP 100R Laser Printer Operator's Guide Chapter 6: Supervisory Functions Roll To Roll Mode This mode permits the connection of external devices. For additional information, contact Technical Support. Rev: 1 Page 6-122 April, 2014 of 128 pages... -
Page 237: Paper Suction
LP 100R Laser Printer Operator's Guide Chapter 6: Supervisory Functions Paper Suction The Paper Suction setting adjusts the tension on the documents to be printed to maximize print quality and minimize paper jams. If the Auto setting (the preferred setting) is selected, the energy applied is determined by the Material Type. - Page 238 LP 100R Laser Printer Operator's Guide Chapter 6: Supervisory Functions Note: Brackets ( [ ] ) around a specific Paper Suction setting indicate that it is the Default Paper Suction setting. An arrow () pointing to a specific Paper Suction setting indicates that it is ...
-
Page 239: Energy Fusion
LP 100R Laser Printer Operator's Guide Chapter 6: Supervisory Functions Energy Fusion The Energy Fusion setting changes power to the fuser lamp to optimize the fusing of the printed image. The Low setting (the preferred setting) maximizes the life of the fuser lamp and other replaceable components. - Page 240 LP 100R Laser Printer Operator's Guide Chapter 6: Supervisory Functions 3. Press the Up or Down triangle to move the selection bar to the desired Energy Fusion setting. 4. Press Enter to save the Energy Fusion setting selected. Note: Pressing Enter after any Printer Setup function has been executed saves the ...
-
Page 241: Aidc Mode
LP 100R Laser Printer Operator's Guide Chapter 6: Supervisory Functions AIDC Mode The AIDC Mode permits adjustment of the image. Note: The AIDC Mode setting can not be changed when a print job is in progress. 1. Press the Up or Down triangle on the Printer Setup menu to move the selection bar to the AIDC Mode function. - Page 242 LP 100R Laser Printer Operator's Guide Chapter 6: Supervisory Functions 3. Press the Up or Down triangle to move the selection bar to the desired AIDC Mode setting: • Enabled (Standard Mode) – Constantly monitors every printed page and automatically adjusts the image density.
-
Page 243: Appendix A: Installing System Software
LP 100R Laser Printer Operator's Guide Appendix A: Installing System Software Appendix A: Installing System Software Introduction .................... A-2 Copying the Operating System ..............A-2 System Program – Full Installation .............. A-3 System Program – Software Upgrade ............A-6 Rev: 1... -
Page 244: Introduction
LP 100R Laser Printer Operator's Guide Appendix A: Installing System Software Introduction This appendix explains how to install the operating software for the LP 100R. The following procedures are defined in this appendix: Installing a full factory-defined METO-Logic operating system from a USB Flash ... -
Page 245: System Program - Full Installation
LP 100R Laser Printer Operator's Guide Appendix A: Installing System Software System Program – Full Installation Note: Before installing a full system, it is important that you print a Status page and the Configuration pages of the current file, which can be used as a backup reference to the current file. - Page 246 LP 100R Laser Printer Operator's Guide Appendix A: Installing System Software 7. The following screen displays: Figure A-1. Full Install selected. Note: If any new screens are included in the system program being installed, there will be a slight delay before the above screen displays.
- Page 247 LP 100R Laser Printer Operator's Guide Appendix A: Installing System Software 10. Open the front door on the printer. Note: Opening the front door causes the audible alarm to turn off. 11. Remove the USB Flash Drive from the USB port.
-
Page 248: System Program - Software Upgrade
LP 100R Laser Printer Operator's Guide Appendix A: Installing System Software System Program – Software Upgrade The System Program upgrade will update all files except User’s Configuration and System Setup files. The current customer settings in the User’s Configuration and System Setup files will not be altered. - Page 249 LP 100R Laser Printer Operator's Guide Appendix A: Installing System Software 7. The following screen displays: Figure A-4. System Program – Upgrade selected. 8. Select Upgrade and press Enter. 9. When the installation of the software is complete, the audible alarm sounds continuously and the following screen displays: Figure A-5.
- Page 250 LP 100R Laser Printer Operator's Guide Appendix A: Installing System Software 10. If No is selected, an Upgrade Complete message displays. If Yes is selected, the firmware is overwritten, followed by the display of the Upgrade Complete message. 11. When the installation of the upgrade software is complete, an Upgrading Complete message displays.
- Page 251 LP 100R Laser Printer Operator's Guide Appendix A: Installing System Software 15. Wait while the printer reboots and will return to the Online Idle screen. Rev: 1 Page A-9 April, 2014 of 10 pages...
- Page 252 LP 100R Laser Printer Operator's Guide Appendix A: Installing System Software This page is intentionally left blank. Rev: 1 Page A-10 April, 2014 of 10 pages...
-
Page 253: Appendix B: Managing Files
LP 100R Laser Printer Operator's Guide Appendix B: Managing Files Appendix B: Managing Files Introduction .................... B-2 Managing Fonts, Logos, and Formats ............B-3 Managing User's Fonts ................B-4 Procedures ..................B-4 Functional Capability ................B-6 USB To Active ..................B-7 Active To USB .................. -
Page 254: Introduction
LP 100R Laser Printer Operator's Guide Appendix B: Managing Files Introduction This appendix includes: Managing Fonts, Logos, and Formats Installing updated files on the hard drive of the printer and/or copying files from the hard drive to a Flash Drive:... -
Page 255: Managing Fonts, Logos, And Formats
LP 100R Laser Printer Operator's Guide Appendix B: Managing Files Managing Fonts, Logos, and Formats The LP 100R laser printer's hard drive can store files containing PostScript ® Intellifont™, and TrueType™ fonts; and KodescriptPlus™ (stored as PCX images) and KodescriptPlus™ formats. Each of the above can be stored in: An active directory containing the individual files that are available to an ... -
Page 256: Managing User's Fonts
LP 100R Laser Printer Operator's Guide Appendix B: Managing Files Managing User's Fonts Note: The Manage User's Fonts functions should be executed only when the printer is in the Offline Idle mode and no print jobs are active. If you move fonts to or from the active directory, check the primary and ... - Page 257 LP 100R Laser Printer Operator's Guide Appendix B: Managing Files 5. Select Files from the Supervisor Menu and press Enter. 6. The following screen displays: Figure B-1. Files menu selected. 7. Select User's Fonts and press Enter. 8. The following screen displays: Figure B-2.
-
Page 258: Functional Capability
LP 100R Laser Printer Operator's Guide Appendix B: Managing Files Functional Capability USB To Active – Adds new fonts to the active directory. Active To USB – Copies active fonts to a flash drive. Delete Active – Deletes fonts from the active directory. -
Page 259: Usb To Active
LP 100R Laser Printer Operator's Guide Appendix B: Managing Files USB To Active 1. Select USB To Active from the Fonts menu. Press Enter. 2. The following screen displays: Figure B-3. Accept/Abort USB To Active selected. 3. If the USB To Active function is to be aborted, press Back, which causes the system to return to the Manage Fonts menu without executing the USB To Active function. - Page 260 LP 100R Laser Printer Operator's Guide Appendix B: Managing Files 5. Press Enter. 6. The following screen displays: Figure B-4. Reading new fonts. 7. When the flash drive has been read, the following screen displays: Figure B-5. Copying new fonts to the active directory.
- Page 261 LP 100R Laser Printer Operator's Guide Appendix B: Managing Files 8. Using the Up and Down buttons, select each font to be added to the active directory, pressing Select after each font selected. Note: When Select is pressed, an asterisk (*) displays to the left of the font selected.
- Page 262 LP 100R Laser Printer Operator's Guide Appendix B: Managing Files 14. When Enter is pressed, a Please Wait… message displays until the Reset function is completed. 15. When the Reset function is completed, the System Startup screen displays, and the printer will be in the Online Idle mode.
-
Page 263: Active To Usb
LP 100R Laser Printer Operator's Guide Appendix B: Managing Files Active To USB 1. Select Active To USB from the Fonts menu and press Enter. 2. The following screen displays: Figure B-7. Copy Font To USB selected. 3. Using the Up and Down buttons, select each font to be copied to a flash drive, pressing Select after each font selected. - Page 264 LP 100R Laser Printer Operator's Guide Appendix B: Managing Files 5. When all fonts to be copied to the flash drive have been selected, press Enter. 6. The following screen displays: Figure B-8. Accept/Abort Active To USB selected. 7. If the Active To USB function is to be aborted, press Back, which causes the system to return to the Manage Fonts menu without executing the Active To USB function.
-
Page 265: Delete Active
LP 100R Laser Printer Operator's Guide Appendix B: Managing Files Delete Active 1. Select Delete from the Fonts menu and press Enter. 2. The following screen displays: Figure B-9. Delete Active fonts. 3. Using the Up and Down buttons, select each font to be deleted, pressing Select after each font selected. - Page 266 LP 100R Laser Printer Operator's Guide Appendix B: Managing Files 7. Press Home. 8. The following screen displays: Figure B-10. Resetting METO-Logic (system program). Note: There should be no flash drive in the USB port. 9. Press Enter. 10. When Enter is pressed, a Please Wait… message displays until the Reset function is complete.
-
Page 267: Manage Archive
LP 100R Laser Printer Operator's Guide Appendix B: Managing Files Manage Archive 1. Select Manage Archive from the Fonts menu and press Enter. 2. The following screen displays: Figure B-11. Manage Archive Fonts selected. Functional Capability To Active – Moves fonts from the archive directory to the active directory ... -
Page 268: To Active
LP 100R Laser Printer Operator's Guide Appendix B: Managing Files To Active 1. Select To Active from the Manage Archive Fonts menu and press Enter. 2. The following screen displays: Figure B-12. Move fonts from archive to active directory. 3. Using the Up and Down buttons, select each font that is to be moved from the archive directory to the active directory, pressing Select after each font selected. - Page 269 LP 100R Laser Printer Operator's Guide Appendix B: Managing Files 6. A Moving… message displays. 7. When the Move function is complete, the system returns to the Manage Archive Fonts menu. 8. Press Home. 9. The following screen displays: Figure B-13. Resetting METO-Logic (system program).
-
Page 270: To Archive
LP 100R Laser Printer Operator's Guide Appendix B: Managing Files To Archive 1. Select To Archive from the Manage Archive Fonts menu and press Enter. 2. The following screen displays: Figure B-14. Move fonts from active to archive directory. 3. Using the Up and Down buttons, select each font to be moved from the active directory to the archive directory, pressing Select after each font selected. - Page 271 LP 100R Laser Printer Operator's Guide Appendix B: Managing Files A Moving… message displays. 7. When the Move function is complete, the system returns to the Manage Archive Fonts menu. 8. Press Home. 9. The following screen displays: Figure B-15. Resetting METO-Logic (system program) 10.
-
Page 272: Usb To Archive
LP 100R Laser Printer Operator's Guide Appendix B: Managing Files USB To Archive 1. Select USB To Archive from the Manage Archive Fonts menu and press Enter. 2. The following screen displays: Figure B-16. Accept/Abort USB To Archive selected. 3. If the USB To Archive function is to be aborted, press Back, which causes the system to return to the Manage Archive Fonts menu without executing the USB To Archive function. - Page 273 LP 100R Laser Printer Operator's Guide Appendix B: Managing Files 6. The following screen displays: Figure B-17. Reading new fonts. 7. When the flash drive has been read the following screen displays: Figure B-18. Copying new fonts to the archive directory.
- Page 274 LP 100R Laser Printer Operator's Guide Appendix B: Managing Files 8. Using the Up and Down buttons, select each font to be added to the archive directory, pressing Select after each font selected. Note: When Select is pressed, an asterisk (*) displays to the left of the font selected.
-
Page 275: Archive To Usb
LP 100R Laser Printer Operator's Guide Appendix B: Managing Files Archive To USB 1. Select Archive To USB from the Manage Archive Fonts menu and press Enter. 2. The following screen displays: Figure B-20. Copy font Archive To USB selected. - Page 276 LP 100R Laser Printer Operator's Guide Appendix B: Managing Files 6. The following screen displays: Figure B-21. Accept/Abort Archive To USB selected. 7. If the Archive To USB function is to be aborted, press Back, which causes the system to return to the Manage Archive Fonts menu without executing the Archive To USB function.
-
Page 277: Delete Archive
LP 100R Laser Printer Operator's Guide Appendix B: Managing Files Delete Archive 1. Select Delete Archive from the Manage Archive Fonts menu and press Enter. 2. The following screen displays: Figure B-22. Delete Archive fonts. 3. Using the Up and Down buttons, select each font to be deleted, pressing Select after each font selected. - Page 278 LP 100R Laser Printer Operator's Guide Appendix B: Managing Files 7. Press Home. 8. The following screen displays: Figure B-23. Resetting METO-Logic (system program). Note: There should be no flash drive in the USB port. 9. Press Enter. 10. When Enter is pressed, a Please Wait… message displays until the Reset function is complete.
-
Page 279: System Program
Note: Do not attempt to execute this function unless you are being guided by SATO or your printer representative either by telephone or in person. 1. If the POWER LED is not green, press it for approximately 1 second and release. - Page 280 LP 100R Laser Printer Operator's Guide Appendix B: Managing Files 8. Select System Program and press Enter. 9. The following screen displays: Figure B-25. System Program Install option selected. 10. Select Install and press Enter. 11. The following screen displays: Figure B-26.
- Page 281 LP 100R Laser Printer Operator's Guide Appendix B: Managing Files 12. If the Install function is to be aborted, press Back, which causes the system to return to the Files menu without executing the Install function. 13. If the Install function is not to be aborted: a.
-
Page 282: Copying The System Program
LP 100R Laser Printer Operator's Guide Appendix B: Managing Files Copying the System Program Note: If this Copy function is selected, the System Program will be copied. However, none of the system program supporting files will be copied. 1. If the POWER LED is not green, press it for approximately 1 second and release. - Page 283 LP 100R Laser Printer Operator's Guide Appendix B: Managing Files 8. Select System Program and press Enter. 9. The following screen displays: Figure B-28. METO-Logic Program copy option selected. 10. Select Copy and press Enter. 11. The following screen displays: Figure B-29.
- Page 284 LP 100R Laser Printer Operator's Guide Appendix B: Managing Files 12. If the Copy function is to be aborted, press Back, which causes the system to return to the Files menu without executing the Copy function. 13. If the Copy function is not to be aborted: a.
-
Page 285: System Menu
Note: Do not attempt to execute this function unless you are being guided by SATO or your printer representative either by telephone or in person. 1. If the POWER LED is not green, press it for approximately 1 second and release. - Page 286 LP 100R Laser Printer Operator's Guide Appendix B: Managing Files 8. Select System Menu and press Enter. 9. The following screen displays: Figure B-31. System Menu Install option selected. 10. Select Install and press Enter. 11. The following screen displays: Figure B-32.
- Page 287 LP 100R Laser Printer Operator's Guide Appendix B: Managing Files 12. If the Install function is to be aborted, press Back which causes the system to return to the Files menu without executing the Install function. 13. If the Install function is not to be aborted: a.
-
Page 288: Copying The Updated System Menu
LP 100R Laser Printer Operator's Guide Appendix B: Managing Files Copying the Updated System Menu 1. If the POWER LED is not green, press it for approximately 1 second and release. 2. When the System Start-up screen displays, press the OFFLINE switch to change the printer from the Online Idle mode to the Offline Idle mode. - Page 289 LP 100R Laser Printer Operator's Guide Appendix B: Managing Files 8. Select System Menu and press Enter. 9. The following screen displays: Figure B-34. System Menu Copy option selected. 10. Select Copy and press Enter. 11. The following screen displays: Figure B-35.
- Page 290 LP 100R Laser Printer Operator's Guide Appendix B: Managing Files 12. If the Copy function is to be aborted, press Back, which causes the system to return to the Files menu without executing the Copy function. 13. If the Copy function is not to be aborted: a.
-
Page 291: User's Configuration File
LP 100R Laser Printer Operator's Guide Appendix B: Managing Files User’s Configuration File Installing the Updated User’s Configuration File Note: Executing this function allows you to move the Configuration files from one printer to another printer without having to re-enter all of the Configuration data. - Page 292 LP 100R Laser Printer Operator's Guide Appendix B: Managing Files 8. Select System Menu and press Enter. 9. The following screen displays: Figure B-37. Configuration File Install option selected. 10. Select Install and press Enter. 11. The following screen displays: Figure B-38.
- Page 293 LP 100R Laser Printer Operator's Guide Appendix B: Managing Files 12. If the Install function is to be aborted, press Back, which causes the system to return to the Files menu without executing the Install function. 13. If the Install function is not to be aborted: a.
-
Page 294: Copying The Updated User's Configuration File
LP 100R Laser Printer Operator's Guide Appendix B: Managing Files Copying the Updated User’s Configuration File 1. If the POWER LED is not green, press it for approximately 1 second and release. 2. When the System Start-up screen displays, press the OFFLINE switch to change the printer from the Online Idle mode to the Offline Idle mode. - Page 295 LP 100R Laser Printer Operator's Guide Appendix B: Managing Files 8. Select User’s Configuration and press Enter. 9. The following screen displays: Figure B-40. Configuration File Copy option selected. 10. Select Copy and press Enter. 11. The following screen displays: Figure B-41.
- Page 296 LP 100R Laser Printer Operator's Guide Appendix B: Managing Files 12. If the Copy function is to be aborted, press Back, which will cause the system to return to the Files menu without executing the Copy function. 13. If the Copy function is not to be aborted: a.
-
Page 297: System Setup File
LP 100R Laser Printer Operator's Guide Appendix B: Managing Files System Setup File Installing the Updated System Setup File This function controls the interface parameters and printer options (i.e., swing guide, burster unit, and passwords): 1. If the POWER LED is not green, press it for approximately 1 second and release. - Page 298 LP 100R Laser Printer Operator's Guide Appendix B: Managing Files 8. Select System Menu and press Enter. 9. The following screen displays: Figure B-43. System Setup File Install option selected. 10. Select Install and press Enter. 11. The following screen displays: Figure B-44.
- Page 299 LP 100R Laser Printer Operator's Guide Appendix B: Managing Files 12. If the Install function is to be aborted, press Back, which causes the system to return to the Files menu without executing the Install function. 13. If the Install function is not to be aborted: a.
-
Page 300: Copying The Updated System Setup File
LP 100R Laser Printer Operator's Guide Appendix B: Managing Files Copying the System Setup File 1. If the POWER LED is not green, press it for approximately 1 second and release. 2. When the System Start-up screen displays, press the OFFLINE switch to change the printer from the Online Idle mode to the Offline Idle mode. - Page 301 LP 100R Laser Printer Operator's Guide Appendix B: Managing Files 8. Select System Setup and press Enter. 9. The following screen displays: Figure B-46. System Setup File Copy option selected. 10. Select Copy and press Enter. 11. The following screen displays: Figure B-47.
- Page 302 LP 100R Laser Printer Operator's Guide Appendix B: Managing Files 12. If the Copy function is to be aborted, press Back, which will cause the system to return to the Files menu without executing the Copy function. 13. If the Copy function is not to be aborted: a.
-
Page 303: System Error Log
LP 100R Laser Printer Operator's Guide Appendix B: Managing Files System Error Log Installing the System Error Log 1. If the POWER LED is not green, press it for approximately 1 second and release. 2. When the System Start-up screen displays, press the OFFLINE switch to change the printer from the Online Idle mode to the Offline Idle mode. - Page 304 LP 100R Laser Printer Operator's Guide Appendix B: Managing Files 8. Select System Error Log and press Enter. 9. The following screen displays: Figure B-49. System Error Log Install option selected. 10. Select Install and press Enter. 11. The following screen displays: Figure B-50.
- Page 305 LP 100R Laser Printer Operator's Guide Appendix B: Managing Files 12. If the Install function is to be aborted, press Back, which causes the system to return to the Files menu without executing the Install function. 13. If the Install function is not to be aborted: a.
-
Page 306: Copying The System Error Log
LP 100R Laser Printer Operator's Guide Appendix B: Managing Files Copying the System Error Log 1. If the POWER LED is not green, press it for approximately 1 second and release. 2. When the System Start-up screen displays, press the OFFLINE switch to change the printer from the Online Idle mode to the Offline Idle mode. - Page 307 LP 100R Laser Printer Operator's Guide Appendix B: Managing Files 8. Select System Error Log and press Enter. 9. The following screen displays: Figure B-52. System Error Log Copy option selected. 10. Select Copy and press Enter. 11. The following screen displays: Figure B-53.
- Page 308 LP 100R Laser Printer Operator's Guide Appendix B: Managing Files 12. If the Copy function is to be aborted, press Back, which causes the system to return to the Files menu without executing the Copy function. 13. If the Copy function is not to be aborted: a.
-
Page 309: Capturing A File To Flash Drive
LP 100R Laser Printer Operator's Guide Appendix B: Managing Files Capturing a File to a Flash Drive 1. If the POWER LED is not green, press it for approximately 1 second and release. 2. When the System Start-up screen displays, press the OFFLINE switch to change the printer from the Online Idle mode to the Offline Idle mode. - Page 310 LP 100R Laser Printer Operator's Guide Appendix B: Managing Files 8. Select Capture and press Enter. 9. The following screen displays: Figure B-55. File Capture. 10. To discontinue the File Capture when the above screen displays, press Back, which will cause the system to return to the Supervisor Menu.
- Page 311 LP 100R Laser Printer Operator's Guide Appendix B: Managing Files 13. When the above screen displays, transmit the File from the host computer to the printer. Note: During File Capture, the number of KBytes, as they are received by the printer, are continuously being incremented until the File Capture is complete.
- Page 312 LP 100R Laser Printer Operator's Guide Appendix B: Managing Files This page is intentionally left blank. Rev: 1 Page B-60 April, 2014 of 60 pages...
-
Page 313: Appendix C: Service/Technical Support
LP 100R Laser Printer Operator's Guide Appendix C: Service/Technical Support Appendix C: Service/Technical Support Service ....................C-2 Technical Support ..................C-2 Rev: 1 Page C-1 April, 2014 of 2 pages... -
Page 314: Technical Support
200,000 pages of printing. (i.e., 200,000, 400,000, 600,000, 800,000, 1,000,000, etc.) Service on the LP 100R printer is provided either directly by SATO or by an authorized SATO outlet. To enter a request for service, call: 800-524-0029 ... -
Page 315: Appendix D: Ordering Supplies
LP 100R Laser Printer Operator's Guide Appendix D: Ordering Supplies Appendix D: Ordering Supplies Ordering ....................D-2 Supplies ....................D-2 Available Supplies ................D-2 Rev: 1 Page D-1 April, 2014 of 2 pages... - Page 316 LP 100R Laser Printer Operator's Guide Appendix D: Ordering Supplies Ordering To order parts and consumables for the LP 100R printer, call SATO customer service at the following number: 800-645-3290 You can also reach SATO customer service by selecting that option when you call the SATO service number, 800-524-0029.
- Page 317 LP 100R Laser Printer Operator's Guide Appendix E: The Menu System Appendix E: The Menu System Main Menu ....................E-2 Operator Express Menu ................E-3 Supervisor Menu ..................E-4 Configuration ................... E-5 Printer Setup ................... E-6 Emulation Settings – KodePlus ..............E-8 Emulation Settings –...
-
Page 318: Appendix E: The Menu System
LP 100R Laser Printer Operator's Guide Appendix E: The Menu System Main Menu Express Advanced Operator Express Advanced Menu Recall Configurations Supervisor Horizontal Fine Adj Service Vertical Fine Adj Print Configurations Time & Usage Status Page Printer Cleaned Supervisor Menu... -
Page 319: Operator Express Menu
LP 100R Laser Printer Operator's Guide Appendix E: The Menu System Operator Express Recall Configurations Horizontal Fine Adj Vertical Fine Adj Print Configurations Time & Usage Status Page Printer Cleaned Page Flush Recall Config Horizontal Fine Vertical Fine Printer Cleaned... -
Page 320: Supervisor Menu
LP 100R Laser Printer Operator's Guide Appendix E: The Menu System Supervisor Menu (Default Password is 4615) Test Prints Interface Setup Configuration Files Reset Cancel Job On Jam Cancel Job On Field Error Change Password Password Enable Time Network Time... -
Page 321: Printer Setup
LP 100R Laser Printer Operator's Guide Appendix E: The Menu System Printer Setup Form Height Print Width Configuration Lines Per Inch Characters Per Inch Recall Vertical Adjustment Store Remove Horizontal Adjustment Edit Image Density Material Type Orientation Emulation Primary Font... -
Page 322: Printer Setup
LP 100R Laser Printer Operator's Guide Appendix E: The Menu System Printer Setup Form Height Print Width Lines Per Inch Characters Per Inch Vertical Adjustment Horizontal Adjustment Unit: Inches Unit: Inches Unit: Text Lines Unit: Text Characters Unit: Inches Unit:... - Page 323 LP 100R Laser Printer Operator's Guide Appendix E: The Menu System Printer Setup (cont'd) Resolution Swing Mode Reverse Mode 240 DPI [Disabled] [Disabled] [Disabled] 300 DPI Enabled Enabled Enabled [400 DPI] 480 DPI 600 DPI Burster Mode Roll To Roll Mode...
-
Page 324: Emulation Settings - Kodeplus
LP 100R Laser Printer Operator's Guide Appendix E: The Menu System Emulation Settings Kode/KodePlus IGP/VGL IGP/PGL PCL5e IPDS KodePlus Field Check Control Chars Location BVR Conversion 68000 Compatible BVR Conversion 68000 Compatible Field Check Control Characters Location [Off] [Disabled] Control Character Formats (A–Z) -
Page 325: Emulation Settings Igp/Vgl
LP 100R Laser Printer Operator's Guide Appendix E: The Menu System Emulation Settings IGP/VGL IGP/VGL Control Characters Power-up ^X Power-up ^F Power-up ^PY Label Height PY Then PN Then CMD Resolution Hex Dump Language Label Height Control Characters Power-up ^X... -
Page 326: Emulation Settings - Igp/Pgl
LP 100R Laser Printer Operator's Guide Appendix E: The Menu System Emulation Settings IGP/PGL IGP/PGL Settings Define CR Code Define LF Code Select SFCC CR Edit Auto Uppercase Skip CMD Prefix Host Form Length Version Handle Missing Font Auto Uppercase... -
Page 327: Emulation Settings Pcl5E
LP 100R Laser Printer Operator's Guide Appendix E: The Menu System Emulation Settings PCL5e PCL5e Settings Margins Scan Direction Margins Scan Direction [Standard] [Portrait] Extended Landscape Reverse Portrait Reverse Landscape ] = Default setting Rev: 1 Page E-11 April, 2014... -
Page 328: Emulation Settings Ipds
LP 100R Laser Printer Operator's Guide Appendix E: The Menu System Emulation Settings IPDS TCP/IP Port Emulation Resolution Valid Printable Area Code Page Code Page Version Page Counter Update Exception Filter Font Capture Setting Default Font Default Font Size Font Substitution... - Page 329 LP 100R Laser Printer Operator's Guide Appendix E: The Menu System Code Page Default Font [International #5] Hebrew Character Set A [Courier Roman Medium] Courier Roman Bold USA/Canada Iceland OCR-B Courier Italic Medium Canadian French - 116 Greece Courier 10 Courier Italic Bold Germany F.R./Austria...
-
Page 330: Interface Setup
LP 100R Laser Printer Operator's Guide Appendix E: The Menu System Interface Setup RS-232 Parallel Ethernet Parallel Setup Ethernet Setup RS-232 Enable/Disable Enable Ethernet Support for Service Only Host Protocol Strobe Press ENTER to Continue Busy Req Static IP Settings... -
Page 331: Parallel Setup
LP 100R Laser Printer Operator's Guide Appendix E: The Menu System Parallel Setup Enable/Disable Strobe Busy Req Reset Settings Busy Req Tb Time Tc Time Enable/Disable Strobe Ta Time Reset Settings 0.000 0.000 Enter - Yes [Disabled] [Early] 0.125 0.125 0.250... -
Page 332: Ethernet Setup
LP 100R Laser Printer Operator's Guide Appendix E: The Menu System Ethernet Setup Enable Ethernet Host Protocol Static IP Settings DHCP IP Settings Activate New Settings Job Trace Windows Network Printing Raw Printing Socket Buffer Socket TCP/IP Windows Job Trace... -
Page 333: Files
LP 100R Laser Printer Operator's Guide Appendix E: The Menu System Files User's Fonts User's Logos User's Formats System Program System Menu User's Configuration System Setup System Error Log Capture File Capture Configuration System System Manage Manage Manage System System... -
Page 334: Service Menu
LP 100R Laser Printer Operator's Guide Appendix E: The Menu System Service Menu (Default Password is 7839) Time & Usage Critical Files P/H Uniformity Engine Parameters Dead Zone AIDC Sensor Threshold Language Line End Enable Display Errors Print Redirect Change CE Cycle... -
Page 335: Shortcut Keys
LP 100R Laser Printer Operator's Guide Appendix E: The Menu System Shortcut Keys Align Recall Status Test Maint Maintenance Test Prints Status Print Alignment Recall Config Printer Cleaned Check AIDC Sensor 1/10" Grid Status Page Horizontal Fine Adjustment Character Fill Time &... - Page 336 LP 100R Laser Printer Operator's Guide Appendix E: The Menu System This page is intentionally left blank. Rev: 1 Page E-20 April, 2014 of 20 pages...
- Page 337 LP 100R Laser Printer Operator's Guide Appendix F: Product Specifications Appendix F: Product Specifications Print Method .................... F-2 Print Speed ..................... F-2 Print Resolution ..................F-2 Interfaces ....................F-2 Emulations ....................F-2 Document Width ..................F-3 Document Length ..................F-3 Print Area ....................
-
Page 338: Print Method
LP 100R Laser Printer Operator's Guide Appendix F: Product Specifications Print Method Laser exposure–type electric image printer Print Speed 3,300 lines per minute (6 lines per 1"/25.4 mm) Print Resolution 240/300/400/480/600 400 is standard Can be switched by command ... -
Page 339: Document Width
LP 100R Laser Printer Operator's Guide Appendix F: Product Specifications Document Width 6–18" (152.4–457.2 mm) 17" (431.8 mm) print image Document Length 5–24" (152.4–609.6 mm) " (592.24 mm) print image maximum print area Print Area 17" (431.8 mm) Maximum Ejection Size 18"... -
Page 340: Input Voltage
LP 100R Laser Printer Operator's Guide Appendix F: Product Specifications Input Voltage AC 200-240V, 30 Amps, 50/60Hz (Single Phase) Dimensions 36" x 37" x 47" (w x d x h) 720 mm x 940 mm x 1,185 mm (w x d x h) ... - Page 341 LP 100R Laser Printer Operator's Guide Appendix G: Operating/Environ. Requirements Appendix G: Operating/Environmental Requirements Space Requirements ................G-2 Power Requirements ................G-3 Power Source ..................G-3 Temperature/Relative Humidity ..............G-3 Operating Conditions ................G-4 Precautions When Operating the Printer ............G-5 Moving the Printer ...................
-
Page 342: Space Requirements
LP 100R Laser Printer Operator's Guide Appendix G: Operating/Environ. Requirements Space Requirements The following diagram shows the amount of space required to house the printer and provide adequate working space: 39 3/8"(1000mm) 28 3/8"(720mm) 39 3/8"(1000mm) 24 7/8"(631mm) 28 3/8"(720mm) 5 11/32"(136mm) -
Page 343: Power Requirements
LP 100R Laser Printer Operator's Guide Appendix G: Operating/Environ. Requirements Power Requirements 200-240 AC volts 30 Amps 50/60 Hz Single phase Termination The United States requires a NEMA L6-30R (Twist Lock). Other countries should replace the line cord at the Connector Panel Input Power Supply to match the electrical codes of that country. -
Page 344: Operating Conditions
LP 100R Laser Printer Operator's Guide Appendix G: Operating/Environ. Requirements Operating Conditions To ensure the safe operation of, and peak performance by, the printer, you must observe the following: Do not install the printer: Near curtains or other objects that catch fire and easily burn. -
Page 345: Precautions When Operating The Printer
An odor may be noticed when the printer is operated in a poorly ventilated room for long periods of time. Moving the Printer Call the SATO service department before moving the printer over a long distance. Rev: 1 Page G-5 April, 2014... - Page 346 LP 100R Laser Printer Operator's Guide Appendix G: Operating/Environ. Requirements This page is intentionally left blank. Rev: 1 Page G-6 April, 2014 of 6 pages...
-
Page 347: Appendix H: Default Passwords
LP 100R Laser Printer Operator's Guide Appendix H: Default Passwords Appendix H: Default Passwords Default Passwords ................... H-2 Rev: 1 Page H-1 April, 2014 of 2 pages... -
Page 348: Default Passwords
To change the supervisor password, see Password Enable Function on page 6-39. If you need to access the service menu, or if you lose your new supervisor password, see the LP 100R Maintenance Guide or call your service provider. Rev: 1 Page H-2 April, 2014... -
Page 349: Appendix I: End-User License Agreement
LP 100R Laser Printer Operator's Guide Appendix I: End-User License Agreement Appendix I: End-User License Agreement End-User License Agreement for SATO Controller Software ......I-2 Rev: 1 Page I-1 April, 2014 of 4 pages... -
Page 350: End-User License Agreement For Sato Controller Software
SATO America, Inc., End-User License Agreement ("EULA") is a legal agreement between you (either an individual or a single entity) and SATO America, Inc., for the SATO America, Inc., software product(s) identified above which may include associated software components, media, printed materials, and "online"... - Page 351 ‘Authorized Users' use of or inability to use the SATO Controller Software, even if SATO America, Inc., has been advised of the possibility of such damages. In no event will SATO America, Inc., be liable for loss of data or for indirect, special, incidental, consequential (including lost profit), or other damages based in contract, tort or otherwise.
- Page 352 Should you have any questions concerning this EULA, or if you desire to contact SATO America, Inc., for any reason, use the address information enclosed in this Software to contact: SATO America, Inc.
- Page 354 LP 100R Laser Printer Operator’s Guide Part No. 9855063 Rev. 1 April 2014...