Table of Contents
Advertisement
Quick Links
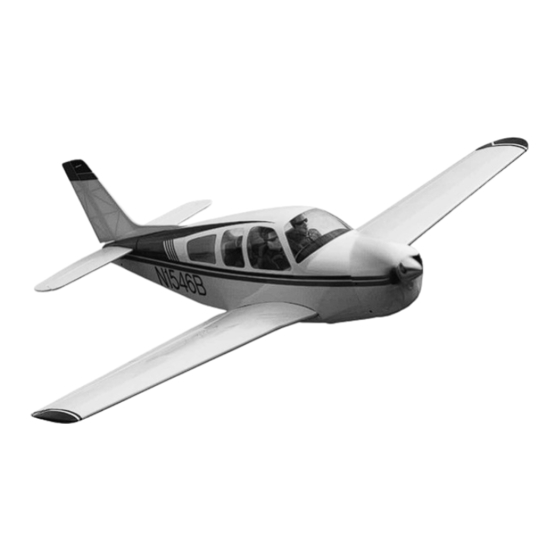
Beechcraft Bonanza 15e ARF
Assembly Manual
Specifications
Wingspan:
48.0 in (1220mm)
Length:
41.9 in (1065mm)
Wing Area:
410 sq in (26.4 sq dm)
Weight w/Battery:
4.20 – 4.50 lb (1.90 – 2.0 kg)
Weight w/o Battery:
3.50 – 3.80 lb (1.50 – 1.60 kg)
Cockpit Detail Kit (EFL2582), 1/9 Civilian Pilot Blue with Glasses
(EFLA156) and 1/9 Civilian Pilot (EFLA151) all sold separately.
Advertisement
Table of Contents

Related Manuals for E-FLITE Beechcraft Bonanza 15e ARF


Summary of Contents for E-FLITE Beechcraft Bonanza 15e ARF
-
Page 1: Specifications
Beechcraft Bonanza 15e ARF Assembly Manual Specifications Wingspan: 48.0 in (1220mm) Length: 41.9 in (1065mm) Wing Area: 410 sq in (26.4 sq dm) Weight w/Battery: 4.20 – 4.50 lb (1.90 – 2.0 kg) Weight w/o Battery: 3.50 – 3.80 lb (1.50 – 1.60 kg) Cockpit Detail Kit (EFL2582), 1/9 Civilian Pilot Blue with Glasses (EFLA156) and 1/9 Civilian Pilot (EFLA151) all sold separately. -
Page 2: Table Of Contents
Note on Lithium Polymer Batteries......3 sport modeler. For those who want to push the scale EFL2580 Cowling Required Tools and Adhesives........3 looks and performance even further, E-flite offers EFL2581 Landing Gear Set Rudder and Elevator Servo several optional accessory kits (sold separately) that... -
Page 3: Recommended Radio Equipment
Li-Po batteries can result in fire. Always follow the manufacturer’s instructions when disposing of SPM6070 AR7000 DSM2 7-Channel Lithium Polymer batteries. Receiver The Spektrum trademark is used with permission of Bachmann Industries, Inc. Beechcraft Bonanza 15e ARF Assembly Manual... -
Page 4: Rudder And Elevator Servo And Pushrod Installation
Use a hobby knife with a #11 blade to remove the pulling aft. servo arm and install a standard 4-way arm on each covering from the rudder pushrod exit on the right servo. side of the rear fuselage. Beechcraft Bonanza 15e ARF Assembly Manual... - Page 5 Step 9 strengthen the wood. Allow the CA to cure without outer hole in the servo arm. Hold the servo in place and use a pencil to mark the using accelerator. mounting hole locations. Beechcraft Bonanza 15e ARF Assembly Manual...
- Page 6 90-degree openings in the top of the firewall. bend using pliers. Beechcraft Bonanza 15e ARF Assembly Manual...
-
Page 7: Tailcone Installation
Slide a silicone keeper on to the threaded end of tape so that it cannot move. the rudder and elevator pushrods. Install a clevis on each of the pushrod ends so that it is approximately centered on the threads. Beechcraft Bonanza 15e ARF Assembly Manual... -
Page 8: Tail Installation
Remove the tailcone and the card stock tabs. Use a 1/16-inch drill bit in a pin vise to drill the mounting holes in the tailcone. □ Step 7 Set the prepared tailcone aside until the tail has been installed. Beechcraft Bonanza 15e ARF Assembly Manual... - Page 9 3/4-inch Allen head tail retention screws. Engage a 3/32-inch hex wrench in the screw head to hold it in place while the tail is being installed. Use threadlock on all metal-to-metal fasteners to prevent them from vibrating loose. Beechcraft Bonanza 15e ARF Assembly Manual...
- Page 10 Connect the elevator pushrod to the outer hole in the control horn, and connect the rudder pushrod to the adjustable horn. Secure the clevises with the silicone keepers. Beechcraft Bonanza 15e ARF Assembly Manual...
-
Page 11: Optional V-Tail Ruddervator Servo And Pushrod Installation
Use a #1 Phillips screwdriver to remove the small Insert the non-threaded ends of the pushrods into pulling aft. servo arm and install a standard 4-way arm on each their housings from the rear of the fuselage. servo. Beechcraft Bonanza 15e ARF Assembly Manual... - Page 12 Beechcraft Bonanza 15e ARF Assembly Manual...
- Page 13 Install a clevis on each of the pushrod bend using pliers. openings in the top of the firewall. ends so that it is approximately centered on the threads. Beechcraft Bonanza 15e ARF Assembly Manual...
-
Page 14: Optional V-Tail Installation
Step 3 Step 5 lower rear fuselage. Invert the fuselage and place a bolt into the rear Apply a small amount of threadlock to the end of the mounting hole. exposed screw. Beechcraft Bonanza 15e ARF Assembly Manual... - Page 15 Connect each pushrod to the outer hole in insert it into the forward mounting hole. Use a 3/32- the control horns and secure the clevises with the inch hex wrench to tighten it into place. silicone keepers. Beechcraft Bonanza 15e ARF Assembly Manual...
-
Page 16: Nosewheel Steering Cable And Servo Installation
Use sidecutters to remove three of the servo arms, Insert the pushrod connector in the outer hole in the leaving one long arm as shown. servo arm. Use pliers to press the button keeper on to the bottom of the connector. Beechcraft Bonanza 15e ARF Assembly Manual... - Page 17 Mark the servo mounting holes with a pencil. Cutting a bevel on the end of the pushrod housing will make it much easier to insert through the holes in the fuselage bulkheads. Beechcraft Bonanza 15e ARF Assembly Manual...
-
Page 18: Nose Gear Installation
1 1/8-inch dimension mounts from left to right across the rails. □ Step 12 Apply a drop of thin CA to each hole to strengthen the wood. Allow the CA to cure without using accelerator. Beechcraft Bonanza 15e ARF Assembly Manual... - Page 19 Step 7 behind the forward end of the mounting rails. Use a #1 Phillips screwdriver to install the nose gear with four #4 x 7/16 countersunk wood screws. Beechcraft Bonanza 15e ARF Assembly Manual...
-
Page 20: Aileron Servo Installation
Note that this servo arm installed from the bottom of the servo. orientation is for the right-hand wing panel, reverse the arm when performing this step for the left wing. Beechcraft Bonanza 15e ARF Assembly Manual... - Page 21 1/8-inch from the mounting blocks to the inside of the hatch at the the edge of the cutout in the hatch. marked locations. Beechcraft Bonanza 15e ARF Assembly Manual...
- Page 22 Apply a drop of thin CA to each of the mounting servo. Use dental floss to secure the connectors. a hobby knife to do so if required. holes to strengthen the wood. Allow the CA to cure completely without using accelerator. Beechcraft Bonanza 15e ARF Assembly Manual...
- Page 23 #2 x 3/8-inch wood screws. clevis so that it does not interfere with the next step. pliers to make a 90-degree bend at the marked location. Use sidecutters to trim the bent portion to a length of 1/4-inch. Beechcraft Bonanza 15e ARF Assembly Manual...
-
Page 24: Flap Servo Installation
Repeat steps 1 through 21 to install the aileron servo right flap servos have the arms oriented in the same grommets and bushings. Note that the bushings are and pushrod in the opposite wing panel. direction. installed from the bottom of the servo. Beechcraft Bonanza 15e ARF Assembly Manual... - Page 25 ‘X’. Note: It may be necessary to carve a relief in one of the blocks to provide clearance for the servo lead. Use a hobby knife to do so if required. Beechcraft Bonanza 15e ARF Assembly Manual...
- Page 26 Slide a silicone keeper on to the pushrod. Thread on completely without using accelerator. end of the 4-inch flap pushrod. Make a mark with a a clevis so that the pushrod measures 3 1/16-inch felt-tipped pen. from the bend to the clevis pin. Beechcraft Bonanza 15e ARF Assembly Manual...
- Page 27 Apply a small drop of thin CA to the flap servo clevis to the flap horn. aileron and flap servo leads where they hatch mounting holes in the wing. Allow the CA to exit the wing. cure completely without using accelerator. Beechcraft Bonanza 15e ARF Assembly Manual...
-
Page 28: Wing Joining
Secure the pushrod to the arm with a snap keeper. □ Step 20 Repeat steps 1 through 19 to install the flap servo and pushrod in the opposite wing panel. Beechcraft Bonanza 15e ARF Assembly Manual... - Page 29 Apply low-tack tape to the servo leads where they exit the top of the wing to hold them out of the way while the panels are being joined. Beechcraft Bonanza 15e ARF Assembly Manual...
-
Page 30: Main Landing Gear Installation
Stretch a rubber band between the left and right wing bolts on the upper and lower surfaces to hold the wing panels together. □ Step 10 Allow the glue to cure completely then remove the binder clamp, rubber bands and wing bolts. Beechcraft Bonanza 15e ARF Assembly Manual... -
Page 31: Optional Retract Installation Nose Gear
Use a #1 Phillips screwdriver to install the landing mounting surface of the retractable nose gear and gear with four #4 x 7/16-inch countersunk wood make a mark on the gear leg with a felt-tipped pen. screws. Beechcraft Bonanza 15e ARF Assembly Manual... - Page 32 5/8 inch behind Use a 1.5mm hex wrench to remove the brass wheel to be parallel to the aluminum steering arm. the straight section. collar from the adjustable axle. Beechcraft Bonanza 15e ARF Assembly Manual...
- Page 33 1.5mm hex the axle to the nose gear leg. slot with a ruler. These marks will locate the aft end wrench to install it. of the template. Beechcraft Bonanza 15e ARF Assembly Manual...
- Page 34 1/4 inch behind the front edge of the tipped pen to mark the cutout on the fuselage. the remaining piece as shown. mounting rails. Mark a line with a pencil. Beechcraft Bonanza 15e ARF Assembly Manual...
- Page 35 Place the nose gear on the mounting rails and feed tab on the nose gear and secure it with the silicone mounting holes in the rails. the servo wire through the holes in the bulkheads to keeper. the radio compartment. Beechcraft Bonanza 15e ARF Assembly Manual...
-
Page 36: Optional Retract Installation - Main Gear
Use a file to make two 1/4 inch long flat spots on the approximately 1/4 inch of covering overhanging the next to the gear mounting rails. gear leg, one each on the forward and aft sides. interior of the gear well. Beechcraft Bonanza 15e ARF Assembly Manual... - Page 37 1.5mm hex wrench to secure it in place over the flat Once the axle alignment is set, apply threadlock to the 2 1/2-inch wheel. spot in the axle. each of the setscrews and secure them in place with a 2.5mm hex wrench. Beechcraft Bonanza 15e ARF Assembly Manual...
- Page 38 Allow the CA to cure Use a pencil to mark the mounting holes on the rails. completely without using accelerator. □ Step 18 Perform steps 1 through 17 to install the retract in the opposite wing. Beechcraft Bonanza 15e ARF Assembly Manual...
-
Page 39: Motor And Esc Installation
Place a washer on each of the 4-40 x 3/4- inch motor mounting screws. □ Step 5 Use a 3/32-inch hex wrench to install the motor on the firewall with the power leads exiting to the right- hand side. Beechcraft Bonanza 15e ARF Assembly Manual... - Page 40 ESC. the battery floor then press the ESC into place on a mark with a pencil. the right side of the battery tray. Beechcraft Bonanza 15e ARF Assembly Manual...
-
Page 41: Cowling And Spinner Installation
Push the connectors and excess wire through the Use a 1/16-inch drill bit in a pin vise to drill a 3/8-inch firewall under the battery tray. deep hole in the fuselage at each tab location. Beechcraft Bonanza 15e ARF Assembly Manual... - Page 42 Install the spinner nut finger-tight to seat the spinner Install the canopy on the fuselage. Remove the spinner nut from the propeller adapter base against the propeller face. supplied with the motor and place the propeller on the shaft. Beechcraft Bonanza 15e ARF Assembly Manual...
- Page 43 Use the shaft of a hex wrench or locations on the cowling. CA to each of the cowl screw holes in the fuselage. screwdriver to tighten the spinner nut. Allow the CA to dry completely without using accelerator. Beechcraft Bonanza 15e ARF Assembly Manual...
- Page 44 If there is a gap between make a cutout in the front of the cowl for the steering the spinner cone and base, check both pieces for arm to rotate. clearance with the propeller. Beechcraft Bonanza 15e ARF Assembly Manual...
-
Page 45: Optional Aluminum Spinner Installation
Step 3 adapter and silicone spacer. pages 41 through 44 to locate, mount and trim the Set the spinner cone in place against the backplate cowling. and center the cutouts on the propeller blades. Beechcraft Bonanza 15e ARF Assembly Manual... -
Page 46: Belly Pan Installation
Install the wing on the fuselage by first inserting the leading edge tabs into the rectangular slot in the fuselage bulkhead. □ Step 7 Set the spinner cone in place against the backplate and center the cutouts on the propeller blades. Beechcraft Bonanza 15e ARF Assembly Manual... -
Page 47: Battery And Receiver Installation
Tape it in place with low-tack tape. glue to the joint between the belly pan and the wing leading edge, and to the areas that were under the tape on the lower surface of the wing. Beechcraft Bonanza 15e ARF Assembly Manual... -
Page 48: Optional Cockpit Detail Kit Installation
□ Step 3 Cut a 1-inch long piece of adhesive-backed hook and loop tape. Use the tape to attach the main receiver to the radio tray in front of the servos. Beechcraft Bonanza 15e ARF Assembly Manual... - Page 49 Apply glue to the inside of the rear bulkhead in the forward opening. dry, then repeat for the opposite side and cross canopy. Set the rear panel in place and allow the members. glue to dry. Beechcraft Bonanza 15e ARF Assembly Manual...
-
Page 50: Final Assembly
Connect a 3-inch Y-harness to the rudder and Step 6 nosewheel steering servos. Label a 3-inch Y-harness and plug it into the aileron channel of the receiver. Plug the aileron servo leads from the wing into the Y-harness. Beechcraft Bonanza 15e ARF Assembly Manual... -
Page 51: Radio Connections For Optional V-Tail Installation
□ Step 8 Plug the extension lead from the ESC into the throttle channel of the receiver. Use threadlock on all metal-to-metal fasteners to prevent them from vibrating loose. Beechcraft Bonanza 15e ARF Assembly Manual... -
Page 52: Radio Connections For Retractable Landing Gear
The rudder channel will be the master, and the nosewheel steering the slave channel. Refer to the instructions provided with your radio to set up the mix. Beechcraft Bonanza 15e ARF Assembly Manual... -
Page 53: Center Of Gravity
Repair or replace any items that would be considered questionable. Failure of any of these components in flight would mean the loss of your aircraft. Beechcraft Bonanza 15e ARF Assembly Manual... - Page 54 • Keep all chemicals, small parts and anything electrical out of the reach of children. • Moisture causes damage to electronics. Avoid water exposure to all equipment not specifically designed and protected for this purpose. Beechcraft Bonanza 15e ARF Assembly Manual...
-
Page 55: Templates
Flap Servo and Nose Gear Cutout Templates LH flap servo hatch template. Place against inside surface. Align with this edge Remove shaded portion RH flap servo hatch template. Place against inside surface. Beechcraft Bonanza 15e ARF Assembly Manual... - Page 56 This Page Intentionally Blank Beechcraft Bonanza 15e ARF Assembly Manual...
-
Page 57: Warranty Information
Horizon Hobby. cover damage due to improper installation, operation, maintenance, or attempted repair by anyone other than Horizon. Return of any goods by Purchaser must be approved in writing by Horizon before shipment. Beechcraft Bonanza 15e ARF Assembly Manual... -
Page 58: Users In The European Union
Horizon Product Support 4105 Fieldstone Road Champaign, Illinois 61822 Please call 877-504-0233 or e-mail us at productsupport@horizonhobby.com with any questions or concerns regarding this product or warranty. Beechcraft Bonanza 15e ARF Assembly Manual... -
Page 59: 2010 Ama Model Aircraft Safety Code
Exceptions include Free Flight fuses or devices that AMA Document #922 for Testing for RF Interference. burn producing smoke and are securely attached to See AMA Document #923 for Frequency the model aircraft during flight. Rocket motors up to Management Agreement.) Beechcraft Bonanza 15e ARF Assembly Manual... - Page 60 © 2010 Horizon Hobby, Inc. 4105 Fieldstone Road Champaign, Illinois 61822 Horizon Hobby UK Horizon Hobby Deutschland GmbH Units 1-4 Ployters Rd Hamburger Strasse 10 Staple Tye 25335 Elmshorn Harlow, Essex Germany CM18 7NS Printed 10/09 United Kingdom 16117...