Table of Contents

Related Manuals for Fluke TiX520


Summary of Contents for Fluke TiX520
- Page 1 TiX520, TiX560 Expert Series Thermal Imager Users Manual February 2015 © 2015 Fluke Corporation. All rights reserved. Specifications are subject to change without notice. All product names are trademarks of their respective companies.
- Page 2 LIMITED WARRANTY AND LIMITATION OF LIABILITY Each Fluke product is warranted to be free from defects in material and workmanship under normal use and service. The warranty period is two years and begins on the date of shipment. Parts, product repairs, and services are warranted for 90 days. This warranty extends only to the original buyer or end-user customer of a Fluke authorized reseller, and does not apply to fuses, disposable batteries, or to any product which, in Fluke's opinion, has been misused, altered, neglected, contaminated, or damaged by accident or abnormal conditions of operation or handling.
-
Page 3: Table Of Contents
Table of Contents Title Page Introduction ........................1 How to Contact Fluke ....................2 Safety Information ......................2 Operation in Extreme Conditions ................3 Radio Frequency Data ....................3 Accessories ........................5 Before You Start ......................6 Battery ........................7 Two-Bay Battery Charger Base ................ - Page 4 TiX520, TiX560 Users Manual IR-PhotoNotes™ ....................... 17 Voice Annotation (Recording) ................... 18 Listen to a Voice Annotation (Recording) ..............18 Edit Captured Infrared Image ..................18 Save Captured Infrared Image .................. 19 Micro SD Memory Card ....................19 Temperature Measurement ................... 19 ...
- Page 5 File Format ......................34 Auto Off ........................ 35 Localization ......................35 Image Storage ...................... 36 Advanced Settings ....................36 Fluke Connect™ Wireless System ................38 Fluke Connect App ....................38 Fluke Connect Tools .................... 38 Remote Control......................39 Maintenance ........................39 How to Clean the Case .....................
- Page 6 TiX520, TiX560 Users Manual...
- Page 7 List of Tables Table Title Page Symbols ..........................4 Accessories .......................... 5 Bottom Panel ........................9 Features ..........................10 Controls ..........................13 Touch Targets ........................15 Level and Span Settings ....................... 22 Palettes ..........................26...
- Page 8 TiX520, TiX560 Users Manual...
- Page 9 List of Figures Figure Title Page Laser Warning ........................2 Add-On Lens Installation ....................... 6 Adjustable Neck Strap ......................16...
- Page 10 TiX520, TiX560 Users Manual viii...
-
Page 11: Introduction
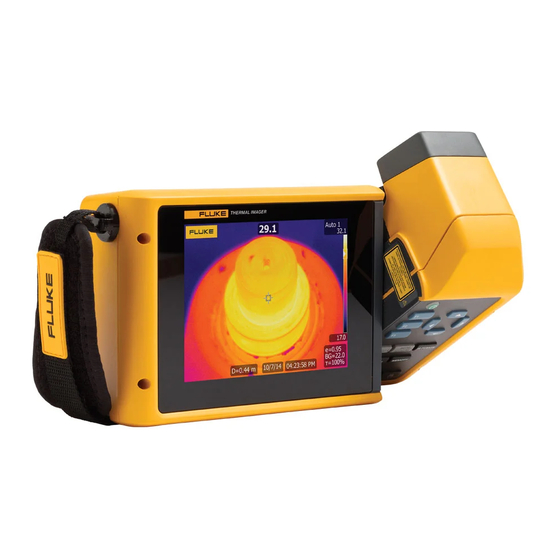
Introduction Image Presentation The Fluke TiX520 and TiX560 Expert Series Thermal • Standard Palettes: Red, Grayscale, Inverted Imagers (the Product or Imager) are handheld, infrared Grayscale, High Contrast, Amber, Inverted Amber, Hot imaging cameras for use in multiple applications. These... -
Page 12: How To Contact Fluke
To download SmartView software visit Product swivel, see Figure 1. www.fluke.com/smartviewdownload. To download the Fluke Connect app, go to iTunes or Google play and download Fluke Connect. RAYONNEMENT LASER NE PAS REGARDER DANS LE FAISCEAU APPAREIL LASER DE CLASSE 2... -
Page 13: Operation In Extreme Conditions
Expert Series Thermal Imager Safety Information Warning Operation in Extreme Conditions To prevent personal injury: Storage and/or continual operation of the Imager in extreme ambient temperature conditions can result in • Read all safety information before you use temporary interruption of operation. If this occurs, let the the Product. - Page 14 disposed of by a qualified recycler or hazardous materials handler per local regulations. Contact your authorized Fluke Service Center for recycling information. This product complies with the WEEE Directive (2002/96/EC) marking requirements. The affixed label indicates that you must not discard this electrical/electronic product in domestic household waste. Product Category: ...
-
Page 15: Accessories
Description Part Number FLK-TI-SBP4 Smart Battery Pack 4597142 FLK-TI-SBC3B Charging Base/Power Supply with Adapters 4354922 TI-CAR CHARGER 12 V Vehicle Charger Adapter 3039779 FLUKE-TIX5xx Neck Strap 4574715 FLUKE-TIX5xx Hand Strap 4574703 FLK-Bluetooth Bluetooth Headset 4603258 FLK-HDMI Cable HDMI Cable 4388596... -
Page 16: Before You Start
• Warranty Registration Card Fluke recommends the removable memory card that is supplied with the Imager or available from Fluke. Fluke does not warrant the use or reliability of aftermarket memory cards of different brands or capacities. To request a printed manual, email Fluke at TPubs@fluke.com. -
Page 17: Battery
Expert Series Thermal Imager Before You Start Battery Two-Bay Battery Charger Base Before you use the Imager for the first time, charge the 1. Connect the ac power supply to the ac wall outlet and battery for a minimum of 2.5 hours. The battery status connect the dc output to the charger base. -
Page 18: Optional 12 V Vehicle Charger
TiX520, TiX560 Users Manual Note Optional 12 V Vehicle Charger Make sure that the Imager is near room 1. Connect the 12 V adapter into the 12 V accessory temperature before you connect it to the charger. socket of the vehicle. - Page 19 Expert Series Thermal Imager Before You Start Table 3 shows the location of the battery and interfaces. Table 3. Bottom Panel Item Description Smart Battery Port Lithium-ion Smart Battery Anchor for Neck Strap SD Memory Card Slot ...
-
Page 20: Features And Controls
TiX520, TiX560 Users Manual Features and Controls Table 4 shows the Imager features. Table 4. Features Item Description Infrared Camera Lens Focus Control Laser Distance Finder Visual Camera and Lens Laser Distance Finder Button Image Capture Button ... -
Page 21: Power On And Off
Expert Series Thermal Imager Before You Start The Fluke LaserSharp Auto Focus System uses a Power On and Off precision-adjusted and aligned laser pointer to indicate the To turn on or turn off the Imager, push and hold for two area of focus. -
Page 22: Image Capture Button
TiX520, TiX560 Users Manual In general, push: Image Capture Button The large green button is the Image Capture Button (see to set the change and go back to the live view. Table 4). In normal operation, the function of the Image ... - Page 23 Go to IR Fusion Menu Manual/Auto Level and Span Go to internal Image Memory LED Light hwj001.eps Zoom In/Zoom Out Fluke Connect™ Rescale ...
- Page 24 IR-Fusion mode. Use it to infinitely adjust the picture from Full IR mode to Full Visible mode. Fluke Connect The Imager supports the Fluke Connect™ Wireless Auto/Manual Level and Span System (may not be available in all regions). Push ...
-
Page 25: Touch Screen
Expert Series Thermal Imager Before You Start Touch Screen Table 6. Touch Targets The touch screen is a shortcut to the most often used adjustments: date, time, emissivity, palette, temperature degrees, level and span, AutoBlend level, and background temperature. With the touch screen, you interact directly with what is displayed. -
Page 26: How To Use The Menus
TiX520, TiX560 Users Manual How to Use the Menus The menus, coupled with the three function button and arrow buttons, are the access point for: • Thermal image display • Camera features • Measurement • Advanced functions • Memory review •... -
Page 27: Image Capture
Expert Series Thermal Imager Image Capture To add photos using the IR-PhotoNotes annotation Image Capture system: Point the Imager at the target object. Focus on the object using the LaserSharp™ Auto Focus System or advanced 1. With an infrared image in the buffer, push to open manual focus (see page 11). -
Page 28: Voice Annotation (Recording)
TiX520, TiX560 Users Manual To play back: Voice Annotation (Recording) 1. Do the steps in the Review Image Files section on page 33 to see the image on the display. A Bluetooth headset is required and the radio must be enabled for voice (audio) recording. -
Page 29: Save Captured Infrared Image
33. measurements. These objects pose a burn hazard. More information is available on emissivity at http://www.fluke.com/emissivity http://www.fluke.com/emissivityexplanation. We recommend the study of this topic to get the most accurate temperature measurements. -
Page 30: Smartview Software
Imager www.fluke.com/smartviewdownload. This software is information. intended for Fluke Imagers and contains features to analyze images, organize data and information, and make Measurement Menu professional reports. SmartView allows audio annotations The Measurement Menu has settings for the calculation and photos from the IR-PhotoNotes™... -
Page 31: Level/Span
Expert Series Thermal Imager Menus Level/Span Temperature Level for Manual Operation Mode Level and span are set for automatic or manual When put into manual ranging, the level setting moves the adjustment. To choose between automatic or manual level thermal span up or down within the total temperature and span: range. -
Page 32: Emissivity Adjustment
TiX520, TiX560 Users Manual Table 7. Level and Span Settings To adjust the temperature span: 1. Push or the touch screen to increase or widen the temperature span. 2. Push or the touch screen to decrease or narrow the temperature span. -
Page 33: Background (Reflected Background Temperature Compensation)
Expert Series Thermal Imager Menus Note Background (Reflected Background Temperature Compensation) Surfaces with an emissivity of <0.60 make reliable and consistent determination of actual Compensation for reflected background temperature is set temperatures problematic. The lower the in the Background tab. Very hot objects or very cold emissivity, the more potential error is associated objects can affect the apparent temperature and with the Imager's temperature measurement... -
Page 34: Transmission/Transmittance Adjustment
TiX520, TiX560 Users Manual Transmission/Transmittance Adjustment Spot Temperatures When you do infrared inspections through infrared- The Spot Temperatures are floating HI and LO transparent windows (IR windows), not all of the infrared temperature indicators that move on the display as the energy emitted from the objects of interest is transmitted temperature measurements of the image fluctuate. -
Page 35: Markers
Expert Series Thermal Imager Menus Markers To enable or disable the Center Box feature: Up to three adjustable, fixed-temperature spot markers are 1. Go to Measurement > Center Box. available on the display. You can use these markers to highlight a region before you save the image. The marker 2. -
Page 36: Image Menu
TiX520, TiX560 Users Manual Image Menu Table 8. Palettes The Image menu has controls for different features used in Standard Palettes Ultra Contrast™ Palettes the presentation of the infrared image on the Imager's LCD and some saved image files. Grayscale... -
Page 37: Ir-Fusion ® Technology
IR-Fusion technology has different modes: Push to open the scroll bar that adjusts the Icon TiX520 TiX560 IR-Fusion mode. Use it to infinitely adjust the picture from -Picture-in-Picture (PIP) Full IR mode to Full Visible mode. -AutoBlend Picture-in-Picture (PIP) -
Page 38: Display Graphics Presentation
TiX520, TiX560 Users Manual Note Outside/Inside Alarm The Imager does not sense ambient or surface If you set values for the high-temperature color alarm and dew point level automatically. To use the low- a low-temperature color alarm, the Imager will have the temperature color alarm function as a dew point options for inside or outside color alarms. -
Page 39: Logo
Menus To do a distance measurement: Logo A Fluke logo shows on the display and captured images. 1. Point the Imager at the target. You can choose to turn on or turn off the logo: 2. Push the Laser Distance Finder button. -
Page 40: Backlight
TiX520, TiX560 Users Manual To turn on or turn off the LaserSharp Auto Focus System Video and the laser pointer: The Imager can record infrared and IR-Fusion™ to the SD card or internal memory in .is3 or .avi format. 1. Go to Camera > Auto Focus. -
Page 41: Hdmi
Expert Series Thermal Imager Menus In the Auto Capture sub-menu, you will see these options: HDMI ® HDMI (High-Definition Multimedia Interface) is a compact • Start Capture: Executes the Auto Capture settings in audio/video interface for transferring uncompressed data camera memory. and compressed/uncompressed digital audio data from the •... -
Page 42: Wireless Connectivity
1. Connect the Imager to a PC with internet access and an iPhone, and an iPad through the WiFi connection. A Fluke SmartView software. transferred image can be viewed with Fluke Connect™ or SmartView Analysis and Reporting software if installed in SmartView detects that the radio is disabled in the the device. -
Page 43: Memory Menu
Expert Series Thermal Imager Menus To turn on the WiFi Network feature: 2. Push to highlight the preview image of the file for review. 1. Go to Settings > Wireless > WiFi > WiFi Network. 3. Push to review the file. 2. -
Page 44: Settings Menu
Visit the Fluke website or contact memory card, or a USB flash memory device in different Fluke to find out how to download SmartView analysis and file formats. Image format selections are .bmp, .jpg, and reporting software at no charge. -
Page 45: Auto Off
Expert Series Thermal Imager Menus To set the date: 1. Go to Settings > Date. Auto Off The Auto Off timer is user-defined separately for the LCD 2. Push to highlight the date format. and power. 3. Push to set a new format. Note 4. -
Page 46: Image Storage
TiX520, TiX560 Users Manual 6. Push to highlight hours or minutes. Image Storage The storage setting allows you to choose to save images The 12 hour format has a selection to set the time as to the internal memory, micro SD memory card, or USB AM or PM. - Page 47 640 x 480 pixels using a 320 x 240 sensor. Results are viewable on the Imager after they are captured 1. Go to Settings > Advanced > Imager Info. on the TiX560. The TiX520 requires SmartView software 2. Push to highlight Licenses.
-
Page 48: Fluke Connect™ Wireless System
4. Select the Wi-Fi network that begins with "Fluke..". better images. For best results, hold the Imager steady as you do the inspection. 5. Go to the Fluke Connect App and select "Thermal Imager" from the list. To set: You are now able to take images on the Imager. -
Page 49: Remote Control
You can view the display of the Imager with a PC that has additional information about the controls on the SmartView software installed or the Fluke Connect mobile software UI. app. The TiX560 Imager has the additional ability so you... -
Page 50: How To Clean The Case
• Do not attempt to charge the batteries in extreme cold outlet before the Product or battery. environments. • Use only Fluke approved power adapters to Caution charge the battery. Do not incinerate the Product and/or battery. • Keep cells and battery packs clean and dry. -
Page 51: General Specifications
® Software ..............SmartView full analysis and reporting software available for free download at www.fluke.com Power Batteries ............. 2 Lithium-ion rechargeable smart battery packs with 5-segment LED display to show charge level. Battery Life ............3 hours continuous use for each battery pack (assumes 50 % brightness of LCD) Battery Charge Time .......... - Page 52 TiX520, TiX560 Users Manual Safety Standards ..........IEC 61010-1, CAT None, Pollution Degree 2 IEC 60825-1, Class II, <1mW Electromagnetic Compatibility (EMC) International ............IEC 61326-1: Basic Electromagnetic Environment CISPR 11: Group 1, Class A Group 1: Equipment has intentionally generated and/or uses conductively-coupled radio frequency energy that is necessary for the internal function of the equipment itself.
-
Page 53: Detailed Specifications
Detailed Specifications Temperature Measurements Temperature Range (not calibrated below -10 °C) TiX520 ............-20 °C to +850 °C (-4 °F to +1562 °F) TiX560 ............-20 °C to +1200 °C (-4 °F to +2192 °F) Accuracy Range 1, 2 ............±2 °C or 2 % (whichever is greater) at 25 °C ambient Range 3 ............ - Page 54 TiX520, TiX560 Users Manual Infrared Lenses Lens Field of View Spatial Resolution (IFOV) Minimum Focus Distance Standard IR Lens 24 ° x 18 ° 1.31 mRad 15 cm (6 in) Optional 2x Telephoto 12 ° x 9 ° 1.05 mRad...
- Page 55 Expert Series Thermal Imager Detailed Specifications Image and Data Storage File Formats ............BMP, JPG, IS2, IS3, AVI (No analysis software required for .bmp and .jpg files) Export File Formats with ® SmartView Software ......... JPEG, JPG, JPE, JFIF, BMP, GIF, DIB, PNG, TIF, TIFF Memory Review ..........
- Page 56 TiX520, TiX560 Users Manual...