Table of Contents
Advertisement
Quick Links
Download this manual
See also:
Setup Manual
Advertisement
Table of Contents

Related Manuals for Swann DVR4-1160


Summary of Contents for Swann DVR4-1160
-
Page 1: Channel Digital Video Recorder
Advanced security made easy DVR4-1160™ MPEG 4 Channel Digital Video Recorder Operating Instructions Operating Instructions SW342-LPM www.swannsecurity.com SR342-LPM-60010-200609... -
Page 2: Before You Begin
Before You Begin FCC Verification: NOTE: This equipment has been tested and found to comply with the limits for Class B digital device, pursuant to part 15 of the FCC Rules. These limits are de- signed to provide reasonable protection against harmful interference in a residen- tial installation. -
Page 3: Table Of Contents
Contents Before You Begin Contents Package Contents DVR Layout Remote Control Connecting Cameras to the DVR Starting the DVR Main Menu Hard drive Setup Setting the Time Camera Setup Record Setup Record Framerate Video Quality Record Schedule Sensor Setup Motion Detector Setup System Password Image Parameters Miscellaneous Setup... -
Page 4: Package Contents
Easy Setup Guide Power Adapter with Cable Software CD Network cable USB cable RCA Video Cable RCA to BNC adapters X 4 Security Stickers (4 Pack) If you are missing any of the components above, contact Swann Communications for assistance. -
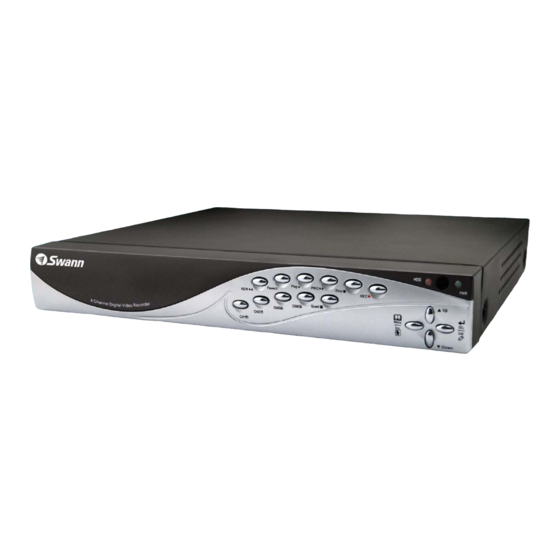
Page 5: Dvr Layout
DVR Layout Front Panel 7 8 9 16 17 18 1.Rewind - Press to rewind a Note: will not function if the cameras 12. Channel 3 - Press to view recording / press to move cursor left. are not activated in CAMERA SETUP channel 3. -
Page 6: Remote Control
Remote Control 1. 0-9 (digit key pad) 8. SELECT/SEL - Buttons 1-4 can be used to view channels 1-4 in indi- vidual display mode during recording and playback. -Press to select an option/enter a sub menu. - 0-9 can be used for a password. - 0-9 can be used in NETWORK SETUP to change digits. -
Page 7: Connecting Cameras To The Dvr
Connecting Cameras to the DVR Cameras and accessories optional 1. Connect the power and BNC ends of the security camera to an extension cable. 2. Connect the DC end on the extension cables to the 4 way power splitter plugs. 3. -
Page 8: Starting The Dvr
Starting the DVR Once you have connected the DVR and switched the power on it will begin to boot up. During boot up you will see the following screens V2.6 CHECKING HDD..MASTER [ST3250310SV] G-V-MLANG SLAVE [..NONE] 2009.XX.XX This third screen will only show on first boot up or after a new hard drive has been installed. Push SELECT to format the hard drive or MENU to cancel the format and continue with the start up. -
Page 9: Main Menu
Main Menu To access the main menu push the MENU button. You can scroll through the sub menus by using the UP & DOWN buttons on the DVR front panel or the remote control. The red arrow indicates the sub-menu or option that is currently selected. See page 4 for DVR functions and page 5 for remote control functions. -
Page 10: Camera Setup
Camera Setup Camera Setup allows you to choose which channels will be active when the cameras are plugged into the DVR. When a camera is set to OFF in Camera Setup you will not be able to view the display for that camera. You will also not be able to record unless the camera is set to ON in Camera Setup. -
Page 11: Video Quality
Video Quality The video quality for all the cameras can be adjusted in the MAIN menu. 1. In the MAIN menu scroll down to VIDEO QUALITY. 2. Push the SELECT button to scroll between LOW, NORMAL, HIGH and HIGHEST. 3.Push the MAIN menu button once you have selected the quality level to update the changes. -
Page 12: Motion Detector Setup
Motion Detector Setup 1. Select whether you want motion detection ON or OFF. The motion detector levels range from 1-3 with 1 being the least sensitive and 3 having the highest sensitivity. 2. With the LEVEL option selected push the SELECT button to scroll through the motion detector sensitivity levels (1-3). -
Page 13: System Password
System Password The DVR includes the option of a six character password. When the password is enabled the DVR will prompt you for it when you try to: a. stop a recording b. reset the menu c. access the main menu d. -
Page 14: Image Parameters
Image Parameters In the IMAGE PARAMETERS screen you can change the picture settings Contrast, Brightness, Hue and Saturation for each camera. Each setting can be set from 0-100%. 1. In the MISCELLANEOUS SETUP screen scroll down to IMAGE PARAMETERS. 2. Push the FWD button on the DVR front panel or the RIGHT button on the remote to choose the camera you would like to adjust settings for. -
Page 15: Keypad Tones
Miscellaneous Setup Keypad Tones The beeper sound you hear each time you push a button can be disabled. 1. In the Main menu select MISCELLANEOUS SETUP and then KEYPAD TONES. 2. Push the SELECT button to turn ON or OFF. Sequence Dwell Time With sequence dwell time activated you can set the time the display shows each channel when the channels are viewed in individual mode. - Page 16 Miscellaneous Setup (continued) Language Setup The DVR can be set to 5 foreign languages. Italian, French, Dutch, Portuguese and Spanish. 1. In the Main menu scroll down to the LANGUAGES option and push SELECT to change the language. Note: If you have changed the language and are having trouble set- ting it back to English simply push the MAIN menu button until you see one of the options below: SELEZIONE LINGUA...
-
Page 17: Recording
Recording Record Screen 1. Record indicator - When a channel is recording the record indicator will appear beside the channel number. 2. Audio indicator - The audio indicator will appear on the top left corner on the display the audio is aasigned to. See AUDIO PORT SETUP on page 17 to configure this setting. -
Page 18: Playback
Playback Playback Screen The Search Video screen will display all the recordings currently stored on the hard drive. Playback will automatically play in quad mode. if you would like to view the footage in individual mode simply push the channel button (1-4) you’d like to view individually;... -
Page 19: Installing Dvr Software
Installing DVR Software Installing the DVR software 1. Insert the mini CD into a CD/DVD ROM drive on your computer. 2. If your CD/DVD ROM drive does not auto run the CD; click MY COMPUTER click on the drive the CD is in and double click on the “DXCLIENT2.7.1-ENG.EXE”... -
Page 20: Playback
Installing DVR Software (continued) 4. Follow the instructions in the setup wizard and click NEXT. 5. The installation is now complete. Tick the checkbox to run the DXCLIENT and click FINISH. -
Page 21: Configuring Activex
Configuring ActiveX You may need to change the security settings on your PC to be able to view the DVR remotely. If you are having trouble viewing your DVR remotely and are getting messages regarding active X controls the following instructions may help. Changing Security Settings on Internet Explorer 1. -
Page 22: Ip Setup
IP Setup IP Allocation DHCP Setup 1. In the NETWORK SETUP sub menu go to IP ALLOCATION and press SELECT to choose DHCP. Note: the next five options will now show “0.0.0.0” 2.Push the MENU button to go back to the Main menu. 3. -
Page 23: User Set Up
User Set Up User Setup In the USER SETUP screen you can assign the DVR an Admin ID and an Admin Password. These are needed for access- ing your DVR remotely. The Admin ID and Password can be up to 14 charaters long. You can also set a USER ID and PASSWORD. -
Page 24: Dxclient
DxClient Opening DxClient PC viewer 1. On your PC click on START > ALL PROGRAMS (PROGRAMS) 2. Find DXCLIENT and click DXCLIENT in the DXCLIENT folder. 3. The DxClient program should now be open with a blank screen. Click on the large NET button. -
Page 25: Dxclient Layout
DxClient Layout 1. Play - Press to begin playing recording 22. PTZ Control - Press to change between ZOOM, IRIS 2.Pause - Press to pause recording and FOCUS 3. Stop - Press to stop recording 23. Zoom Out/- - Press zoom out, iris out or focus out 4. -
Page 26: Netviewer
Netviewer The DxClient Netviewer allows you to view, control recording, view playback and control cameras (depending on the cameras - must have PTZ capabilities). Note: to view the DVR using the DxClient Netviewer the DVR must be connected to a network (using the network cable). - Page 27 Netviewer (continued) Stream Capture Using the Stream Capture function you can record live footage and then convert it into an AVI file. This enables you to playback the recording on other meida players such as VLC, DivX or Windows Media player. 1.
- Page 28 Netviewer (continued) 1. Click the BACK UP [AVI] button in the DxCli- ent. This will begin Stream Capturing and open a mini display. 2. Click the REVIEW AND CONVERT button when you want the capture to end; below the mini display shows the time of the current capture, the maximum time allowed to capture and below that the number of frames currently captured.
-
Page 29: Hdd Viewer
HDD Viewer DxClient Configuration - HDD Viewer In this configuration window you can choose where you want the capture images and recording files be saved and change other miscellaneous settings concerning the DVR when it is connected to a PC using a USB cable.. Note: to view the DVR using the DxClient HDD Viewer the DVR must be connected directly to a PC using a USB cable. -
Page 30: Hdd Viewer (Continued)
HDD Viewer (continued) Backup The DVR allows you to backup all your recordings onto your hard drive. The backup format is a MCG file which can be played back on the DxClient; you can select where you would like the MCG file saved. (it only allows you to select the drive you would like to save the MCG file in). - Page 31 HDD Viewer (continued) Viewing Backup File Once you have selected the drive you want the backup files to be saved on and have completed the backup you can view the file on the DxClient. 1. Click on the large FILE button on the right panel of the DxClient.
-
Page 32: Hdd Viewer (Continued)
HDD Viewer (continued) Search Time You can also search the recordings by going to a specific time and date. If you have a certain date and time you would like to playback footage from; you can use the Search Time function to do this. 1. -
Page 33: Installing And Changing The Hdd
Installing and changing the HDD Note: the following instructions are for installing or changing the hard drive. If your DVR already has a hard drive pre-installed disregard these steps. 1. Ensure the DVR is unplugged and removed from mains power. 2. -
Page 34: Troubleshooting
Troubleshooting Problem: My monitor is not showing any display/picture. Solution: Make sure you have connected the VIDEO OUTPUT to a VIDEO INPUT on the back of your TV/monitor Problem: My DVR does not switch on. Solution: Make sure you have plugged in the power supply (12V 3A) to the DVR and into the wall socket. - Page 35 Installing and changing the HDD DVR4-1160 Video Video Format NTSC or PAL Video Input 4CH Composite Video Output 1CH Composite Display Resolution NTSC: 720 x 480 PAL: 720 x 576 Display Frame Rate NTSC: 120fps (4 x 30fps) PAL: 100fps (4 x 25fps)
-
Page 36: Warranty Information
Swann. The end user is responsible for all freight charges incurred to send the product to Swann’s repair centres. The end user is responsible for all shipping costs incurred when shipping from and to any country other than the country of origin.