Sign In
Upload
Manuals
Brands
Toshiba Manuals
Projection TV
TheaterWide 56HM66
Toshiba TheaterWide 56HM66 Manuals
Manuals and User Guides for Toshiba TheaterWide 56HM66. We have
7
Toshiba TheaterWide 56HM66 manuals available for free PDF download: Operating Manual, Service Manual, Installation Manual, Manual D'installation, Specifications
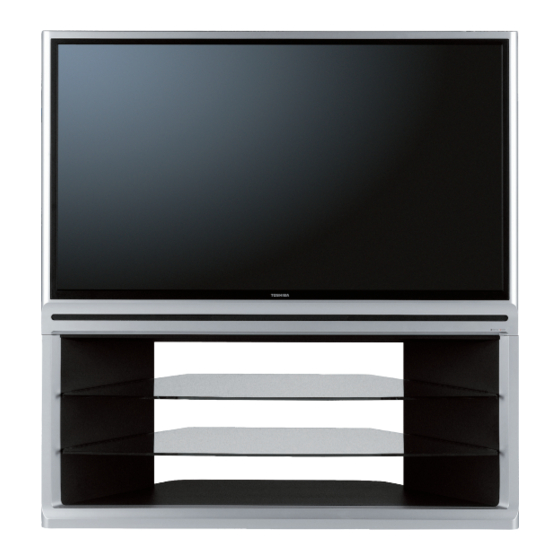
Toshiba TheaterWide 56HM66 Operating Manual (81 pages)
Toshiba 50HM66/ 56HM66 Dlp projection tv
Brand:
Toshiba
| Category:
Projection TV
| Size: 19 MB
Table of Contents
Important Notes about Your DLP Projection TV
2
Voice Announce Feature
2
Important Notice about Hot Lamp Restart
2
Contents
3
Introduction
4
Features
4
Overview of Steps for Installing, Setting up and Using Your New TV
4
Front of TV
5
Right Side of TV
5
TV Back Panel Connections
6
Using the Remote Control
7
Preparing the Remote Control for Use
7
Installing the Remote Control Batteries
7
Remote Control Effective Range
7
Learning about the Remote Control
8
Using the Remote Control to Control Your Other Devices
9
Remote Control Functional Key Chart
10
Programming the Remote Control to Control Your Other Devices
11
Remote Control Codes
12
Menu Layout and Navigation
14
Main Menu Layout
14
Setup/Installation Menu Layout
15
Navigating the Menu System
15
Setting up Your TV
16
Selecting the Menu Language
16
To Configure the ANT 1 and ANT 2 Input Sources
16
Programming Channels into the Tv's Channel Memory
17
Programming Channels Automatically
17
To Add or Delete Channels in the Channel Memory
17
Programming Your Favorite Channels
18
To Add a Channel to the Channel Memory
18
To Remove a Channel from the Channel Memory
18
To Save Your New Settings
18
To Program Favorite Channels for Another Input
19
To Clear Your Favorite Channel Lists
19
To Tune Your Favorute Channels Using the Favorite Channel List
19
Setting the Colorstream HD Audio Mode
20
Viewing the Cablecard Menu
20
Setting the HDMI Audio Mode
20
Setting the Quick Restart Feature
21
Viewing the Digital Signal Meter
21
Viewing the System Status
22
Restore Factory Defaults
22
To Cancel the Reset
22
Using the Tv's Basic Features
23
Selecting the Video Input Source to View
23
Labeling the Video Input Sources
23
Tuning Channels
24
Using the Channel Browser
24
Input Labeling Example
24
To Clear the Input Labels
24
Elements of the Channel Browser Banner
25
Adding and Clearing Channels and Inputs in the Channel History
25
To Open the Channel Browser Banner
25
To Tune to a Channel or Input in Browse Mode
25
Using the Home Feature
26
Tuning Your Favorite Channels
26
Tuning to the Next Programmed Channel
26
Tuning to a Specific Channel
26
Selecting the Picture Size
27
Natural Picture Size
27
Theaterwide 1 Picture Size
27
Scrolling the Theaterwide Picture
28
Using the Auto Aspect Ratio Feature
29
Selecting the Cinema Mode
29
Adjusting the Picture
30
Selecting the Picture Mode
30
Adjusting the Picture Quality
30
Using the Closed Caption Mode
31
Closed Caption Advanced
31
To View Captions or Text
31
To Customize the Closed Captions
31
Adjusting the Audio
32
Digital Closed Captions
32
Muting the Sound
32
Using the Digital Audio Selector
32
Selecting Stereo/Sap Broadcasts
33
Adjusting the Audio Quality
33
Using the Stablesound Feature
34
Selecting the Optical Audio Output Format
34
Turning off the Built-In Speakers
34
Using the Locks Menu
35
Entering the PIN Code
35
Changing Your PIN Code
35
If You Cannot Remember Your PIN Code
35
Blocking TV Programs and Movies by Rating
36
Blocking TV Programs and Movies by Additional Ratings
36
To Download the Additional Rating System
36
Blocking Channels
37
To Unblock Individual Channels
37
To Block All Channels at Once
37
Unlocking Programs Temporarily
38
Using the Input Lock Feature
38
Setting the Sleep Timer
39
Using the Control Panel Lock Feature
39
To Unlock the Control Panel
39
To Display the Remaining Sleep Time
39
Displaying TV Setting Information On-Screen Using RECALL
40
Understanding the Auto Power off Feature
40
Understanding the Last Mode Memory Feature
40
Using the Tv's Advanced Features
41
Using the Advanced Picture Settings Features
41
Using Dynamic Contrast
41
Using Cableclear/Dnr
41
Selecting the Color Temperature
42
Selecting the Lamp Mode
42
Using the Advanced Audio Settings Features
43
Using the Game Mode Feature
43
Using the SRS WOW Surround Sound Feature
43
To Turn on Game Mode
43
Troubleshooting
44
LED Indications
46
Lamp Unit Replacement and Care
47
Replacing the Lamp Unit
47
When to Replace the Lamp Unit
47
To Obtain a Replacement Lamp Unit
47
How to Replace the Lamp Unit
48
Required Tools
48
Cleaning the Lamp Unit Glass
49
Disposing of the Used Lamp Unit
49
Specifications
50
Index
54
Safety Precautions
58
Child Safety
58
Lamp Unit Replacement
58
Important Safety Instructions
59
Installation
59
Additional Safety Precautions
59
Care
60
Service
60
Technical Specifications
61
Connecting Your TV
63
Overview of Cable Types
63
Coaxial Cable
63
Standard A/V Cables
63
About the Connection Illustrations
64
Connecting a Digital Cablecard
64
TV Back Panel
64
To View Encrypted Digital Channels
64
Connecting a VCR and Antenna or Cable TV
65
To View the Antenna or Cable Signal
65
To View the VCR
65
Connecting a VCR and Cable Box
66
To View Basic and Premium Cable Channels
66
Connecting a DVD Player with Colorstream
67
To View Antenna or Cable Channels
67
To View the DVD Player
67
To View the VCR or View and Record Antenna Channels
67
Connecting a VCR with S-Video and a Cable Box
68
To Record a TV Program While Watching a DVD
68
Connecting an HDMI or DVI Device to the HDMI Input
69
To Connect an HDMI Device
69
To Connect the IR Blaster Cable
70
If You Cannot Locate the Device's Infrared Sensor
70
Connecting a Camcorder
71
To View the Camcorder Video
71
Connecting a Digital Audio System
72
Connecting an Analog Audio System
72
To Control the Audio
72
G-Link Connection
73
To Connect to the G-Link Terminal
73
Front of Cable Box
73
Front of VCR
73
Connecting a Personal Computer
74
Signal Names for Mini D-Sub 15-Pin Connector
74
Connecting a Home Network
75
File Sharing
75
E-Mail Scheduling of Recordings and Reminders
75
Advertisement
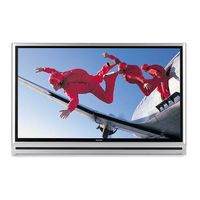
Toshiba TheaterWide 56HM66 Operating Manual (56 pages)
Integrated High Definition DLP Projection Television
Brand:
Toshiba
| Category:
Projection TV
| Size: 2 MB
Table of Contents
Important Notes about Your DLP™ Projection TV
2
Trademark Information
2
Welcome to Toshiba
2
Table of Contents
3
Chapter 1: Introduction
4
Features of Your New TV
4
Overview of Steps for Installing, Setting Up, and Using Your New TV
4
TV Front and Side Panel Controls and Connections
5
TV Back Panel Connections
6
Chapter 2: Using the Remote Control
7
Preparing the Remote Control for Use
7
Installing the Remote Control Batteries
7
Remote Control Effective Range
7
Learning about the Remote Control
8
Using the Remote Control to Control Your Other Devices
9
Remote Control Functional Key Chart
10
Programming the Remote Control to Control Your Other Devices
11
Remote Control Codes
12
Chapter 3: Menu Layout and Navigation
14
Main Menu Layout
14
Setup/Installation Menu Layout
15
Navigating the Menu System
15
Chapter 4: Setting up Your Tv
16
Selecting the Menu Language
16
Configuring the Antenna Input Sources for the ANT
16
And ANT 2 Terminals
16
Programming Channels into the Tv's Channel Memory
17
Programming Channels Automatically
17
Manually Adding and Deleting Channels in the Channel Memory
17
Programming Your Favorite Channels
18
Setting the Colorstream HD Audio Mode
20
Setting the HDMI™ Audio Mode
20
Viewing the Cablecard™ Menu
20
Setting the Quick Restart™ Feature
20
Viewing the Digital Signal Meter
21
Viewing the System Status
22
Chapter 5: Using the Tv's Basic Features
23
Selecting the Video Input Source to View
23
Labeling the Video Input Sources
23
Tuning Channels
24
Using the Channel Browser
24
Tuning Your Favorite Channels
26
Tuning to the Next Programmed Channel
26
Tuning to a Specific Channel (Programmed or Unprogrammed)
26
Switching between Two Channels Using Channel Return
26
Switching between Two Channels Using Surflock
26
Selecting the Picture Size
27
Scrolling the Theaterwide Picture (Theaterwide 2 and 3 Only)
28
Scrolling the Theaterwide ® Picture
28
Using the Auto Aspect Ratio Feature
29
Selecting the Cinema Mode (480I Signals Only)
29
Adjusting the Picture
30
Selecting the Picture Mode
30
Adjusting the Picture Quality
30
Using the Closed Caption Mode
31
Closed Caption Advanced
31
Digital Closed Captions
32
Adjusting the Audio
32
Muting the Sound
32
Using the Digital Audio Selector
32
Selecting Stereo/Sap Broadcasts
33
Adjusting the Audio Quality
33
Using the Stablesound ® Feature
34
Turning off the Built-In Speakers
34
Selecting the Optical Audio Output Format
34
Using the Locks Menu
35
Entering the PIN Code
35
If You Cannot Remember Your PIN Code
35
Changing Your PIN Code
35
Blocking TV Programs and Movies by Rating (V-Chip)
36
Blocking Channels
37
Unlocking Programs Temporarily
38
Using the Input Lock Feature
38
Using the Control Panel Lock Feature
39
Setting the Sleep Timer
39
Displaying TV Setting Information On-Screen Using RECALL
40
Understanding the Auto Power off Feature
40
Understanding the Last Mode Memory Feature
40
Chapter 6: Using the Tv's Advanced Features
41
Using the Advanced Picture Settings Features
41
Using Dynamic Contrast
41
Using Cableclear ® /DNR (Digital Noise Reduction)
41
Using MPEG Noise Reduction
41
Selecting the Color Temperature
42
Selecting the Lamp Mode
42
Using the Game Mode Feature
43
Using the Advanced Audio Settings Features
43
Using the SRS WOW™ Surround Sound Feature
43
Chapter 7: Troubleshooting
44
General Troubleshooting
44
LED Indications
46
Chapter 8: Appendix
47
Lamp Unit Replacement and Care
47
Replacing the Lamp Unit (User-Replaceable Component)
47
When to Replace the Lamp Unit
47
How to Replace the Lamp Unit
48
Disposing of the Used Lamp Unit
49
Specifications
50
Limited United States Warranty
51
For DLP™ Television Models
51
Limited Canada Warranty
52
For DLP™ Television Models
52
Index
54
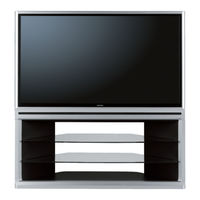
TOSHIBA TheaterWide 56HM66 Operating Manual (56 pages)
Integrated High Definition DLP Projection Television
Brand:
TOSHIBA
| Category:
Projection TV
| Size: 8 MB
Table of Contents
Welcome to Toshiba
2
Features of Your New Tv
4
Tv Front and Side Panel Controls and Connections
5
Tv Back Panel Connections
6
Remote Control Effective Range
7
Installing the Remote Control Batteries
7
Learning about the Remote Control
8
Usingthe Remotecontrolto Control Yourother Devices
9
Remote Control Functional Key Chart
10
Programmingthe Remote Control to Control Your Other Devices
11
Chapter 2 : Using the Remote Control
11
Remote Control Codes
12
Main Menu Layout
14
Setup/Installation Menu Layout
15
Navigating the Menu System
15
Selecting the Menu Language
16
And ANT 2 Terminals
16
Programming Channels into the Tv's Channel Memory
17
Programming Channels Automatically
17
Manually Adding and Deleting Channels in the Channel Memory
17
Programming Your Favorite Channels
18
Settingthe Colorstream Hdaudio Mode
20
Settingthe HDMI
20
Viewing the Digital Signal Meter
21
Viewing the System Status
22
Restore Factory Defaults
22
Selecting the Video Input Source to View
23
Labeling the Video Input Sources
23
Tuning Channels
24
Usingthe Channel Browser
24
Elements of the Channel Browser
25
Selecting the Picture Size
27
Natural Picture Size
27
Scrolling the Theaterwide® Picture (Theaterwide 2 And3 Only)
28
Using the Auto Aspect Ratio Feature
29
Selectingthe Cinemamode (480I Signalsonly)
29
Selecting the Picture Mode
30
Adjusting the Picture Quality
30
Using the Closed Caption Mode
31
Closed Caption Advanced
31
Adjusting the Audio
32
Digital Closed Captions
32
Muting the Sound
32
Selecting Stereo/Sap Broadcasts
33
Adjusting the Audio Quality
33
Using the Stablesound Feature
34
Selecting the Optical Audio Output Format
34
Turning off the Built-In Speakers
34
Using the Locks Menu
35
Entering the PIN Code
35
Blocking Tv Programs and Movies by Rating (V-Chip)
36
Independent Rating System for Broadcasters
36
Blocking Channels
37
Unlocking Programs Temporarily
38
Using the Input Lock Feature
38
Using the Control Panel Lock Feature
39
Setting the Sleep Timer
39
Displaying TV Settinginformation On-Screenusingrecall
40
Understanding the Auto Power off Feature
40
Understanding the Last Mode Memory Feature
40
Using the Advanced Picture Settings Features
41
Using MPEG Noise Reduction
41
Selecting the Color Temperature
42
Selecting the Lamp Mode
42
Using the Game Mode Feature
43
General Troubleshooting
44
Closed Caption Problems
45
Led Indications
46
Lampunit Replacementandcare
47
Replacing the Lamp Unit (User-Replaceable Component)
47
When to Replace the Lamp Unit
47
How to Replace the Lamp Unit
48
Disposingof the Used Lamp Unit
49
Specifications
50
Limited United States Warranty
51
Limited Canada Warranty
52
Advertisement
Toshiba TheaterWide 56HM66 Installation Manual (24 pages)
Integrated High Definition DLP Projection Television
Brand:
Toshiba
| Category:
Projection TV
| Size: 1 MB
Table of Contents
Lamp Unit Replacement
2
Safety Precautions
2
Important Safety Instructions
3
Installation, Care, and Service
3
Welcome to Toshiba
5
Terminal Specifications for DLP™ Projection Televisions
5
Table of Contents
6
Connecting Your TV
7
Overview of Cable Types
7
About the Connection Illustrations
8
Connecting a Digital Cablecard
8
Connecting a VCR and Antenna or Cable TV (no Cable Box)
9
Connecting a VCR and Cable Box
10
Connecting a DVD Player with Colorstream
11
Receiver
11
Connecting a VCR with S-Video and a Cable Box
12
Connecting an HDMI™ or DVI Device to the HDMI Input
13
Connecting a Device to the IR out Infrared Terminal Using the IR Blaster Cable for IR Pass-Through Device Control
14
Connecting an IR Receiver/Repeater Control System to the IR in Infrared Terminal
15
Connecting a Camcorder
15
Connnecting a Digital Audio System
16
Connecting an Analog Audio System
16
G-LINK™ Connection
17
Connecting a Personal Computer (PC)
18
Connecting a Home Network
19
Index
21
Toshiba TheaterWide 56HM66 Service Manual (34 pages)
Projection Television
Brand:
Toshiba
| Category:
Projection TV
| Size: 6 MB
Table of Contents
Important Notice
2
Green Product Procurement
2
Lead-Free Solder
2
Safety Instruction
2
Led Blink Codes
5
Replacing the Lamp Unit
6
Cleaning the Lamp Unit Glass
7
Front Bezel Removal
9
Light Engine Replacement
10
Block Diagram
21
Toshiba TheaterWide 56HM66 Specifications (2 pages)
56” (measured diagonally) INTEGRATED HDTV DLP (720p)
Brand:
Toshiba
| Category:
Projection TV
| Size: 0 MB
(French) Toshiba TheaterWide 56HM66 Manual D'installation (24 pages)
Téléprojecteur DLP intégré à haute définition
Brand:
Toshiba
| Category:
Projection TV
| Size: 2 MB
Table of Contents
Remplacement de la Lampe
2
Instructions Importantes Sur la Sécurité
3
Installation, Entretien Et Service Après-Vente
3
Bienvenue À Toshiba
5
Spécifications des Connecteurs des Téléprojecteurs DLP
5
Table of Contents
6
Raccordement du Téléviseur
7
Aperçu des Types de Câbles
7
Au Sujet des Illustrations de Raccordement
8
Raccordement D'une Carte Cablecard™ Numérique
8
Raccordement D'un Magnétoscope Et D'une Antenne Ou D'une Câblodistribution (Aucun Décodeur Câble)
9
Raccordement D'un Magnétoscope Et D'un Décodeur Câble
10
Raccordement D'un Lecteur DVD Avec Colorstream ® (VIDéo À Composante), D'un Magnétoscope Et D'un Récepteur Satellite
11
Raccordement D'un Magnétoscope Muni de S-VIDéo Et D'un Décodeur Câble
12
Raccordement D'un Appareil HDMI™ Ou DVI À L'entrée HDMI
13
Raccordement D'un Appareil Au Connecteur Infrarouge IR out À L'aide du Câble IR Blaster Pour Commander un Appareil D'intercommunication IR
14
Raccorder Une Commande de Récepteur/Répéteur IR Au Connecteur Infrarouge IR in
15
Raccorder un Caméscope
15
Raccordement D'un Système Audio Numérique
16
Raccordement D'un Système Audio Analogique
16
Raccordement G-LINK
17
Raccordement D'un Ordinateur Personnel (PC)
18
Raccordement D'un Réseau Domestique
19
Index
21
Advertisement
Related Products
Toshiba 56H80
Toshiba 56HMX96 - 56" Rear Projection TV
Toshiba TheaterWide 56HM195
Toshiba 56HM16
Toshiba 56MX195 - 56" Rear Projection TV
Toshiba 51HX83
Toshiba 50A10
Toshiba TheaterWide 57HC85
Toshiba 53H71
Toshiba 55A10A
Toshiba Categories
Laptop
Air Conditioner
TV
LCD TV
All in One Printer
More Toshiba Manuals
Login
Sign In
OR
Sign in with Facebook
Sign in with Google
Upload manual
Upload from disk
Upload from URL