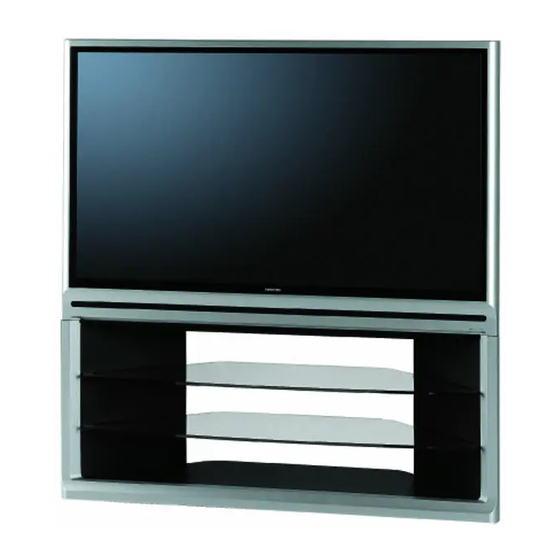
Toshiba 50HM66 - 50" Rear Projection TV Service Manual
Projection television
Hide thumbs
Also See for 50HM66 - 50" Rear Projection TV:
- Operating manual (81 pages) ,
- Installation manual (24 pages) ,
- Manual d'installation (24 pages)
Table of Contents
Advertisement
SERVICE MANUAL
For Technical Bulletins, Technical Tips, or other information regarding the
service of this model, visit the Toshiba America Consumer Products National
Service Division website at:
This model is classified as a
This Service Manual describes replacement parts for the green product. When repairing this
green product, use the part(s) described in this manual and
For (*1) and (*2), refer to
SOLDER.
© TOSHIBA CORPORATION 2008
Projection Television
50HM66
www7.toshiba.com
green product
(*1), as indicated by the underlined serial number.
GREEN PRODUCT PROCUREMENT
Rev.1
lead-free solder
(*2).
LEAD-FREE
and
Advertisement
Table of Contents

Related Manuals for Toshiba 50HM66 - 50" Rear Projection TV


Summary of Contents for Toshiba 50HM66 - 50" Rear Projection TV
- Page 1 SERVICE MANUAL Projection Television 50HM66 Rev.1 For Technical Bulletins, Technical Tips, or other information regarding the service of this model, visit the Toshiba America Consumer Products National Service Division website at: www7.toshiba.com This model is classified as a green product (*1), as indicated by the underlined serial number.
-
Page 2: Important Notice
EXPRESS OR IMPLIED WARRANTY OF MERCHANTABILITY AND FITNESS FOR A PARTICULAR PURPOSE. Toshiba shall not be liable for any damages, losses, expenses or costs, if any, incurred in connection with or as a result of use of any information or data provided herein. - Page 3 that have these same characteristics. Use only the specified parts when the mark is indicated in the circuit diagram or parts list. Part mounting and wire routing should be the same as that used originally. For safety purposes, insulating materials such as isolation tubes or tape are sometimes used and printed circuit boards are sometimes mounted floating.
- Page 4 Entering Service Mode Set VOLUME to minimum and press MUTE button twice on the remote control. ↓ Press MUTE button again and hold button down. ↓ Service Mode display While holding the MUTE button, press MENU button on TV set. Selecting the Adjusting Item Every pressing of CH button in the service mode changes the adjustment items.
-
Page 5: Led Blink Codes
LED BLINK CODES The yellow, blue, and red/green LED lights on the TV (at the bottom center of the TV) indicate the TV's status, as described below: Note: If the TV loses A/C power (e.g., a power outage occurs or the power cord is unplugged), when power is restored, the yellow LED will blink while the TV is booting until the remote control is usable. -
Page 6: Replacing The Lamp Unit
Replacing the Lamp Unit WARNING: RISK OF ELECTRIC SHOCK! TO REDUCE THE RISK OF ELECTRIC SHOCK, NEVER REMOVE TV COVERS, EXCEPT AS SPECIFIED HEREIN. REFER ALL SERVICING NOT SPECIFIED IN THIS MANUAL TO QUALIFIED SERVICE PERSONNEL. Failure to follow this WARNING may result in death or serious injury. The light source for this TV is a mercury lamp with internal atmospheric pressure that increases during use. -
Page 7: Cleaning The Lamp Unit Glass
WARNING: RISK OF ELECTRIC SHOCK! The lamp unit door is provided with an interlock to reduce the risk of electric shock and excessive ultraviolet radiation. Never defeat its purpose or attempt to service without removing the lamp unit door completely. Failure to follow this WARNING may result in death or serious injury. Grasp the lamp unit handle and gently pull the lamp unit straight out of the TV. - Page 8 • In the U.S., call TACP Consumer Solutions at 1-800-631-3811. • In Canada, locate the nearest Toshiba authorized service depot by directing your web browser to www.toshiba.ca; click "Home Entertainment", and then click "Support". Disposing of the Used Lamp Unit CAUTION: Always handle the lamp unit with care.
-
Page 9: Front Bezel Removal
Front Bezel Removal 50HM66, 50HMX96, 56HM16, 56HM66, 56HMX96 1. Remove 7 Screws from cabinet Back 2. Remove Front Plate 3. Remove 2 Screws 4. Pull front Bezel up then out ______________________________________________________________________________ 2007 Toshiba America Consumer Products, LLC. Page 10 of 12 SMART2006001_Version2.2... -
Page 10: Light Engine Replacement
LIGHT ENGINE REPLACEMENT Remove the back cover. Remove the lamp cover by removing screws 1, 2, and 3. Remove the LVDS and POWER cables. Unfasten the thermostat lead wires. (Leave the thermostat Breaker.) - Page 11 Remove the door SW unit by unscrewing as shown below. Disconnect the ballast cable and remove the ballast unit from the retaining clips 1 - 4. Remove the light engine. Reassemble the light engine by following steps 1 – 7 in reverse. Lamp Fan Replacement Remove screws 1, 2, and 3 securing the lamp fan cover and remove the lamp fan cover.
- Page 12 Remove the Ballast Fan cable (1) and Lamp Fan cable (2). Remove the 2 screws securing the Lamp fan and remove the lamp fan. Remove the 4 rubber corners from the old lamp fan and place them on the new lamp fan. Assemble the new fan to the light engine by following steps 1 –...
- Page 13 DMD Fan Replacement Remove the DMD Fan cable. Remove the DMD Fan casing by removing screws 1, 2, and 3. Remove the 2 screws securing the LVDS connector.
- Page 14 Remove the DMD shield case by removing screws 1 and 2. Remove the DMD Fan by removing screws 1 and 2. Assemble the new DMD fan by following steps 1 – 5 in reverse. Ballast Fan Replacement Remove the retaining pins from the fan.
- Page 15 Replace the Ballast Fan. Fix the Ballast Fan with two pins. Thermostat Breaker Replacement Disconnect the thermostat lead wires.
- Page 16 Replace the Thermostat Breaker by removing the retaining screw. (Thermostat Breaker is secured by 2 screws in some production units.) Reconnect the thermostat lead wires.
- Page 17 POD Fan Has Stopped BLUE - Solid (Lamp will still light but has error Indication on GREEN - .5 second blinks Screen) Refer to Chart 4 UNKNOWN Sequence or No Sequence Go To Chart 2 ______________________________________________________________________________ 2007 Toshiba America Consumer Products, LLC. SMART2006001_Version2.2...
- Page 18 Technical Support. Connections Engine 1-800-345-9785 Footnote 1. The Color Wheel will emit a high pitched whine when the TV Receiver is first turned on. ______________________________________________________________________________ 2007 Toshiba America Consumer Products, LLC. Page 3 of 12 SMART2006001_Version2.2...
- Page 19 Replacing the Light Engine under Warranty requires a concession number to be obtained from Technical Support. 1-800-345-9785 ______________________________________________________________________________ 2007 Toshiba America Consumer Products, LLC. Page 4 of 12 SMART2006001_Version2.2...
- Page 20 P823B Pin 6? and 20? Check F873 and Change Regulator Check F875 and Power Supply Power Supply P823B P822B PB90 PB80B CS110 PB504 Back AV & Regulator PCB ______________________________________________________________________________ 2007 Toshiba America Consumer Products, LLC. Page 5 of 12 SMART2006001_Version2.2...
-
Page 21: Block Diagram
BLOCK DIAGRAM T840 D840 Standby Power 5V-1 Transformer HDMI IN IC05 Regulator 3.3V-1 T800 RF-SW T862 SR81 D801 MAIN Power IC823 Transformer 3.3V D1 IC827 DC-DC 3.3V D2 SR82 CONV IC831 IC611 6V D US MTS AN5832SA IC899 Regulator IC700 IC201 TC90111A TB1131F... - Page 22 1 12 v P904 9v 41 41 9v 12 v 2 2 12 v POD_FAN 2 5v3 43 43 5v3 PB504 5v1 4 IR_OUT 5 P831A P831B AUDIO_GND 1 1 AUDIO_GND AUDIO_VCC 3 3 AUDIO_VCC © 2006 Toshiba America Consumer Products, Inc.
- Page 23 Video Signal Paths (Analog) ______________________________________________________________________________ 2007 Toshiba America Consumer Products, LLC. Page 7 of 12 SMART2006001_Version2.2...
- Page 24 Audio Signal Paths (Analog) ______________________________________________________________________________ 2007 Toshiba America Consumer Products, LLC. Page 8 of 12 SMART2006001_Version2.2...
- Page 25 Audio Signal Paths (Digital) ______________________________________________________________________________ 2007 Toshiba America Consumer Products, LLC. Page 9 of 12 SMART2006001_Version2.2...
- Page 29 Location Part No. Description A110 75002053 CABINET,CENTER DIVIDER ASSY A201 75002049 COVER BEZEL ASSY A205 75002048 BACK COVER A235 75002051 SPK GRILLE COVER A333 75002050 PIECE AV MOUNT ASSY A338 75002052 PIECE AV BUTTONS. A621 23717443 SCREW, SCREW, AV BOARD ECO A811 75002133 PAD CENTER PARTITION B810...
- Page 30 Location Part No. Description C876 76073155 ELECTROLYTIC, 16V 1000UF M 3A C877 76073205 ELECTROLYTIC CE04P 50V 470UF M 3A C878 76073035 ELECTROLYTIC, 16V 22UF M 3A C879 76073084 ELECTROLYTIC, 50V 4.7UF M C881 76109103 CERAMIC CHIP, 50V B 0.01UF K C883 76109103 CERAMIC CHIP, 50V B 0.01UF K C884...
- Page 31 Location Part No. Description F820 23144378 FUSE, RADIAL LEAD SUB-MINIATUR, 250V 2A F840 23144374 FUSE, RADIAL LEAD SUB-MINIATUR 250V 800MA F871 23144707 FUSE, AXIAL, 125V 0.63A F873 23144715 FUSE, CARTRIDGE 5.2X20, 125V 5A F875 23144715 FUSE, CARTRIDGE 5.2X20, 125V 5A F877 23144714 FUSE, AXIAL, 125V 4A F899...
- Page 32 Location Part No. Description P902A 23713754 PLUG, 3P 2.5MM G, B3B-EH-F1-TV4 Q001 75002038 DC FAN,2806KL-04W-B39-B02 Q842 23000823 IC, PHOTO COUPLER, TLP421F(GR) Q850 23205506 TRANSISTOR, 2SC4081 Q Q851 23205507 TRANSISTOR, 2SA1576A Q Q852 23205506 TRANSISTOR, 2SC4081 Q Q855 23205506 TRANSISTOR, 2SC4081 Q Q856 23205506 TRANSISTOR, 2SC4081 Q Q857...
- Page 33 Location Part No. Description R862 76011103 CHIP, 1/20W 10K OHM J R863 76011102 CHIP, 1/20W 1K OHM J R864 76011103 CHIP, 1/20W 10K OHM J R865 76011333 CHIP, 1/20W 33K OHM J R866 76011332 CHIP, 1/20W 3.3K OHM J R867 76998333 CHIP, 1/16W 33K OHM R869 76011103 CHIP, 1/20W 10K OHM J...
- Page 34 TOSHIBA CORPORATION 1-1, SHIBAURA 1-CHOME, MINATO-KU, TOKYO 105-8001, JAPAN...
Need help?
Do you have a question about the 50HM66 - 50" Rear Projection TV and is the answer not in the manual?
Questions and answers