Sign In
Upload
Manuals
Brands
Sony Manuals
Digital Camera
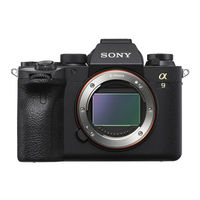
ILCE-9M2
Sony ILCE-9M2 Manuals
Manuals and User Guides for Sony ILCE-9M2. We have
3
Sony ILCE-9M2 manuals available for free PDF download: Help Manual, Instruction Manual
Sony ILCE-9M2 Instruction Manual (263 pages)
Interchangeable Lens, E-mount
Brand:
Sony
| Category:
Digital Camera
| Size: 16 MB
Table of Contents
Check out the Help Guide
2
In-Camera Guide
2
Table of Contents
3
Notes on Using Your Camera
11
Preparations for Shooting
15
Checking the Camera and the Supplied Items
15
Identifying Parts
16
Front Side
16
Rear Side
17
Top Side
19
Sides
21
Bottom
24
Basic Operations
25
Using the Control Wheel
25
Using the Multi-Selector
26
Using the Fn (Function) Button (Function Menu)
26
How to Use the Quick Navi Screen
28
Changing the Screen Display
31
Switching the Screen Display (While Shooting/During Playback)
31
Histogram Display
32
DISP Button (Monitor/Finder)
33
Startup Guide
35
Step 1: Charging the Battery Pack
35
Step 2: Inserting the Battery Pack into the Camera
36
To Remove the Battery Pack
37
Step 3: Inserting a Memory Card
37
Close the Cover
38
Step 4: Attaching a Lens
39
Compatible Lenses
41
Step 5: Setting the Language and the Clock
42
Step 6: Shooting Images in Auto Mode
43
Shooting Still Images
45
Focusing
47
Focus Mode
47
Auto Focus
49
Focus Area
49
Adjusting the Focus Area Settings to the Camera's Orientation (Horizontal/Vertical) Switch V/H AF Area)
54
AF/MF Control
55
AF on
56
Face/Eye AF Set
56
Tracking Subject (Tracking Function)
60
Registering the Current Focus Area ( AF Area Registration)
61
Focus Frame Color
63
AF Illuminator
63
Circ. of Focus Point
64
AF Micro Adj
64
Aperture Drive in AF
66
Manual Focus
67
Direct Manual Focus (DMF)
68
Focus Magnifier
69
MF Assist
70
Shutter Setting
71
Shutter Type
71
Using the Electronic Shutter
72
Displaying the Release Timing (Shoot. Timing Disp.)
75
Shoot. Start Disp
76
Anti-Flicker Shoot
76
E-Front Curtain Shutter
78
Shooting with Drive Modes (Continuous Shooting/Self-Timer)
79
Continuous Shooting
80
Self-Timer
82
Self-Timer (Cont)
83
Cont. Bracket
84
Single Bracket
85
Indicator During Bracket Shooting
86
WB Bracket
87
DRO Bracket
88
Bracket Settings
89
Interval Shooting
90
Press the Shutter Button
91
Using Touch Function
93
Touch Operation
93
Touch Panel/Pad
93
Touch Focus
94
Touch Tracking
95
Selecting a Still Image Size/Image Quality
97
File Format
97
RAW File Type
98
JPEG Quality
98
JPEG Image Size
99
Aspect Ratio
100
APS-C/Super 35Mm
100
Selecting a Shooting Mode
101
List of Mode Dial Function
101
Available Functions
101
( Intelligent Auto)
102
About Scene Recognition
102
Program Auto
103
Program Shift
103
Aperture Priority
104
Shutter Priority
105
Manual Exposure
106
Bulb Shooting
107
Recall
108
Movie: Exposure Mode
109
S&Q Motion: Exposure Mode
110
Controlling the Exposure/Metering Modes
111
Exposure Comp
111
Metering Mode
113
Face Priority in Multi Metering
114
Spot Metering Point
115
AE Lock
116
Correcting Brightness and Contrast Automatically
117
D-Range Optimizer (DRO)
117
Auto HDR
118
Selecting the ISO Sensitivity
120
ISO Range Limit
121
ISO AUTO Min. SS
121
Using the Zoom
123
The Zoom Features Available with this Product
123
Clear Image Zoom/Digital Zoom (Zoom)
124
About Zoom Scale
125
White Balance
126
Capturing a Standard White Color to Set the White Balance (Custom White Balance)
127
Shutter AWB Lock
128
Setting How to Process Images
130
Creative Style
130
To Adjust (Contrast)
131
Color Space
133
Reducing Blur
134
Steadyshot Settings
134
Noise Reduction
136
Long Exposure NR
136
High ISO NR
137
Using Flash (Sold Separately)
138
Flash Mode
139
Flash Comp
140
FEL Lock
141
Wireless Flash
142
Using a Flash with a Sync Terminal Cord
143
Shooting Movies
145
Movie W/ Shutter
147
Changing Settings for Movie Recording
149
File Format
149
Record Setting
150
S&Q Settings
152
Playback Speed
153
Audio Recording
154
Audio Rec Level
155
Marker Settings
156
4K Output Select
157
Proxy Recording
158
Viewing Images
159
Playing Back Still Images
159
Enlarging an Image Being Played Back ( Enlarge Image)
160
Rotating Recorded Images Automatically (Display Rotation)
161
Playing Back Movies
161
Photo Capture
162
Playing Back Images on the Image Index Screen (Image Index)
163
Setting the Method for Jumping between Images (Image Jump Setting)
164
Switching between Still Images and Movies (View Mode)
165
Cont. PB for Interval
165
Selecting Which Memory Card to Play Back (Select Playback Media)
166
Copying Images from One Memory Card to Another (Copy)
166
Playing Back Images Using Slideshow (Slide Show)
167
Protecting Images (Protect)
168
Setting Rating Function
170
Attaching Audio Files to Images (Voice Memo)
172
Deleting Images
174
Deleting a Displayed Image
174
Deleting Multiple Selected Images (Delete)
174
Customizing the Camera
176
Registering Frequently Used Functions
176
Memory
176
Registering Shooting Settings to a Custom Key (Reg. Custom Shoot Set)
177
Assigning Frequently Used Functions to Buttons (Custom Key)
179
Customizing the Functions of the Dial
181
Changing the Function of the Dial Temporarily (My Dial Settings)
181
Customizing the MENU (My Menu)
183
Add Item
183
Sort Item
183
Delete Item
184
Display from My Menu
184
Checking Images Before/After Recording
185
Auto Review
185
Aperture Preview
185
Shot. Result Preview
186
Monitor/Viewfinder Settings
187
Finder/Monitor
187
Finder Frame Rate
188
Memory Card Settings
189
Format
189
File/Folder Settings
189
File Settings
191
Rec. Media Settings
192
Recording Mode
193
Camera Settings
195
Power Save Start Time
195
IR Remote Ctrl
195
HDMI Settings
196
HDMI Info. Display
197
USB Power Supply
200
Save/Load Settings
201
Initializing the Camera
202
Setting Reset
202
Using Network Functions
203
Using the Wi-Fi/One-Touch (Nfc)/Bluetooth/Wired LAN Functions
203
Installing Imaging Edge Mobile
203
Recording Location Information to Captured Images
204
Transferring Images to the FTP Server
204
Connecting the Camera and a Smartphone
205
Using a Smartphone as a Remote Control for the Camera
205
Transferring Images from the Camera to a Smartphone
207
Connecting the Camera to a Wireless Access Point
208
Using a Remote Commander with Bluetooth Communication
209
Using a Computer
211
Connecting the Camera to a Computer
211
Selecting the Appropriate USB Connection Method
211
Operating the Camera from a Computer (PC Remote Function)
212
Introduction to Computer Software
213
Imaging Edge
213
Playmemories Home
214
Remote Camera Tool
214
MENU Items/List of Icons
215
Using MENU Items
215
List of MENU Items
216
(Camera Settings 1)
216
(Camera Settings 2)
222
(Network)
226
(Playback)
227
(Setup)
229
(My Menu)
232
List of Icons on the Monitor
233
Icons on the Shooting Screen
233
Shooting Settings
235
Icons on the Playback Screen
237
Basic Information
237
Image Information
238
About this Product
239
Troubleshooting
239
Cleaning the Image Sensor
240
Attaching Accessories
242
Mount Adaptor
242
LA-EA1/LA-EA3 Mount Adaptor
243
LA-EA2/LA-EA4 Mount Adaptor
244
Vertical Grip
246
Specifications
247
Battery Life and Number of Recordable Images
247
Memory Cards that Can be Used
248
Number of Recordable Images
249
Recordable Movie Times
250
Notes on Continuous Movie Recording
251
Specifications
253
Index
257
Advertisement
Sony ILCE-9M2 Help Manual (265 pages)
Interchangeable Lens Digital Camera
Brand:
Sony
| Category:
Digital Camera
| Size: 6 MB
Table of Contents
Check out the Help Guide
2
Table of Contents
3
Notes on Using Your Camera
11
Preparations for Shooting
15
Checking the Camera and the Supplied Items
15
Identifying Parts
16
Front Side
16
Rear Side
17
Top Side
19
Sides
21
Bottom
24
Basic Operations
25
Using the Control Wheel
25
Using the Multi-Selector
26
Using the Fn (Function) Button (Function Menu)
26
How to Use the Quick Navi Screen
28
Changing the Screen Display
31
Switching the Screen Display (While Shooting/During Playback)
31
DISP Button (Monitor/Finder)
33
Startup Guide
35
Step 1: Charging the Battery Pack
35
Step 2: Inserting the Battery Pack into the Camera
36
Step 3: Inserting a Memory Card
37
Step 4: Attaching a Lens
39
Step 5: Setting the Language and the Clock
42
Step 6: Shooting Images in Auto Mode
43
Shooting Still Images
45
Focusing
47
Focus Mode
47
Auto Focus
49
Focus Area
49
Adjusting the Focus Area Settings to the Camera's Orientation (Horizontal/Vertical) Switch V/H AF Area)
54
AF/MF Control
55
AF on
56
Face/Eye AF Set
56
Tracking Subject (Tracking Function)
60
Registering the Current Focus Area ( AF Area Registration)
61
Focus Frame Color
63
AF Illuminator
63
Circ. of Focus Point
64
AF Micro Adj
64
Aperture Drive in AF
66
Manual Focus
67
Direct Manual Focus (DMF)
68
Focus Magnifier
69
MF Assist
70
Shutter Setting
71
Shutter Type
71
Using the Electronic Shutter
72
Displaying the Release Timing (Shoot. Timing Disp.)
75
Shoot. Start Disp
76
Anti-Flicker Shoot
76
E-Front Curtain Shutter
78
Shooting with Drive Modes (Continuous Shooting/Self-Timer)
79
Continuous Shooting
80
Self-Timer
82
Self-Timer (Cont)
83
Cont. Bracket
84
Single Bracket
85
Indicator During Bracket Shooting
86
WB Bracket
87
DRO Bracket
88
Interval Shooting
90
Using Touch Function
93
Touch Operation
93
Touch Panel/Pad
93
Touch Focus
94
Touch Tracking
95
Selecting a Still Image Size/Image Quality
97
File Format
97
RAW File Type
98
JPEG Quality
98
JPEG Image Size
99
Aspect Ratio
100
APS-C/Super 35Mm
100
Selecting a Shooting Mode
101
List of Mode Dial Function
101
( Intelligent Auto)
102
Program Auto
103
Aperture Priority
104
Shutter Priority
105
Manual Exposure
106
Bulb Shooting
107
Recall
108
Movie: Exposure Mode
109
S&Q Motion: Exposure Mode
110
Controlling the Exposure/Metering Modes
111
Exposure Comp
111
Metering Mode
113
Face Priority in Multi Metering
114
Spot Metering Point
115
AE Lock
116
Correcting Brightness and Contrast Automatically
117
D-Range Optimizer (DRO)
117
Auto HDR
118
Selecting the ISO Sensitivity
120
ISO Range Limit
121
ISO AUTO Min. SS
121
Using the Zoom
123
The Zoom Features Available with this Product
123
Clear Image Zoom/Digital Zoom (Zoom)
124
About Zoom Scale
125
White Balance
126
Capturing a Standard White Color to Set the White Balance (Custom White Balance)
127
Shutter AWB Lock
128
Setting How to Process Images
130
Creative Style
130
Color Space
133
Reducing Blur
134
Steadyshot Settings
134
Noise Reduction
136
Long Exposure NR
136
High ISO NR
137
Using Flash (Sold Separately)
138
Flash Mode
139
Flash Comp
140
FEL Lock
141
Wireless Flash
142
Using a Flash with a Sync Terminal Cord
143
Shooting Movies
145
Changing Settings for Movie Recording
149
File Format
149
Record Setting
150
S&Q Settings
152
Audio Recording
154
Audio Rec Level
155
Marker Settings
156
4K Output Select
157
Proxy Recording
158
Viewing Images
159
Playing Back Still Images
159
Enlarging an Image Being Played Back ( Enlarge Image)
160
Rotating Recorded Images Automatically (Display Rotation)
161
Playing Back Movies
161
Photo Capture
162
Playing Back Images on the Image Index Screen (Image Index)
163
Setting the Method for Jumping between Images (Image Jump Setting)
164
Switching between Still Images and Movies (View Mode)
165
Cont. PB for Interval
165
Selecting Which Memory Card to Play Back (Select Playback Media)
166
Copying Images from One Memory Card to Another (Copy)
166
Playing Back Images Using Slideshow (Slide Show)
167
Protecting Images (Protect)
168
Setting Rating Function
170
Attaching Audio Files to Images (Voice Memo)
172
Deleting Images
174
Deleting a Displayed Image
174
Deleting Multiple Selected Images (Delete)
174
Registering Frequently Used Functions
176
Memory
176
Registering Shooting Settings to a Custom Key (Reg. Custom Shoot Set)
177
Assigning Frequently Used Functions to Buttons (Custom Key)
179
Customizing the Functions of the Dial
181
Changing the Function of the Dial Temporarily (My Dial Settings)
181
Customizing the MENU (My Menu)
183
Add Item
183
Sort Item
183
Delete Item
184
Display from My Menu
184
Checking Images Before/After Recording
185
Auto Review
185
Aperture Preview
185
Shot. Result Preview
186
Monitor/Viewfinder Settings
187
Finder/Monitor
187
Finder Frame Rate
188
Memory Card Settings
189
Format
189
File/Folder Settings
189
File Settings
191
Rec. Media Settings
192
Camera Settings
195
Power Save Start Time
195
IR Remote Ctrl
195
HDMI Settings
196
USB Power Supply
200
Save/Load Settings
201
Initializing the Camera
202
Setting Reset
202
Using Network Functions
203
Using the Wi-Fi/One-Touch (Nfc)/Bluetooth/Wired LAN Functions
203
Installing Imaging Edge Mobile
203
Recording Location Information to Captured Images
204
Transferring Images to the FTP Server
204
Connecting the Camera and a Smartphone
205
Using a Smartphone as a Remote Control for the Camera
205
Transferring Images from the Camera to a Smartphone
207
Connecting the Camera to a Wireless Access Point
208
Using a Remote Commander with Bluetooth Communication
209
Using a Computer
211
Connecting the Camera to a Computer
211
Selecting the Appropriate USB Connection Method
211
Operating the Camera from a Computer (PC Remote Function)
212
Introduction to Computer Software
213
Imaging Edge
213
Playmemories Home
214
Remote Camera Tool
214
MENU Items/List of Icons
215
Using MENU Items
215
List of MENU Items
216
(Camera Settings 1)
216
(Camera Settings 2)
222
(Network)
226
(Playback)
227
(Setup)
229
(My Menu)
232
List of Icons on the Monitor
233
Icons on the Shooting Screen
233
Icons on the Playback Screen
237
About this Product
239
Troubleshooting
239
Cleaning the Image Sensor
240
Attaching Accessories
242
Mount Adaptor
242
Vertical Grip
246
Specifications
247
Battery Life and Number of Recordable Images
247
Memory Cards that Can be Used
248
Number of Recordable Images
249
Recordable Movie Times
250
Specifications
253
Index
257
Sony ILCE-9M2 Instruction Manual (104 pages)
Interchangeable Lens Digital Camera
Brand:
Sony
| Category:
Digital Camera
| Size: 1 MB
Table of Contents
Check out the Help Guide
2
Table of Contents
3
Notes on Using Your Camera
6
Preparations for Shooting
10
Checking the Camera and the Supplied Items
10
Identifying Parts
11
Front Side
11
Rear Side
12
Top Side
14
Sides
16
Bottom
19
Basic Operations
20
Using the Control Wheel
20
Using the Multi-Selector
21
Using the Fn (Function) Button (Function Menu)
21
How to Use the Quick Navi Screen
23
Startup Guide
26
Step 1: Charging the Battery Pack
26
Step 2: Inserting the Battery Pack into the Camera
27
Step 3: Inserting a Memory Card
28
Step 4: Attaching a Lens
30
Step 5: Setting the Language and the Clock
33
Step 6: Shooting Images in Auto Mode
34
Focusing
36
Focus Mode
36
Auto Focus
38
Focus Area
38
Manual Focus
41
Direct Manual Focus (DMF)
42
Shutter Setting
43
Shutter Type
43
Using the Electronic Shutter
44
Displaying the Release Timing (Shoot. Timing Disp.)
46
Shoot. Start Disp
47
Continuous Shooting
48
Using Touch Function
50
Touch Operation
50
Touch Panel/Pad
50
Touch Focus
51
Touch Tracking
52
Selecting a Still Image Size/Image Quality
54
File Format
54
JPEG Quality
54
JPEG Image Size
55
APS-C/Super 35Mm
56
Shooting Movies
57
Changing Settings for Movie Recording
57
File Format
57
Record Setting
58
Using Network Functions
61
Using the Wi-Fi/One-Touch (Nfc)/Bluetooth/ Wired LAN Functions
61
Installing Imaging Edge Mobile
61
Recording Location Information to Captured Images
62
Transferring Images to the FTP Server
62
Connecting the Camera to a Wireless Access Point
63
Using a Computer
64
Introduction to Computer Software
64
Imaging Edge
64
Playmemories Home
65
Remote Camera Tool
65
MENU Items/List of Icons
66
Using MENU Items
66
List of MENU Items
67
(Camera Settings 1)
67
(Camera Settings 2)
73
(Network)
77
(Playback)
78
(Setup)
80
(My Menu)
83
List of Icons on the Monitor
84
Icons on the Shooting Screen
84
Icons on the Playback Screen
88
About this Product
90
Specifications
90
Battery Life and Number of Recordable Images
90
Memory Cards that Can be Used
91
Number of Recordable Images
92
Recordable Movie Times
93
Specifications
96
Index
100
Advertisement
Advertisement
Related Products
Sony ILCE-9
Sony ILCE-9 a9
Sony ILCE-9M3
Sony alpha ILCE-3000
Sony ILCE-6400
Sony ILCE-6000Y
Sony ILCE7RM3A/B
Sony ILCE-6100L
Sony ILCE-1M2
Sony ILCE-6100Y
Sony Categories
Laptop
TV
Camcorder
CD Player
Stereo System
More Sony Manuals
Login
Sign In
OR
Sign in with Facebook
Sign in with Google
Upload manual
Upload from disk
Upload from URL