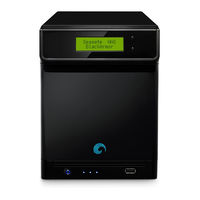
Sign In
Upload
Manuals
Brands
Seagate Manuals
Storage
BlackArmor NAS 220
Seagate BlackArmor NAS 220 Manuals
Manuals and User Guides for Seagate BlackArmor NAS 220. We have
7
Seagate BlackArmor NAS 220 manuals available for free PDF download: User Manual, Reviewer's Manual, Specification, Datasheet
Seagate BlackArmor NAS 220 User Manual (130 pages)
integrated software suite
Brand:
Seagate
| Category:
Software
| Size: 3.79 MB
Table of Contents
End User License Agreement
3
Table of Contents
7
Chapter 1. Introduction
11
What Is Seagate Blackarmor Backup
11
Advantages
11
System Requirements and Supported Media
12
Minimum System Requirements
12
Supported Operating Systems
12
Supported File Systems
13
License Policy
13
Technical Support
14
Chapter 2. Seagate Blackarmor Backup Installation and Startup
15
Installing Seagate Blackarmor Backup
15
Installing Boxed Version
15
Extracting Seagate Blackarmor Backup
15
Running Seagate Blackarmor Backup
16
Removing Seagate Blackarmor Backup
16
Chapter 3. General Information
17
The Difference between File Archives and Disk/Partition Images
17
Full, Incremental and Differential Backups
17
Blackarmor Backup Secure Zone
18
Viewing Disk and Partition Information
18
Try&Decide
19
Blackarmor Drivecleanser, File Shredder, and System Clean-Up
19
Support for Zip Format
19
Chapter 4. Getting to Know Seagate Blackarmor Backup
21
Blackarmor One-Click Protection
21
Program Workspace
23
Chapter 5. Creating Backup Archives
27
Selecting What Data to Back up
27
Performing Backup
28
Selecting Data for Backup
28
Selecting the Target Archive Location
30
Scheduling
31
Backup Method
32
Source Files Exclusion
33
Selecting the Backup Options
34
Setting Automatic Consolidation
35
Providing a Comment
36
The Operation Summary and the Backup Process
36
Fine-Tuning Your Backups
36
Archive Protection
36
Source Files Exclusion
37
Pre/Post Commands
37
Compression Level
37
Backup Performance
38
Archive Splitting
39
File-Level Security Settings
39
Error Handling
39
Additional Settings
40
Backup Reserve Copy Settings
40
Creating a Custom Data Category for Backups
41
Making Reserve Copies of Your Backups
41
Chapter 6. Restoring Backup Data
43
Restore under Windows or Boot from CD
43
Network Settings in Rescue Mode
43
Restoring Files and Folders from File Archives
43
Restoring Disks/Partitions or Files from Images
47
Starting the Restore Wizard
47
Archive Selection
47
Restoration Method Selection
48
Selecting a Disk/Partition to Restore
49
Selecting a Target Disk/Partition
50
Changing the Restored Partition Type
51
Changing the Restored Partition Size and Location
51
Assigning a Letter to the Restored Partition
52
Setting Restore Options
52
Restoration Summary and Executing Restoration
52
Files to Preserve During Restoration
52
Pre/Post Commands
52
Restoration Priority
53
File-Level Security Settings
53
Additional Settings
53
Chapter 7. Try&Decide
55
Using Try&Decide
58
Try&Decide Options
58
Try&Decide Usage Examples
58
Chapter 8. Scheduling Tasks
60
Creating Scheduled Tasks
60
Setting up Once Only Execution
61
Setting up Upon Event Execution
62
Setting up Daily Execution
63
Setting up Weekly Execution
64
Setting up Monthly Execution
64
Managing Scheduled Tasks
65
Chapter 9. Managing Blackarmor Backup Secure Zone
66
Creating Blackarmor Backup Secure Zone
66
Resizing Blackarmor Backup Secure Zone
68
Changing Password for Blackarmor Backup Secure Zone
69
Deleting Blackarmor Backup Secure Zone
70
Chapter 10. Creating Bootable Media
71
Chapter 11. Other Operations
74
Validating Backup Archives
74
Operation Results Notification
76
Email Notification
76
Winpopup Notification
77
Viewing Tasks and Logs
78
Consolidating Backups
81
Removing Backup Archives
83
Chapter 12. Exploring Archives and Mounting Images
85
Searching
85
Google Desktop and Windows Search Integration
87
Mounting an Image
93
Unmounting an Image
95
Chapter 13. Transferring the System to a New Disk
96
General Information
96
Security
97
Executing Transfers
97
Selecting Clone Mode
97
Selecting Source Disk
97
Selecting Destination Disk
98
Partitioned Destination Disk
99
Selecting Partition Transfer Method
99
Cloning with Manual Partitioning
100
Cloning Summary
102
Chapter 14. Adding a New Hard Disk
103
Selecting a Hard Disk
103
Creating New Partitions
103
Disk Add Summary
104
Chapter 15. Security and Privacy Tools
106
Using File Shredder
106
Blackarmor Drivecleanser
107
Creating Custom Algorithms of Data Destruction
110
System Clean-Up
111
System Clean-Up Wizard Settings
112
Data Destruction Method" Setting
112
Files" Setting
112
Computers" Setting
113
Drive Free Space" Setting
114
Commands" Setting
114
Network Places Filter" Setting
115
Cleaning up Separate System Components
115
Appendix A. Partitions and File Systems
116
Hard Disk Partitions
116
File Systems
116
Fat16
116
A.2 File Systems
116
A.2.1 Fat16
116
Fat32
117
Ntfs
117
Linux Ext2
117
Linux Ext3
117
A.2.3 Ntfs
117
A.2.5 Linux Ext3
117
Linux Reiserfs
118
A.2.6 Linux Reiserfs
118
Appendix B. Hard Disks and BIOS Setup
119
Installing Hard Disks in Computers
119
Installing a Hard Disk, General Scheme
119
Motherboard Sockets, IDE Cable, Power Cable
120
Configuring Hard Disk Drives, Jumpers
120
Bios
121
Setup Utility
121
B.2 Bios
121
B.2.1 Setup Utility
121
Standard CMOS Setup Menu
122
Arranging Boot Sequence, Advanced CMOS Setup Menu
123
Hard Disk Initialization Errors
124
Installing a SATA Hard Drive
125
Steps for Installing a New Internal SATA Drive
125
Appendix C. Hard Disk Wiping Methods
127
Information Wiping Methods' Functioning Principles
127
Information Wiping Methods Used by Seagate Blackarmor Backup
128
Appendix D. Startup Parameters
129
Advertisement
Seagate BlackArmor NAS 220 User Manual (59 pages)
User Guide
Brand:
Seagate
| Category:
Server
| Size: 0.94 MB
Table of Contents
Table of Contents
3
Preface
6
About this Guide
6
Kit Contents
6
System Requirements
7
Finding more Information
7
All about the Seagate Blackarmor® NAS 220
8
Introduction
8
About the Blackarmor Server
8
Main Components of the Blackarmor Server Kit
8
Features of the Blackarmor Server
9
What You Can Do with the Blackarmor Server
11
The Difference between a Blackarmor Administrator and User
12
About Blackarmor Administrators
12
About Blackarmor Users
12
How to Get Started
13
Blackarmor Administrators Start here
13
Blackarmor Users Start here
14
Getting Started with Your Blackarmor® Server
15
Introduction
15
Setup Steps for Administrators
16
Installing the Blackarmor Server and Software
16
Connecting to the Server
17
Completing the Initial Setup
17
Creating Custom Shares
18
Creating User Accounts
19
Distributing Blackarmor User Information
20
Making Blackarmor Accessible Using Seagate Global Access
20
Connecting a USB Printer to Your Blackarmor Server
22
Setting Your Blackarmor as a Media Server
22
Next Steps for Administrators
23
Getting Started as a Blackarmor User
24
Optional Steps
25
Creating a Seagate Global Access Account
25
Getting the most from Your Blackarmor® Server
26
Introduction
26
Your Role as a Blackarmor Administrator
27
Your Blackarmor Server's Default Settings
28
Managing Blackarmor Volumes, Shares and Storage
29
Understanding Volumes and Shares
29
Working with Volumes
30
Understanding Raid
30
Creating New Volumes
31
Working with Shares
31
Setting Storage Space Limits for Blackarmor Users
33
Setting Grace Time for Exceeded Quotas
33
Controlling Web File Downloads to the Blackarmor Server
33
Managing Blackarmor Users
34
Working with User Accounts
34
Creating and Modifying User Groups
34
Protecting Your Blackarmor Files with Network Backups
35
Setting Your Blackarmor Server as a Media Server
36
Monitoring Your Blackarmor Server
36
Monitoring Status with the Server's Leds
37
Using Leds to Monitor Server
37
Using Email Alerts to Monitor Server Status
38
Checking Disk Drive Status Using SMART
38
Changing the Blackarmor Server's Advanced Settings
38
Dynamic Domain Name System (DNS) Settings
39
File Protocol Settings
39
Network Time Protocol (NTP) Settings
39
Power Saving Settings
39
Web Access Protocol Settings
39
Secure Socket Layer (SSL) Settings
40
Uninterruptible Power Supply (UPS) Settings
40
Web Access Protocol Settings
40
Workgroup and Domain Settings
40
Maintaining Your Blackarmor Server
41
Basic Hardware Safety and Maintenance
41
Keeping the Server's Firmware Current
42
Resetting Your Blackarmor Server
42
Tips for Blackarmor® Users
43
Introduction
43
Understanding Your Blackarmor User Account
43
Access Limitations
43
Storage Space Limitations
44
Automatic Sorting for Media Files
44
Grace Time Limits for Quotas
45
File Protocol Support on Shares
45
Accessing Shares and Files on the Blackarmor Server
45
Backing up Your Files
46
Backing up Files with Blackarmor Backup
46
Backing up Files between Servers
46
Backing up to or from an External USB Drive
46
Accessing Your Blackarmor Files over the Web
47
Downloading Large Web Files to Your Blackarmor Server
47
Retrieving Deleted Files from the Recycle bin
48
Solving Problems
49
General Troubleshooting Tips
49
Troubleshooting
49
Common Problems and Solutions
49
I Can't Connect to the Server over the Local Network
49
I Can't Connect to the Server over the Web
49
I Can't Open Blackarmor Manager
50
I Can't Log in to Blackarmor Manager
50
I Can't Access a Share
50
I Can't Access a File on a Share
50
I Can't Store any more Files on a Share Because Its Volume Is Full
50
A Firmware Upgrade Failed
50
A Volume Is in Degraded Mode
50
I Can't Get Streaming Music from the Blackarmor Server
50
Technical Specifications
51
Glossary
52
Remote Access
54
Usb Drive
56
User Account
56
Kit Contents
57
Seagate BlackArmor NAS 220 User Manual (59 pages)
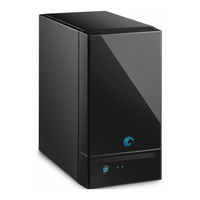
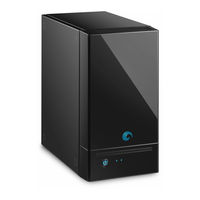
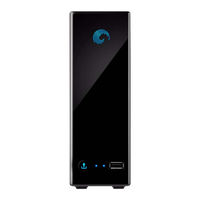
BlackArmor NAS 220 User Guide
Brand:
Seagate
| Category:
Network Storage Server
| Size: 0.93 MB
Table of Contents
Table of Contents
3
Preface
6
About this Guide
6
Kit Contents
6
System Requirements
7
Finding more Information
7
All about the Seagate Blackarmor® NAS 220
8
Introduction
8
About the Blackarmor Server
8
Main Components of the Blackarmor Server Kit
8
Features of the Blackarmor Server
9
What You Can Do with the Blackarmor Server
11
The Difference between a Blackarmor Administrator and User
12
About Blackarmor Administrators
12
About Blackarmor Users
12
How to Get Started
13
Blackarmor Administrators Start here
13
Blackarmor Users Start here
14
Getting Started with Your Blackarmor® Server
15
Introduction
15
Setup Steps for Administrators
16
Installing the Blackarmor Server and Software
16
Connecting to the Server
17
Completing the Initial Setup
17
Creating Custom Shares
18
Creating User Accounts
19
Distributing Blackarmor User Information
20
Making Blackarmor Accessible Using Seagate Global Access
20
Connecting a USB Printer to Your Blackarmor Server
22
Setting Your Blackarmor as a Media Server
22
Next Steps for Administrators
23
Getting Started as a Blackarmor User
24
Optional Steps
25
Creating a Seagate Global Access Account
25
Getting the most from Your Blackarmor® Server
26
Introduction
26
Your Role as a Blackarmor Administrator
27
Your Blackarmor Server's Default Settings
28
Managing Blackarmor Volumes, Shares and Storage
29
Understanding Volumes and Shares
29
Working with Volumes
29
Working with Volumes
30
Understanding Raid
30
Working with Shares
31
Setting Storage Space Limits for Blackarmor Users
33
Setting Grace Time for Exceeded Quotas
33
Controlling Web File Downloads to the Blackarmor Server
33
Managing Blackarmor Users
34
Working with User Accounts
34
Creating and Modifying User Groups
34
Protecting Your Blackarmor Files with Network Backups
35
Setting Your Blackarmor Server as a Media Server
36
Monitoring Your Blackarmor Server
36
Monitoring Status with the Server's Leds
37
Using Email Alerts to Monitor Server Status
38
Checking Disk Drive Status Using SMART
38
Changing the Blackarmor Server's Advanced Settings
38
Dynamic Domain Name System (DNS) Settings
39
File Protocol Settings
39
Network Time Protocol (NTP) Settings
39
Power Saving Settings
39
Secure Socket Layer (SSL) Settings
40
Uninterruptible Power Supply (UPS) Settings
40
Web Access Protocol Settings
40
Workgroup and Domain Settings
40
Maintaining Your Blackarmor Server
41
Basic Hardware Safety and Maintenance
41
Keeping the Server's Firmware Current
42
Resetting Your Blackarmor Server
42
Tips for Blackarmor® Users
43
Introduction
43
Understanding Your Blackarmor User Account
43
Access Limitations
43
Storage Space Limitations
44
Automatic Sorting for Media Files
44
Grace Time Limits for Quotas
45
File Protocol Support on Shares
45
Accessing Shares and Files on the Blackarmor Server
45
Backing up Your Files
46
Backing up Files with Blackarmor Backup
46
Backing up Files between Servers
46
Backing up to or from an External USB Drive
46
Accessing Your Blackarmor Files over the Web
47
Downloading Large Web Files to Your Blackarmor Server
47
Retrieving Deleted Files from the Recycle bin
48
Solving Problems
49
General Troubleshooting Tips
49
Common Problems and Solutions
49
I Can't Connect to the Server over the Local Network
49
I Can't Connect to the Server over the Web
49
I Can't Open Blackarmor Manager
50
I Can't Log in to Blackarmor Manager
50
I Can't Access a Share
50
I Can't Access a File on a Share
50
I Can't Store any more Files on a Share Because Its Volume Is Full
50
A Firmware Upgrade Failed
50
A Volume Is in Degraded Mode
50
I Can't Get Streaming Music from the Blackarmor Server
50
Technical Specifications
51
Glossary
52
Remote Access
54
Ssl Certificate
55
Kit Contents
57
Advertisement
Seagate BlackArmor NAS 220 User Manual (29 pages)
Global Access User Guide
Brand:
Seagate
| Category:
Storage
| Size: 2.01 MB
Table of Contents
Table of Contents
3
1 Using Web Access
4
Using the Sign in Page
4
Signing in to Seagate Global Access
5
Creating a Seagate Global Access Account
5
If You Forget Your Password
6
Viewing Network Storage Device Details
6
Accessing Folders Via the Web
7
Using Folder Commands
9
Downloading Folders
10
Adding Files to a Folder
10
Creating a Folder
12
Sharing a Folder
13
Updating the Folder List
15
Selecting a View Option
16
Using File Commands
16
Overwriting Files
16
Previewing Images
18
Downloading Files
20
2 Managing Shared Folders
21
Working with Shares
22
Viewing Shared Folders
22
Editing Shares
23
Removing a Share
24
Sorting Shared Folders
25
Receiving a Share
26
3 Managing Account Settings
27
Creating a Display Name
28
Using the Account Settings Page
28
Index
29
Seagate BlackArmor NAS 220 Reviewer's Manual (22 pages)
BlackArmor Networked shared storage for small businesses
Brand:
Seagate
| Category:
Network Storage Server
| Size: 0.77 MB
Table of Contents
Table of Contents
3
Introduction
5
Capacity and Pricing
5
Key Features
6
Dual Gigabit Ethernet Ports
7
Four USB Ports
7
External Power Supply
7
Multiple Simultaneous RAID Levels
8
Hot-Swappable Drives
8
High Security
9
Designed for Growth
9
Remote Access - Accessibility from Anywhere
9
PC and Macintosh Support
9
Tools for Systems Integrators
10
Secure Remote Management
10
Active Directory Support
10
What Can You Do with Blackarmor NAS
10
Installation
11
Install the Blackarmor NAS and Software
11
Connect with Blackarmor Discovery
11
Complete the Initial Setup with Blackarmor Manager
12
Shares, Public and Private
14
Create Customized Folders, or Shares
15
Create User Accounts and Assign Access Rights
16
Make Blackarmor Internet Accessible (Optional)
17
Optional Features
17
Protect Data with File Backups
18
Blackarmor Backup
18
Try & Decide
19
NAS to NAS Backup
19
Enable Media (Itunes) Server Functions
20
Power Management
20
Other Functions
20
Conclusion
21
Product Specifications
22
Seagate BlackArmor NAS 220 Datasheet (2 pages)
Network Attached Storage Server
Brand:
Seagate
| Category:
Network Storage Server
| Size: 2.13 MB
Seagate BlackArmor NAS 220 Specification (2 pages)
10/100/1000 Ethernet, USB 2.0 2TB, 4TB, 6TB Centralized Network Storage
Brand:
Seagate
| Category:
Server
| Size: 2.06 MB
Advertisement
Related Products
Seagate BlackArmor NAS 110
Seagate NAS HDD
Seagate NL35.2 ST3250824NS
Seagate NL35.2 ST3400633NS
Seagate NL35.2 ST3400833NS
Seagate NWD-WLP4-200
Seagate NWD-BLP4-400
Seagate NWD-BFH8-3200
Seagate NWD-BFH8-1600
Seagate NWD-BFH6-1200
Seagate Categories
Storage
Computer Hardware
Network Storage Server
Network Hardware
DC Drives
More Seagate Manuals
Login
Sign In
OR
Sign in with Facebook
Sign in with Google
Upload manual
Upload from disk
Upload from URL