Sign In
Upload
Manuals
Brands
Sabo Manuals
Lawn and Garden Equipment
35-V EL
Sabo 35-V EL Manuals
Manuals and User Guides for Sabo 35-V EL. We have
3
Sabo 35-V EL manuals available for free PDF download: Operator's Manual
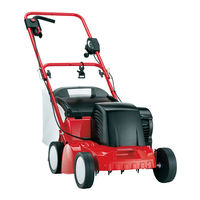
Sabo 35-V EL Operator's Manual (72 pages)
Scarifier
Brand:
Sabo
| Category:
Lawn and Garden Equipment
| Size: 2 MB
Table of Contents
Deutsch
7
Table of Contents
7
Erklärung der Symbole
8
Einführung
8
Erklärung des auf der Maschine Angebrachten Typenschildes
8
Erklärung der Piktogramme
8
Bestimmungsgemässer Gebrauch
9
Allgemeine Sicherheitsvorschriften für den Elektro-Vertikutierer
9
Allgemeine Sicherheitshinweise
9
Vorbereitende Maßnahmen
10
Handhabung
10
Wartung und Lagerung
11
Vor der Ersten Inbetriebnahme
12
Anbringen des Anschlusskabels (Abbildung C2 )
12
Inbetriebnahme des Vertikutierers
12
Vorbereitende Arbeiten
12
Führungsholm-Oberteil Anbauen (Abbildung C3 )
12
Führungsholm-Unterteil Anbauen (Abbildung C1 )
12
Beschreibung der Bauteile
12
Vertikutierprobe
13
Fangsack am Vertikutierer Einhängen (Abbildung R1 + S1 )
13
Betrieb mit Grasfangsack (Zubehör)
13
Grasfangeinrichtung
13
Anhalten IM Notfall
13
Einstellung (Abbildung Z2 + V2 )
13
Einhängen des Anschlusskabels in der Zugentlastung (Abbildung D2 )
13
Abstellen des Motors (Abbildung F )
13
Starten des Motors (Abbildung A2 )
13
Einstellen der Vertikutiertiefe
13
Zeitliche Einschränkungen
14
Pflege und Wartung des Vertikutierers
14
Wartungsintervalle
14
Tipps zur Rasenpflege (Abbildung M )
14
Handhabung des Kabels Beim Vertikutieren
14
Prüfung der Betriebssicherheit
14
Vertikutieren an Hanglagen
14
Vertikutierbetrieb
14
Betrieb ohne Grasfangsack
14
Wartung des Messerwelle
15
Störungsursachen und Deren Beseitigung
15
Auswechseln des Zahnriemens
15
Reinigung (Abbildung N3 )
15
Transport und Sicherung des Gerätes (Abbildung N )
15
Umklappen des Führungsholmes
15
Aufbewahrung
15
Technische Daten
16
Motor
16
Vertikutierer
16
Schallleistungspegel
16
Schalldruckpegel
16
Schwingungen
16
Original-Ersatzteile und Zubehör
16
Français
17
Explication de la Plaque Signaletique Placée Sur la Machine
18
Explication des Pictogrammes
18
Explication des Symboles
18
Introduction
18
Consignes Générales de Sécurité
19
Prescriptions Generales de Securite Relatives Au Scarificateur Electrique
19
Utilisation Conforme a L'emploi Prevu
19
Maniement
20
Mesures Préparatoires
20
Entretien Et Rangement
21
Avant la Première Mise en Marche
22
Branchement du Câble D'alimentation (Illustration C2 )
22
Description des Elements
22
Mise en Service du Scarificateur
22
Montage de la Partie Inférieure du Guidon (Illustration C1 )
22
Montage de la Partie Supérieure du Guidon (Illustration C3 )
22
Travaux Préliminaires
22
Arrêt D'urgence
23
Arrêt du Moteur (Illustration F )
23
Dispositif de Récupération de L'herbe
23
Essai de Scarification
23
Fixation du Câble D'alimentation Dans la Décharge de Traction (Illustration D2 )
23
Fonctionnement Avec Sac de Récupération de L'herbe (Accessoire)
23
Mise en Marche du Moteur (Illustration A2 )
23
Reglage de la Profondeur de Scarification
23
Réglage (Illustrations Z2 + V2 )
23
Suspension du Sac de Récupération Sur Le Scarificateur (Illustration R1 + S1 )
23
Conseils Pour L'entretien des Pelouses (Illustration M )
24
Contrôle de la Sécurité de Fonctionnement
24
Entretien Et Maintenance du Scarificateur
24
Fonctionnement du Scarificateur
24
Fonctionnement Sans Sac de Récupération de L'herbe
24
Intervalles D'entretien
24
Positionnement du Câble Pendant L'utilisation du Scarificateur
24
Restrictions Horaires
24
Utilisation du Scarificateur Sur des Terrains en Pente
24
Causes de Dérangements Et Élimination
25
Entretien de L'arbre Porte-Lames
25
Nettoyage (Illustration N3 )
25
Rabattre la Barre de Guidage
25
Remplacement de la Courroie Dentée
25
Stockage
25
Transport Et Sécurité de L'appareil (Illustration N )
25
Caractéristiques Techniques
26
Moteur
26
Niveau de Pression Sonore
26
Niveau de Puissance Acoustique
26
Pièces Détachées Originales
26
Scarificateur
26
Vibrations
26
English
27
Explanation of the Pictograms
28
Explanation of the Rating Plate Affixed to the Machine
28
Explanation of the Symbols
28
Introduction
28
General Safety Guidelines for the Electric Scarifier
29
General Safety Instructions
29
Preparatory Measures
29
Proper Use
29
Handling
30
Description of Components
31
Maintenance and Storage
31
Preparation
31
Adjusting the Scarifying Depth
32
Assembling the Handlebar Lower Section (Illustration C1 )
32
Assembling the Handlebar Upper Section (Illustration C3 )
32
Attaching the Connecting Cable (Illustration C2 )
32
Attaching the Connecting Cable to the Strain Relief Fitting (Illustration D2 )
32
Before Using the Scarifier for the First Time
32
Emergency Stopping
32
Starting the Machine
32
Starting the Motor (Illustration A2 )
32
Switching off the Motor (Illustration F )
32
Attaching the Grass Collector to the Scarifier (Illustration R1 + S1 )
33
Emptying the Grass Collector (Illustration L )
33
Grass Collector
33
Handling the Cable During Use
33
Operation with Grass Collector (Accessory)
33
Operation Without Grass Collector
33
Scarifier Operation
33
Scarifying Test
33
Setting (Illustration Z2 + V2 )
33
Using the Machine on Slopes
33
Care and Servicing of Your Scarifier
34
Changing the Drive Belt
34
Cleaning (Illustration N3 )
34
Folding the Guide Tube
34
Maintenance of the Blade Shaft
34
Service Intervals
34
Storage
34
Transporting and Securing the Equipment (Illustration N )
34
Motor
35
Original Spare Parts
35
Scarifier
35
Sound Power Level
35
Sound Pressure Level
35
Technical Data
35
Troubleshooting
35
Vibrations
35
Dutch
37
Inleiding
38
Verduidelijking Van de Pictogrammen
38
Verklaring Van de Symbolen
38
Verklaring Van Het Op de Machine Aangebrachte Typeplaatje
38
Algemene Veiligheidsinstructies
39
Algemene Veiligheidsvoorschriften Voor de Elektro-Verticuteerder
39
Gebruik Conform de Voorschriften
39
Gebruik
40
Voorbereidende Maatregelen
40
Onderhoud en Opslag
41
Aanbrengen Van de Kabel (Afbeelding C2 )
42
Beschrijving Van de Componenten
42
Bovenste Deel Van de Duwboom Aanbouwen (Afbeelding C3 )
42
Ingebruikname Van de Verticuteerder
42
Onderste Deel Van de Duwboom Aanbouwen (Afbeelding C1 )
42
Voor de Eerste Ingebruikname
42
Voorbereidende Werkzaamheden
42
Bevestigen Van de Kabel in de Trekontlasting (Afbeelding D2 )
43
Gebruik Met Grasopvangzak (Accessoire)
43
Grasopvanginrichting
43
Instellen Van de Verticuteerdiepte
43
Instelling (Afbeelding Z2 + V2 )
43
Opvangzak Aan de Verticuteerder Hangen (Afbeelding R1 + S1 )
43
Starten Van de Motor (Afbeelding A2 )
43
Stoppen in Geval Van Nood
43
Uitschakelen Van de Motor (Afbeelding F )
43
Verticuteerproef
43
Controle Van de Bedrijfsveiligheid
44
Gebruik Zonder Opvangzak
44
Onderhoudsintervallen
44
Tijdelijke Beperkingen
44
Tips Voor de Verzorging Van Het Gazon (Afbeelding M )
44
Verticuteerbedrijf
44
Verticuteren Op Hellingen
44
Verzorging en Onderhoud Van de Verticuteerder
44
Voeren Van de Kabel Bij Het Verticuteren
44
Omklappen Van de Duwboom
45
Onderhoud Van de Messenas
45
Opbergen
45
Reiniging (Afbeelding N3 )
45
Transport en Beveiliging Van Het Apparaat (Afbeelding N )
45
Uitwisselen Van de Tandriem
45
Geluidsdrukniveau
46
Geluidsvermogen
46
Motor
46
Originele Onderdelen
46
Technische Gegevens
46
Trillingen
46
Verticuteerder
46
Español
47
Explicación de la Placa de Características Instalada en la Máquina
48
Explicación de Los Pictogramas
48
Explicación de Los Símbolos
48
Introducción
48
Advertencias Generales sobre la Seguridad
49
Normas Generales de Seguridad para el Escarificador Eléctrico
49
Uso Conforme a Su Destino
49
Manejo
50
Medidas Preparatorias
50
Mantenimiento y Almacenamiento
51
Antes del Primer Uso
52
Colocación del Cable de Conexión (Ilustración C2 )
52
Descripción de Los Componentes
52
Montaje del Larguero Guía Inferior (Ilustración C1 )
52
Montaje del Larguero Guía Superior (Ilustración C3 )
52
Puesta en Marcha del Escarificador
52
Trabajos Preliminares
52
Ajuste (Ilustración Z2 + V2 )
53
Ajuste de la Profundidad de Trabajo
53
Apagado del Motor (Ilustración F )
53
Colgar la Bolsa Colectora en el Escarificador (Ilustración R1 + S1 )
53
Colocación del Cable de Conexión en el Dispositivo de Contratación (Ilustración D2 )
53
Dispositivo Colector de Hierba
53
Funcionamiento con la Bolsa Colectora de Césped (Accesorio)
53
Parada de Emergencia
53
Prueba de Escarificación
53
Puesta en Marcha del Motor (Ilustración A2 )
53
Escarificación
54
Escarificar en Laderas
54
Funcionamiento sin Bolsa Colectora
54
Indicaciones para el Cuidado del Césped (Ilustración M )
54
Intervalos de Mantenimiento
54
Manejo del Cable Durante el Funcionamiento
54
Restricción de Horarios
54
Vaciado de la Bolsa Colectora (Ilustración L )
54
Verificación de la Seguridad de Funcionamiento
54
Causas de Averías y Su Eliminación
55
Cuidado y Mantenimiento del Escarificador
55
Cómo Guardar el Aparato
55
Limpieza (Ilustración N3 )
55
Mantenimiento del Árbol de las Cuchillas
55
Plegar el Larguero de Guía
55
Sustitución de la Correa Dentada
55
Transporte y Protección del Aparato (Figura N )
55
Datos Técnicos
56
Escarificador
56
Motor
56
Nivel de la Presión Acústica
56
Nivel de Potencia Acústica
56
Recambios Originales y Accesorios
56
Vibraciones
56
Italiano
57
Introduzione
58
Spiegazione Dei Pittogrammi
58
Spiegazione Dei Simboli
58
Spiegazione Della Targhetta D'identificazione Applicata Sulla Macchina
58
Impiego Conforme Allo Scopo Previsto
59
Informazioni DI Sicurezza Generali
59
Norme DI Sicurezza Generali Per L'arieggiatore Elettrico
59
Misure Preliminari
60
Uso
60
Manutenzione E Deposito
61
Descrizione Dei Componenti Costruttivi
62
Inserire Il Cavo D'alimentazione (Illustrazione C2 )
62
Lavori DI Preparazione
62
Messa in Funzione Dell'arieggiatore
62
Montaggio Della Parte Inferiore del Longherone DI Guida (Illustrazione C1 )
62
Montaggio Della Parte Superiore del Longherone DI Guida (Illustrazione C3 )
62
Prima Della Prima Messa in Funzione
62
Appendere Il Sacco Per la Raccolta Dell'erba All'arieggiatore (Illustrazione R1 + S1 )
63
Avviamento del Motore (Illustrazione A2 )
63
Collegare Il Cavo Alimentazione Alla Fascia DI Serraggio (Illustrazione D2 )
63
Dispositivo DI Raccolta Dell'erba
63
Fermare Il Motore in Caso DI Emergenza
63
Funzionamento con Sacco DI Raccolta (Accessori)
63
Prova DI Arieggiatura
63
Regolare la Profondità DI Arieggiatura
63
Regolazione (Illustrazione Z2 + V2 )
63
Spegnere Il Motore (Illustrazione F )
63
Arieggiatura in Pendenza
64
Consigli Per la Cura del Prato (Illustrazione M )
64
Controllo Della Sicurezza DI Funzionamento
64
Esercizio DI Arieggiatura
64
Funzionamento Senza Sacco DI Raccolta
64
Intervalli DI Manutenzione
64
Limitazioni Temporali
64
Manovrabilità del Cavo Durante L'arieggiatura
64
Per Svuotare Il Sacco DI Raccolta (Illustrazione L )
64
Cause Dei Disturbi E Loro Eliminazione
65
Conservazione
65
Manutenzione Dell'albero Della Lama
65
Pulitura (Illustrazione N3 )
65
Pulizia E Manutenzione Dell'arieggiatore
65
Ribaltamento del Longherone DI Guida
65
Sostituzione Della Cinghia Dentata
65
Trasporto E Fissaggio Dell'apparecchio (Illustrazione N )
65
Arieggiatore
66
Dati Tecnici
66
Livello DI Potenza Sonora
66
Livello DI Pressione Sonora
66
Motore
66
Oscillazioni
66
Advertisement
Sabo 35-V EL Operator's Manual (88 pages)
Brand:
Sabo
| Category:
Lawn and Garden Equipment
| Size: 3 MB
Table of Contents
Deutsch
17
Table of Contents
17
1 Erklärung des auf der Maschine Angebrachten Typenschildes
18
2 Einführung
18
3 Erklärung der Symbole
19
Vorbereitende Maßnahmen
21
Handhabung
22
Wartung und Lagerung
23
6 Beschreibung der Bauteile
24
7 Vorbereitende Arbeiten
24
Führungsholm-Unterteil Anbauen (Abbildung C1 )
24
Führungsholm-Oberteil Anbauen (Abbildung C3 )
24
8 Vor der Ersten Inbetriebnahme
25
9 Inbetriebnahme des Vertikutierers
25
Anbringen des Anschlusskabels (Abbildung C2 )
25
Einhängen des Anschlusskabels in der Zugentlastung (Abbildung D2 )
25
Starten des Motors (Abbildung A2 )
25
10 Abstellen des Motors (Abbildung F )
26
11 Anhalten IM Notfall
26
12 Einstellen der Vertikutiertiefe
26
Einstellung (Abbildung Z2 + V2 )
26
Vertikutierprobe
26
13 Grasfangeinrichtung
27
Entleeren des Grasfangsacks (Abbildung L )
27
Betrieb ohne Grasfangsack
27
14 Vertikutierbetrieb
27
Vertikutieren an Hanglagen
27
Handhabung des Kabels Beim Vertikutieren
27
Prüfung der Betriebssicherheit
27
Zeitliche Einschränkungen
28
Tipps zur Rasenpflege (Abbildung M )
28
15 Wartungsintervalle
28
16 Pflege und Wartung des Vertikutierers
29
Reinigung (Abbildung N3 )
29
Aufbewahrung
29
Umklappen des Führungsholmes
29
Transport und Sicherung des Gerätes (Abbildung N )
29
Wartung des Messerwelle
29
Auswechseln des Zahnriemens
30
17 Störungsursachen und Deren Beseitigung
30
Français
31
1 Explication de la Plaque Signaletique Placée Sur la Machine
32
2 Introduction
32
3 Explication des Symboles
33
Consignes Générales de Sécurité
34
Mesures Préparatoires
35
Maniement
36
Entretien Et Rangement
37
6 Description des Elements
38
7 Travaux Préliminaires
38
Montage de la Partie Inférieure du Guidon (Illustration C1 )
38
Montage de la Partie Supérieure du Guidon (Illustration C3 )
38
8 Avant la Première Mise en Marche
39
9 Mise en Service du Scarificateur
39
Branchement du Câble D'alimentation (Illustration C2 )9
39
Fixation du Câble D'alimentation Dans la Décharge de Traction (Illustration D2 )
39
Mise en Marche du Moteur (Illustration A2 )
39
10 Arrêt du Moteur (Illustration F )
40
11 Arrêt D'urgence
40
12 Reglage de la Profondeur de Scarification
40
Réglage (Illustrations Z2 + V2 )
40
Essai de Scarification
40
Scarificateur
41
Contrôle de la Sécurité de Fonctionnement
42
Restrictions Horaires
42
Conseils Pour L'entretien des Pelouses (Illustration M )
42
15 Intervalles D'entretien
42
16 Entretien Et Maintenance du Scarificateur
43
Nettoyage (Illustration N3 )
43
Stockage
43
Rabattre la Barre de Guidage
43
Transport Et Sécurité de la Tondeuse (Illustration N )
43
Entretien de L'arbre Porte-Lames
43
Remplacement de la Courroie Dentée
44
17 Causes de Dérangements Et Élimination
44
English
45
1 Explanation of the Rating Plate Affixed to the Machine
46
2 Introduction
46
3 Explanation of the Symbols
47
4 Proper Use
48
General Safety Instructions
48
Preparatory Measures
49
Handling
49
Maintenance and Storage
51
6 Description of Components
52
7 Preparation
52
Assembling the Handlebar Lower Section
52
Assembling the Handlebar Upper Section (Illustration C3 )
52
8 Before Using the Scarifier for the First Time
52
9 Starting the Machine
53
Attaching the Connecting Cable (Illustration C2 )
53
Attaching the Connecting Cable to the Strain Relief Fitting (Illustration D2 )
53
Starting the Motor (Illustration A2 )
53
10 Switching off the Motor (Illustration F )
53
11 Emergency Stopping
54
12 Adjusting the Scarifying Depth
54
Setting (Illustration Z2 + V2 )
54
Scarifying Test
54
13 Grass Collector
54
Operation with Grass Collector (Accessory)
54
Attaching the Grass Collector to the Scarifier (Illustration R1 + S1 )
54
14 Scarifier Operation
55
Using the Machine on Slopes
55
Handling the Cable During Use
55
Checking Operating Safety
55
Time Restrictions
55
Tips on Caring for Your Lawn (Illustration M )
56
15 Service Intervals
56
16 Care and Servicing of Your Scarifier
56
Cleaning (Illustration N3 )
56
Storage
57
Folding the Guide Tube
57
Transporting and Securing the Equipment (Illustration N )
57
Maintenance of the Blade Shaft
57
Changing the Drive Belt
57
17 Troubleshooting
58
Dutch
59
1 Verklaring Van Het Op de Machine Aangebrachte Typeplaatje
60
2 Inleiding
60
3 Verklaring Van de Symbolen
61
Verticuteerder
62
Voorbereidende Maatregelen
63
Gebruik
63
Onderhoud en Opslag
65
6 Beschrijving Van de Componenten
66
7 Voorbereidende Werkzaamheden
66
Onderste Deel Van de Duwboom Aanbouwen (Afbeelding C1 )
66
Bovenste Deel Van de Duwboom Aanbouwen (Afbeelding C3 )
66
8 Voor de Eerste Ingebruikname
66
9 Ingebruikname Van de Verticuteerder
67
Aanbrengen Van de Kabel (Afbeelding C2 )
67
Bevestigen Van de Kabel in de Trekontlasting (Afbeelding D2 )
67
Starten Van de Motor (Afbeelding A2 )
67
10 Uitschakelen Van de Motor (Afbeelding F )
68
11 Stoppen in Geval Van Nood
68
12 Instellen Van de Verticuteerdiepte
68
Instelling (Afbeelding Z2 + V2 )
68
Verticuteerproef
68
Gebruik Zonder Opvangzak
69
Verticuteren Op Hellingen
69
Tijdelijke Beperkingen
70
Tips Voor de Verzorging Van Het Gazon (Afbeelding M )
70
15 Onderhoudsintervallen
70
16 Verzorging en Onderhoud Van de Verticuteerder
71
Reiniging (Afbeelding N3 )
71
Opbergen
71
Omklappen Van de Duwboom
71
Transport en Beveiliging Van Het Apparaat (Afbeelding N )
71
Onderhoud Van de Messenas
71
Uitwisselen Van de Tandriem
72
17 Oorzaken Van Storingen en Het Verhelpen Daarvan
72
Русский
73
1 Описание Типовой Таблички На Корпусе Машины
74
2 Введение
74
3 Значение Символов
75
Подготовительные Работы
77
Эксплуатация
78
Техобслуживание И Хранение
80
6 Описание Частей Конструкции
80
7 Подготовительные Работы
81
Монтаж Нижней Части Ручки (Рис. C1 )
81
Монтаж Верхней Части Ручки (Рис. C3 )
81
8 Перед Вводом В Эксплуатацию
81
9 Ввод Аэратора В Эксплуатацию
81
Подключение Соединительного Кабеля (Рис. C2 )
81
Подвешивание Кабеля С Помощью Механизма Для Разгрузки От Натяжения (Рис. D2 )
82
Запуск Двигателя (Рис. A2 )
82
10 Выключение Двигателя (Рис. F )
82
11 Аварийное Выключение
82
12 Настройка Глубины Аэрации
83
Настройка (Рис. Z2 + V2 )
83
Пробная Аэрация
83
13 Травосборник
83
Работа С Травосборником (Комплектующие)
83
Установка Травосборника На Аэратор (Рис. R1 + S1 )
83
Опорожнение Травосборника (Рис. L )
84
Ограничения По Времени
85
Советы По Уходу За Газоном (Рис. M )
85
15 Интервалы Техобслуживания
85
Уход И Техобслуживание Аэратора
86
Очистка (Рис. N3 )
86
Хранение
86
Складывание Ручки
86
Транспортировка И Закрепление Устройства (Рис. N )
86
Техобслуживание Вала Режущего Механизма
86
Замена Зубчатого Ремня
87
17 Неисправности, Их Причины И Устранение
88
Sabo 35-V EL Operator's Manual (76 pages)
Scarifier
Brand:
Sabo
| Category:
Lawn and Garden Equipment
| Size: 3 MB
Table of Contents
Deutsch
7
Table of Contents
7
Einführung
8
Vertikutierbetrieb
14
Prüfung der Betriebssicherheit
14
Handhabung des Kabels Beim Vertikutieren
14
Vertikutieren an Hanglagen
14
Zeitliche Einschränkungen
14
Betrieb ohne Grasfangsack
14
Entleeren des Grasfangsacks (Abbildung L )
14
Fangsack am Vertikutierer Einhängen (Abbildung R1 + S1 )
14
Betrieb mit Grasfangsack (Zubehör)
14
Grasfangeinrichtung
14
Pflege und Wartung des Vertikutierers
15
Reinigung (Abbildung N3 )
15
Aufbewahrung
15
Umklappen des Führungsholmes
15
Vor der Ersten Inbetriebnahme
15
Transport und Sicherung des Gerätes (Abbildung N )
15
Wartung des Messerwelle
15
Auswechseln des Zahnriemens
15
Schalldruckpegel
16
Original-Ersatzteile und Zubehör
16
Schwingungen
16
Schallleistungspegel
16
Störungsursachen und Deren Beseitigung
16
Motor
16
Vertikutierer
16
Français
17
Introduction
18
Contrôle de la Sécurité de Fonctionnement
24
Explication des Symboles
24
Fonctionnement du Scarificateur
24
Positionnement du Câble pendant L'utilisation du Scarificateur
24
Utilisation du Scarificateur Sur des Terrains en Pente
24
Conseils pour L'entretien des Pelouses (Illustration M )
25
Entretien de L'arbre Porte-Lames
25
Entretien et Maintenance du Scarificateur
25
Intervalles D'entretien
25
Nettoyage (Illustration N3 )
25
Rabattre la Barre de Guidage
25
Restrictions Horaires
25
Stockage
25
Transport et Sécurité de la Tondeuse (Illustration N )
25
Caractéristiques Techniques
26
Causes de Dérangements et Élimination
26
Moteur
26
Niveau de Pression Sonore
26
Niveau de Puissance Acoustique
26
Pièces Détachées Originales
26
Remplacement de la Courroie Dentée
26
Scarificateur
26
Vibrations
26
English
27
Explanation of the Rating Plate Affixed to the Machine
28
Introduction
28
Attaching the Grass Collector to the Scarifier (Illustration R1 + S1 )
33
Operation with Grass Collector (Accessory)
33
Checking Operating Safety
34
Emptying the Grass Collector (Illustration L )
34
Handling the Cable During Use
34
Operation Without Grass Collector
34
Scarifier Operation
34
Service Intervals
34
Time Restrictions
34
Tips on Caring for Your Lawn (Illustration M )
34
Using the Machine on Slopes
34
Care and Servicing of Your Scarifier
35
Changing the Drive Belt
35
Cleaning (Illustration N3 )
35
Folding the Guide Tube
35
Maintenance of the Blade Shaft
35
Storage
35
Transporting and Securing the Equipment (Illustration N )
35
Troubleshooting
35
Motor
36
Original Spare Parts
36
Scarifier
36
Sound Power Level
36
Sound Pressure Level
36
Technical Data
36
Vibrations
36
Dutch
37
Inleiding
38
Verklaring Van Het Op de Machine Aangebrachte Typeplaatje
38
Controle Van de Bedrijfsveiligheid
44
Gebruik Met Grasopvangzak (Accessoire)
44
Gebruik Zonder Opvangzak
44
Leegmaken Van de Opvangzak (Afbeelding L )
44
Opvangzak Aan de Verticuteerder Hangen (Afbeelding R1 + S1 )
44
Verklaring Van de Symbolen
44
Verticuteerbedrijf
44
Verticuteren Op Hellingen
44
Voeren Van de Kabel Bij Het Verticuteren
44
Omklappen Van de Duwboom
45
Onderhoudsintervallen
45
Opbergen
45
Reiniging (Afbeelding N3 )
45
Tijdelijke Beperkingen
45
Tips Voor de Verzorging Van Het Gazon (Afbeelding M )
45
Transport en Beveiliging Van Het Apparaat (Afbeelding N )
45
Verzorging en Onderhoud Van de Verticuteerder
45
Geluidsdrukniveau
46
Geluidsvermogen
46
Motor
46
Onderhoud Van de Messenas
46
Oorzaken Van Storingen en Het Verhelpen Daarvan
46
Originele Onderdelen
46
Technische Gegevens
46
Trillingen
46
Uitwisselen Van de Tandriem
46
Verticuteerder
46
Español
47
Introducción
48
Colgar la Bolsa Colectora en el Escarificador (Ilustración R1 + S1 )
54
Dispositivo Colector de Hierba
54
Escarificación
54
Escarificar en Laderas
54
Funcionamiento con la Bolsa Colectora de Césped (Accesorio)
54
Funcionamiento sin Bolsa Colectora
54
Manejo del Cable Durante el Funcionamiento
54
Vaciado de la Bolsa Colectora (Ilustración L )
54
Verificación de la Seguridad de Funcionamiento
54
Cuidado y Mantenimiento del Escarificador
55
Cómo Guardar el Aparato
55
Indicaciones para el Cuidado del Césped (Ilustración M )
55
Intervalos de Mantenimiento
55
Limpieza (Ilustración N3 )
55
Mantenimiento del Árbol de las Cuchillas
55
Plegar el Larguero de Guía
55
Transporte y Protección del Aparato (Figura N )
55
Causas de Averías y Su Eliminación
56
Datos Técnicos
56
Escarificador
56
Motor
56
Nivel de la Presión Acústica
56
Nivel de Potencia Acústica
56
Recambios Originales y Accesorios
56
Sustitución de la Correa Dentada
56
Vibraciones
56
Italiano
57
Introduzione
58
(Illustrazione R1 + S1 )
64
Appendere Il Sacco Per la Raccolta Dell'erba All'arieggiatore
64
Arieggiatura in Pendenza
64
Controllo Della Sicurezza DI Funzionamento
64
Dispositivo DI Raccolta Dell'erba
64
Esercizio DI Arieggiatura
64
Funzionamento con Sacco DI Raccolta (Accessori)
64
Funzionamento Senza Sacco DI Raccolta
64
Manovrabilità del Cavo Durante L'arieggiatura
64
Per Svuotare Il Sacco DI Raccolta (Illustrazione L )
64
Conservazione
65
Consigli Per la Cura del Prato (Illustrazione M )
65
Intervalli DI Manutenzione
65
Prima Della Prima Messa in Funzione
65
Pulitura (Illustrazione N3 )
65
Pulizia E Manutenzione Dell'arieggiatore
65
Ribaltamento del Longherone DI Guida
65
Trasporto E Fissaggio Dell'apparecchio (Illustrazione N )
65
Manutenzione Dell'albero Della Lama
66
Sostituzione Della Cinghia Dentata
66
Arieggiatore
67
Cause Dei Disturbi E Loro Eliminazione
67
Livello DI Potenza Sonora
67
Livello DI Pressione Sonora
67
Motore
67
Oscillazioni
67
Pezzi DI Ricambio Originali
67
Advertisement
Advertisement
Related Products
Sabo 38-EV
Sabo 31-V EL
Sabo 38-BV
Sabo 33-V ACCU
Sabo 36-ACCU
Sabo 36-EL
Sabo 32-EL
Sabo 45-220
Sabo 45-PRO E V PUSH
Sabo 45-PRO V
Sabo Categories
Lawn Mower
Lawn and Garden Equipment
Trimmer
Blower
Brush Cutter
More Sabo Manuals
Login
Sign In
OR
Sign in with Facebook
Sign in with Google
Upload manual
Upload from disk
Upload from URL