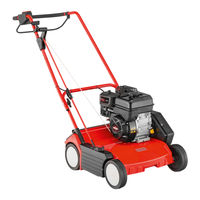
Sign In
Upload
Manuals
Brands
Sabo Manuals
Lawn and Garden Equipment
38-BV
Sabo 38-BV Manuals
Manuals and User Guides for Sabo 38-BV. We have
3
Sabo 38-BV manuals available for free PDF download: Operator's Manual
Sabo 38-BV Operator's Manual (76 pages)
Brand:
Sabo
| Category:
Lawn and Garden Equipment
| Size: 2 MB
Table of Contents
Deutsch
6
Table of Contents
6
Einführung
7
Erklärung des auf der Maschine Angebrachten Typenschildes
7
Erklärung der Piktogramme
7
Erklärung der Symbole
7
Bestimmungsgemässer Gebrauch
8
Allgemeine Sicherheitsvorschriften für den Benzin-Vertikutierer
8
Allgemeine Sicherheitshinweise
8
Vorbereitende Maßnahmen
9
Handhabung
9
Wartung und Lagerung
10
Beschreibung der Bauteile
11
Vorbereitende Arbeiten
11
Führungsholm-Oberteil Anbauen (Abbildung C3 + E3 )
11
Schaltkasten-Montage (Abbildung K1 )
11
Holmstart-Montage (Abbildung L1 )
11
Vor der Ersten Inbetriebnahme
11
Einstellen der Vertikutiertiefe
12
Betrieb mit Grasfangsack (Zubehör)
12
Grasfangeinrichtung
12
Einstellung (Abbildung T2 + V2 + Z2 )
12
Starten des Motors (Abbildung Z2 + S2 + A2 + E + Q2 )
12
Anhalten IM Notfall
12
Abstellen des Motors (Abbildung F + Y2 )
12
Ölstand Überprüfen und Öl Einfüllen (Abbildung Y1 )
12
Kraftstoff Einfüllen
12
Wartungsintervalle
13
Tipps zur Rasenpflege (Abbildung M )
13
Zeitliche Einschränkungen
13
Prüfung der Betriebssicherheit
13
Vertikutieren an Hanglagen
13
Ölstandkontrolle
13
Vertikutierbetrieb
13
Betrieb ohne Grasfangsack
13
Entleeren des Grasfangsacks
13
Fangsack am Vertikutierer Einhängen (Abbildung L2 + S1 )
13
Wartung des Messerwelle
14
Wartung des Motors
14
Auswechseln des Keilrippenriemens
14
Wartung der Räder
14
Transport und Sicherung des Gerätes
14
Aufbewahrung
14
Pflege und Wartung des Vertikutierers
14
Reinigung
14
Umklappen des Führungsholmes (Abbildung A1 )
14
Ölwechsel (Abbildung Y1 + Y2 + y )
15
Reinigen Bzw. Austausch des Luftfilters (Abbildung W )
15
Reinigen der Ablagerungskappe (Abbildung W1 )
15
Kontrolle der Zündkerze (Abbildung y )
15
Vorschriftsmäßiges Überwintern des Motors (oder Längerer Nichtgebrauch)
15
Störungsursachen und Deren Beseitigung
15
Schalldruckpegel
16
Original-Ersatzteile und Zubehör
16
Schwingungen
16
Technische Daten
16
Schallleistungspegel
16
Vertikutierer
16
Motor
16
Français
17
Explication de la Plaque Signalétique Placée Sur la Machine
18
Explication des Pictogrammes
18
Explication des Symboles
18
Introduction
18
Consignes Générales de Sécurité
19
Prescriptions Générales de Sécurité Relatives Au Scarificateur À Essence
19
Utilisation Conforme À L'emploi Prévu
19
Maniement
20
Mesures Préparatoires
20
Entretien Et Rangement
21
Avant la Première Mise en Service
22
Description des Composants
22
Montage de la Corde de Lanceur Sur Le Guidon (Illustration L1 )
22
Montage de la Partie Supérieure du Guidon (Illustration C3 + E3 )
22
Montage du Boîtier de Commutation (Illustration K1 )
22
Travaux Préliminaires
22
10 Démarrage du Moteur (Illustration Z2 + S2 + A2 + E + Q2 )
23
13 Réglage de la Profondeur de Scarification
23
Arrêt D'urgence
23
Arrêt du Moteur (Illustration F + Y2 )
23
Contrôler Le Niveau D'huile Et Ajouter de L'huile (Illustration Y1 )
23
Dispositif de Récupération de L'herbe
23
Fonctionnement Avec Sac de Récupération D'herbe (Accessoire)
23
Remplissage de Carburant
23
Réglage (Illustration T2 + V2 + Z2 )
23
Conseils Pour L'entretien des Pelouses (Illustration M )
24
Contrôle de la Sécurité de Fonctionnement
24
Contrôle du Niveau D'huile
24
Fixation du Sac de Récupération Sur Le Scarificateur (Illustration L2 + S1 )
24
Fonctionnement du Scarificateur
24
Fonctionnement Sans Sac de Récupération D'herbe
24
Intervalles D'entretien
24
Restrictions Horaires
24
Utilisation du Scarificateur Sur des Terrains en Pente
24
Vidage du Sac de Récupération D'herbe
24
Entretien de L'arbre Porte-Lames
25
Entretien Et Maintenance du Scarificateur
25
Maintenance des Roues
25
Maintenance du Moteur
25
Nettoyage
25
Rabattement du Guidon (Illustration A1 )
25
Remplacement de la Courroie Trapézoïdale Striée
25
Stockage
25
Transport Et Sécurisation de L'appareil
25
Causes de Dérangement Et Élimination
26
Contrôle de la Bougie D'allumage (Illustration y )
26
Hibernation Conforme du Moteur (Ou Non-Utilisation Prolongée)
26
Nettoyage du Collecteur de Dépôts (Illustration W1 )
26
Nettoyage Ou Remplacement du Filtre À Air (Illustration W )
26
Vidange D'huile (Illustration Y1 + Y2 + y )
26
Caractéristiques Techniques
27
Moteur
27
Niveau de Pression Acoustique
27
Niveau de Puissance Acoustique
27
Pièces de Rechange Et Accessoires D'origine
27
Scarificateur
27
Vibrations
27
English
28
Explanation of the Pictograms
29
Explanation of the Rating Plate Affixed to the Machine
29
Explanation of the Symbols
29
Introduction
29
General Safety Guidelines for the Petrol Scarifier
30
General Safety Information
30
Proper Use
30
Handling
31
Preparatory Measures
31
Maintenance and Storage
32
Assembling the Guide Bar Upper Section (Figure C3 + E3 )
33
Assembly of Switching Box (Figure K1 )
33
Before Initial Use
33
Description of Components
33
Handle Starter Assembly (Figure L1 )
33
Preparation
33
Adjusting the Scarifying Depth
34
Checking the Oil Level and Filling with Oil (Figure Y1 )
34
Emergency Stopping
34
Filling with Fuel
34
Grass Collector
34
Operation with Grass Collecting Bag (Accessory)
34
Setting (Figure T2 + V2 + Z2 )
34
Starting the Engine (Figure Z2 + S2 + A2 + E + Q2 )
34
Switching off the Engine (Figure F + Y2 )
34
Attaching the Grass Collector to the Scarifier (Figure L2 + S1 )
35
Checking Operating Safety
35
Checking the Oil Level
35
Emptying the Grass Collecting Bag
35
Operation Without Grass Collecting Bag
35
Scarifier Operation
35
Service Intervals
35
Time Restrictions
35
Tips on Caring for Your Lawn (Figure M )
35
Using the Machine on Slopes
35
Care and Servicing for Your Scarifier
36
Changing the Ribbed V-Belt
36
Cleaning
36
Collapsing the Guide Bar (Figure A1 )
36
Maintenance of the Cutter Shaft
36
Oil Change (Figure Y1 + Y2 + y )
36
Servicing the Engine
36
Servicing the Wheels
36
Storage
36
Transporting and Securing the Device
36
Checking the Spark Plug (Figure y )
37
Cleaning and Replacing the Air Filter (Figure W )
37
Cleaning the Deposit Cap (Figure W1 )
37
Correct Winter Storage of the Engine (or When Not Used for a Long Period of Time)
37
Troubleshooting
37
Engine
38
Original Spare Parts and Accessories
38
Scarifier
38
Sound Power Level
38
Sound Pressure Level
38
Technical Data
38
Vibrations
38
Dutch
39
Inleiding
40
Verklaring Van de Pictogrammen
40
Verklaring Van de Symbolen
40
Verklaring Van Het Op de Machine Aangebrachte Typeplaatje
40
Algemene Veiligheidsinstructies
41
Algemene Veiligheidsvoorschriften Voor de Benzineverticuteerder
41
Gebruik Conform de Voorschriften
41
Gebruik
42
Voorbereidende Maatregelen
42
Onderhoud en Opslag
43
Beschrijving Van de Componenten
44
Bovenste Deel Van de Duwstang Aanbouwen (Afbeelding C3 + E3 )
44
Montage Van de Schakelkast (Afbeelding K1 )
44
Montage Van de Startstang (Afbeelding L1 )
44
Voorbereidende Werkzaamheden
44
Vóór de Eerste Inbedrijfstelling
44
Brandstof Invullen
45
Gebruik Met Grasopvangzak (Accessoire)
45
Grasopvanginrichting
45
Instellen Van de Verticuteerdiepte
45
Instelling (Afbeelding T2 + V2 + Z2 )
45
Oliepeil Controleren en Olie Bijvullen (Afbeelding Y1 )
45
Starten Van de Motor (Afbeelding Z2 + S2 + A2 + E + Q2 )
45
Stoppen in Geval Van Nood
45
Uitschakelen Van de Motor (Afbeelding F + Y2 )
45
Controle Van de Bedrijfsveiligheid
46
Gebruik Zonder Opvangzak
46
Leegmaken Van de Opvangzak
46
Oliepeilcontrole
46
Onderhoudsintervallen
46
Opvangzak Aan de Verticuteerder Hangen (Afbeelding L2 + S1 )
46
Tijdelijke Beperkingen
46
Tips Voor de Verzorging Van Het Gazon (Afbeelding M )
46
Verticuteerbedrijf
46
Verticuteren Op Hellingen
46
Omklappen Van de Duwstang (Afbeelding A1 )
47
Onderhoud Van de Messenas
47
Onderhoud Van de Motor
47
Onderhoud Van de Wielen
47
Opbergen
47
Reiniging
47
Transport en Opslag Van Het Apparaat
47
Vervangen Van de Poly-V-Belt
47
Verzorging en Onderhoud Van de Verticuteerder
47
Controle Van de Bougie (Afbeelding y )
48
Olie Wisselen (Afbeelding Y1 + Y2 + y )
48
Oorzaken Van Storingen en Het Verhelpen Daarvan
48
Overwinteren Van de Motor Volgens Voorschrift (of Bij Langdurige Stilstand)
48
Reinigen Van de Afzettingskap (Afbeelding W1 )
48
Schoonmaken Resp. Vervangen Van de Luchtfilter (Afbeelding W )
48
Geluidsdrukniveau
49
Geluidsvermogensniveau
49
Motor
49
Originele Reserveonderdelen en Toebehoren
49
Technische Gegevens
49
Trillingen
49
Verticuteerder
49
Español
50
Explicación de la Placa de Características Instalada en la Máquina
51
Explicación de Los Pictogramas
51
Explicación de Los Símbolos
51
Introducción
51
Advertencias Generales sobre la Seguridad
52
Normas Generales de Seguridad para el Escarificador de Gasolina
52
Uso Previsto
52
Manejo
53
Medidas Preparatorias
53
Mantenimiento y Almacenamiento
54
Antes de la Primera Puesta en Servicio
55
Descripción de Los Componentes
55
Montaje de la Caja de Distribución (Figura K1 )
55
Montaje del Arrancador de Larguero (Figura L1 )
55
Montaje del Larguero Guía Superior (Figura C3 + E3 )
55
Trabajos Preliminares
55
Ajuste (Figura T2 + V2 + Z2 )
56
Ajuste de la Profundidad del Escarificador
56
Apagado del Motor (Figura F + Y2 )
56
Arranque del Motor (Figura Z2 + S2 + A2 + E + Q2 )
56
Controlar el Nivel de Aceite y Reponer Aceite (Figura Y1 )
56
Dispositivo Colector de Hierba
56
Funcionamiento con la Bolsa Colectora de Césped (Accesorio)
56
Llenado de Combustible
56
Parada de Emergencia
56
Colgar la Bolsa Colectora en el Escarificador (Figura L2 + S1 )
57
Control del Nivel de Aceite
57
Escarificación
57
Escarificar en Laderas
57
Funcionamiento sin Bolsa Colectora
57
Indicaciones para el Cuidado del Césped (Figura M )
57
Intervalos de Mantenimiento
57
Restricción de Horarios
57
Vaciado de la Bolsa Colectora
57
Verificación de la Seguridad de Funcionamiento
57
Cuidado y Mantenimiento del Escarificador
58
Cómo Cambiar la Correa Trapezoidal con Dentado Interior
58
Cómo Guardar el Aparato
58
Limpieza
58
Mantenimiento de las Ruedas
58
Mantenimiento del Motor
58
Mantenimiento del Árbol de Cuchillas
58
Plegado del Larguero de Guía (Figura A1 )
58
Transporte y Protección del Aparato
58
Cambio de Aceite (Figura Y1 + Y2 + y )
59
Causas de Averías y Su Eliminación
59
Control de la Bujía (Figura y )
59
Instrucciones para el Periodo Invernal del Motor (O Prolongado Desuso)
59
Limpieza de la Tapa del Depósito (Figura W1 )
59
Limpieza O Recambio del Filtro de Aire (Figura W )
59
Accesorios y Repuestos Originales
60
Datos Técnicos
60
Escarificador
60
Motor
60
Nivel de la Presión Acústica
60
Nivel de Potencia Acústica
60
Vibraciones
60
Italiano
61
Introduzione
62
Spiegazione Dei Pittogrammi
62
Spiegazione Dei Simboli
62
Spiegazione Della Targhetta D'identificazione Applicata Sulla Macchina
62
Avvisi DI Sicurezza Generali
63
Impiego Conforme Allo Scopo Previsto
63
Norme DI Sicurezza Generali Per lo Scarificatore a Benzina
63
Misure Preliminari
64
Uso
64
Manutenzione E Deposito
65
Descrizione Dei Componenti Costruttivi
66
Lavori DI Preparazione
66
Montaggio del Cassetta DI Distribuzione (Figura K1 )
66
Montaggio Della Parte Superiore del Longherone DI Guida (Figura C3 + E3 )
66
Montaggio Dello Starter Sul Longherone (Figura L1 )
66
Prima Della Prima Messa in Funzione
66
Avviamento del Motore (Figura Z2 + S2 + A2 + E + Q2 )
67
Controllare Il Livello Dell'olio Ed Eventualmente Rabboccare (Figura Y1 )
67
Dispositivo DI Raccolta Dell'erba
67
Fermare Il Motore in Caso DI Emergenza
67
Funzionamento con Sacco DI Raccolta (Accessori)
67
Regolare la Profondità DI Scarificazione
67
Regolazione (Figura T2 + V2 + Z2 )
67
Rifornire DI Carburante
67
Spegnere Il Motore (Figura F + Y2 )
67
Appendere Il Sacco Per la Raccolta Dell'erba Allo Scarificatore (Figura L2 + S1 )
68
Consigli Per la Cura del Prato (Figura M )
68
Controllo del Livello Dell'olio
68
Controllo Della Sicurezza DI Funzionamento
68
Esercizio DI Scarificazione
68
Funzionamento Senza Sacco DI Raccolta
68
Intervalli DI Manutenzione
68
Limitazioni Temporali
68
Per Svuotare Il Sacco DI Raccolta
68
Scarificazione in Pendenza
68
Conservazione
69
Manutenzione del Motore
69
Manutenzione Dell'albero Portalama
69
Manutenzione Delle Ruote
69
Pulizia
69
Pulizia E Manutenzione Dello Scarificatore
69
Ribaltamento del Longherone DI Guida (Figura A1 )
69
Sostituzione Della Cinghia Trapezoidale Ad Alette
69
Trasporto E Fissaggio Dell'apparecchio
69
Cambio Dell'olio (Figura Y1 + Y2 + y )
70
Cause Dei Disturbi E Loro Eliminazione
70
Controllo Della Candela DI Accensione (Figura y )
70
Prescrizioni Per un Corretto Svernamento del Motore (Oppure Non Utilizzo Prolungato)
70
Pulizia Della Cuffia DI Deposito (Figura W1 )
70
Pulizia O Cambio del Filtro Dell'aria (Figura W )
70
Dati Tecnici
71
Livello DI Potenza Sonora
71
Livello DI Pressione Sonora
71
Motore
71
Oscillazioni
71
Parti DI Ricambio E Accessori Originali
71
Scarificatore
71
Advertisement
Sabo 38-BV Operator's Manual (80 pages)
Brand:
Sabo
| Category:
Lawn and Garden Equipment
| Size: 2 MB
Table of Contents
Deutsch
7
Table of Contents
7
1 Einführung
8
2 Erklärung des auf der Maschine Angebrachten Typenschildes
8
3 Erklärung der Piktogramme
8
4 Erklärung der Symbole
8
5 Bestimmungsgemässer Gebrauch
9
6 Allgemeine Sicherheitsvorschriften für den Benzin-Vertikutierer
9
Allgemeine Sicherheitshinweise
9
Vorbereitende Maßnahmen
10
Handhabung
10
Wartung und Lagerung
11
7 Beschreibung der Bauteile
12
8 Vorbereitende Arbeiten
12
Führungsholm-Oberteil Anbauen (Abbildung C3 + E3 )
12
Schaltkasten-Montage (Abbildung K1 )
12
Holmstart-Montage (Abbildung L1 )
12
9 Vor der Ersten Inbetriebnahme
12
Ölstand Überprüfen und Öl Einfüllen (Abbildung Y1 )
13
Kraftstoff Einfüllen
13
10 Starten des Motors (Abbildung Z2 + S2 + A2 + E + Q2 )
13
11 Abstellen des Motors (Abbildung F + Y2 )
13
12 Anhalten IM Notfall
13
13 Einstellen der Vertikutiertiefe
13
Einstellung (Abbildung T2 + V2 + Z2 )
13
14 Grasfangeinrichtung
13
Betrieb mit Grasfangsack (Zubehör)
13
Fangsack am Vertikutierer Einhängen (Abbildung L2 + S1 )
14
Entleeren des Grasfangsacks
14
Betrieb ohne Grasfangsack
14
15 Vertikutierbetrieb
14
Vertikutieren an Hanglagen
14
Ölstandkontrolle
14
Prüfung der Betriebssicherheit
14
Zeitliche Einschränkungen
14
Tipps zur Rasenpflege (Abbildung M )
14
16 Wartungsintervalle
14
17 Pflege und Wartung des Vertikutierers
15
Reinigung
15
Aufbewahrung
15
Umklappen des Führungsholmes (Abbildung A1 )
15
Transport und Sicherung des Gerätes
15
Wartung des Messerwelle
15
Auswechseln des Keilrippenriemens
15
Wartung der Räder
15
18 Wartung des Motors
15
Kontrolle der Zündkerze (Abbildung y )
16
Vorschriftsmäßiges Überwintern des Motors (oder Längerer Nichtgebrauch)
16
Reinigen Bzw. Austausch des Luftfilters (Abbildung W )
16
19 Störungsursachen und Deren Beseitigung
16
Ölwechsel (Abbildung Y1 + Y2 + y )
16
20 Technische Daten
17
Motor
17
Vertikutierer
17
Schallleistungspegel
17
Schalldruckpegel
17
Schwingungen
17
21 Original-Ersatzteile und Zubehör
17
Français
19
1 Introduction
20
2 Explication de la Plaque Signaletique Placée Sur la Machine
20
3 Explication des Pictogrammes
20
4 Explication des Symboles
20
5 Utilisation Conforme a L'emploi Prevu
21
6 Prescriptions Generales de Securite Relatives Au Scarificateur À Essence
21
Consignes Générales de Sécurité
21
Mesures Préparatoires
22
Maniement
22
Entretien Et Rangement
23
7 Description des Elements
24
8 Travaux Préliminaires
24
Montage de la Partie Supérieure du Guidon (Illustration C3 + E3 )
24
Montage du Boîtier de Commutation (Illustration K1 )
24
Montage du Câble de Lancement Sur Le Guidon (Illustration L1 )
24
9 Avant la Première Mise en Marche
24
10 Démarrage du Moteur (Illustration Z2 + S2 + A2 + E + Q2 )
25
11 Arrêt du Moteur (Illustration F + Y2 )
25
Contrôler Le Niveau D'huile Et Ajouter de L'huile (Figure Y1 )
25
Remplissage de Carburant
25
12 Arrêt D'urgence
25
13 Reglage de la Profondeur de Scarification
25
Réglage (Illustrations T2 + V2 + Z2 )
25
14 Dispositif de Récupération de L'herbe
26
Fonctionnement Avec Sac de Récupération de L'herbe (Accessoire)
26
Suspension du Sac de Récupération Sur Le Scarificateur (Illustration L2 + S1 )
26
Vidage de L'herbe du Sac de Récupération
26
Fonctionnement Sans Sac de Récupération de L'herbe
26
15 Fonctionnement du Scarificateur
26
Utilisation du Scarificateur Sur des Terrains en Pente
26
Contrôle du Niveau D'huile
26
Contrôle de la Sécurité de Fonctionnement
26
Restrictions Horaires
26
17 Entretien Et Maintenance du Scarificateur
27
Nettoyage
27
Stockage
27
Escamotage du Guidon (Illustration A1 )
27
Transport Et Sécurité de L'appareil
27
Entretien de L'arbre Porte-Lames
27
Remplacement de la Courroie Trapézoïdale À Stries
27
Maintenance des Roues
27
18 Maintenance du Moteur
28
Vidange D'huile (Illustration Y1 + Y2 + y )
28
Nettoyage Ou Remplacement du Filtre À Air (Illustration W )
28
Contrôle de la Bougie D'allumage (Illustration y )
28
Hibernation du Moteur Conforme Au Règlement (Ou Non Utilisation Prolongée)
28
19 Causes de Dérangements Et Élimination
28
20 Caractéristiques Techniques
29
Moteur
29
Scarificateur
29
Niveau de Puissance Acoustique
29
Niveau de Pression Sonore
29
Vibrations
29
21 Pièces Détachées Originales
29
English
31
1 Introduction
32
2 Explanation of the Rating Plate Affixed to the Machine
32
3 Explanation of the Pictograms
32
4 Explanation of the Symbols
32
5 Proper Use
33
6 General Safety Guidelines for the Petrol Scarifier
33
General Safety Instructions
33
Preparatory Measures
33
Handling
34
Maintenance and Storage
35
7 Description of Components
35
8 Preparation
36
Assembling the Handlebar Upper Section (Illustration C3 + E3 )
36
Assembly of Switching Box (Illustration K1 )
36
Handle Starter Assembly (Illustration L1 )
36
9 Before Using the Scarifier for the First Time
36
Check the Oil Level and Fill with Oil (Figure Y1 )
36
Filling with Fuel
36
10 Starting the Engine (Illustration Z2 + S2 + A2 + E + Q2 )
36
11 Switching off the Engine (Illustration F + Y2 )
37
12 Emergency Stopping
37
13 Adjusting the Scarifying Depth
37
Setting (Illustration T2 + V2 + Z2 )
37
14 Grass Collector
37
Operation with Grass Collector (Accessory)
37
Attaching the Grass Collector to the Scarifier (Illustration L2 + S1 )
37
Emptying the Grass Collector
37
Operation Without Grass Collector
37
15 Scarifier Operation
37
Time Restrictions
38
Tips on Caring for Your Lawn (Illustration M )
38
16 Service Intervals
38
17 Care and Servicing of Your Scarifier
38
Cleaning
38
Storage
38
Collapsing the Handle (Illustration A1 )
38
Transporting and Securing the Equipment
38
Maintenance of the Blade Shaft
39
Changing the Ribbed V-Belt
39
Servicing the Wheels
39
18 Servicing the Engine
39
Oil Change (Illustration Y1 + Y2 + y )
39
Cleaning and Replacing the Air Filter (Illustration W )
39
Checking the Spark Plug (Illustration y )
39
Correct Winter Storage of the Engine (or When Not Used for a Long Period of Time)
39
19 Troubleshooting
39
20 Technical Data
40
Engine
40
Scarifier
40
Sound Power Level
40
Sound Pressure Level
40
Vibrations
40
21 Original Spare Parts
40
Dutch
41
1 Inleiding
42
2 Verklaring Van Het Op de Machine Aangebrachte Typeplaatje
42
3 Verduidelijking Van de Pictogrammen
42
4 Verklaring Van de Symbolen
42
5 Gebruik Conform de Voorschriften
43
6 Algemene Veiligheidsvoorschriften Voor de Benzine Verticuteerder
43
Algemene Veiligheidsinstructies
43
Voorbereidende Maatregelen
44
Gebruik
44
Onderhoud en Opslag
45
7 Beschrijving Van de Componenten
46
Bovenste Deel Van de Duwboom Aanbouwen (Afbeelding C3 + E3 )
46
Montage Van de Schakelkast (Afbeelding K1 )
46
Montage Van de Startstang (Afbeelding L1 )
46
Olie en Oliepeil Controleren (Afbeelding Y1 )
46
Brandstof Invullen
46
8 Voorbereidende Werkzaamheden
46
9 Voor de Eerste Ingebruikname
46
10 Starten Van de Motor (Afbeelding Z2 + S2 + A2 + E + Q2 )
47
11 Uitschakelen Van de Motor (Afbeelding F + Y2 )
47
12 Stoppen in Geval Van Nood
47
13 Instellen Van de Verticuteerdiepte
47
Instelling (Afbeelding T2 + V2 + Z2 )
47
14 Grasopvanginrichting
47
Gebruik Met Grasopvangzak (Accessoire)
47
Opvangzak Aan de Verticuteerder Hangen (Afbeelding L2 + S1 )
47
Leegmaken Van de Opvangzak
47
Gebruik Zonder Opvangzak
48
15 Verticuteerbedrijf
48
Verticuteren Op Hellingen
48
Oliepeilcontrole
48
Controle Van de Bedrijfsveiligheid
48
Tijdelijke Beperkingen
48
Tips Voor de Verzorging Van Het Gazon (Afbeelding M )
48
Olie Wisselen (Afbeelding Y1 + Y2 + y )
49
16 Onderhoudsintervallen
48
17 Verzorging en Onderhoud Van de Verticuteerder
49
Reiniging
49
Opbergen
49
Neerklappen Van de Geleidestangen (Afbeelding A1 )
49
Transport en Opslag Van Het Apparaat
49
Onderhoud Van de Messenas
49
Vervangen Van de Poly-V-Belt
49
Onderhoud Van de Wielen
49
Controle Van de Bougie (Afbeelding y )
50
Overwinteren Van de Motor Volgens Voorschrift (of Bij Langdurige Stilstand)
50
18 Onderhoud Van de Motor
49
19 Oorzaken Van Storingen en Het Verhelpen Daarvan
50
Schoonmaken Resp. Vervangen Van de Luchtfilter (Afbeelding W )
50
20 Technische Gegevens
50
Motor
50
Verticuteerder
50
Geluidsvermogen
51
Geluidsdrukniveau
51
Trillingen
51
21 Originele Onderdelen
51
Español
53
1 Introducción
54
2 Explicación de la Placa de Características Instalada en la Máquina
54
3 Explicación de Los Pictogramas
54
4 Explicación de Los Símbolos
54
5 Uso Conforme a Su Destino
55
6 Normas Generales de Seguridad para el Escarificador de Gasolina
55
Advertencias Generales sobre la Seguridad
55
Medidas Preparatorias
56
Manejo
56
Mantenimiento y Almacenamiento
57
7 Descripción de Los Componentes
58
8 Trabajos Preliminares
58
Montaje del Larguero Guía Superior (Ilustración C3 + E3 )
58
Montaje de la Caja de Distribución (Ilustración K1 )
58
Montaje del Arrancador de Larguero (Ilustración L1 )
58
9 Antes del Primer Uso
58
Controlar el Nivel de Aceite y Reponer Aceite (Ilustración Y1 )
58
Llenado de Combustible
59
10 Arranque del Motor (Ilustración Z2 + S2 + A2 + E + Q2 )
59
11 Apagado del Motor (Ilustración F + Y2 )
59
12 Parada de Emergencia
59
13 Ajuste de la Profundidad de Trabajo
59
Ajuste (Ilustración T2 + V2 + Z2 )
59
14 Dispositivo Colector de Hierba
59
Funcionamiento con la Bolsa Colectora de Césped (Accesorio)
60
Colgar la Bolsa Colectora en el Escarificador (Ilustración L2 + S1 )
60
Vaciado de la Bolsa Colectora
60
Funcionamiento sin Bolsa Colectora
60
15 Escarificación
60
Escarificar en Laderas
60
Control del Nivel de Aceite
60
Verificación de la Seguridad de Funcionamiento
60
Restricción de Horarios
60
Indicaciones para el Cuidado del Césped (Ilustración M )
60
17 Cuidado y Mantenimiento del Escarificador
61
Limpieza
61
Cómo Guardar el Aparato
61
Plegado del Larguero de Guía (Ilustración A1 )
61
Transporte y Protección del Aparato
61
Mantenimiento del Árbol de las Cuchillas
61
Cómo Cambiar la Correa Trapezoidal con Dentado Interior
61
Mantenimiento de las Ruedas
61
18 Mantenimiento del Motor
62
Cambio de Aceite (Ilustración Y1 + Y2 + y )
62
Limpieza O Recambio del Filtro de Aire (Ilustración W )
62
Control de la Bujía (Ilustración y )
62
Instrucciones para el Periodo Invernal del Motor (O Prolongado Desuso)
62
19 Causas de Averías y Su Eliminación
62
20 Datos Técnicos
63
Motor
63
Escarificador
63
Nivel de Potencia Acústica
63
Nivel de la Presión Acústica
63
Vibraciones
63
21 Recambios Originales y Accesorios
63
Italiano
65
1 Introduzione
66
2 Spiegazione Della Targhetta D'identificazione Applicata Sulla Macchina
66
3 Spiegazione Dei Pittogrammi
66
4 Spiegazione Dei Simboli
66
5 Impiego Conforme Allo Scopo Previsto
67
6 Norme DI Sicurezza Generali Per L'arieggiatore Abenzina
67
Informazioni DI Sicurezza Generali
67
Misure Preliminari
68
Uso
68
Manutenzione E Deposito
69
7 Descrizione Dei Componenti Costruttivi
70
8 Lavori DI Preparazione
70
Montaggio Della Parte Superiore del Longherone DI Guida (Illustrazione C3 + E3 )
70
Montaggio del Cassetta DI Distribuzione (Illustrazione K1 )
70
Montaggio Dello Starter Sul Manubrio (Illustrazione L1 )
70
9 Prima Della Prima Messa in Funzione
70
Controllare Il Livello Dell'olio Ed Eventualmente Rabboccare (Illustrazione Y1 )
70
Rifornire DI Carburante
71
10 Avviamento del Motore (Illustrazione Z2 + S2 + A2 + E + Q2 )
71
11 Spegnere Il Motore (Illustrazione F + Y2 )
71
12 Fermare Il Motore in Caso DI Emergenza
71
13 Regolare la Profondità DI Arieggiatura
71
Regolazione (Illustrazione T2 + V2 + Z2 )
71
14 Dispositivo DI Raccolta Dell'erba
71
Funzionamento con Sacco DI Raccolta (Accessori)
71
Appendere Il Sacco Per la Raccolta Dell'erba All'arieggiatore (Illustrazione L2 + S1 )
72
Per Svuotare Il Sacco DI Raccolta
72
Funzionamento Senza Sacco DI Raccolta
72
15 Esercizio DI Arieggiatura
72
Arieggiatura in Pendenza
72
Controllo del Livello Dell'olio
72
Controllo Della Sicurezza DI Funzionamento
72
Limitazioni Temporali
72
Consigli Per la Cura del Prato (Illustrazione M )
72
16 Intervalli DI Manutenzione
72
17 Pulizia E Manutenzione Dell'arieggiatore
73
Pulitura
73
Conservazione
73
Ribaltamento del Longherone DI Guida (Illustrazione A1 )
73
Trasporto E Fissaggio Dell'apparecchio
73
Manutenzione Dell'albero Della Lama
73
Sostituzione Della Cinghia Trapezoidale a Squame
73
Manutenzione Delle Ruote
73
18 Manutenzione del Motore
74
Cambio Dell'olio (Illustrazione Y1 + Y2 + y )
74
Pulizia O Cambio del Filtro Dell'aria (Illustrazione W )
74
Controllo Della Candela DI Accensione (Illustrazione y )
74
Prescrizioni Per un Corretto Svernamento del Motore
74
Prolungato)
74
19 Cause Dei Disturbi E Loro Eliminazione
74
20 Dati Tecnici
75
Motore
75
Arieggiatore
75
Livello DI Potenza Sonora
75
Livello DI Pressione Sonora
75
Oscillazioni
75
Sabo 38-BV Operator's Manual (98 pages)
Brand:
Sabo
| Category:
Lawn and Garden Equipment
| Size: 2 MB
Table of Contents
Deutsch
17
Table of Contents
17
1 Erklärung des auf der Maschine Angebrachten Typenschildes
18
2 Einführung
18
3 Erklärung der Symbole
19
4 Bestimmungsgemässer Gebrauch
20
5 Allgemeine Sicherheitsvorschriften für den Benzin-Vertikutierer
20
Allgemeine Sicherheitshinweise
20
Vorbereitende Maßnahmen
21
Handhabung
21
Wartung und Lagerung
23
6 Beschreibung der Bauteile
24
7 Vorbereitende Arbeiten
24
Führungsholm-Oberteil Anbauen (Abbildung C3 + E3 )
24
Holmstart-Montage (Abbildung L1 )
24
Montage des Kurzschlusskabels (Abbildung N1 )
25
8 Vor der Ersten Inbetriebnahme
25
Öl Einfüllen (Abbildung Y1 )
25
Kraftstoff Einfüllen
25
9 Starten des Motors (Abbildung S2 + A2 + E )
25
10 Abstellen des Motors (Abbildung F + Y2 )
26
11 Anhalten IM Notfall
26
12 Einstellen der Vertikutiertiefe
26
Einstellung (Abbildung T2 + V2 + Z2 )
26
13 Grasfangeinrichtung
27
Betrieb mit Grasfangsack (Zubehör)
27
Fangsack am Vertikutierer Einhängen (Abbildung L2 + S1 )
27
Entleeren des Grasfangsacks
27
Betrieb ohne Grasfangsack
27
14 Vertikutierbetrieb
27
Vertikutieren an Hanglagen
27
Ölstandkontrolle
27
Prüfung der Betriebssicherheit
27
Zeitliche Einschränkungen
28
Tipps zur Rasenpflege (Abbildung M )
28
15 Wartungsintervalle
28
16 Pflege und Wartung des Vertikutierers
29
Reinigung
29
Aufbewahrung
29
Umklappen des Führungsholmes (Abbildung A1 )
29
Transport und Sicherung des Gerätes
29
Wartung des Messerwelle
30
Auswechseln des Keilrippenriemens
30
Wartung der Räder
30
17 Wartung des Motors
30
Ölwechsel
30
Reinigen Bzw. Austausch des Luftfilters (Abbildung W )
31
Kontrolle der Zündkerze (Abbildung y )
31
Vorschriftsmäßiges Überwintern des Motors (oder Längerer Nichtgebrauch)
31
18 Störungsursachen und Deren Beseitigung
32
Français
33
1 Explication de la Plaque Signaletique Placée Sur la Machine
34
2 Introduction
34
3 Explication des Symboles
35
4 Utilisation Conforme a L'emploi Prevu
36
5 Prescriptions Generales de Securite Relatives Au Scarificateur À Essence
36
Consignes Générales de Sécurité
36
Mesures Préparatoires
37
Maniement
38
Entretien Et Rangement
39
6 Description des Elements
40
7 Travaux Préliminaires
40
Montage de la Partie Supérieure du Guidon (Illustration C3 + E3 )
41
Montage du Câble de Lancement Sur Le Guidon (Illustration L1 )
41
Montage du Câble de Court-Circuit (Illustration N1 )
41
8 Avant la Première Mise en Marche
41
Remplissage D'huile (Illustration Y1 )
41
Remplissage de Carburant
41
9 Démarrage du Moteur (Illustration S2 + A2 + E )
42
10 Arrêt du Moteur (Illustration F + Y2 )
42
11 Arrêt D'urgence
42
12 Reglage de la Profondeur de Scarification
42
Réglage (Illustrations T2 + V2 + Z2 )
43
13 Dispositif de Récupération de L'herbe
43
Fonctionnement Avec Sac de Récupération de L'herbe (Accessoire)
43
Suspension du Sac de Récupération Sur Le Scarificateur (Illustration L2 + S1 )
43
Vidage de L'herbe du Sac de Récupération
43
Fonctionnement Sans Sac de Récupération de L'herbe11
43
14 Fonctionnement du Scarificateur
44
Utilisation du Scarificateur Sur des Terrains en Pente
44
Contrôle du Niveau D'huile
44
Contrôle de la Sécurité de Fonctionnement
44
Restrictions Horaires
44
Conseils Pour L'entretien des Pelouses (Illustration M )
44
15 Intervalles D'entretien
44
16 Entretien Et Maintenance du Scarificateur
45
Nettoyage
45
Stockage
45
Escamotage du Guidon (Illustration A1 )
46
Transport Et Sécurité de la Tondeuse
46
Entretien de L'arbre Porte-Lames
46
Remplacement de la Courroie Trapézoïdale À Stries
46
Maintenance des Roues
46
17 Maintenance du Moteur
46
Vidange D'huile
47
Nettoyage Ou Remplacement du Filtre À Air (Illustration W )
47
Contrôle de la Bougie D'allumage (Illustration y )
47
Hibernation du Moteur Conforme Au Règlement (Ou Non Utilisation Prolongée)
48
Caractéristiques Techniques
48
18 Causes de Dérangements Et Élimination
48
English
49
1 Explanation of the Rating Plate Affixed to the Machine
50
2 Introduction
50
3 Explanation of the Symbols
51
4 Proper Use
52
5 General Safety Guidelines for the Petrol Scarifier
52
General Safety Instructions
52
Preparatory Measures
53
Handling
53
Maintenance and Storage
55
6 Description of Components
56
7 Preparation
56
Assembling the Handlebar Upper Section (Illustration C3 + E3 )
56
Handle Starter Assembly (Illustration L1 )
56
Assembing the Short-Circuit Cable (Illustration N1 )
56
8 Before Using the Scarifier for the First Time
57
Filling with Oil (Illustration Y1 )
57
Filling with Fuel
57
9 Starting the Engine (Illustration S2 + A2 + E )
57
10 Switching off the Engine (Illustration F + Y2 )
58
11 Emergency Stopping
58
Adjusting the Scarifying Depth
58
Setting (Illustration T2 + V2 + Z2 )
58
13 Grass Collector
58
Operation with Grass Collector (Accessory)
58
Attaching the Grass Collector to the Scarifier (Illustration L2 + S1 )
59
Emptying the Grass Collector
59
Operation Without Grass Collector
59
14 Scarifier Operation
59
Using the Machine on Slopes
59
Checking the Oil Level
59
Checking Operating Safety
59
Time Restrictions
59
Tips on Caring for Your Lawn (Illustration M )
60
15 Service Intervals
60
16 Care and Servicing of Your Scarifier
61
Cleaning
61
Storage
61
Collapsing the Handle (Illustration A1 )
61
Transporting and Securing the Equipment
61
Maintenance of the Blade Shaft
61
Changing the Ribbed V-Belt
61
Servicing the Wheels
62
17 Servicing the Engine
62
Oil Change
62
Cleaning and Replacing the Air Filter (Illustration W )
63
Checking the Spark Plug (Illustration y )
63
Correct Winter Storage of the Engine (or When Not Used for a Long Period of Time)
63
18 Troubleshooting
64
Dutch
65
1 Verklaring Van Het Op de Machine Aangebrachte Typeplaatje
66
2 Inleiding
66
3 Verklaring Van de Symbolen
67
4 Gebruik Conform de Voorschriften
68
5 Algemene Veiligheidsvoorschriften Voor de Benzine Verticuteerder
68
Algemene Veiligheidsinstructies
68
Voorbereidende Maatregelen
69
Gebruik
69
Onderhoud en Opslag
71
6 Beschrijving Van de Componenten
72
Bovenste Deel Van de Duwboom Aanbouwen (Afbeelding C3 + E3 )
72
Montage Van de Kortsluitleiding (Afbeelding N1 )
72
Montage Van de Startstang (Afbeelding L1 )
72
7 Voorbereidende Werkzaamheden
72
Olie Bijvullen (Afbeelding Y1 )
73
Brandstof Invullen
73
8 Voor de Eerste Ingebruikname
73
9 Starten Van de Motor (Afbeelding S2 + A2 + E )
73
10 Uitschakelen Van de Motor (Afbeelding F + Y2 )
74
11 Stoppen in Geval Van Nood
74
12 Instellen Van de Verticuteerdiepte
74
Instelling (Afbeelding T2 + V2 + Z2 )
74
13 Grasopvanginrichting
74
Gebruik Met Grasopvangzak (Accessoire)
74
Opvangzak Aan de Verticuteerder Hangen (Afbeelding L2 + S1 )
75
Leegmaken Van de Opvangzak
75
Gebruik Zonder Opvangzak
75
14 Verticuteerbedrijf
75
Verticuteren Op Hellingen
75
Oliepeilcontrole
75
Controle Van de Bedrijfsveiligheid
75
Tijdelijke Beperkingen
76
Tips Voor de Verzorging Van Het Gazon (Afbeelding M )
76
15 Onderhoudsintervallen
76
16 Verzorging en Onderhoud Van de Verticuteerder
77
Reiniging
77
Opbergen
77
Neerklappen Van de Geleidestangen (Afbeelding A1 )
77
Transport en Opslag Van Het Apparaat
77
Onderhoud Van de Messenas
77
Vervangen Van de Poly-V-Belt
78
Onderhoud Van de Wielen
78
17 Onderhoud Van de Motor
78
Olie Wisselen
78
Schoonmaken Resp. Vervangen Van de Luchtfilter (Afbeelding W )
79
Controle Van de Bougie (Afbeelding y )
79
Overwinteren Van de Motor Volgens Voorschrift (of Bij Langdurige Stilstand)
79
18 Oorzaken Van Storingen en Het Verhelpen Daarvan
80
Русский
81
1 Описание Типовой Таблички На Корпусе Машины
82
2 Введение
82
3 Значение Символов
83
4 Надлежащая Эксплуатация
84
5 Общие Указания По Технике Безопасности Для Бензиновых Аэраторов
84
Общие Указания По Технике Безопасности
84
Подготовительные Работы
85
Эксплуатация
86
Техобслуживание И Хранение
88
6 Описание Частей Конструкции
89
7 Подготовительные Работы
89
Монтаж Верхней Части Ручки (Рис. C3 + E3 )
89
Монтаж Пускового Механизма (Рис. L1 )
89
Монтаж Кабеля Короткого Замыкания (Рис. N1 )
89
8 Перед Вводом В Эксплуатацию
89
Заливка Масла (Рис. Y1 )
90
Заливка Топлива
90
9 Запуск Двигателя (Рис. S2 + A2 + E )
90
10 Выключение Двигателя (Рис. F + Y2 )
91
11 Аварийное Выключение
91
12 Настройка Глубины Аэрации
91
Настройка (Рис. T2 + V2 + Z2 )
91
13 Травосборник
91
Работа С Травосборником (Комплектующие)
91
Fangsack am Vertikutierer Einhängen (Рис. L2 + S1 )
92
Опорожнение Травосборника
92
Работа Без Травосборника
92
14 Аэрация
92
Аэрация На Склонах
92
Проверка Уровня Масла
92
Проверка Безопасности В Эксплуатации
92
Ограничения По Времени
93
Советы По Уходу За Газоном (Рис. M )
93
15 Интервалы Техобслуживания
93
16 Уход И Техобслуживание Аэратора
94
Очистка
94
Хранение
94
Складывание Ручки (Рис. A1 )
94
Транспортировка И Закрепление Устройства
94
Техобслуживание Вала Режущего Механизма
95
Замена Поликлинового Ремня
95
Техобслуживание Колес
95
17 Техобслуживание Двигателя
96
Смена Масла
96
Очистка Или Замена Воздушного Фильтра (Рис. W )
96
Проверка Свечи Зажигания (Рис. y )
97
Хранение Двигателя В Зимний Период (Или В Случае Длительного Неиспользования)
97
18 Неисправности, Их Причины И Устранение
98
Advertisement
Advertisement
Related Products
Sabo 38-EV
Sabo 31-V EL
Sabo 35-V EL
Sabo 33-V ACCU
Sabo 36-ACCU
Sabo 36-EL
Sabo 32-EL
Sabo 45-220
Sabo 45-PRO E V PUSH
Sabo 45-PRO V
Sabo Categories
Lawn Mower
Lawn and Garden Equipment
Trimmer
Battery Charger
Blower
More Sabo Manuals
Login
Sign In
OR
Sign in with Facebook
Sign in with Google
Upload manual
Upload from disk
Upload from URL