Sign In
Upload
Manuals
Brands
Roland Manuals
Musical Instrument
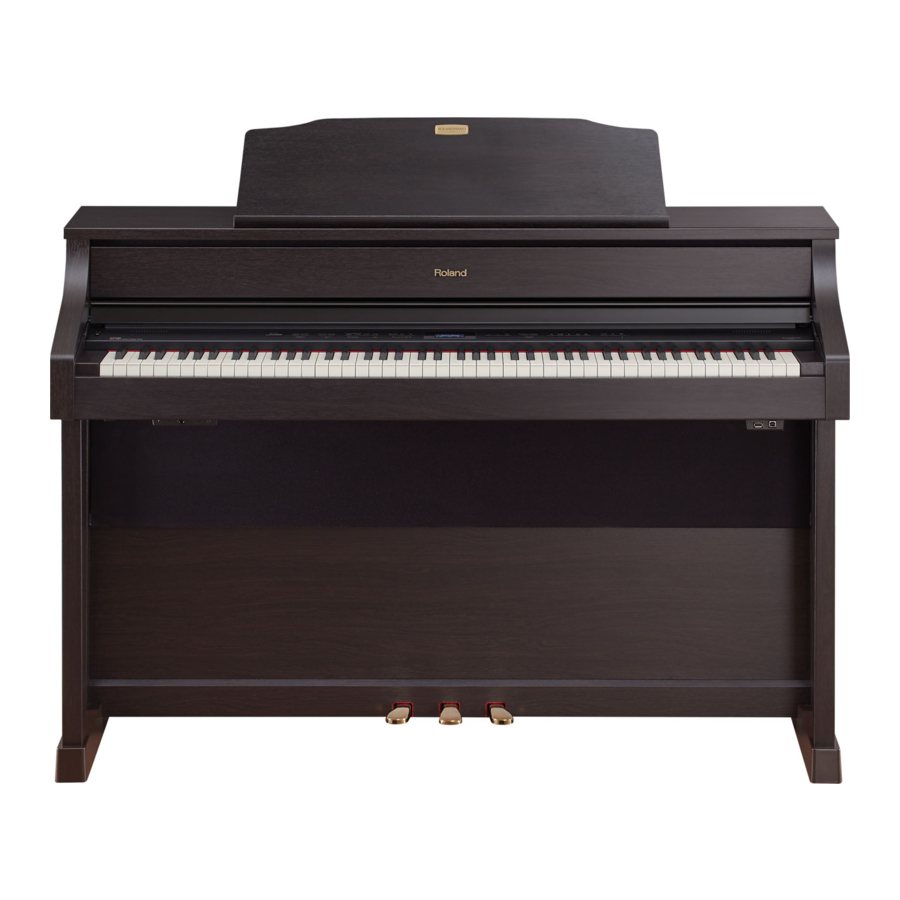
HP508
Roland HP508 Manuals
Manuals and User Guides for Roland HP508. We have
3
Roland HP508 manuals available for free PDF download: Owner's Manual, System Update
Roland HP508 Owner's Manual (122 pages)
Brand:
Roland
| Category:
Musical Instrument
| Size: 35 MB
Table of Contents
Performance Functions
1
Table of Contents
2
1 : Overview
5
Panel Descriptions
6
Top Panel
6
Rear Panel (Connecting Your Equipment)
8
Phones Jack
9
An Overview of the FA
10
Overall Structure
10
Synthesizer
10
Sequencer
10
Sampler
10
How the Sound Engine Is Structured
11
Tones
11
Studio Sets
12
About the Effects
13
About Memory
14
About the Sequencer
15
Songs
15
Tracks
15
About the Sampler
16
Getting Ready
17
Placing this Unit on a Stand
17
Turning the Power On/Off
19
Turning the Power on
19
Turning the Power off
19
Playing the Demo Songs
19
2 : Performing
21
Playing One Tone (Single Play)
22
Selecting a Tone
22
Selecting a Tone from a List
23
Playing Two Tones Together (Dual)
24
Changing the Tones
24
Playing Different Tones in the Right and Left Hands (Split)
25
Changing the Tones
25
Changing the Split Point
25
Playing Multiple Parts (Multi Part Play)
26
Viewing the Part Settings (PART VIEW Screen)
26
Selecting the Parts that Sound (Keyboard Switch)
27
Switching Studio Sets
27
Registering/Recalling Favorite Sounds (Favorites)
28
Registering a Sound as a Favorite
28
Recalling a Favorite
28
Registering/Recalling/Editing Favorites in the List
28
Changing the Keyboard Settings
29
Raising/Lowering the Key Range in Semitone Steps (Transpose)
29
Raising/Lowering the Key Range in Octaves (Octave Shift)
29
3 : Performance Functions
31
Playing Arpeggios
32
Using the Arpeggiator
32
Setting the Arpeggiator Tempo
32
Holding the Arpeggio (Hold)
32
Arpeggiator Settings
33
Importing a Computer SMF File into an Arpeggio Style
34
(Import SMF)
34
Creating an Arpeggio Style from a Song (Import Song)
34
Using Chord Memory
35
Performing with the Chord Memory Function
35
Chord Memory Settings
35
Performing with Rhythm Patterns
36
Selecting/Playing Rhythm Patterns
36
Changing the Tempo of the Rhythm Pattern
37
Saving a Rhythm Group
37
Importing SMF into a Rhythm Pattern
38
Creating a Rhythm Pattern from a Song
38
Modifying the Sound in Real Time
39
Using the SOUND MODIFY Knobs to Vary the Sound
39
Changing the Tonal Character of the Part (CUTOFF, RESONANCE)
39
Changing How the Volume will Vary of the Part
39
(Attack, Release)
39
Changing the Stereo Position of the Sound of the Part
39
(Pan)
39
Adjusting the Volume of the Part (LEVEL)
39
Adjusting the Level of the Low, MID, and High Frequencies (EQ)
39
Adjusting the Input Volume (INPUT LEVEL)
39
Applying Effects Conveniently (GLOBAL CONTROL)
40
Moving Your Hand to Vary the Pitch or Volume (D-BEAM Controller)
41
Changing the Pitch (Pitch Bend)
41
Applying Vibrato or Dynamics (Modulation)
41
Using an Assigned Function to Vary the Sound ([S1] [S2] Buttons)
41
Using a Pedal to Vary the Sound
42
Sustaining the Notes (Hold Pedal)
42
Adding Expression to Your Performance (Control Pedal)
42
Performing with a Microphone (Vocoder)
42
Using the Vocoder
42
Editing the Vocoder Settings
42
4 : Editing
43
Editing a Studio Set
44
Overall Settings for the Studio Set
44
Settings for each Part
44
Saving a Studio Set
45
Initializing a Studio Set (Studio Set Init)
45
Initializing a Part (Part Init)
45
Editing a Tone
46
Basic Procedure for Tone Edit
46
Supernatural Acoustic Tone (SN-A)
46
Supernatural Synth Tone (SN-S)
46
Supernatural Drum Kit (SN-D)
47
PCM Synth Tone (PCMS)
47
PCM Drum Kit (PCMD)
48
Saving a Tone/Drum Kit
48
Initializing a Tone (Tone Initialize)
48
Selecting the Partials that Sound (Partial Switch)
49
Selecting the Partials to Edit (Partial Select)
49
Initializing a Partial (Partial Initialize)
49
Copying a Partial (Partial Copy)
49
Editing a Pattern
50
Initializing a Pattern (Initialize)
50
Specifying the Time Signature and Length (Setup)
50
Specifying the Grid Scale (Scale)
50
Specifying the Note Type, Duration, and Loudness (Note Setup)
51
Entering Notes
51
Deleting Notes (Clear Step, Clear Note)
51
Saving the Pattern
51
Editing the Effects
52
Turning Effects On/Off
52
Editing the Effects of the Studio Set
53
Editing the Effects of the Tone
53
Editing the System Effects
54
5 : Sequencer (Creating Songs)
55
Playing Songs
56
Selecting and Playing Songs
56
Setting the Tempo of the Song
56
Looping the Song Playback
57
Recording the Song
58
Recording Workflow
58
Prepare for Recording
58
Realtime Recording
59
Selecting the Performance Data to Record (Recording Select)
60
Removing Unwanted Data During Recording
60
(Realtime Erase)
60
Auditioning Sounds or Phrases During Recording
60
(Rehearsal Function)
60
Step Recording
61
Canceling a Recording or Edit (Undo/Redo)
62
Editing the Song
63
Specifying the Sound Engine Played by each Track
63
Muting a Part's Performance (MUTE)
63
Sounding One Part by Itself (SOLO)
63
Edit Performance Data for Entire Tracks (Track Modify)
64
Basic Procedure for Track Modify
64
Correcting the Song's Timing (Quantize)
64
Erasing Unwanted Performance Data (Erase)
65
Deleting Unwanted Measures (Delete)
65
Copying Performance Data (Copy)
65
Inserting Blank Measures (Insert)
66
Transposing (Transpose)
66
Changing the Velocity (Change Velocity)
66
Changing the Duration of the Notes (Change Duration)
67
Moving Performance Data Forward or Backward
67
(Shift Clock)
67
Editing Individual Events of Performance Data (Microscope)
68
Selecting the Track to Edit / Viewing Specific Performance Data (View)
69
Inserting Performance Data (Create)
69
Erasing Performance Data (Erase)
69
Moving Performance Data (Move)
70
Copying/Pasting Performance Data (Copy/Paste)
70
Changing the Tempo During a Song
71
Changing the Time Signature During a Song
71
Adjusting the Pan and Volume Balance (Mixer)
72
Erasing the Song in the Temporary Area (Song Clear)
72
Assigning a Name to the Song (Song Name)
72
Specifying the Song's Time Signature (Time Signature)
73
Deleting a Song (Delete Song)
73
Saving/Exporting a Song
74
Save the Song
74
Exporting Tracks as Individual WAV Format Files (Multi-Track Export)
74
Exporting a Two-Channel MIX in WAV Format
75
Exporting the Song in SMF Format
75
Exporting Samples in WAV Format
76
Importing an SMF as a Song
76
6 : Sampler
77
Playing Samples
78
Selecting/Playing Samples
78
Switching Banks
78
Sampling
79
Sampling Procedure
79
Setting the Input Volume (Input Setting)
80
Moving/Copying a Sample (Clip Board)
80
Moving a Sample
80
Copying a Sample
80
Editing a Sample
81
Editing Procedure
81
Renaming the Sample (Rename)
81
Cutting Unwanted Regions from the Sample (Truncate)
81
Deleting a Sample (Delete)
81
Zooming the Sample Display (Zoom)
82
Auditioning the Edited Result (Preview)
82
Exporting the Sample in WAV Format (Export Sample)
82
Importing an Audio File (Sample Import)
82
Switching the Sample Information Display
82
(Change Information)
82
7 : Pads
83
Using the Pads
84
Specifying the Function of the Pads (PAD UTILITY)
84
Playing Samples (SAMPLE PAD)
84
Selecting Parts (PART SELECT)
84
Switching Part Mute (PART MUTE)
84
Switching the Soloed Part (PART SOLO)
84
Using the Pads as Numeric Keys (NUMERIC)
84
Selecting Partials and Turning Them On/Off
84
Partial Sw/Sel
84
Turning the Keyboard Switch On/Off (KBD SW)
85
8 : Daw
87
Connecting to a Computer Via USB
88
Installing the USB Driver
88
Making USB Driver Settings
88
Using the FA with DAW Software
89
Using the FA as a DAW Controller
89
Using the FA to Control DAW Software
89
Assigning Functions to Knobs and Buttons
90
Using the FA as a MIDI Keyboard
90
Playing the Fa's Sound Engine from DAW Software
91
Using the FA as an Audio Interface
91
Specifying the USB Audio Output
91
Saving the DAW CONTROL Settings
92
9 : Settings
93
Useful Functions
94
Basic Procedure for Utility Operations
94
Backing up User Data (Backup/Restore)
94
Backing up to an SD Card (Backup)
94
Returning Backup Data to the FA (Restore)
94
Importing a Studio Set or Tone (Import Studio Set/Tone)
95
Importing from Backup Data
95
Importing Tones Downloaded from the Axial Site
95
Restoring the Factory Settings (Factory Reset)
95
Initializing an SD Card (Format SD Card)
96
Backing-Up SD Card Data to a Computer
96
Transmitting the Temporary Area's Data to an External MIDI Device (Bulk Dump)
96
Settings for the Entire FA
97
Basic Procedure for System Settings
97
Saving the System Settings
97
System Parameter
97
About MIDI Connectors
102
Connection Examples
103
About the Wireless LAN Function
104
What Is Wireless LAN Function
104
Basic Connection Method (Connect by WPS)
104
Wireless LAN Function Settings
105
Status Indication (WIRELESS STATUS)
105
Connecting to a Wireless LAN Access Point that You Select (SELECT ACCESS POINT)
105
Other Settings (WIRELESS OPTIONS)
106
Checking the IP Address and MAC Address (WIRELESS INFORMATION)
106
10 : Appendix
107
About SD Cards
108
Chord Memory List
109
Block Diagram
111
Error Message List
112
Troubleshooting
113
MIDI Implementation Chart
118
Main Specifications
120
Advertisement
Roland HP508 Owner's Manual (68 pages)
Roland Digital Piano
Brand:
Roland
| Category:
Musical Instrument
| Size: 34 MB
Table of Contents
Important Safety Instructions
2
Using the Unit Safely
3
Important Notes
5
About the Ivory Feel Keyboard
6
Table of Contents
7
Look What You Can Do
8
Operation Guide
10
Twin Piano
10
Panel Descriptions
14
Before You Play
16
Setting up the Music Rest
16
Opening/Closing the Lid
16
Turning the Power On/Off
17
Performing
18
Performing with Various Sounds
18
Switching Tones
18
Performing with Two Layered Tones (Dual Play)
19
Playing Different Tones with the Right and Left Hands (Split Play)
20
Adjusting the Sound to Your Taste
22
Adding Reverberation to the Sound (Ambience)
22
Adjusting the Brightness of the Sound (Brilliance)
23
Adjusting the Keyboard Response (Key Touch)
23
Dividing the Keyboard for Two-Person Performance (Twin Piano)
24
Shifting the Pitch (Transpose)
25
Practicing
26
Practicing with the Metronome
26
Changing the Tempo
26
Changing the Time Signature
26
Adjusting the Metronome's Volume
27
Adding a Count-In to Synchronize Your Performance
27
Practicing with a Song
28
Selecting and Playing a Song
28
Playing Songs Consecutively (All Songs Play)
29
Adjusting the Volume Balance of the Song and the Keyboard Performance (Song Balance)
29
Adjusting a Song's Tempo for Easier Practicing
29
Practicing One Hand at a Time (Part Mute)
30
Repeatedly Practicing a Portion of a Song (AB Repeat)
31
Recording the Song You're Practicing
32
SMF Recording
32
Audio Recording
32
Overdubbing a Recorded Song
33
Recording a Performance You Play Along with a Song
35
SMF Recording
36
Converting a Song Recorded as an SMF to Audio
36
Audio Recording
36
Audio Recording
37
Transposing a Song for Easier Performance (Audio Transpose)
38
Audio Recording
38
Enjoying Karaoke with an Audio File (Center Cancel)
38
Burning an Audio Recording of a Song (WAV File) to a CD
39
Saving a Song with the Name You Specify
40
Renaming a Song
41
Personalizing Your Piano Sound (Piano Designer)
42
Making Detailed Adjustments to the Piano Sound
42
Convenient Functions
44
Adjusting the Brightness of the Display (Display Contrast)
44
Making the Power Automatically Turn off after a Time (Auto Off)
44
Retaining the Settings Even after Power-Off (Memory Backup)
44
Restoring the Factory Settings (Factory Reset)
45
Copying a Saved Song (Copy Song)
45
Deleting a Saved Song (Delete Song)
46
Initializing the Memory (Format Media)
46
Disabling the Buttons (Panel Lock)
47
About the Wireless LAN Function
47
Basic Connection Method (Connect by WPS)
47
Wireless LAN Function Settings
48
Status Indication
48
Connecting to a Wireless LAN Access Point that You Select (Select AP)
48
Other Settings (Option)
49
Various Settings (Function Mode)
50
Applying a Headphones 3D Ambience Effect to the Piano Sound (Headphones 3D Ambience)
50
Adjusting the Dual Play Volume Balance (Dual Balance)
50
Matching the Pitch with Other Instruments (Master Tuning)
50
Changing the Tuning Method (Temperament)
50
Specifying a Song's Tonic (Temperament Key)
50
Adjusting the Volume of an Audio Playback Device (Input Volume)
50
Playing Back an Audio File with Its Central Sound Minimized
51
Cancel)
51
Transposing an Audio File (Audio Transpose)
51
Specifying What the Transpose will Affect (Transpose Mode)
51
Changing the Pitch of the Tone in Octave Steps (Octave Shift)
51
Selecting the Format for Recording (Recording Mode)
51
Changing How the Pedal Effects Are Applied (Damper Pedal Part)
51
Changing How the Pedals Work (Center Pedal)
52
Preventing Doubled Notes When Connected to a Sequencer (Local Control)
52
MIDI Transmit Channel Settings (MIDI Transmit Channel)
52
Renaming a Song (Save Song)
52
Copying a Saved Song (Copy Song)
52
Deleting a Saved Song (Delete Song)
52
Initializing the Memory (Format Media)
52
Changing the USB Driver Settings (USB Driver)
52
Changing the USB Flash Drive Setting (USB Memory Mode)
53
Controlling Video Equipment (Visual Control Mode)
53
Specifying the Visual Control Channel (Visual Control Channel)
53
Wireless LAN Function Settings
54
Adjusting the Brightness of the Display (Display Contrast)
54
Specifying the Maximum Volume (Volume Limit)
54
Changing the Language Displayed in the Screen (Language)
54
Making the Power Automatically Turn off after a Time (Auto Off)
54
Storing Your Settings (Memory Backup)
54
Restoring the Factory Settings (Factory Reset)
54
Troubleshooting
55
Control
55
Tone List
58
Internal Song List
59
Main Specifications
60
Error Messages
61
Assembling
62
Index
64
Declaration of Conformity
66
Roland HP508 System Update (2 pages)
Brand:
Roland
| Category:
Musical Instrument
| Size: 0 MB
Table of Contents
How to Know the Version
1
Update History
1
Additional Functions
1
What You will Need to Update Your HP508
1
Cautions with the Update
1
Getting the Update File
2
Procedure for the Update
2
Advertisement
Advertisement
Related Products
Roland HP506
Roland HP504
Roland HP505
Roland HP503
Roland HP-5000S
Roland HP-5000SL
Roland HP550G
Roland HP 530
Roland HP 5700
Roland HP 555G
Roland Categories
Musical Instrument
Synthesizer
Recording Equipment
Drums
Electronic Keyboard
More Roland Manuals
Login
Sign In
OR
Sign in with Facebook
Sign in with Google
Upload manual
Upload from disk
Upload from URL