Sign In
Upload
Manuals
Brands
Quantum Manuals
Storage
Scalar 10K
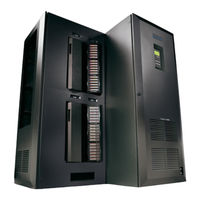
Quantum Scalar 10K Tape Storage Library Manuals
Manuals and User Guides for Quantum Scalar 10K Tape Storage Library. We have
5
Quantum Scalar 10K Tape Storage Library manuals available for free PDF download: User Manual, Reference Manual, Warranty, Release Note
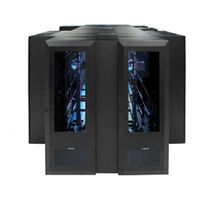
Quantum Scalar 10K User Manual (324 pages)
tape library
Brand:
Quantum
| Category:
Storage
| Size: 4 MB
Table of Contents
Table of Contents
3
About this Guide
26
Product Safety Statements
27
GS Mark (Germany Only)
27
About this Guide
27
Mechanical Locks
28
Main Power Switch
28
Barcode Scanner
28
Disposal of Electrical and Electronic Equipment
29
Product Model Number
29
Figure 1-1 Laser Safety Label
29
Explanation of Symbols and Notes
30
Table 1-1 Hazard Alert Message
30
Other Documents You Might Need
32
Getting more Information or Help
32
Getting more Information or Help
33
System Description
35
General Description
37
Capacity-On-Demand Configuration
38
Customer-Specific Configuration
38
Dual Aisle Configuration
38
Modules
39
Figure 2-2 Top View of Scalar 10K Modules
39
Accessor Module
40
Control Module
40
Expansion Module
40
Drive Module
41
Tower Module
41
Internal Components
42
Tape Drives
42
Figure 2-3 Module Cell Locations and Internal View of Library
43
Storage Assemblies
44
Figure 2-4 Storage Assembly
44
Figure 2-5 Five Storage Assemblies Per Rack (Top and Side View of EM)
45
Cartridge Accessor
46
Figure 2-6 Cartridge Accessor
46
Tape Cartridges
47
Insert/Eject Station
48
Figure 2-7 I/E Station Magazines
49
Connectivity
50
SAN Connectivity
50
Figure 2-8 Indirect Fibre Channel Attachment
51
SCSI Connectivity
52
Figure 2-9 Direct SCSI Attachment
52
Scalar DLC
53
Single Server
53
Redundant Servers
54
Figure 2-10 Scalar DLC Network Attachments
54
Figure 2-11 Scalar DLC Network Attachments with Redundant Robotics
55
Remote Library Management
56
Operation
57
Overview
59
Using the Operator Panel
59
Main Screen
60
Table 3-1 Operator Panel Indicators
61
Table 3-2 Operator Panel Push Buttons
61
Table 3-3 Insert/Eject Station Indicators
62
Starting the Scalar 10K
63
Shutting down the Scalar 10K
64
Normal Shutdown
64
Figure 3-2 Main Screen
64
Figure 3-3 Reboot Screen
64
Emergency Shutdown
65
Restarting the Scalar 10K
66
Using the Remote Management Unit
66
Supported Browsers
67
RMU Prerequisites
67
Setting up the RMU
68
Accessing and Logging into the RMU
69
Checking Status and General Information
70
Configuring Network Parameters
71
Configuring SNMP
71
Downloading the SNMP MIB File
72
Configuring RMU Users
73
Adding/Removing Users
73
Changing a Password
74
Configuring the Time and Date
74
Synchronizing with an NTP Server
75
Updating Firmware
75
Viewing Diagnostic Files
76
Using the Operator Panel (Via the RMU)
76
Viewing Logs
77
Getting Help
77
Rebooting the RMU
77
Figure 3-4 RMU Location (CM Front View-Service Door Open)
78
Menus and Commands
79
Overview
83
Using the Operator Panel
83
Operator Panel Buttons
83
Special Characters or Cursors
84
Help Button
85
Operator Intervention Message
85
Operator Panel Menu Tree Structure
86
Figure 4-1 Operator Panel Menu Tree Structure
86
Main Menu
87
Mode Dialog
88
Figure 4-3 Mode Dialog
88
Figure 4-4 Ready Screen
88
Figure 4-5 Not Ready Screen
89
Figure 4-6 Shutdown Screen
89
Table 4-1 Operating State and Mode
89
Figure 4-8 Library Submenu
90
Library Submenu
90
Status Menu
90
Status Menu
91
SCSI Submenu
91
Figure 4-7 Status Menu
91
Mode Parms Dialog
91
Element Address
92
Figure 4-12 Mixed-Media Screen
93
Mixed-Media Support
93
Figure 4-13 Parity Screen
95
Parity
95
Lcd
96
Reservations Dialog
97
Figure 4-17 System Dialog
99
System Dialog
99
Element Dialog
100
Figure 4-19 Continuation Screen
100
Figure 4-20 Element Dialog
100
Figure 4-21 Response Dialog
101
Figure 4-22 Continuation Screen
102
Figure 4-23 Continuation Screen
102
Figure 4-24 Logs Submenu
103
Logs Submenu
103
Command Log Dialog
104
Error Log Dialog
104
Figure 4-27 Print Log Screen
105
Figure 4-28 Response Screen
105
Print Log Dialog
105
Figure 4-29 Print Inventory Screen
106
Figure 4-30 Response Screen
106
Print Inventory Dialog
106
Firmware Submenu
107
Drives Submenu
108
Figure 4-32 Drives Submenu
108
Drive State Dialog
109
Figure 4-38 Element Dialog
113
Figure 4-39 Response Screen
113
Media Info Dialog
113
Drive Log Dialog
114
Firmware Dialog
115
Towers Submenu
116
Figure 4-43 Towers Submenu
116
IE Stations Dialog
117
Commands Menu
118
Park
118
Figure 4-45 Commands Menu
118
Figure 4-46 Response Dialog
118
Figure 4-47 Response Dialog
118
Move Submenu
119
Position Gripper Dialog
120
Position Scanner Dialog
122
Figure 4-55 Move Media Dialog
124
Move Media Dialog
124
Figure 4-56 Target Dialog
125
Figure 4-57 Response Screen
126
Figure 4-58 Response Screen
126
Inventory Dialog
127
Figure 4-61 Inventory Dialog
127
Figure 4-62 Ending Inventory Dialog
128
Insert/Eject Submenu
129
Figure 4-67 Response Screen
130
Insert Screen
130
Insert Clean Tape Dialog
131
Figure 4-70 Target Screen
132
Figure 4-71 Usage Screen
133
Figure 4-72 Response Screen
133
Eject Dialog
134
Figure 4-73 Eject Dialog
134
Figure 4-75 Response Screen
135
Eject Clean Tape Dialog
136
Figure 4-77 Eject Clean Tape Screen
137
Figure 4-78 Response Screen
137
Database Menu
138
Media Dialog
138
Figure 4-79 Database Menu
138
Element Dialog
139
Figure 4-82 Element Dialog
139
Config Dialog
141
Figure 4-84 Continuation Screen
141
Figure 4-85 Config Screen
141
Setup Menu
142
Library Submenu
142
Figure 4-111 Media Dialog
142
Figure 4-80 Media Dialog
142
Figure 4-86 Setup Menu
142
Figure 4-87 Library Submenu
142
Figure 4-9 SCSI Submenu
142
Figure 4-91 SCSI Submenu
142
Figure 4-88 Trace Submenu
143
Trace Submenu
143
SCSI Submenu
144
Target ID Dialog
145
Figure 4-93 Parity Dialog
146
Parity Dialog
146
Ports Dialog
147
Figure 4-95 Host Dialog
148
Host Dialog
148
Figure 4-96 Security Submenu
149
Security Submenu
149
Figure 4-97 Host Dialog
150
User Security
150
Figure 4-100 Invalid Password
151
Figure 4-101 Change Password Dialog
151
Figure 4-102 Password Changed Screen
151
Figure 4-99 Host Dialog
151
Figure 4-103 I/E Security
152
I/E Security
152
Figure 4-105 Change Password Dialog
153
Figure 4-106 Password Changed Screen
153
Figure 4-107 Security Is off Screen
153
Figure 4-108 Security Is on Screen
153
Reset Passwords
154
Media Dialog
155
Capacity Submenu
157
Figure 4-113 Storage Dialog
158
Storage Dialog
158
Figure 4-114 Enter Capacity Dialog
159
Figure 4-115 Enter Authorization Code Dialog
159
Figure 4-116 Acceptance Screen
159
Figure 4-117 Authorization Failed
160
Figure 4-118 RMU Submenu
160
RMU Submenu
160
Figure 4-119 Host Dialog
161
Host Dialog
161
IP Dialog
161
Advanced Dialog
162
Figure 4-121 more Submenu
162
Figure 4-122 Advanced Dialog
162
More Submenu
162
Figure 4-123 Inventory Dialog
164
Inventory Dialog
164
Drives Submenu
165
Figure 4-124 Drives Submenu
165
ID Dialog
166
Figure 4-127 Continuation Screen
167
Tape Alert Notification Dialog
169
Table 4-1 Tape Alerts
170
Tape Alert Notify Configuration Dialog
170
Logical Serial Number
172
Cleaning Submenu
172
IE Station Submenu
173
Drives Dialog
174
Figure 4-135 Drives Dialog
174
Figure 4-136 Media Dialog
175
Figure 4-137 Usage Dialog
175
Media Dialog
175
Figure 4-138 View Dialog
176
View Dialog
176
Utils Menu
177
Library Submenu
177
Figure 4-139 Utils Menu
177
Figure 4-140 Library Submenu
177
Figure 4-141 Screen Dialog
178
Screen Dialog
178
Figure 4-143 Password Dialog
179
Figure 4-144 Password Change Dialog
179
Figure 4-145 Invalid Password Dialog
179
Audio Dialog
180
Figure 4-146 Audio Dialog
180
Figure 4-147 Time Dialog
181
Time Dialog
181
Date Dialog
182
Snap Shot Screen
182
Figure 4-151 Lights Screen
183
Lights Dialog
183
Speed Dialog
183
Drives Submenu
184
Figure 4-152 Drives Submenu
184
Figure 4-153 Status Change Submenu
184
Status Change Submenu
184
Figure 4-154 Initialize Dialog
185
Figure 4-155 Command Complete Screen
185
Initialize Dialog
185
Activate Dialog
186
Figure 4-156 Activate Dialog
186
Figure 4-157 Activate Drive
186
Figure 4-158 Vary off Dialog
187
Vary off Dialog
187
Figure 4-159 Vary on Dialog
188
Vary on Dialog
188
Figure 4-160 Operations Submenu
189
Operations Submenu
189
Update Microcode Dialog
190
Figure 4-162 Starting Drive
191
Figure 4-163 Ending Drive
191
Clean Drives Dialog
192
Figure 4-166 Progress Screen
193
Figure 4-167 Response Screen
193
Unload Drives Dialog
194
Figure 4-169 Progress Dialog
195
Figure 4-170 Response Dialog
195
Dismount Drives Dialog
196
Figure 4-171 Starting Drive
196
Figure 4-172 Ending Drive
197
Figure 4-173 Progress Dialog
197
Figure 4-174 Response Dialog
197
Towers Submenu
198
Status Change Dialog
198
Figure 4-177 Tower Mode Change
199
Figure 4-178 Tower Return Dialog
199
Figure 4-179 Inventory Tower
199
Figure 4-180 Initialize Dialog
200
Figure 4-181 Command Complete
200
Figure 4-182 Inventory Tower
200
Initialize Dialog
200
Service Menu
201
Start Dialog
201
Figure 4-183 Service Menu
201
Figure 4-184 Preventive Maintenance Due Dialog
201
Figure 4-185 Confirm Change Dialog
202
Figure 4-186 Start Dialog with no Errors
202
Diags Submenu
203
Figure 4-187 Start Dialog with Errors
203
Figure 4-188 Diags Submenu
203
Accessor Submenu
204
Figure 4-189 Accessor Submenu
204
Figure 4-190 Move Dialog
205
Move Dialog
205
Step
206
Gripper Submenu
207
Trace
207
Get/Put Storage Dialog
208
Figure 4-199 Response Dialog
209
Get/Put Drives Dialog
211
Step Dialog
213
Figure 4-206 Scanner Submenu
214
Scanner Submenu
214
Test Dialog
214
Verify Dialog
214
Figure 4-207 Verify Dialog
215
Verify Dialog
215
Trigger Dialog
216
Fiducial Test Dialog
217
Figure 4-210 Tower Submenu
218
Figure 4-211 Home Dialog
218
Home Dialog
218
Tower Submenu
218
Figure 4-212 Tower Homing
219
Figure 4-213 Initialize Dialog
219
Figure 4-214 Command Complete
219
Figure 4-215 Wrong Tower Mode
219
Figure 4-216 Home Dialog
220
Figure 4-217 Position Tower
220
Step Dialog
220
DI/DO Submenu
221
Figure 4-218 Wrong Tower Mode
221
Figure 4-219 DI/DO Submenu
221
Figure 4-220 Loopback Dialog
221
Loopback Dialog
221
Figure 4-221 Response Dialog
222
Figure 4-222 Sensors Submenu
223
Sensors Submenu
223
Wrap Dialog
223
Figure 4-223 Wrap Dialog
224
Figure 4-224 Response Dialog
224
Wrap Dialog
224
Real Time
225
Figure 4-233 Locks Dialog
228
Locks Dialog
228
Figure 4-234 Self \Test Dialog
229
Self Test Dialog
229
Figure 4-236 P/S Submenu
230
Figure 4-237 Library Power
230
Library Power
230
P/S Submenu
230
UDS Power
231
Library Submenu
232
Storage Move
232
Corner Moves
233
Teach Submenu
234
Figure 4-242 Teach Submenu
234
Figure 4-243 Teach New Dialog
234
New Dialog
234
Figure 4-244 Progress Screen
235
Figure 4-245 Response Screen
235
Figure 4-246 Failed Screen
235
Continue Dialog
236
Figure 4-247 Continue Dialog
236
Current Dialog
237
Figure 4-250 Failed Screen
237
Figure 4-251 Teach Current Dialog
237
Figure 4-254 Response Screen
239
Figure 4-255 Failed Screen
239
Bays Dialog
240
Figure 4-256 Bays Dialog
240
Figure 4-257 Continue Dialog
240
Figure 4-259 Response Screen
241
Figure 4-260 Failed Screen
241
Drive Dialog
242
Figure 4-261 Drive Dialog
242
Figure 4-262 Continuation Screen
242
Figure 4-263 Progress Screen
242
Figure 4-264 Response Screen
243
Figure 4-265 Failed Screen
243
Figure 4-266 Gripper Dialog
244
Gripper Dialog
244
Figure 4-269 Teach Marginal Screen
245
Figure 4-270 Failed Screen
245
Tape Dialog
246
SAC Dialog
246
Figure 4-271 Teach Tape Dialog
246
Demo Dialog
247
Figure 4-274 Demo Dialog
247
Verify Submenu
249
All Dialog
249
Figure 4-277 Verify Submenu
249
Figure 4-278 All Dialog
249
Report Dialog
250
Advanced Submenu
250
Figure 4-279 Report Screen
250
Figure 4-280 Response Screen
250
Figure 4-281 Advanced Submenu
250
About Screen
251
Figure 4-282 about Screen
251
Advertisement
Quantum Scalar 10K Reference Manual (304 pages)
Quantum Scalar 1000: Release Note
Brand:
Quantum
| Category:
Software
| Size: 5 MB
Table of Contents
Reference Guide
2
Table of Contents
3
1 About this Guide and Your Product
17
Explanation of Symbols and Notes
17
Other Documents You Might Need
17
Getting more Information or Help
18
2 Description
19
System Description
19
Logical Library Concepts
20
Figure 1 Client Connection
20
Figure 2 Physical Libraries Connected to the Scalar DLC
20
PC System Requirements
21
Figure 3 Partitions and Logical Libraries
21
Figure 4 Clients and Logical Libraries
21
Redundant Solution Requirements
22
Table 1 SCSI and Fibre Channel Adapters
22
Tape Library Requirements
23
Remote Browser Requirements
23
Table 2 Required Firmware Version
23
Operating Mode
23
Graphical User Interface
24
Command Line Interface
24
Service and Maintenance Alerts
24
3 Configuration
25
Autostart Installation
25
Scalar DLC Management GUI
25
Resizing Windows and Panes
26
Figure 5 about Scalar DLC
26
Table 3 Scalar DLC Service State
26
Browser Pre-Installation
27
Table 4 Scalar DLC Home
27
Figure 6 ADIC Scalar DLC Home Page
28
Figure 7 Tools and Utilities Page
29
Launch the Management GUI from a Browser
30
Figure 8 Scalar DLC GUI Logon Dialog
30
Table 5 Management GUI Default Users
30
Java Plug-In
30
Launch the Management GUI as an Application
31
Figure 9 Host Connection Window
31
Firewall and Proxy Issues
31
Configuration
32
Figure 10 Configuration Window
32
Table 6 Object Name Limitations
32
Automatic Configuration
33
Advanced Configuration
34
Create Partitions
34
Manual Configuration
34
Rescan Scsi Bus
34
Assign Partitions to a Library
35
Create a Logical Library
35
Create Client
35
Assign Drives to Cartridges
36
Initialize the Logical Library
36
Inserting New Media
36
Create Clean Pool
37
Create Scratch Pool
37
Mark Cleaning Cartridges
37
Configure Aliasing
38
Configure Clean Manager
38
Reserve Drives and Cartridges
38
Additional Configuration
39
Configure Additional Libraries
39
Define Drives and Cartridges
39
Configure Email Notifications
40
Update Atac Settings
40
Installing New Slots
41
Front Door
42
I/E Station Door
42
Operating the Tape Library Doors
42
Backup Database Manually
43
Managing the Database
43
Schedule Database Backup
43
Schedule Database Compact
43
Schedule Transaction Logs Backup
43
Set up Database Backup Mode
43
Archive Database
44
Compact Database Manually
44
Restore Database from Backup
44
Restore Database from File
44
4 Management GUI
45
Main Menu Bar
46
Figure 11 Management GUI
46
Figure 12 Main Menu Bar
46
Connection
47
Screen Refresh Icon
47
Create Configuration
48
Table 7 Wizard Buttons
48
Wizards
48
Figure 13 Select Physical Library
49
Figure 14 Select Logical Library
49
Figure 15 Select Configuration Method
50
Operation
50
Figure 16 Select Media
51
Figure 17 Select Library Prototype
51
Figure 18 Select Mailbox
52
Figure 19 Select Client
52
Figure 20 Configuration Summary
53
Assign Partitions
54
Figure 21 Configuration Complete
54
Figure 22 Partitions Contained
54
Figure 23 Partitions Not Contained
55
Figure 24 Partition List
55
Create Ticket
56
Figure 25 Partitions Summary
56
Figure 26 Ticket Registration
57
Figure 27 Ticket Priority and Description
57
Figure 28 Ticket Category
58
Figure 29 Ticket Device, Library, and Client
59
Figure 30 Ticket Service Code
60
Create Rule
61
Figure 31 Ticket Summary
61
Table 8 Event Specification
61
Figure 32 Rule Name
66
Figure 33 Rule Event
66
Figure 34 Rule Event Location
67
Figure 35 Rule Notification Sent Dialog
67
Figure 36 Rule Notification Receiver
68
Figure 37 Rule Email Destination
69
Figure 38 Rule Email
69
Extended Service
70
Figure 39 Rule Summary
70
Figure 40 Registration Information
71
Figure 41 Connect to RMU
72
Figure 42 View Log: Standard Mode
73
View Log
73
Figure 43 View Log: Advanced Mode
74
Figure 44 Log Message Details
75
Figure 45 Scalar DLC Software Version Code
76
Help
76
GUI Tabs
77
Figure 46 GUI Tabs: Working Areas
77
Table 9 Tree Objects
78
Table 10 Logical Library States
79
Table 11 Physical Library States
80
Table 12 Robot States
80
Table 13 Partition Class and State
81
Table 14 Storage Slots
81
Table 15 Mailbox Slots
82
Table 16 Drive Slots
83
Table 17 Element Properties: Icons
83
Table 18 Operational Buttons
84
Tabs Structure
84
GUI Log
85
Figure 47 GUI Log
85
5 Library Tab
87
Figure 48 Library Controller
88
Library
89
Library Properties
89
Figure 49 Library Properties
89
Library Diagnostics
90
Figure 50 Library Diagnostics
90
Figure 51 Stop Current Test
91
Figure 52 Random Move: Select Media Type
91
Random Move Test
91
Cartridges
92
Figure 53 Random Mount: Select Media Type
92
Figure 54 Cartridges
92
Figure 55 Multiple Mailbox Selection
93
Cartridge State
94
Table 19 Cartridge States
94
Home Position
95
Figure 56 Move Cartridge to Destination
96
Move Cartridge to Element
96
Drag and Drop Operations
97
Random Mount Test
92
Pool
98
Figure 57 Pool
98
Icon Operation
98
Mailbox
100
Figure 58 Mailbox
100
Drives
101
Figure 59 Drives
101
6 Configuration Tab
103
Logical Tab
104
Figure 60 Logical Controller
104
Figure 61 Logical Library Properties
105
Library
105
Figure 62 Logical Library Resources
107
Figure 63 Logical Library Statistics
108
Figure 64 Logical Partition
109
Partition
109
Cartridge
110
Figure 65 Inventory Elements Range
110
Figure 66 Normal Cartridge
110
Figure 67 Foreign Cartridge
112
Figure 68 Pool
113
Pool
113
Assign Media to Pool
114
Figure 69 Assign/Unassign Cartridges to Pool
114
Figure 70 Mailbox
115
Mailbox
115
Figure 71 Assign/Unassign Slots to Mailbox
116
Figure 72 Storage Slot
117
Storage Slot
117
Figure 73 Mailbox Slot
118
Mailbox Slot
118
Drive
120
Figure 74 Drive Properties
120
Figure 75 Drive Statistics
122
Create Library
123
Figure 76 Logical Library Creation
123
Assign Partition
124
Figure 77 Partition Assign
124
Create Pool
125
Figure 78 Pool Creation
125
Create Mailbox
126
Figure 79 Mailbox Creation
126
Physical Tab
128
Figure 80 Physical Controller
128
Figure 81 Physical Library Properties
129
Library
129
Figure 82 Media Rules
131
Apply Media Rule
132
Figure 83 Media Rule Creation
132
Figure 84 Apply Media Rule
133
Figure 85 Physical Library Statistics
133
Figure 86 Robot Online
134
Robot
134
Figure 87 Robot Offline
135
Partition
135
Figure 88 Physical Partition
136
Icon Operation
136
Offline Cartridge
137
Figure 89 Offline Cartridges
138
Figure 90 Offline Cartridge
139
Figure 91 Physical Storage Slots
140
Storage Slots
140
Figure 92 Physical Mailboxes
141
Mailboxes
141
Drives
142
Figure 93 Physical Drives
142
Create Partition
143
Figure 94 Partition Creation
143
Users Tab
144
Table 20 User Access Level
144
Table 21 User Rights
145
Figure 95 User Controller
146
Figure 96 User
147
User
147
Create User
148
Figure 97 User Creation
148
Clients Tab
150
Das
151
DAS Client
151
Figure 98 das Interface Pane
151
Figure 99 das Client Properties
152
Figure 100 das Client Drives
154
Figure 101 Define Drives
156
Figure 102 das Client Volsers
157
Figure 103 Reserve/Define Volser Range
158
Figure 104 das Client Aliasing
159
Create das Client
160
Figure 105 das Client Creation
160
Scsi
162
Figure 106 SCSI Pane
162
SCSI Client
163
Figure 107 SCSI Client Properties
164
Figure 108 SCSI Client Mode
166
Figure 109 SCSI Client Drives
168
Figure 110 SCSI Client I/E Slots
169
Figure 111 SCSI Client Storages
170
Create SCSI Client
171
Figure 112 SCSI Client Creation Properties
171
Robar
172
Figure 113 ROBAR Interface Pane
172
ROBAR Client
174
Figure 114 ROBAR Client Properties
174
Create ROBAR Client
176
Figure 115 ROBAR Client Creation
176
SCSI Target Tab
178
Table 22 SCSI Target Icons
178
Table 23 SCSI and Fibre Channel Adapter Target-LUN Settings
179
Figure 116 Port: SCSI
180
Port
180
Figure 117 Port: Fibre Channel
181
Figure 118 SCSI Target
182
Target
182
Figure 119 SCSI LUN
184
Icon Operation
184
Logical Unit Number (LUN)
184
Create Target
185
Figure 120 SCSI Target Creation
185
Create LUN
186
Figure 121 SCSI LUN Creation
186
7 Events Tab
189
Queue Tab
190
Figure 122 Queue Tab
190
Monitoring Tab
192
Figure 123 Monitoring Tab
192
Table 24 Event Classes
192
Table 25 Event Data
193
Acknowledge Tab
194
Figure 124 Acknowledge Tab
194
History Tab
195
Rules Tab
195
Figure 125 History Tab
195
Figure 126 Rules Tab
196
8 Service Tab
199
Logs Tab
199
Command Log
200
Figure 127 Command Log
200
Figure 128 Email Data
201
Send Log Via Email
201
Error Log
202
Figure 129 Error Log
202
Diagnostic Tab
203
Figure 130 Diagnostic Tab
203
Figure 131 Diagnostic Description
204
ATAC Calls Tab
205
Figure 132 ATAC Calls Tab
205
Figure 133 Start Repair
207
Figure 134 Repair
208
Figure 135 Fixed Problem Confirmation
209
Figure 136 Not Fixed Problem Confirmation
209
Figure 137 Repair History
210
Operator Panel Tab
211
Figure 138 Operator Panel Tab for the Scalar 10K
211
Figure 139 Operator Panel Tab for the Scalar 1000
213
Cluster Tab
214
Figure 140 Cluster Tab
214
SNMP Tab
215
Agents
216
Figure 141 SNMP Agents
216
Traps
217
Figure 142 SNMP Service Configuration: Trap Destination
218
Security
219
Figure 143 SNMP Security
219
Figure 144 SNMP Service Configuration: Security
220
9 Tools and Utilities
221
Database Tool
222
Figure 145 Log on Dialog
222
Operation
222
Database Backup
223
Figure 146 Database Backup
223
Figure 147 Backup Schedule Dialog
224
Extended Mode
225
Figure 148 Database Extended Mode Dialog
225
Figure 149 Backup Log Schedule Dialog
226
Database Compact
228
Figure 150 Database Compact Dialog
228
Figure 151 Compact Schedule Dialog
229
Database Restore
230
Figure 152 Database Restore Dialog (by Backup)
230
Figure 153 Database Restore Dialog (Restore from Device)
231
Database Save
232
Figure 154 Database Save Dialog
232
Table 26 Database Archive
232
SCSI Target Port Tool
233
Figure 155 SCSI Target Port Tool
233
Figure 156 Advanced Port Settings
234
Parameter Operation
234
Cluster Configurator Tool
235
Figure 157 Cluster Configuration Utility: no Configuration
235
Figure 158 Cluster Configuration Utility: Configuration Complete
235
Problem Report Tool
236
Figure 159 Problem Report Tool
236
Log Viewer Utility
237
Figure 160 Log Viewer Main Window
237
Figure 161 Log Viewer: Command Tracking
238
Figure 162 View Event
238
Table 27 Log Viewer Operations
239
Figure 163 Result Description
240
Figure 164 Search
240
Figure 165 Goto Event
240
Figure 166 Logging Options
240
Figure 167 Filtering Options
241
Figure 168 Viewing Options
241
Trace Manager Utility
242
Figure 169 Trace Manager Main Window
242
Figure 170 Group Level
243
Figure 171 Class Level
243
Figure 172 Add Object
244
Figure 173 Add Existing Object
244
Figure 174 Object Level
244
Figure 175 Start Tracing
245
Figure 176 Tracing Options
245
Trace Viewer Utility
246
Figure 177 Trace Viewer Main Window
246
Figure 178 View Trace Record
247
Scalar DLC Software Licensing
248
Standard License
248
Figure 179 Licensing Dialog
248
Figure 180 about License
249
Figure 181 License Request File
249
Figure 182 Licensing Review
250
Figure 183 Send License Via Email
251
Figure 184 Licensing before Installation
251
Figure 185 Authorization String
252
Figure 186 Time-Based License
252
Installing License
252
Cluster License
253
Figure 187 Finishing License
253
Application Notes
255
Glossary
255
Table 28 Terms
255
Element Addressing
260
Figure 188 Element Addressing (Single-Aisle Library)
260
Table 29 Element Mapping (Single-Aisle Libraries)
260
Application Notes
261
Figure 189 Element Addressing (Dual-Aisle Library)
261
Table 30 Element Mapping (Dual-Aisle Libraries)
261
Media Types
262
Table 31 Media Types
262
Storage Types
263
Mailbox Types
264
Table 32 Storage Types
264
Table 33 Mailbox Types
264
Drive Types
265
Table 34 Drive Types
266
Error Codes
267
Table 35 Error Codes
267
Quantum Scalar 10K Reference Manual (98 pages)
Intelligent Library
Brand:
Quantum
| Category:
Storage
| Size: 0 MB
Table of Contents
Table of Contents
3
1 About this Guide and Your Product
5
Explanation of Symbols and Notes
5
Other Documents You Might Need
5
Contact Information
6
Getting more Information or Help
6
2 Understanding SMI-S, CIM, and MOF
7
Managing Sans with SMI-S
7
Your Library, SMI-S, and CIM
8
Understanding CIM
8
WBEM Initiative
8
Unified Modeling Language
8
Understanding MOF
9
3 CIM Profiles and Subprofiles
11
Server Profile, Version 1.2
11
Storage Library Profile, Version 1.2
11
Storage Library Subprofiles
13
Library Capacity Subprofile
13
Software Subprofile
13
Location Subprofile
13
Access Points Subprofile
13
Limited Access Port Subprofile
13
Physical Package Subprofile
13
Fibre Channel Target Port Subprofile
13
Element Counting Subprofile
14
4 Service Discovery and CIM Indications
15
Setting up Authentication and Privacy
15
Enabling the CIM Server
15
CIM Clients
15
Discovering the CIM Server
16
Using CIM Indications
17
A MOF Files
21
MOF File for the Powervault ML6000
21
B References
39
Web Resources
39
CIM-XML Tools
39
C SMI-S Common Protocol Interface Specification37
41
Resources
41
Web
41
Notes and Issues
41
Overview
41
Architecture
42
Requirements
43
General Purpose SMI-S Server
43
Overview
43
Slp
43
Communication Interface
43
Security Considerations
43
Schema Considerations
43
Profiles
43
Server Profile Content
43
Storage Library Profile Content
54
Fibre Channel Blade Support
81
LUN Mapping (EVPS)
86
Advertisement
Quantum Scalar 10K Warranty (7 pages)
Quantum DX100: Supplementary Guide
Brand:
Quantum
| Category:
Storage
| Size: 0 MB
Table of Contents
End User Warranty Periods
1
Limited Warranty
2
Claim Process
2
Fastexchange: Faststor1, Faststor 2, and Scalar 24 Product Lines
3
Guardian One-Year On-Site: DX3000, DX5000, DPM5500 Warranty Claims
3
End User Hardware Limited Warranty
4
Product Warranty Start Date
4
Repaired or Rapid Exchange³ Warranty
4
Warranty Limitations
4
Disclaimer of Warranties
4
Limitation of Liability
4
End User Software Limited Warranty
5
Term of Warranty
5
Warranty Limitations
5
Disclaimer of Warranties
5
Limitation of Liability
5
Index of FOSS Licenses
6
Quantum Scalar 10K Release Note (7 pages)
Quantum Scalar 10K: Release Note
Brand:
Quantum
| Category:
Storage
| Size: 0 MB
Table of Contents
Table of Contents
1
Purpose of this Release
1
New Features and Enhancements
2
Compatibility Matrix
2
Resolved Issues
3
Known Issues
5
Documentation
6
Contacting Quantum
7
Advertisement
Related Products
Quantum FastStor 1
Quantum Scalar 100
Quantum Scalar 1000
Quantum Atlas 10K II
Quantum Atlas 10K III
Quantum Scalar 50
Quantum Scalar i2000
Quantum Scalar 218
Quantum Scalar 218FC
Quantum Scalar i80
Quantum Categories
Storage
Wheelchair
Network Hardware
Wireless Access Point
Controller
More Quantum Manuals
Login
Sign In
OR
Sign in with Facebook
Sign in with Google
Upload manual
Upload from disk
Upload from URL