Sign In
Upload
Manuals
Brands
Pioneer Manuals
Car Amplifier
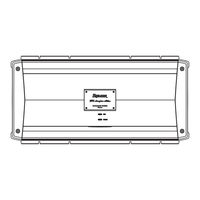
PRS-D2000SPL - Premier Amplifier
Pioneer PRS-D2000SPL - Premier Amplifier Manuals
Manuals and User Guides for Pioneer PRS-D2000SPL - Premier Amplifier. We have
4
Pioneer PRS-D2000SPL - Premier Amplifier manuals available for free PDF download: Owner's Manual, Service Manual
Pioneer PRS-D2000SPL - Premier Amplifier Owner's Manual (128 pages)
CLASS D MONO AMPLIFIER
Brand:
Pioneer
| Category:
Amplifier
| Size: 4.58 MB
Table of Contents
2
English
2
Before Using This Product
2
Product Registration
2
Table of Contents
3
About This Product
3
Caution
3
In Case of Trouble
3
Warning
4
Setting the Unit
4
MODE SELECT Switch
4
Bass Boost Frequency Control
4
Bass Boost Level Control
4
Terminal Cover
4
Cut Off Frequency Control for LPF
5
Gain Control
5
BFC (Beat Frequency Control) Switch
5
HEAT Indicator
5
PROTECT Indicator
5
Power Indicator
5
Subsonic Select Switch
6
Setting the Gain Properly
7
Connecting the Unit
8
Connection Diagram
9
Solderless Terminal Connections
9
Connecting the Speaker Output Terminals
10
Connecting the Power Terminal
11
Setting the Gain for Synced Amplifier
11
Connecting the Speaker Wires
16
Installation
16
Attaching the Bass Boost Remote Control
17
Example of Installation On the Floor Mat or On the Chassis
17
Replacing the Terminal Cover
17
Changing the Direction of the Badge
18
Additional Information
18
Troubleshooting
19
Specifications
20
Español
20
Antes De Usar Este Producto
21
Advertencia
21
En Caso De Desperfectos
21
Precaucion
21
Sobre Este Producto
22
Ajuste De Esta Unidad
22
Interruptor MODE SELECT
22
Control De La Frecuencia De Refuerzo De Graves
22
Control De Nivel De Refuerzo De Los Graves
22
Cubierta De Terminales
22
Control De Frecuencia De Corte Para LPF
23
Control De Ganancia
23
Interruptor BFC (Control De La Frecuencia De Batido)
23
Indicador HEAT
23
Indicador PROTECT
23
Indicador De Alimentación
23
Interruptor Selector Subsónico
24
Configuración Apropiada De La Ganancia
25
Conexión De La Unidad
26
Diagrama De Conexión
27
Conexiones De Terminales Sin Soldadura
27
Conexión Del Terminal De Salida De Altavoz
28
Conexión Del Terminal De Alimentación
29
Ajuste De La Ganancia Del Amplificador Sincronizado
29
Conexión De Los Cables De Altavoces
34
Instalación
34
Instalación Del Control Remoto De Intensificación De Los Graves
35
Ejemplo De Instalación En La Alfombra Del Piso O En El Chasis
35
Recolocación De La Cubierta De Terminales
35
Cambio De La Dirección De La Placa De Identificación
36
Información Adicional
36
Localización Y Solución De Problemas
37
Especificaciones
38
Deutsch
38
Vor Gebrauch Dieses Produkts
39
IM Störungsfall
39
Vorsicht
39
Warnung
39
Über Dieses Produkt
40
Einstellen Dieses Geräts
40
MODE Select-Schalter
40
Bassverstärkungs-Frequenzregler
40
Steuerung Des Bassverstärkungspegels
40
Anschlussabdeckung
40
Ausschaltfrequenz-Regelung Für LPF
41
Verstärkungsregelung
41
Interferenzschutzschalter (BFC)
41
Hitze-Anzeige (HEAT)
41
Schutzanzeige (PROTECT)
41
Subsonic-Wahlschalter
42
Richtige Einstellung Der Verstärkung
43
Anschluss Der Einheit
44
Anschlussschema
45
Lötfreie Verbindungen
45
Anschluss Der Lautsprecher-Ausgang-Klemmen
46
Anschluss Der Stromversorgung
47
Einstellen Der Verstärkung Für Verstärkersynchronisierung
47
Anschließen Der Lautsprecherkabel
52
Einbau
52
Befestigen Der Fernbedienung Für Die Bassverstärkung
53
Beispiel Eines Einbaus Auf Einer Bodenmatte Oder Auf Dem Rahmen
53
Wiederanbringen Der Anschlussabdeckung
53
Ändern Der Ausrichtung Der Plakette
54
Zusätzliche Informationen
54
Fehlersuche
55
Technische Daten
56
Français
57
Attention
57
En Cas D'anomalie
57
Précaution
57
Quelques Mots Concernant Cet Appareil
58
Réglage De L'appareil
58
Commutateur MODE SELECT
58
Commande De Fréquence De L'accentuation Des Graves
58
Commande Du Niveau D'accentuation Des Graves
58
Couvre-Bornes
58
Commande De La Fréquence De Coupure Pour LPF
59
Commande Du Gain
59
Interrupteur BFC (Commande De Fréquence De Battement)
59
Témoin HEAT
59
Témoin PROTECT
59
Témoin D'alimentation
59
Sélecteur Infrasonore
60
Réglage Correct Du Gain
61
Raccordement De L'appareil
62
Schéma De Raccordement
63
Prise De Connexion Sans Soudure
63
Raccordement Des Bornes De Sortie Vers Les Haut-Parleurs
64
Raccordement De La Borne D'alimentation
65
Réglage Du Gain De L'amplificateur Associé
65
Connexion Des Câbles Des Haut-Parleurs
70
Installation
70
Fixation De La Télécommande D'accentuation Des Graves
71
Exemple D'installation Sur Le Tapis De Sol Ou Sur Le Châssis
71
Remise En Place Du Couvre-Bornes
71
Changement De La Direction De L'étiquette Signalétique
72
Informations Complémentaires
72
Guide De Dépannage
73
Caractéristiques Techniques
74
Italiano
74
Prima DI Usare Questo Prodotto
74
Registrazione Del Prodotto
75
In Caso DI Difficotà
75
A Proposito Del Prodotto
75
Precauzione
75
Attenzione
76
Regolazione DI Questa Unità
76
Commutatore MODE SELECT
76
Comando DI Selezione Della Frequenza Per L'espansione Dei Bassi
76
Controllo Del Livello DI Potenza Dei Bassi
76
Coperchio Dei Terminali
76
Commando Della Soglia Della Frequenza DI Taglio Per LPF
77
Comando Del Guadagno
77
Selettore BFC (Beat Frequency Control)
77
Indicatore HEAT
77
Indicatore PROTECT
77
Indicatore Dell'alimentazione
77
Interruttore DI Selezione Subsonica
78
Regolazione Corretta Del Guadagno
79
Come Collegare L'unità
80
Schema DI Collegamento
81
Collegamenti Senza Saldatura Ai Terminali
81
Come Collegare Il Terminale DI Uscita Degli Altoparlanti
82
Come Collegare Il Terminale Dell'alimentazione
83
Regolazione Del Guadagno Dell'amplificatore Sincronizzato
83
Collegamento Dei Cavi D'altoparlanti
88
Installazione
88
Fissaggio Del Telecomando DI Potenziamento Dei Bassi
89
Esempio Dell'installazione Sul Pavimento Oppure Sullo Chassis
89
Riapplicazione Del Coperchio Dei Terminali
89
Cambio DI Orientamento Dell'etichetta
90
Informazioni Aggiuntive
90
Risoluzione Dei Problemi
91
Caratteristiche
92
Dutch
92
Alvorens Gebruik
93
Bij Problemen
93
Over Dit Product
93
Waarschuwing
94
Instellen Van Dit Toestel
94
MODE SELECT Schakelaar
94
Frequentieregelaar Van Het Versterkingsniveau
94
Bass Boost Niveauregeling
94
Aansluitingenafdekking
94
Regelaar Voor Drempelfrequentie Voor LPF
95
Versterkingsregelaar
95
BFC (Beat Frequency Control) Schakelaar
95
HEAT Indicator
95
PROTECT Indicator
95
Subsonic Keuzetoets
96
Correct Instellen Van De Gain
96
(Extra Versterking)
97
Aansluiten Van Het Toestel
98
Aansluitschema
99
Aansluitingen Zonder Solderen
99
Verbinden Van De Luidsprekeruitgangsaansluitingen
100
Aansluiten Van Het Spanningsaansluitpunt
101
Instellen Van De Versterking Voor Een Gesynchroniseerde Versterker
101
Aansluiten Van De Luidsprekerdraden
106
Installatie
106
Bevestigen Van De Bass Boost Afstandsbediening
107
Voorbeeld Van Installatie Op De Vloermat of Op Het Chassis
107
Terugzetten Van De Aansluitingenafdekking
107
Omdraaien Van Het Embleem
108
Aanvullende Informatie
108
Oplossen Van Problemen
109
Technische Gegevens
110
Unknown
111
Êâ„Ëòú‡ˆËfl Ëá‰Âîëfl
111
Ñâèòú'ëfl ' ÒÎÛ˜‡Â 'Óáìëíìó'âìëfl ÔÓ·ÎÂÏ
111
ÀìùóχˆËfl Ó ‰‡ÌÌÓÏ ÛÒÚÓÈÒÚ'Â
111
Éëíéêéüçé
111
Èêöñìèêöüñöçàö
111
Íòôîû‡Ú‡ˆËë ‰‡Ììó„Ó ÛòúÓèòú
112
LJÒúÓèí‡ ÛÒÚÓÈÒÚ
112
ÈâÂíî˛˜‡Úâî¸ Çõåéê Êöüàåä
112
Êâ„ÛîëÓ'‡Ìëâ ˜‡ÒÚÓÚ˚ ÔÓ‰˙Âχ Ìëáíëı ˜‡ÒÚÓÚ
112
Êâ„ÛîëÓ'‡Ìëâ ÛÓ'ìfl ÔÓ‰˙Âχ Ìëáíëı ˜‡ÒÚÓÚ
112
Ä˚¯Í
112
ÄóìúÓî¸ Ô‰ÂθÌÓÈ ˜‡ÒÚÓÚ˚ ‰Îfl LPF (ÙËθڇ Ìëêìëı ˜‡ÒÚÓÚ)
113
Êâ„ÛîëÓ'‡Ìëâ Ûòëîâìëfl
113
ÈâÂíî˛˜‡Úâî¸ BFC (ÔÂÂÍβ˜‡ÚÂθ ˜‡ÒÚÓÚ˚ ·Ëâìëfl)
113
Àì‰Ëí‡Úó Íöèãä
113
Àì‰Ëí‡Úó Áäôàíõ
113
Àì‰Ëí‡Úó Ôëú‡Ìëfl
113
Ñóá'ûíó'óè ÔâÂíî˛˜‡Úâî¸ '˚·Ó
114
Êâ„ÛîëÓ'‡Ìëâ Ìòëîâìëfl ‰ÓÎÊÌ˚Ï
114
Ó·‡Áóï
115
Èó‰Íî˛˜âìëâ ÛÒÚÓÈÒÚ
116
Ëıâï‡ ÒÓ‰ËÌÂÌËÈ
117
Ëóâ‰Ëìâìëfl ·Âòô‡Â˜ì˚ı ÍÎÂÏÏ
117
Ëóâ‰Ëìâìëâ '˚Ió‰Ì˚ı Á‡ÊËÏÓ' ‰Ë̇ÏËÍ
118
Ëóâ‰Ëìâìëâ ÍÎÂÏÏ˚ ËÒÚÓ˜ÌË͇ Ôëú‡Ìëfl
119
Êâ„ÛîëÓ'‡Ìëâ Ìòëîâìëfl ‰Îfl ÒëìıÓìëáó'‡Ììó„Ó Ûòëîëúâîfl
119
Ëóâ‰Ëìâìëâ ÔÓ'Ó‰Ó' ‰Ë̇ÏËÍÓ
124
ÈËòóâ‰Ëìâìëâ „Ûîflúó‡ ‰ËÒڇ̈ËÓÌÌÓ„Ó Ûô‡'Îâìëfl ÔÓ‰˙Âχ Ìëêìëı ˜‡ÒÚÓÚ
125
ÈËïâ ÛÒÚ‡ÌÓ'ÍË Ûòëîëúâîfl ̇ ÍÓ'ËÍ ËÎË Ì‡ ‡Ï ‡'Úóïó·ëîfl
125
Çóá'‡˘Âìëâ Í˚¯Íë ̇ Ïâòúó
125
Àáïâìâìëâ LJԇ'Îâìëfl Ùï·îâï
126
Ñóôóîìëúâî¸ì‡Fl ËìùóχˆËfl
126
Ç˚fl'îâìëâ ÌÂËÒÔ‡'ÌÓÒÚÂÈ
127
Ëôâˆëùë퇈Ëë
128
Pioneer Corporation
Advertisement
Pioneer PRS-D2000SPL - Premier Amplifier Owner's Manual (56 pages)
CLASS D MONO AMPLIFIER
Brand:
Pioneer
| Category:
Car Amplifier
| Size: 2.45 MB
Table of Contents
2
English
2
Before Using This Product
2
Important
2
Information to User
2
Table of Contents
3
About This Product
3
Caution
3
Product Registration
3
Warning
4
Setting the Unit
4
MODE SELECT Switch
4
Bass Boost Frequency Control
4
Bass Boost Level Control
4
Terminal Cover
4
Cut Off Frequency Control for LPF
5
Gain Control
5
BFC (Beat Frequency Control) Switch
5
HEAT Indicator
5
PROTECT Indicator
5
Power Indicator
5
Subsonic Select Switch
6
Setting the Gain Properly
7
Connecting the Unit
8
Connection Diagram
9
Solderless Terminal Connections
9
Connecting the Speaker Output Terminals
10
Connecting the Power Terminal
11
Setting the Gain for Synced Amplifier
11
Connecting the Speaker Wires
16
Installation
16
Attaching the Bass Boost Remote Control
17
Example of Installation On the Floor Mat or On the Chassis
17
Replacing the Terminal Cover
17
Changing the Direction of the Badge
18
Additional Information
18
Troubleshooting
19
Specifications
20
Français
21
Attention
21
Enregistrement Du Produit
21
Précaution
21
Quelques Mots Concernant Cet Appareil
22
Réglage De L'appareil
22
Commutateur MODE SELECT
22
Commande De Fréquence De L'accentuation Des Graves
22
Commande Du Niveau D'accentuation Des Graves
22
Couvre-Bornes
22
Commande De La Fréquence De Coupure Pour LPF
23
Commande Du Gain
23
Interrupteur BFC (Commande De Fréquence De Battement)
23
Témoin HEAT
23
Témoin PROTECT
23
Témoin D'alimentation
23
Sélecteur Infrasonore
24
Réglage Correct Du Gain
25
Raccordement De L'appareil
26
Schéma De Raccordement
27
Prise De Connexion Sans Soudure
27
Raccordement Des Bornes De Sortie Vers Les Haut-Parleurs
28
Raccordement De La Borne D'alimentation
29
Réglage Du Gain De L'amplificateur Associé
29
Connexion Des Câbles Des Haut-Parleurs
34
Installation
34
Fixation De La Télécommande D'accentuation Des Graves
35
Exemple D'installation Sur Le Tapis De Sol Ou Sur Le Châssis
35
Remise En Place Du Couvre-Bornes
35
Changement De La Direction De L'étiquette Signalétique
36
Informations Complémentaires
36
Guide De Dépannage
37
Caractéristiques Techniques
38
Español
38
Antes De Usar Este Producto
39
Advertencia
39
Registro Del Producto
39
Sobre Este Producto
40
Ajuste De Esta Unidad
40
Interruptor MODE SELECT
40
Control De La Frecuencia De Refuerzo De Graves
40
Control De Nivel De Refuerzo De Los Graves
40
Cubierta De Terminales
40
Control De Frecuencia De Corte Para LPF
41
Control De Ganancia
41
Interruptor BFC (Control De La Frecuencia De Batido)
41
Indicador HEAT
41
Indicador PROTECT
41
Indicador De Alimentación
41
Interruptor Selector Subsónico
42
Configuración Apropiada De La Ganancia
43
Conexión De La Unidad
44
Diagrama De Conexión
45
Conexiones De Terminales Sin Soldadura
45
Conexión Del Terminal De Salida De Altavoz
46
Conexión Del Terminal De Alimentación
47
Ajuste De La Ganancia Del Amplificador Sincronizado
47
Conexión De Los Cables De Altavoces
52
Instalación
52
Instalación Del Control Remoto De Intensificación De Los Graves
53
Ejemplo De Instalación En La Alfombra Del Piso O En El Chasis
53
Recolocación De La Cubierta De Terminales
53
Cambio De La Dirección De La Placa De Identificación
54
Información Adicional
54
Localización Y Solución De Problemas
55
Especificaciones
Pioneer PRS-D2000SPL - Premier Amplifier Service Manual (58 pages)
Class D mono amplifier
Brand:
Pioneer
| Category:
Amplifier
| Size: 8.83 MB
Table of Contents
2
Safety Information
4
Table of Contents
5
1 Service Precautions
5
A 1.1 Service Precautions
5
Notes On Soldering
6
2 Specifications
7
Panel Facilities
8
Connection Diagram
9
3 Basic Items for Service
9
Check Points After Servicing
10
Jigs List
11
4 Block Diagram
12
5 Diagnosis
12
Connector Function Description
13
6 Service Mode
14
7 Disassembly
18
Power Supply Unit
20
8 Each Setting and Adjustment
20
Adjustment
22
9 Exploded Views and Parts List
22
Packing
24
Exterior(1)
26
Exterior(2)
30
10 Schematic Diagram
30
Amp Unit(Guide Page)
36
Power Supply Unit(Guide Page)
42
Remote Control Unit
44
11 Pcb Connection Diagram
44
Amp Unit
48
Power Supply Unit
52
Remote Control Unit
53
12 Electrical Parts List
Advertisement
Pioneer PRS-D2000SPL - Premier Amplifier Owner's Manual (22 pages)
Class D Mono Amplifier
Brand:
Pioneer
| Category:
Amplifier
| Size: 2.71 MB
Table of Contents
2
Before Using This Product
2
Important
2
Infonnation to User
2
Table of Contents
3
About This Product
3
Caution
3
Product Registration
3
Warning
4
Setting the Unit
4
MODE SELECT Switch
4
Bass Boost Frequency Control
4
Bass Boost Level Control
4
Tenninal Cover
4
Cut Off Frequency Control for LPF
5
Gain Control
5
BFC (Beat Frequency Control) Switch
5
HEAT Indicator
5
PROTECT Indicator
5
Power Indicator
5
Subsonic Select Switch
6
Setting the Gain Properly
7
Connecting the Unit
8
Connection Diagram
9
Solderless Tenninal Connections
9
Connecting the Speaker Output Tenninals
10
Connecting the Power Tenninal
11
Setting the Gain for Synced Amplifier
11
Connecting the Speaker Wires
16
Installation
16
Attaching the Bass Boost Remote Control
17
Example of Installation On the Floor Mat or On the Chassis
17
Replacing the Tenninal Cover
17
Changing the Direction of the Badge
18
Additional Information
18
Troubleshooting
19
Specifications
20
Pioneer Electronics (USA) Inc
21
Customer Support Division
21
P.o. Box 1760
Share and save
Advertisement
Related Products
Pioneer PRS-D1200SPL - Premier Amplifier
Pioneer PRS-X340
Pioneer PRS-D5000SPL
Pioneer PRS-D800
Pioneer PRS-A500
Pioneer PRS-X340UC
Pioneer PRS-X340EW
Pioneer PRS-X340X1R
Pioneer PRS-D2200T - Premier Amplifier
Pioneer Premier PRS-D2100T
Pioneer Categories
Car Receiver
Receiver
Amplifier
DVD Player
CD Player
More Pioneer Manuals
×
Login
Sign In
OR
Sign in with Facebook
Sign in with Google
×
Upload manual
Upload from disk
Upload from URL