Sign In
Upload
Manuals
Brands
NEC Manuals
Projector
MT1075 Series
NEC MT1075 Series Manuals
Manuals and User Guides for NEC MT1075 Series. We have
12
NEC MT1075 Series manuals available for free PDF download: User Manual, Command Manual, Control Commands, Installation Manual, Specifications, Quick Connect Manual, Compatibility Chart
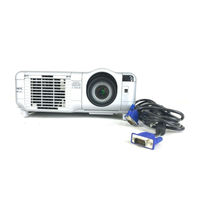
NEC MT1075 Series User Manual (75 pages)
NEC LCD Projector MT1075/MT1065 User's Manual
Brand:
NEC
| Category:
Projector
| Size: 3 MB
Table of Contents
Limited Warranty
3
Declaration of Conformity
4
Important Information
6
Installation
6
Safety Cautions
6
Fire and Shock Precautions
7
Lamp Replacement
7
What's in the Box
7
Table of Contents
8
Features You'll Enjoy
9
Introduction
9
Introduction to the Projector
9
Part Names of the Projector
10
Attaching the Lens Cap
10
Carrying the Projector
10
Top Features
11
Terminal Panel Features
12
Part Names of the Remote Control
13
Battery Installation
15
Operating Range for Wireless Remote Control
15
Remote Control Precautions
15
Using the Remote Control in Wired Operation
15
Installation and Connections
16
Selecting a Location
16
Throw Distance and Screen Size
17
Reflecting the Image
17
Connecting Your PC or Macintosh Computer
18
When Viewing a DVI Digital Signal
18
Setting up the Screen and the Projector
16
Making Connections
18
Connecting an External Monitor
19
To Connect SCART Output (RGB)
19
Connecting Your DVD Player
20
Connecting Your VCR or Laser Disc Player
21
Connecting the Supplied Power Cable
21
Projecting an Image (Basic Operation)
22
Turning on the Projector
22
Adjusting the Picture Size and Position
23
Selecting a Source
23
Selecting the Computer or Video Source
23
Correcting the Horizontal and Vertical Keystone Distortion (3D Reform)
24
Optimizing RGB Picture Automatically
26
Turning up or down Volume
26
Using the Laser Pointer
26
Setting the Function Switch
27
To Turn off the Projector
27
Connecting to Your Computer for the Remote Mouse Function
28
Switching Operation Mode between Computer and Projector
28
Turning off the Projector
27
Convenient Features
28
Using the Remote Mouse Function
28
When Using the USB Port
28
Auto 3D Reform
29
Enlarging and Moving a Picture
31
Freezing a Picture
31
Getting the On-Line Help
31
Turning off the Image and Sound
31
Operate the Menus Using the USB Mouse
32
Using a USB Mouse
32
Using the USB HUB Function
32
Changing Background Logo
33
Making Freehand Drawings on a Projected Image (Chalkboard)
33
USB Memory Device or USB Memory Card Reader Support
33
Making the most out of the Viewer Function
34
Using the Viewer
34
Operating the Viewer Function from the Projector (Playback)
35
Projecting Slides (Viewer)
35
Storing Images Displayed on the Projector on the PC Card (Capture)
36
Switching to Slides Directly from Other Input Modes
36
Viewing Digital Images
36
Auto Play Mode
36
Using the PC Card Files Fucntion (PC Card Files)
37
Deleting Captured Images
37
Basic Menu Operation
38
Customizing the Menu
38
Using On-Screen Menu
38
Using the Menus
38
Menu Tree
39
Menu Elements
42
Entering Alphanumeric Characters by Using the Menu
43
Menu Descriptions & Functions
43
Source Select
43
Image Options
44
Selecting Aspect Ratio
44
Sound
44
Adjusting Position and Clock
45
Masking Unwanted Area (Blanking)
45
Selecting Noise Reduction Level
45
Selecting Overscan Percentage
45
Selecting Resolution
45
Selecting Video Filter Level
45
Signal Type
45
Picture Management
45
User Adjust (When Using User 1
45
Projector Options
46
Adjusting Color Temperature and White Balance
46
Cornerstone
46
Keystone
46
Selecting Base Setting
46
Selecting Color Correction
46
Selecting Gamma Correction Mode
46
Setup [Page 2
46
Setup [Page 3
46
Using 3D Reform
46
Using Adapting Color Correction
47
Selecting Signal Format [Signal Select]
51
Selecting Lamp Mode and Lamp Type
52
Selecting Aspect Ratio and Position for Screen
53
Selecting Auto Functions
53
IP Address
54
Network Type
54
Setting LAN Mode
54
Mail
55
Status
56
Setting a Password
56
Security
57
Returning to Factory Default
58
Contents
58
Changing Background Logo
58
Tools
58
Help
58
Information
58
Maintenance
59
Replacing the Lamp
59
To Replace the Lamp
59
Cleaning
60
Cleaning or Replacing the Filter
60
Cleaning the Cabinet and the Lens
60
Lamp Indicator
61
Power Indicator
61
Status Indicator
61
Troubleshooting
61
Common Problems & Solutions
62
If There Is no Picture, or the Picture Is Not Displayed Correctly
63
Specifications
64
Appendix
66
Cabinet Dimensions
66
Mini D-Sub 15 Pin Connector
66
Pin Assignments of D-Sub RGB Input Connector
66
Compatible Input Signal List
67
PC Control Codes and Cable Connection
68
PC Control Connector (D-SUB 9P
68
Using Software Keyboard
68
Handling of the Address for Operation Via a Browser
69
Source Select
69
Operation Using an HTTP Browser
69
Preparation before Use
69
Travelcare Guide
70
Advertisement
NEC MT1075 Series User Manual (69 pages)
Portable Projector
Brand:
NEC
| Category:
Projector
| Size: 3 MB
Table of Contents
Important Information
2
Installation
2
Safety Cautions
2
Fire and Shock Precautions
3
Lamp Replacement
3
What's in the Box
3
Table of Contents
4
Features You'll Enjoy
5
Introduction
5
Introduction to the Projector
5
Part Names of the Projector
6
Attaching the Lens Cap
6
Carrying the Projector
6
Top Features
7
Terminal Panel Features
8
Part Names of the Remote Control
9
Battery Installation
11
Operating Range for Wireless Remote Control
11
Remote Control Precautions
11
Using the Remote Control in Wired Operation
11
Installation and Connections
12
Selecting a Location
12
Throw Distance and Screen Size
13
Reflecting the Image
13
Connecting Your PC or Macintosh Computer
14
When Viewing a DVI Digital Signal
14
Setting up the Screen and the Projector
12
Making Connections
14
Connecting an External Monitor
15
To Connect SCART Output (RGB)
15
Connecting Your DVD Player
16
Connecting Your VCR or Laser Disc Player
17
Connecting the Supplied Power Cable
17
Projecting an Image (Basic Operation)
18
Turning on the Projector
18
Adjusting the Picture Size and Position
19
Selecting a Source
19
Selecting the Computer or Video Source
19
Correcting the Horizontal and Vertical Keystone Distortion (3D Reform)
20
Optimizing RGB Picture Automatically
22
Turning up or down Volume
22
Using the Laser Pointer
22
Setting the Function Switch
23
To Turn off the Projector
23
Connecting to Your Computer for the Remote Mouse Function
24
Switching Operation Mode between Computer and Projector
24
Turning off the Projector
23
Convenient Features
24
Using the Remote Mouse Function
24
When Using the USB Port
24
Auto 3D Reform
25
Enlarging and Moving a Picture
27
Freezing a Picture
27
Getting the On-Line Help
27
Turning off the Image and Sound
27
Operate the Menus Using the USB Mouse
28
Using a USB Mouse
28
Using the USB HUB Function
28
Changing Background Logo
29
Making Freehand Drawings on a Projected Image (Chalkboard)
29
USB Memory Device or USB Memory Card Reader Support
29
Making the most out of the Viewer Function
30
Using the Viewer
30
Operating the Viewer Function from the Projector (Playback)
31
Projecting Slides (Viewer)
31
Storing Images Displayed on the Projector on the PC Card (Capture)
32
Switching to Slides Directly from Other Input Modes
32
Viewing Digital Images
32
Auto Play Mode
32
Using the PC Card Files Fucntion (PC Card Files)
33
Deleting Captured Images
33
Basic Menu Operation
34
Customizing the Menu
34
Using On-Screen Menu
34
Using the Menus
34
Menu Tree
35
Menu Elements
38
Entering Alphanumeric Characters by Using the Menu
39
Menu Descriptions & Functions
39
Source Select
39
Image Options
40
Selecting Aspect Ratio
40
Sound
40
Adjusting Position and Clock
41
Masking Unwanted Area (Blanking)
41
Selecting Noise Reduction Level
41
Selecting Overscan Percentage
41
Selecting Resolution
41
Selecting Video Filter Level
41
Signal Type
41
Picture Management
41
User Adjust (When Using User 1
41
Projector Options
42
Adjusting Color Temperature and White Balance
42
Cornerstone
42
Keystone
42
Selecting Base Setting
42
Selecting Color Correction
42
Selecting Gamma Correction Mode
42
Setup [Page 2
42
Setup [Page 3
42
Using 3D Reform
42
Using Adapting Color Correction
43
Selecting Signal Format [Signal Select]
47
Selecting Lamp Mode and Lamp Type
48
Selecting Aspect Ratio and Position for Screen
49
Selecting Auto Functions
49
IP Address
50
Network Type
50
Setting LAN Mode
50
Mail
51
Status
52
Setting a Password
52
Security
53
Returning to Factory Default
54
Contents
54
Changing Background Logo
54
Tools
54
Help
54
Information
54
Maintenance
55
Replacing the Lamp
55
To Replace the Lamp
55
Cleaning
56
Cleaning or Replacing the Filter
56
Cleaning the Cabinet and the Lens
56
Lamp Indicator
57
Power Indicator
57
Status Indicator
57
Troubleshooting
57
Common Problems & Solutions
58
If There Is no Picture, or the Picture Is Not Displayed Correctly
59
Specifications
60
Appendix
62
Cabinet Dimensions
62
Mini D-Sub 15 Pin Connector
62
Pin Assignments of D-Sub RGB Input Connector
62
Compatible Input Signal List
63
PC Control Codes and Cable Connection
64
PC Control Connector (D-SUB 9P
64
Using Software Keyboard
64
Handling of the Address for Operation Via a Browser
65
Source Select
65
Operation Using an HTTP Browser
65
Preparation before Use
65
Travelcare Guide
66
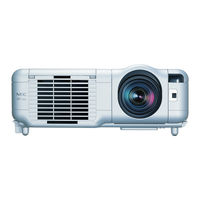
NEC MT1075 Series Command Manual (60 pages)
Control Commands for NEC Projector
Brand:
NEC
| Category:
Projector
| Size: 0 MB
Advertisement
NEC MT1075 Series Command Manual (56 pages)
RS232 codes- Projectors
Brand:
NEC
| Category:
Projector
| Size: 0 MB
NEC MT1075 Series Control Commands (54 pages)
NP115 : RS232 codes- Projectors
Brand:
NEC
| Category:
Projector
| Size: 0 MB
NEC MT1075 Series Control Commands (39 pages)
Control commands
Brand:
NEC
| Category:
Projector
| Size: 0 MB
NEC MT1075 Series Installation Manual (7 pages)
NEC MT1065: Installation Guide
Brand:
NEC
| Category:
Projector
| Size: 0 MB
Table of Contents
Product Description
1
Lens Specifications
1
Ceiling Mounted
2
Cabinet Dimensions
4
Image Sensor
4
Input Panel
7
Control Codes
7
Auto Adjust
7
Cable Connection
7
Communication Protocol
7
NEC MT1075 Series Control Commands (9 pages)
NEC GT5000: Reference Guide
Brand:
NEC
| Category:
Projector
| Size: 0 MB
Table of Contents
Read First
2
Cable Connection
3
Communication Protocol
3
PC Control Connector (D-Sub 9P)
3
PC Control Connector (DIN-8P)
5
NEC MT1075 Series Quick Connect Manual (2 pages)
Brand:
NEC
| Category:
Projector
| Size: 1 MB
Table of Contents
Connect the Supplied 15Pin-15Pin Signal Cable
1
Connect the Supplied Power Cable
1
Turn on the Main Power Switch
1
Turn on the Projector
1
Set up the Projector
1
3D Reform Function
1
Adjust the Tilt Foot
1
Power Indicator
2
Status Indicator
2
Lamp Indicator
2
Common Problems & Solutions
2
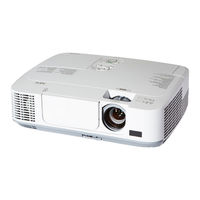
NEC MT1075 Series Specifications (4 pages)
MT Series Installation Projectors
Brand:
NEC
| Category:
Projector
| Size: 0 MB
NEC MT1075 Series Specifications (2 pages)
installation projector
Brand:
NEC
| Category:
Projector
| Size: 0 MB
NEC MT1075 Series Compatibility Chart (1 page)
Compatible Network PC Cards
Brand:
NEC
| Category:
Projector
| Size: 0 MB
Advertisement
Related Products
NEC MT1075/MT1065
NEC MT1075GOV
NEC MT1075 - XGA LCD Projector
NEC MT1056 - MultiSync XGA LCD Projector
NEC MT1060R - XGA LCD Projector
NEC MT1065GOV
NEC MT1030+
NEC MultiSync MT1020
NEC MultiSync MT1040E
NEC MultiSync MT1045E
NEC Categories
Monitor
Projector
Server
Telephone
Computer Hardware
More NEC Manuals
Login
Sign In
OR
Sign in with Facebook
Sign in with Google
Upload manual
Upload from disk
Upload from URL