Sign In
Upload
Manuals
Brands
Intralox Manuals
Tools
ThermoDrive
Intralox ThermoDrive Manuals
Manuals and User Guides for Intralox ThermoDrive. We have
2
Intralox ThermoDrive manuals available for free PDF download: Instruction Manual, User Manual
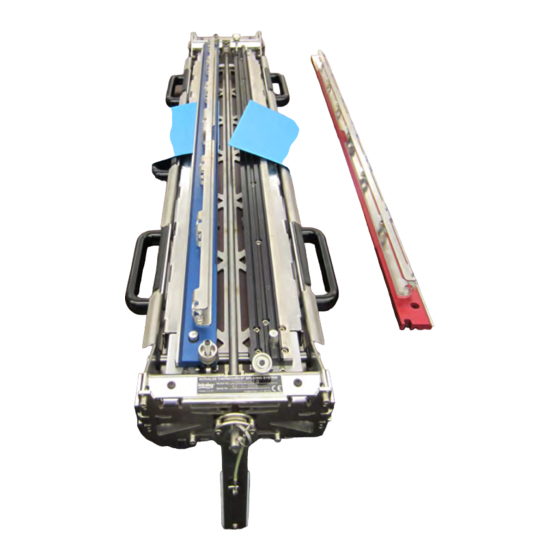
Intralox ThermoDrive Instruction Manual (78 pages)
Belt Splicing System v.2.0 For use with TD 8026/8126 belts & TD 8050 belts
Brand:
Intralox
| Category:
Tools
| Size: 2 MB
Table of Contents
Instruction Manual
1
Safety Information
2
Safety Symbols
3
Heat Wand and Temperature
4
Table of Contents
6
Table of Contents
7
Table of Contents
8
List of Figures
12
EQUIPMENT OVERVIEW System Use
12
System Components
12
Top Clamps/Cut Guides
12
Clamping Fixture
12
Heat Wand with Temperature Control Box
12
Accessories
13
Belt Splicing System V
13
SPLICING SYSTEM COMPONENTS Accessories
14
Figure 2B: Storage Case
14
Clamping Fixture
15
Figure 2C: Clamping Fixture
15
Figure 2D: Top Clamp/Cut Guide Set
16
Heat Wand and Temperature Control Box
17
Figure 2E: Heat Wand Components
17
Standard Procedures
19
Set up the Splicing System
20
Collect Needed Supplies
20
Prepare the Conveyor
20
Prepare Clamping Fixture
21
Secure Clamping Fixture to Conveyor
21
Attach Crank Handle
21
Conveyor
21
Prepare the Heat Wand
22
Make Power Connections
22
Figure 3D: Latch Heat Wand in Stand
22
Adjust Temperature Setpoint
23
Allow Heat Wand to Pre-Heat
24
Safety
25
Prepare Belt Ends
25
Belt End Situations
25
Preparation Overview
25
Clean Belt Ends
26
Cut Belt Ends
26
Figure 4A: Clean Belt Ends
26
Engagement/Alignment
27
Inspect Belt Ends
28
Figure 4G: Hold the Utility Knife against the Cut Guide Edge
28
Align and Secure Belt Ends
29
Prepare to Align
29
Align Belt Ends
29
Lightly Secure Belt Ends
30
Figure 5A: Align Belt Ends on Grooved Deck
30
Check Alignment & Tightly Secure Belt Ends
31
Figure 5E: Close the Clamping Fixture
31
Inspect Tension
32
Inspect Alignment
32
Figure 5H: Clamping Fixture Closed–But Not Locked
32
Alignment
33
6 Splice the Belt
34
Splice the Belt
34
Prepare to Splice
34
Heat Wand
34
Splice the Belt Ends
35
Figure 6C: Remove the Heat Wand from the Stand
35
Figure 6D: Wand Rest at One End
36
Allow the Belt to Cool
37
Inspect the Splice
37
Figure 6I: Wipe Residue from the Heat Wand
37
7 Trim & Inspect the Belt
38
Trim & Inspect the Belt
38
Trimming Overview
38
Trim First Weld Bead
38
Figure 7A: Secure the Belt
38
Trim Second Weld Bead
39
Trim Belt Edges
39
Figure 7D: Remove the Second Weld Bead
39
Inspect the Belt
40
Figure 7H: Create a Smooth Edge and Discard Debris
40
8 Shut Down, Cool, & Pack up
42
Shut Down, Cool, & Pack up
42
Shut down & Clean
42
Cool down
42
Pack the Storage Case
42
Figure 8A: Pack Main Components
42
Figure 8B: Secure the Twist Latches
43
Troubleshooting
44
Troubleshoot
45
Troubleshooting Overview
45
Procedures & Inspections
45
Faulty Cuts & Splices
45
Repeat Cuts
45
Repeat Splices
45
Table of Equipment/Facility Problems
46
Table of Preparing and Aligning Belt Ends Problems
48
Table of Faulty Splice Problems
51
Table of Belt Failures
59
Special Procedures
61
Special Procedures
62
Set up at the Returnway
62
Make Belt Tabs
62
Shim for Belt Top Surface (Vertical) Alignment
63
Trim the Second Weld Bead-Alternative Technique
64
Inspect the Clamping Fixture
64
Nub Top Style Specifics
66
Nub Top Overview
66
Remove Nubs
66
Prepare Silicone Spacers for Use
66
Use Silicone Spacers
67
Troughing Grooves Specifics
68
Troughing Groove Overview
68
Shim the Grooved Deck
68
Trim the Tape
69
14 S8126 Belt Specifics
70
S8126 Belt Specifics
70
S8126 Overview
70
Figure 14A: S8126 Samples
70
Preparing Belt Ends
71
Shim the Smooth Edges to
71
Secure Belt Ends
71
Use Thin Belt Tabs to Secure Belt Ends
71
Repeatedly Inspect Alignment before Cutting
72
Hold the Cut Guides When Fully Tightening Thumb Knobs
72
Add the Second Cut Guide to Secure Belt for Cutting
72
Inspect Cuts for Squareness
72
Align & Secure Belt Ends
73
Remove any Belt Tension
73
Check for Shims and Belt Tabs
73
Repeatedly Inspect Alignment
73
Control Crank Handle During Alignment
73
Hold the Cut Guides When Fully Tightening Thumb Knobs
74
Splice the Belt Ends
74
Control the Crank Handle for 25 Seconds of Melting
74
Close Decks Gently for Cooling
74
Trim & Inspect the Belt
75
15 Perform Preventive Maintenance
77
Advertisement
Intralox ThermoDrive User Manual (44 pages)
TROUGH CONVERTER
Brand:
Intralox
| Category:
Media Converter
| Size: 4 MB
Table of Contents
Introduction
5
Table of Contents
7
Safety and Compliance
9
Owner Responsibilities
9
Safety Features
9
Environmental Compliance
10
Equipment and Component Lifetime
10
Decommissioning
10
Safety Symbol Meanings
10
Overview
11
Description
11
Specifications and Restrictions
11
Conveyor Requirements
11
Belt Requirements
11
Customer Responsibilities
11
Equipment Components
12
Setup
13
Prepare for Installation
13
Collect Supplies
14
Carryway Installation
15
Install Carryway Brackets
15
Assess Carryway Bracket Placement
15
Weld Brackets in Place
17
Weld Steel Rods in Place
18
Prepare for Wearstrip Installation
19
Assess Conveyor End Carryway Wearstrip Placement
19
Create Carryway Wearstrip Patterns
20
Prepare Wearstrips to Install
23
Calculate Carryway Wearstrips
23
Plan for Belt Containment Wearstrips
24
Cut Wearstrips
24
Chamfer Wearstrip Ends
24
Install Wearstrips
25
Conveyor End Belt Containment Wearstrips
25
Carryway Wearstrips
25
Impact or Loading Zone Reinforcement
27
Final Belt Containment Wearstrips
28
Startup
29
Finalize Conveyor Assembly
29
Drive and Idle End Components
29
Carryway and Returnway Components
29
Belt
30
Start up Conveyor
30
Maintenance and Troubleshooting
31
Preventive Maintenance
31
Troubleshooting
31
Trough Converter
31
General Conveyor
32
Wearstrip Notching Procedures
32
Notch Conveyor End Wearstrips
32
Notch Containment Wearstrips
33
Appendix A-Quick Reference
36
Replacement Components List
37
Contact
38
Advertisement
Related Products
Intralox Categories
Accessories
Media Converter
Cables and connectors
Tools
Industrial Equipment
More Intralox Manuals
Login
Sign In
OR
Sign in with Facebook
Sign in with Google
Upload manual
Upload from disk
Upload from URL