Sign In
Upload
Manuals
Brands
imagistics Manuals
All in One Printer
cm3520
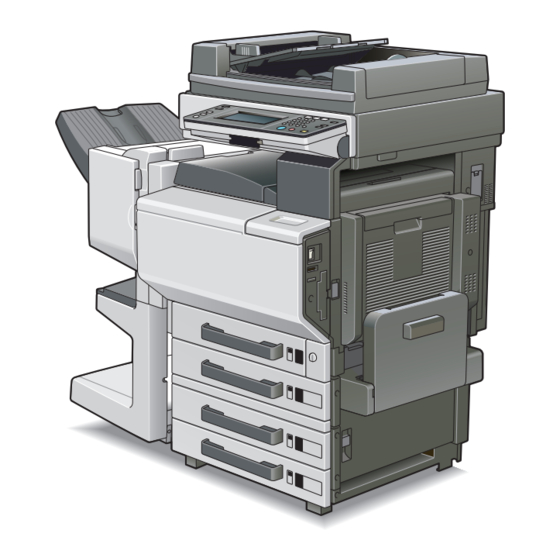
imagistics cm3520 Manuals
Manuals and User Guides for imagistics cm3520. We have
3
imagistics cm3520 manuals available for free PDF download: Service Manual, User Manual
imagistics cm3520 Service Manual (896 pages)
Color Copier
Brand:
imagistics
| Category:
Printer
| Size: 65 MB
Table of Contents
Table of Contents
17
Important Notice
5
Safety Warnings
6
Indication of Warning on the Machine
15
System Configuration
33
Product Specifications
35
Functions
35
Type
35
Machine Specifications
36
Maintenance
36
Operating Environment
36
Types of Paper
36
Built-In Controllers
37
Blank Page
38
II Maintenance
39
Periodical Check
39
Maintenance Items
39
Parts to be Replaced by Users (CRU)
39
Service Schedule
39
Maintenance Call (Per 60,000-Print)
40
Periodical Parts Replacement 1 (Per 150,000-Print)
40
Periodical Parts Replacement 2 (Per 200,000-Print)
40
Periodical Parts Replacement 3 (Per 300,000-Print)
41
Maintenance Parts
42
Concept of Parts Life
44
Maintenance Procedure (Periodical Check Parts)
46
Paper Take-Up Roller
46
Separation Roller
46
Separation Roller 2
47
Paper Take-Up Roller
49
Pick-Up Roller
52
Transport Roller
53
Cleaning of Synchronizing Roller
54
Paper Dust Remover
54
Cleaning of 2Nd Image Transfer Entrance Upper Guide
55
Cleaning of Scanner Rail
55
Cleaning of Transport Roller
55
Cleaning of the Lens
56
Cleaning of the Mirrors (1St/2Nd/3Rd)
56
Cleaning of the CCD Sensor
57
Cleaning of the Original Glass
57
Replacing the Waste Toner Bottle
58
Cleaning of the Area Around the Waste Toner Collecting Port
59
Cleaning of the Comb Electrode
59
Replacing Ozone Filter
59
Cleaning LPH Assy
60
Replacement of the Deodorant Filter
60
Replacing the 2Nd Image Transfer Roller Unit
61
Image Transfer Belt Unit
62
Replacing the Imaging Unit (C, M, Y, Bk)
64
Replacing the Fusing Unit
67
Service Tool
68
CE Tool List
68
Copy Materials
69
Imaging Unit Single Parts (IU)
69
Maintenance Kit
69
Toner Cartridge Single Parts (T/C)
69
Waste Toner Bottle
69
Firmware Upgrade
70
Application to be Used
70
Installing the Cygwin
70
Preparations for Firmware Rewriting
70
Service Environment
70
Writing into the Compact Flash
71
Firmware Rewriting
73
Updating Method
73
Action When Data Transfer Fails
74
Other
75
Disassembly/Adjustment Prohibited Items
75
Disassembly/Assembly List (Other Parts)
76
Disassembly/Assembly Procedure
78
IR Right Cover/Front Right Cover/Bypass Right & Left Cover
78
Exit Tray/Ir Left Cover/Rear Left Cover/Left Front Cover
79
Front Door/Panel Cover/Paper Setting Dial Cover
80
IR Upper Front Cover/Ir Upper Right Cover/Ir Upper Rear Cover
81
Original Glass/Ir Front Cover
82
Control Panel
82
Tray 1
83
Tray 2
84
Scanner Motor Drive Board
84
CCD Unit
85
Image Processing Board
86
Control Board
87
MFP Control Board
88
High Voltage Unit/1
90
High Voltage Unit/2
91
Tray 1 Paper Size Board
92
DC Power Supply
92
LED Drive Board
94
Paper Type Board
95
Tech. Rep. Setting Switches Board
95
Tray 2 Board
96
Tray 2 Paper Size Board
96
Inverter Board
97
Multi Bypass Unit
97
Toner Hopper Unit
98
LPH Unit
100
Scanner Motor
102
Scanner Assy
104
Scanner Drive Cables
105
Winding of the Scanner Drive Cables
107
PWB Box
112
Main Motor
113
Fusing Drive Motor
113
Toner Supply Motor C/Bk
114
Toner Supply Motor Y/M
114
Color PC Drum Motor
115
Color Developing Motor
117
Bk PC Motor
117
1St Image Transfer Pressure/Retraction Motor
118
2Nd Image Transfer Pressure/Retraction Motor
118
Intermediate Transport Motor
119
Fusing Pressure Roller Pressure/Retraction Motor
121
Cleaning Brush Motor
124
Aidc/Registration Sensor/1,2
125
Lph
126
ATDC Sensor Y/M/C
130
Mount the Optional Original Size Detecting Sensors
131
Installation of the Mechanical Counter
132
Option Counter
132
Installation Method for the Key Counter
133
III Adjustment/Setting
135
How to Use the Adjustment Section
135
Adjustment Item List
136
Utility Mode
138
Utility Mode Function Tree
138
Administrator Mode Function Tree
139
Changing the Setting Value in Utility Mode Functions
141
Exiting
141
Procedure
141
Utility Mode Function Setting Procedure
141
Controller Detail
142
Counter List
142
Mode Store
142
Reset Mode
142
Settings in the Store
142
User's Choice: 1
143
User's Choice: 2
143
Copy Program Recall
147
Default Setting
147
Printer Setting
147
3.10 Unit Life Indication
149
Report Types
149
3.11 Settings in the Admin. Mode
150
Admin. Set
150
Settings in Volume Track (E. K. C.)
154
Volume Track Data (E. K. C.)
154
Volume Track Mode (E. K. C.)
154
Volume Track Setting (E. K. C.)
154
3.13 Settings in Printer Setting
155
Common Setting
155
3.14 Settings in Scan Setting
156
Color/Grayscale Compression
156
Device Name
156
PCL Setting
156
Pri. Comp. Method for Monochrome
156
3.15 Settings in Network Setting
157
Common Setting
157
E-Mail/Internet
158
FTP Server
160
Twain
160
Ldap
161
3.16 Settings in Expert User Mode
162
Thick Paper and OHP Film Image Density
162
Color Shift Correction (Bk)
163
Color Shift Correction (C, M, Y)
164
Black Image Density Correction
165
Stabilizer
165
PRT Area (Top Margin)
166
PRT Area (Left Margin)
167
PRT Area (Dup. Left Margin)
168
Center Staple Position
169
3.17 Gradation Adjustment
170
POP3 Server
171
Receive
171
Server Setting (KRDS) / Server Setting (RD)
171
Send
172
Status
172
Tech. Rep. Mode
173
Tech. Rep. Mode Function Setting Procedure
173
Touch Panel Adj
174
Tech. Rep. Mode Function Tree
175
Fuser Nip
177
Fuser Temp
177
Machine Adjust
177
Fuser Speed
178
Org. Detect Sensor
178
PRT Area
179
IR Area
183
Loop Adjust
186
Color Shift Correction
187
LPH Rank
189
LPH Chip Adjust
190
Center Binding Position (9997 Only)
191
Memory / Harddisk Adjust
192
Bypass Guide Adjust
194
ROM Version
194
Image Adjust
194
PRT Max Density
194
Background Voltage Margin
195
PRT Highlight
195
AE Adjust
196
ATDC Level Setting
196
2Nd Transfer Adjust
197
Stabilizer
197
ATDC Toner Supply
198
Feeding Double Sided THIN PAPER
198
Thick Paper Image Density
198
Bias Voltage Choice
199
Monochrome Image Density
199
Settings in KRDS / RD Mode
200
System Input
202
Marketing Area
202
Org. Detect Option Sensor
202
Serial # Input
202
Tel. # Input
202
Book Erase (Center)
203
FLS Paper
203
Peripheral Setting
203
Server Set (KRDS) / Server Set (RD)
204
Reprint
206
Unit Change
206
Chinese Paper Size
207
Display PM Parts Lifetime
207
Hard Disk
207
LCT Paper Size
207
US Zoom Setting
207
4.10 Settings in Counter
208
Admin. Password Initialize
208
Life
208
Procedure
208
Jam
209
Maintenance
209
Trouble
209
Warning
209
4.11 List Output
210
Counter
210
Image Processing
210
4.12 Settings in State Confirm
211
I/O Check
211
Level History1
221
Level History2
221
Table
221
CCD Check
222
Option Check
222
Paper Passage
222
Temp. & Humidity
222
Color Shift
223
IU Lot no
223
LPH Status
223
4.13 Settings in Test Print
224
Gradation Pattern
224
Procedure
224
Halftone Pattern
225
Lattice Pattern
225
Color Sample
226
Solid Pattern
226
Color Solid Pattern
227
LPH Pattern
227
4.14 ADF Check
228
Auto Adjust Stop Position
228
I/O Check
228
Original Stop Position
228
Paper Passage
228
Registration Loop
228
Tray Width Adjust
228
4.15 Gradation Adjust
229
Sensor Auto Adjust
229
Security
230
Exiting
230
Procedure
230
Security Mode Function Setting Procedure
230
Security Mode Function Tree
230
Counter Setting
231
Settings in the Security Mode
231
Admin. Choice
232
Coverage Rate Reset
233
IU Life Stop Setting
233
Lock Job Authentication Mode
233
Remote Diagnosis System Choice
233
Service Code Change
233
Mechanical Adjustment
234
Adjustment of the Scanner Motor Timing Belt
234
Focus Positioning of the Scanner and Mirrors Unit
235
Scanner Position Adjustment
235
Adjustment of the Bypass Paper Size Unit
236
Board Switch
238
PWB Location
238
PWB-S1 (Tech. Rep. Setting Switches Board)
238
Data/Conditions Cleared by Reset Switches/Pins
239
If the Machine Exhibits an Erratic Display or Operation
239
Initialize Procedure
239
Memory Clear Procedure
239
Date/Time Input Mode
240
Date/Time Input Mode Screen
240
Date/Time Input Mode Setting Procedure
240
IV Troubleshooting
241
Jam Display
241
Misfeed Display
241
Misfeed Display Resetting Procedure
241
Sensor Layout
242
System Mounted with 9991 and 9992
242
System Mounted with 9991 and 9994
242
Initial Check Items
244
Solution
244
1St Drawer Take-Up, Fusing Misfeed
245
2Nd Drawer Take-Up, Vertical Transport, Manual Bypass Take-Up
246
LCT Take-Up and Vertical Transport Misfeed (9992)
248
Tray3 Take-Up and Vertical Transport Misfeed (9993/9994)
249
Tray4 Take-Up and Vertical Transport Misfeed (9994)
250
Duplex Transport Misfeed (9991)
251
Fusing/Exit Misfeed
252
Malfunction Code
253
Alert Code
253
Restarting
253
Alert List
254
AIDC Sensor (Back) Failure
255
CCD Clamp/Gain Adjustment Failure
255
P-5: AIDC Sensor (Front) Failure
255
Solution
255
P-21: Color Shift Test Pattern Failure
256
P-22: Color Shift Adjust Failure
256
P-6: Cyan Imaging Unit Failure
256
P-7: Magenta Imaging Unit Failure
256
P-8: Yellow Imaging Unit Failure
256
P-9: Black Imaging Unit Failure
256
1St Image Transfer ATVC (Black) Failure
257
1St Image Transfer ATVC (Color) Failure
257
2Nd Image Transfer ATVC Failure
257
P-30: Color PC Drum Sensor Malfunction
257
P-31: Black PC Drum Sensor Malfunction
257
Trouble Code
258
Trouble Code List
258
How to Reset
266
Solution
267
C0000: Main Motor's Failure to Turn
267
C0001: Main Motor Turning at Abnormal Timing
267
C0016: Bk PC Motor Failure to Turn
268
C0017: Bk PC Motor Turning at Abnormal Timing
268
C0018: Color PC Motor Failure to Turn
268
C0019: Color PC Motor Turning at Abnormal Timing
269
C001A: Color Developing Motor Failure to Turn
269
C001B: Color Developing Motor Turning at Abnormal Timing
269
C0040: Suction Fan Motor's Failure to Turn
270
C0046: Fusing Cooling Fan Motor /1'S Failure to Turn
270
C0048: Fusing Cooling Fan Motor /2 /3'S Failure to Turn
271
C004C: Ozone Ventilation Fan Motor's Failure to Turn
271
C004D: Toner Suction Fan Motor's Failure to Turn
272
C004E: Power Supply Cooling Fan Motor's Failure to Turn
272
C004F: Cooling Fan Motor 2'S Failure to Turn
272
C0060: Fusing Drive Motor's Failure to Turn
273
C0061: Fusing Drive Motor Turning at Abnormal Timing
273
C0094: 2Nd Image Transfer Roller Pressure/Retraction Failure
273
C0096: Image Transfer Belt Pressure/Retraction Failure
274
C0098: Fusing Pressure Roller Pressure/Retraction Failure
274
C0200: Cyan PC Drum Charge Corona Malfunction
275
C0202: Magenta PC Drum Charge Corona Malfunction
275
C0204: Yellow PC Drum Charge Corona Malfunction
275
C0206: Black PC Drum Charge Corona Malfunction
275
C0208: PC Drum Charge Corona Malfunction
275
C0400: Exposure Lamp's Failure to Turn on
275
C0410: Exposure Lamp Turning on at Abnormal Timing
275
C0500: Heating Roller Warm-Up Failure
276
C0501: Fusing Pressure Roller Warm-Up Failure
276
C0510: Heating Roller Abnormally Low Temperature
276
C0511: Fusing Pressure Roller Abnormally Low Temperature
276
C0520: Heating Roller Abnormally High Temperature
276
C0521: Fusing Pressure Roller Abnormally High Temperature
276
C0650: Scanner Home Sensor Malfunction
276
C0660: Scanner Overrun Failure
276
C0900: 2Nd Drawer Lift-Up Motor Failure
277
C0F30: Abnormally Low Toner Density Detected Cyan ATDC Sensor
278
C0F31: Abnormally High Toner Density Detected Cyan ATDC Sensor
279
C0F37: Abnormally High Toner Density Detected Black ATDC Sensor
280
C0F3D: Black ATDC Sensor Adjustment Failure
281
C1203: Memory Mounting Failure
282
C1240: JBIG0 Error
283
C12C3: Hard Disk Error 3
284
C12C4: Hard Disk Error 4
284
C12C5: Hard Disk Error 5
284
C12C6: Hard Disk Error 6
284
C12C7: Hard Disk Error 7
284
C12C8: Hard Disk Error 8
284
C12C9: Hard Disk Error 9
284
C12CA: Hard Disk Error a
284
C12CB: Hard Disk Data Transfer Error
284
C12CC: Hard Disk Unformat
284
C12CF: Hard Disk Specifications Error
285
C13C8: New Transfer Cleaner Unit Resetting Failure
285
C13CA: New Fusing Unit Resetting Failure
285
C13D1: Cyan Imaging Unit EEPROM Access Error
285
C13D2: Magenta Imaging Unit EEPROM Access Error
285
C13D3: Yellow Imaging Unit EEPROM Access Error
285
C13D4: Black Imaging Unit EEPROM Access Error
285
C13D5: Cyan LPH Correction Data Download Failure
286
C13D6: Magenta LPH Correction Data Download Failure
286
C13D7: Yellow LPH Correction Data Download Failure
286
C13D8: Black LPH Correction Data Download Failure
286
C3310: CCD Clamp/Gain Adjustment Failure
286
C3331: MSC Undefined Malfunction Occurring
287
C3332: Scanner Section Undefined Malfunction
287
C3333: Engine Section Undefined Malfunction
287
C3E00: NVRAM Initialization Failure
288
C3E01: NVRAM Initialization Failure
288
C3E02: NVRAM Initialization Failure
288
C3F00: Vendor Connection Failure
288
C3FFC: ROM Contents Error Upon Startup (LPH)
288
C3FFD: ROM Contents Error Upon Startup (Scanner)
288
C3FFE: ROM Contents Error Upon Startup (PRT)
288
C3FFF: ROM Contents Error Upon Startup (MSC)
288
Power Supply Trouble
289
Control Panel Indicators Do Not Light
289
Machine Is Not Energized at All (PU1 Operation Check)
289
Adf
290
Fusing Heaters Do Not Operate
290
Optional Paper Feed Cabinet
290
Power Is Not Supplied to Options
290
Duplex
291
Finisher
291
Image Quality Problem
292
Table
292
Level History 1
293
Level History 2
293
How to Identify Problematic Part
294
Initial Check Items
295
IR System: White Lines in FD, White Bands in FD, Colored Lines in FD, and Colored Bands in FD
296
Solution
296
IR System: White Lines in CD, White Bands in CD, Colored Lines in CD, and Colored Bands in CD
297
IR System: Color Spots
298
IR System: Fog
299
IR System: Blurred Image, Blotchy Image
300
IR System: Incorrect Color Image Registration, Sync Shift (Lines in CD)
301
IR System: Moire
302
IR System: Skewed Image
303
IR System: Distorted Image
304
IR System: Low Image Density, Rough Image
305
IR System: Defective ACS
306
IR System: Blank Copy, Black Copy
307
IR System: Abnormal Image
308
Printer Monocolor: White Lines in FD, White Bands in FD
309
Printer Monocolor: Uneven Density in FD
310
Printer Monocolor: Uneven Density in CD
311
Printer Monocolor: Low Image Density
312
Printer Monocolor: Gradation Reproduction Failure
314
Printer Monocolor: Foggy Background
316
Printer Monocolor: Void Areas, White Spots
318
Printer Monocolor: Colored Spots
319
Printer Monocolor: Blurred Image
320
Printer Monocolor: Blank Copy, Black Copy
321
Printer Monocolor: 0.5-MM-Pitch Uneven Image
322
Printer Monocolor: 2-MM-Pitch Uneven Image
323
Printer Monocolor: 94-MM-Pitch Uneven Image
324
Printer 4-Color: White Lines in FD, White Bands in FD, Colored Lines in FD, and Colored Bands in FD
325
Printer 4-Color: White Lines in CD, White Bands in CD, Colored Lines in CD, and Colored Bands in CD
326
Printer 4-Color: Uneven Density in FD
327
Printer 4-Color: Uneven Density in CD
328
Printer 4-Color: Low Image Density
329
Printer 4-Color: Poor Color Reproduction
331
Printer 4-Color: Incorrect Color Image Registration
333
Printer 4-Color: Void Areas, White Spots
334
Printer 4-Color: Colored Spots
335
Printer 4-Color: Poor Fusing Performance, Offset
336
Printer 4-Color: Brush Effect, Blurred Image
337
Printer 4-Color: Back Marking
338
Printer 4-Color: 204-MM-Pitch Uneven Image
339
Printer 4-Color: 94-MM-Pitch Uneven Image
340
Appendix
341
Parts Layout Drawing
341
IR Section
341
Main Unit
341
Engine Section
342
Tray 1
347
Tray 2
348
Horizontal Transport Unit
356
Connector Layout Drawing
359
Timing Chart
363
Main Unit
363
1-Sided Mode
364
9990 Radf
364
Mixed Original Detection Mode
368
Blank Page
383
1 I General
385
Controller Specifications
385
Supporting Client Specifications
386
II Maintenance
387
2 II Maintenance
387
Checking the Controller Firmware Version
387
Firmware Rewriting
387
Application to be Used
387
Installing the Cygwin
387
Preparations for Updating the Firmware
387
Service Environment
387
Writing into the Compact Flash
389
Updating Method
391
Updating Procedures of Firmware
391
Action When Data Transfer Fails
392
III Adjustment/Setting
393
3 III Adjustment/Setting
393
Checking the External Interface Operation Mode Setting
393
Setting for Pagescope Remote Care
393
E-Mail Reception Settings
393
Server Set (RD)" Settings
393
Setting Procedures
393
Checking the E-Mail Transmission/Reception Settings
394
E-Mail Transmission Settings
394
Connection with Pagescope Remote Care Device Management Server
395
Example of Successful Test Transmission/Reception
395
Supplementary Information: Log Check
395
IV Troubleshooting
397
Checking the System Configuration
397
Status Codes
397
Troubleshooting Procedures
397
Unable to Print over the Network
397
Unable to Transmit Data through Scan to FTP
399
Unable to Transmit Data through Scan to E-Mail/Internet FAX
400
E-Mail Does Not Reach the Destination When Transmission through Scan to E-Mail/Scan to Internet FAX Is Completed
401
Blank Page
405
Product Specifications
407
Type
407
Functions
407
Paper Type
407
Machine Specifications
408
Operating Environment
408
Mixed Original Feed
408
Mixed Original Feed Chart
408
Paper Feed Prohibited Originals
409
Paper Feed Not Guaranteed Originals
409
II Maintenance
411
Periodical Check
411
Maintenance Procedure (Periodical Check Parts)
411
Transport Belt
411
Pick-Up Roller / Paper Take-Up Roll
412
Separation Roller
413
Pick-Up Roller / Paper Take-Up Roll / Separation Roller
414
Registration Roller
414
Exit Roller / Roll
415
Sensor Section
415
Turnover Roller
415
Other
417
Disassembly/Adjustment Prohibited Items
417
Disassembly/Assembly List (Other Parts)
418
Disassembly/Assembly Procedure
418
Front Cover/Rear Cover
418
III Adjustment/Setting
419
How to Use the Adjustment Section
419
Tech. Rep. / Test Mode
420
Tech. Rep. Mode Setting Procedure
420
Type of the Tech. Rep. Mode
420
ADF Paper Passage
421
I/O Check
422
Check Procedure
422
I/O Check List
422
I/O Check Screen
422
Mechanical Adjustment
424
Adjustment of the Tray Volume
424
Adjustment of the Document Edge Guide Reference Position
425
Adjustment of the Document Skew
426
Adjustment of the Document Stop Position
427
Auto Adjust: FD 1-Sided Stop Position
427
Auto Adjust: FD 2-Sided Stop Position
428
Auto Adjust: CD Image Scan Start Position
429
Manual Adjust: FD 1-Sided / 2-Sided Document Stop Position Adjustment
430
Manual Adjust: CD Image Scan Position Adjustment
431
Adjustment of the Loop Value
432
Automatic Adjustment of the Sensor
433
IV Troubleshooting
435
Jam Display
435
Initial Check Items
435
Misfeed Display
435
Misfeed Display Resetting Procedure
435
Sensor Layout
436
Solution
436
Paper Take-Up Section Misfeed
436
Transport Section Misfeed
437
Paper Exit / Turnover Section Misfeed
438
Transport Tray Section Misfeed
439
Set Error Detection
440
Blank Page
443
1 I General
445
Product Specifications
445
Machine Specifications
445
Operating Environment
445
Paper Type
445
Type
445
II Maintenance
447
2 II Maintenance
447
Periodical Check
447
Maintenance Procedure (Periodical Check Parts)
447
Ventilation Section
448
Other
449
Disassembly/Adjustment Prohibited Items
449
Disassembly/Assembly List (Other Parts)
450
Disassembly/Assembly Procedure
450
Duplex Unit
450
III Adjustment/Setting
451
3 III Adjustment/Setting
451
How to Use the Adjustment Section
451
I/O Check
452
Check Procedure
452
I/O Check List
452
I/O Check Screen
452
Mechanical Adjustment
453
Adjusting the Paper Reference Position
453
Changing the Cable Tension Strength (Moving of the Lever)
453
IV Troubleshooting
455
Jam Display
455
Initial Check Items
455
Misfeed Display
455
Misfeed Display Resetting Procedure
455
Sensor Layout
456
Solution
457
Advertisement
imagistics cm3520 User Manual (502 pages)
imagistics cm3520 Desktop scanner/printer User's Guide
Brand:
imagistics
| Category:
All in One Printer
| Size: 20 MB
Table of Contents
Introduction
2
Table of Contents
3
Making Basic Copies
15
Available Features
18
Selecting the Print Color
18
Sorting Copies
18
Stapling Copies
18
Punching Holes in Copies
18
Adjusting Copies to the Size of the Paper
19
Specifying Separate Horizontal and Vertical Zoom Ratios
19
Automatically Selecting the Paper
19
Reserving Bypass Tray Copying
19
Copying Book Documents
19
Copying Multiple Document Pages Onto a Single Page
20
Copying with a Layout for Center Binding
20
Adjusting Copies According to the Image Quality of the Original
20
Printing a Sample Copy
21
Interrupting a Copy Job
21
Enlarging the Touch Panel Screens
21
Checking the Copy Settings
21
Storing the Scanned Image in the Memory
21
Scanning the Document in Separate Batches
22
Printing Distribution Numbers on Copies
22
Making Copies for Filing
22
Erasing Sections of Copies
22
Adjusting the Image to Fit the Paper Size
23
Repeating Copy Images
23
Inserting Paper between Transparencies
23
Copying Booklet Documents
24
Improving the Copy Color Quality
24
Copying with a Background Color
24
Separating the Colors of the Copy
24
Copying with Reversed Colors
25
Enlarging the Image and Printing It on Multiple Pages
25
Printing a Mirror Image of the Document
25
Reducing the Image and Printing Multiple Copies on One Page
26
Managing Copying
26
Explanation of Basic Concepts and Symbols
27
Width" and "Length
27
Paper Orientation
27
Explanation of Manual Conventions
28
Energy Star
30
What Is an ENERGY STAR ® Product
30
Trademarks and Registered Trademarks
30
Legal Restrictions on Copying
31
1 Installation and Operation Precautions
32
For Safe Use
33
Warning and Precaution Symbols
33
Meaning of Symbols
33
Warning
34
Caution
35
Precautions for Routine Use
36
USER INSTRUCTIONS FCC PART 15 - RADIO FREQUENCY DEVICES (for U.S.A. Users)
36
INTERFERENCE-CAUSING EQUIPMENT STANDARD (ICES-003 ISSUE 3) (for Canada Users)
37
For Users in Countries Not Subject to Class B Regulations
37
LED Radiation Safety
37
Ozone Release
37
Installation Precautions
38
Installation Site
38
Power Source
38
Space Requirements
39
Operation Precautions
40
Operating Environment
40
Proper Use
40
Transporting the Machine
41
Care of Machine Supplies
41
Storage of Copies
42
2 Before Making Copies
44
Components and Their Functions
45
Components and Their Functions
46
Part Names and Their Functions
48
Outside of Machine
48
Options
51
Inside of Machine
54
Control Panel
55
Touch Panel
57
Operating the Touch Panel
58
Supplies and Parts
59
Turning the Machine on and off
60
Turning on the Machine
60
When the Machine Is Turned on
60
Queuing a Job During Warm-Up
60
Panel Reset Timer
60
Power Save Mode
61
Recovering from Power Save Mode
62
Sleep Mode
62
Recovering from Sleep Mode
62
Turning off the Machine
63
When the Machine Is Turned off
63
Using the Touch Panel
64
Description of the Touch Panel
64
Default Settings
64
Adjusting the Angle of the Control Panel
66
To Adjust the Angle of the Control Panel
67
Loading Paper into the 1St Drawer
69
Loading Paper into the 2Nd, 3Rd or 4Th Drawer
74
Loading Paper into the Large-Capacity Paper Feed Cabinet
76
Loading Paper into the Bypass Tray
78
Feeding the Document
84
Loading the Document into the Reverse Automatic Document Feeder
84
Placing the Document on the Original Glass
87
3 Basic Copy Operations
92
Specifying the Number of Copies
93
To Specify the Number of Copies
93
To Change the Setting for the Number of Copies
94
Stopping Copying
95
Selecting a Color Setting
96
Auto Color
96
Full Color
96
Color
96
Single Color
96
Black
96
To Select the Color Setting
97
Selecting Output Settings
99
Non Sorting ("Non Sort" Setting)
99
Sorting ("Sort" Setting)
99
Crisscross Sorting (Crisscross Feeding)
100
Stapling (with Finisher 9997 Installed)
101
Stapling (with Finisher 9996 Installed)
101
Hole-Punching
102
To Specify Output Settings
103
Specifying a Zoom Setting
104
Automatic Scaling ("Auto Zoom" Setting)
104
Full Size ("×1.0" Setting)
104
Enlarging (Enlarge Settings)
104
Reducing (Reduce Settings)
104
Minimizing ("Minimal" Setting)
104
Zooming
105
Custom Sizing (Manual Zoom Settings)
105
To Select a Zoom Setting
105
To Enter a Manual Zoom Ratio
106
To Store Manual Zoom Ratios
106
To Recall a Stored Manual Zoom Ratio
107
To Specify Different Vertical and Horizontal Scaling Proportions (X/Y Zoom Settings)
108
Selecting a Paper/Size Setting
109
Automatic Paper Selection ("Auto Paper Select" Setting)
109
Manual Paper Selection
109
Bypass Tray Selection (Bypass Setting)
109
Bypass Reserve Settings for Bypass Tray
109
To Select the Paper Drawer
110
To Specify the Size of the Paper in the 1St Drawer
110
To Specify the Size of the Paper in the Bypass Tray
112
To Set a Non-Standard (Custom) Paper Size
113
To Store a Non-Standard (Custom) Paper Size
114
To Select a Stored Non-Standard (Custom) Paper Size
115
To Specify the Bypass Reserve Settings for the Bypass Tray
116
Selecting Original Settings
118
Single-Sided Original ("1" Setting)
118
Double-Sided Original ("2" Setting)
118
Books ("Book Copy" Settings)
118
Document Orientation (Original Direction Setting)
120
Document Binding Margin Position (Margin Setting)
122
Thick Documents ("Thick Original" Setting)
122
To Specify Original Settings
123
To Specify Book Copy Settings
123
To Specify Conditions of the Original
126
Selecting Copy Settings
128
Single-Sided Copy ("1" Setting)
129
Double-Sided Copy ("2" Setting)
129
Single-Sided 2In1 Copy ("1-2In1" Setting)
129
Double-Sided 2In1 Copy ("2-2In1" Setting)
129
Single-Sided 4In1 Copy ("1-4In1" Setting)
130
Double-Sided 4In1 Copy ("2-4In1" Setting)
130
Booklet Copy ("Booklet" Setting)
131
Bound Booklet ("Bind" and "Center Erase" Settings)
132
Conditions for Making Booklets
133
Center-Erasing ("Center Erase" Setting)
133
To Specify Copy Settings
134
To Select the "Bind" Setting
135
Selecting Photo/Density Settings
136
Image Types
136
Background Setting of "Density" Parameter (Manual)
137
Background Setting of "Density" Parameter ("Auto")
137
Density Setting of "Density" Parameter
137
Text Enhancement Setting
137
Glossy" Setting
138
Screen Pattern Settings
138
To Select a Photo/Density Setting
138
To Select a Glossy Finish ("Glossy" Setting)
139
To Select a Screen Pattern Setting
140
4 Copy Paper
142
Paper Specifications
143
Paper Types
143
Paper Sizes
144
Paper Capacity
145
Print Area
147
Paper Storage
148
Automatically Selecting the Paper Source
149
Operating Conditions
149
Order for Selecting Another Paper Drawer
149
Special Paper
150
5 Original Documents
152
Document Feeding
153
Document Feeding Methods
153
Appropriate Document Types (Using the Reverse Automatic Document Feeder)
153
Document Precautions (Using the Reverse Automatic Document Feeder)
155
Appropriate Document Types (Using the Original Glass)
155
Document Precautions (Using the Original Glass)
156
Small-Sized Documents
156
Centering
156
6 Additional Copy Operations
158
Blocking Document Scan Storage ("Reprint OFF" Function)
159
To Set the "Reprint OFF" Function
159
Copying Documents of Mixed Sizes ("Mixed Original" Function)
160
To Copy Documents of Mixed Sizes
161
Printing Sample Copies ("Copy 1 Set" Function)
163
To Make a Sample Copy
163
Interrupting a Copy Job (Interrupt Mode)
165
To Interrupt Copying
165
Making Copies with an Account
167
Using the Volume Track Mode (E.K.C.)
167
To Make Copies When Accounts Are Specified
167
Setting the "Key Repeat Start/Interval" Function (Accessibility Mode)
169
Setting the "Enlarged Display Clear Check" Function (Accessibility Mode)
171
Checking the Settings
173
To Check the Settings
173
To Change the Settings
175
7 Application Functions
176
Storing the Scanned Image in the Memory ("Scan to Memory" Function)
177
To Use the "Scan to Memory" Function
177
Scanning the Document in Separate Batches ("Separate Scan" Function)
178
To Use the "Separate Scan" Function
179
Printing Distribution Numbers on Copies ("Set Numbering" Function)
180
To Use the "Set Numbering" Function
180
Making Copies for Filing ("File Margin" Function)
183
To Use the "File Margin" Function
183
Erasing Sections of Copies ("Edge/Frame Erase" Function)
185
To Use the "Edge/Frame Erase" Function
186
Adjusting the Document Image ("Image Adjustment" Function)
190
To Use the "Image Adjustment" Function
191
Tiling Copy Images ("Image Repeat" Function)
194
To Use the "Image Repeat" Function
194
Inserting Paper between Transparencies ("OHP Interleave" Function)
197
To Use the "OHP Interleave" Function
197
Making Bound Booklets ("Booklet Original" Function)
199
To Use the "Booklet Original" Function
199
Improving Color Copy Quality (Color Image Adjustment Parameters)
202
To Adjust the "Brightness" Parameter
202
To Adjust the "Contrast" Parameter
204
To Adjust the "Saturation" Parameter
205
To Adjust the "Sharpness" Parameter
206
To Adjust the "Red" Parameter
207
To Adjust the "Green" Parameter
208
To Adjust the "Blue" Parameter
209
To Adjust the "Color Balance" Parameter
210
To Adjust the "Portrait" Parameter
212
To Adjust the "Hue" Parameter
213
To Adjust the "Copy Density" Parameter
214
To Make Sample Copies
215
Editing Images (Creation Functions)
216
To Make Settings for the "Background Color" Function
216
To Make Settings for the "Color Separation" Function
218
To Set the "Neg. Pos. Reverse" Function
220
To Make Settings for the "Multi-Page Enlargement" Function
221
To Make Settings for the "Mirror Image" Function
227
Reducing the Document to Postcard Size and Printing Multiple Copies on One Page ("Postcard" Function)
230
To Make Settings for the "Postcard" Function
230
imagistics cm3520 User Manual (150 pages)
Color laser MFP
Brand:
imagistics
| Category:
Multifunction printer
| Size: 5 MB
Table of Contents
Table of Contents
3
1 Before Making Copies
8
Explanation of Guide Conventions
9
Control Panel Parts and Their Functions
11
Adjusting the Angle of the Control Panel
15
To Lower the Angle of the Control Panel
16
To Raise the Angle of the Control Panel
16
Touch Panel
17
Displaying the Enlarged Basic Screen
17
Touch Panel Operation
19
Keys Displayed in the Touch Panel
20
Paper Type Icons
22
Paper Supply Icons
24
To Use the Volume Track Mode
25
2 Paper Settings
28
To Specify a Non-Standard (Custom) Paper Size for the 1St Drawer
29
To Store a Non-Standard (Custom) Paper Size for the 1St Drawer
34
To Specify a Paper Size Setting for the 1St Drawer
38
To Specify a Non-Standard (Custom) Paper Size for the Multiple Bypass Tray
40
To Store a Non-Standard (Custom) Paper Size for the Multiple Bypass Tray
45
To Specify a Paper Size Setting for the Multiple Bypass Tray
49
To Specify the Paper Type for the Multiple Bypass Tray
51
3 Original Documents
54
Loading the Document
55
Loading the Document into the Reverse Automatic Document Feeder
55
Placing the Document on the Original Glass
58
4 Useful Operations
64
Basic Copying
65
To Make Copies
65
Stopping Copying
69
To Stop a Copy Job
69
To Restart the Copy Job
70
Queuing a Copy Job for the Multiple Bypass Tray
71
To Queue a Copy Job for the Multiple Bypass Tray
71
Interrupting a Copy Job
75
5 Specifying Copy Settings
80
Selecting a Color Setting
81
To Select the Color Setting
81
Selecting Output Settings
83
To Specify Output Settings
84
Specifying a Zoom Setting
86
To Specify a Zoom Setting
87
To Specify a Zoom Ratio
89
To Select the "Auto Zoom" Setting
90
To Specify a Reduce or Enlarge Setting
92
To Specify a Manual Zoom Ratio
94
To Store a Manual Zoom Ratio
96
To Recall a Stored Manual Zoom Ratio
98
To Specify Different Vertical and Horizontal Scaling Proportions (X/Y Zoom Settings)
100
Selecting a Paper Setting
102
To Select the Paper Setting
103
Selecting Original Setting
105
To Select an Original Setting
106
Selecting Copy Settings
109
To Select a Copy Setting
110
Selecting a Photo/Density Setting
112
To Select an Original Image Type Setting
113
To Select the Background, Density, Text Enhancement and "Glossy Mode" Settings
116
Checking the Settings
119
To Check the Settings
119
To Change the Settings
123
Advertisement
Advertisement
Related Products
imagistics cm3530
imagistics cm2520
imagistics cm4530
imagistics C145
imagistics C140
imagistics cm3531
imagistics C650
imagistics C550
imagistics C400
imagistics cm4531
imagistics Categories
All in One Printer
Fax Machine
Copier
Printer
Printer Accessories
More imagistics Manuals
Login
Sign In
OR
Sign in with Facebook
Sign in with Google
Upload manual
Upload from disk
Upload from URL