Sign In
Upload
Manuals
Brands
Geemarc Manuals
Telephone
CL595
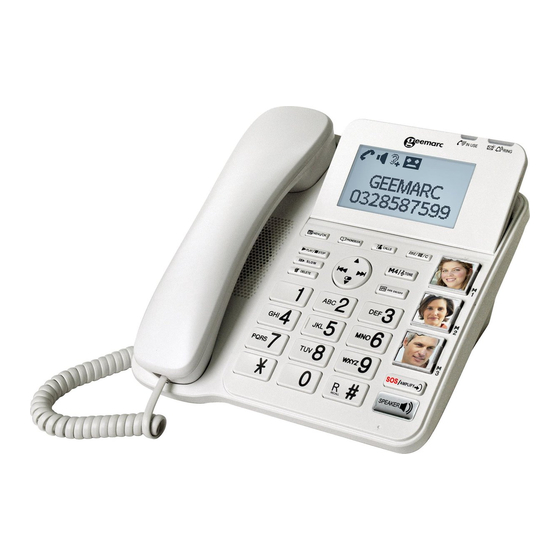
Geemarc CL595 Amplified Corded Telephone Manuals
Manuals and User Guides for Geemarc CL595 Amplified Corded Telephone. We have
1
Geemarc CL595 Amplified Corded Telephone manual available for free PDF download: User Manual
Geemarc CL595 User Manual (48 pages)
Brand:
Geemarc
| Category:
Telephone
| Size: 2 MB
Table of Contents
Table of Contents
2
1 Important Safety Instructions
5
2 Set up the Telephone
6
Package Contents
6
Location
6
Connect the Corded Base Station
7
First Use of Your Base
7
Base Station Installation Options
8
Tabletop to Wall Mount Installation
8
Wall Mount to Tabletop Installation
9
3 Get to Know Your Phone
10
Overview of the Corded Base
10
Base Corded Menu Structure
13
Base LCD Display
14
Text and Digit Entry Table
15
English Character Set
15
4 Use Your Phone
16
Make an External Call
16
Preparatory Dialing
16
Direct Dialing
16
Call from the Phonebook
16
Call from the Call List
16
Call from the Redial List
16
Call Timer
16
Make a Call from Direct Access Memory
16
Answer a Call
17
Volume Boost Function
17
End a Call
17
Adjust Earpiece and Speakerphone Volume
17
Mute a Call
17
Modify the Tonality During a Call
17
Emergency Call Without Main Power
17
Redial the Last Number
18
Redial a Number from the Redial List
18
Store a Redial Number into the Phonebook
18
Delete a Redial Number
18
Delete the Entire Redial List
18
Find the Handset (if You Have an Additional Handset)
18
Make an Internal Call
19
Intercom
19
Call All Handsets
19
Transfer an External Call
19
Make a 3-Way Conference Call
19
5 Phonebook
20
Add a New Phonebook Entry
20
Search for a Phonebook Entry
20
View a Phonebook Entry
20
Edit a Phonebook Entry
20
Delete a Phonebook Entry
21
Delete the Entire Private Phonebook
21
Check the Phonebook Usage
21
Set the Fast Dial Numbers
22
Add or Edit the Fast Dial Number
22
View a Fast Dial Number
22
Delete the Fast Dial Number
22
Delete All the Fast Dial Number
22
Vip Number
23
Record a VIP Number
23
Use a VIP Number
23
Delete One or All VIP Number
23
Record VIP Number in Photo Memory
23
Check the VP Usage
23
6 Caller Display (Network Dependent)
24
View the Call List
24
Details on the Call List Number
24
Store a Call List Number into the Phonebook
25
Store a Call List Number into the Blacklist
25
Store a Call List Number into a Photo Memory
25
Delete an or All the Entire Call List
25
7 Direct Memories Keys
26
Record or Edit Direct Memory Key
26
Record a Voice Tag
26
Listen or Delete a Voice Tag
26
Delete a Direct Memory Key
27
Set the Memory Keys
27
8 Black List Function
28
Record or Edit a Black List Number
28
Check or Edit the Information of the Phone Number Blocked
28
Delete an or All Black List Number
28
Activation of the Black List Function
28
Activation of the Function for the Private or Unavailable Number
29
9 Intercom Function
29
10 Date and Hour Setting
29
Set the Date Format
29
Set the Time Format
29
Set the Date and Time
29
11 Text Language Setting
29
12 Phone Settings
30
Base Settings
30
Set the Ringer Melody for Internal Calls
30
Set the Ringer Melody for External Calls
30
Set the Ringer Volume
30
Set the Key Tone
31
Set the Flash Time
31
First Ring Function
31
Reset Your Base
31
Registration
32
13 Research One Handset
32
14 Sos Emergency Function
33
SOS Setting
33
Delete an or All SOS Number
33
Make an Emergency Call
33
Record SOS Message
33
Play SOS Message
33
Delete a SOS Message
34
Set the Talking Language
34
15 Setting an Alarm
34
Turn ON/OFF the Alarm
34
Set the Alarm Melody
35
Rename the Name of Your Alarm
35
Record a Voice Memo for the Alarm
35
Delete or Play a Voice Memo Alarm
35
16 Talking Help Function
35
17 Answering Machine
36
Switching Answering Machine On/Off
36
Play Messages on TAM
36
Delete All Messages on TAM
37
Record Memos on TAM
37
Answering Machine Settings
37
Set the Talking TAM Language
37
Turn ON/OFF the Base Screening
38
Record Your Outgoing Message (OGM)
38
Playback the Outgoing Message (OGM)
38
Delete a Personalized OGM (SET OGM to DEFAULT)
38
Set the Answer Delay
39
Set the Recording Time of Incoming Message
39
Activate Remote Access
39
Change the 4-Digit Remote Access PIN
39
Activate or Deactivate the Remote Access
40
Function Message Alert
40
Remote Operations
41
18 Troubleshooting
42
19 Technical Specifications
44
20 Care and Maintenance Instructions
45
21 Guarantee
46
22 Declarations
47
Advertisement
Advertisement
Related Products
Geemarc CL555
Geemarc CL50
Geemarc CL200+
Geemarc CL330
Geemarc CL100
Geemarc Clear Sound CL455
Geemarc CL60
Geemarc CLEARSOUND PhotoPHONE
Geemarc Clearsound Ampli DECT150
Geemarc Clear Sound PhotoPHONE 100
Geemarc Categories
Telephone
Hearing Aid
Cordless Telephone
Amplifier
Headsets
More Geemarc Manuals
Login
Sign In
OR
Sign in with Facebook
Sign in with Google
Upload manual
Upload from disk
Upload from URL