Sign In
Upload
Manuals
Brands
Dormakaba Manuals
Household Hardware
TENSOR
Dormakaba TENSOR Manuals
Manuals and User Guides for Dormakaba TENSOR. We have
2
Dormakaba TENSOR manuals available for free PDF download: Mounting Instructions
Dormakaba TENSOR Mounting Instructions (24 pages)
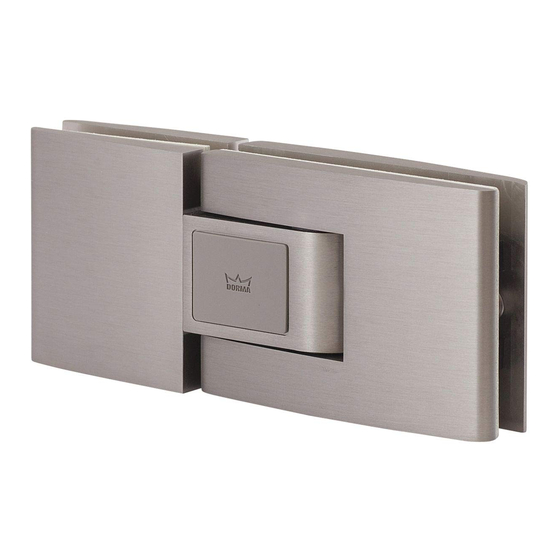
Double action hinge
Brand:
Dormakaba
| Category:
Door Opening System
| Size: 1 MB
Table of Contents
Deutsch
1
Table of Contents
1
1 Über diese Anleitung
2
Informationen zur Anleitung
2
Zielgruppe
2
Verwendete Symbole
2
Sicherheitshinweise
2
Weitere Kennzeichnungen
2
Werkzeugsymbole
2
2 Sicherheit
2
Bestimmungsgemäße Verwendung und Vorherseh-Barer Fehlgebrauch
2
Vorgaben für den Einbauort
2
Vorgaben für den Glastürflügel
3
Anforderungen an die Wand und an das Befestigungs-Material
3
Allgemeine Sicherheitshinweise
3
Chargenkennzeichen
3
3 Produktbeschreibung
3
Funktionsprinzip
3
Produktvarianten
3
Wandbefestigung mit Aufliegender Montageplatte
3
Lieferumfang
3
Maße der Glasbearbeitungen
4
Werkzeuge für die Montage
4
Zargenbefestigung mit Eingelassener Montageplatte
4
Lieferumfang
4
Glas an Glas-Befestigung
4
Lieferumfang
5
Maße der Glasbearbeitungen
5
Werkzeuge für die Montage
5
4 Montage
5
Dicke der Zwischenlage Bestimmen
5
Wandbefestigung mit Aufliegender Montageplatte
5
Glastürflügel Prüfen
5
Pendeltürband Vorbereiten
5
Montageplatten Befestigen
6
Glasflächen Reinigen
6
Pendeltürband am Glastürflügel Befestigen
6
Glastürflügel an Wand Montieren
6
Zargenbefestigung mit Eingelassener Montageplatte
7
Glastürflügel Prüfen
7
Türzarge Vorbereiten
7
Pendeltürband Vorbereiten
7
Montageplatten Befestigen
8
Pendeltürband an der Zarge Befestigen
8
Glasflächen Reinigen
8
Glastürflügel Positionieren und Festschrauben
8
Glas an Glas-Befestigung
8
Seitenteil Montieren
8
Glastürflügel und Seitenteil Prüfen
9
Pendeltürband Vorbereiten
9
Glasflächen Reinigen
10
Glastürflügel an Seitenteil Befestigen
10
Überdrehen der Tür Verhindern
10
Nulllage Einstellen
11
Pendeltürband Warten
11
Reinigungshinweis
11
Störungsbehebung
11
Wartung und Pflege
11
Demontage und Entsorgung
12
English
13
About this Manual
14
Information about the Manual
14
Intended Use and Foreseeable Misuse
14
Specifications for the Installation Location
14
Security
14
Symbols Used
14
Safety Instructions
14
Further Labeling
14
Tool Icons
14
Target Group
14
Function Principle
15
General Safety Instructions
15
Identification Label
15
Product Description
15
Product Variants
15
Wall Mounting with Surface-Mounted Mounting Plate
15
Parts Included
15
Size of Glass Preparations
15
Tools for Installation
16
Frame with Embedded Mounting Plate
16
Parts Included
16
Size of Glass Preparations
16
Glass to Glass Mounting
16
Size of Glass Preparations
17
Tools for Installation
17
Requirements for the Wall and the Mounting Material
15
Determine the Thickness of the Gasket
17
Wall Mounting with Surface-Mounted Mounting Plate
17
Check the Glass Door Leaf
17
Prepare the Double-Action Hinge
17
Fix Mounting Plates
18
Clean Glass Surfaces
18
Attach the Double-Action Hinge Onto the Glass Door Leaf
18
Mount the Glass Door Leaf Onto the Wall
18
Frame with Embedded Mounting Plate
19
Check the Glass Door Leaf
19
Preparing the Door Frame
19
Prepare the Double-Action Hinge
19
Fix Mounting Plates
20
Attach the Double-Action Door Hinge to the Door Frame
20
Clean Glass Surfaces
20
Position and Screw in Glass Door Leaf
20
Glass to Glass Mounting
20
Mount the Side Panel
20
Check the Glass Door Leaf and the Side Panel
21
Prepare the Double-Action Hinge
21
Clean Glass Surfaces
22
Attach the Glass Door Leaf to the Side Panel
22
Prevent the Door Opening too Far
22
Troubleshooting
23
Cleaning Instructions
24
Adjusting the "0" Position
23
Maintenance and Care
24
Disassembly and Disposal
24
Maintaining the Double-Action Hinge
24
Advertisement
Dormakaba TENSOR Mounting Instructions (24 pages)
Brand:
Dormakaba
| Category:
Household Hardware
| Size: 1 MB
Table of Contents
Deutsch
1
Table of Contents
1
1 Über diese Anleitung
2
Informationen zur Anleitung
2
Zielgruppe
2
Verwendete Symbole
2
Sicherheitshinweise
2
Weitere Kennzeichnungen
2
Werkzeugsymbole
2
2 Sicherheit
2
Bestimmungsgemäße Verwendung und Vorherseh-Barer Fehlgebrauch
2
Vorgaben für den Einbauort
2
Vorgaben für den Glastürflügel
3
Anforderungen an die Wand und an das Befestigungs-Material
3
Allgemeine Sicherheitshinweise
3
Chargenkennzeichen
3
3 Produktbeschreibung
3
Funktionsprinzip
3
Produktvarianten
3
Wandbefestigung mit Aufliegender Montageplatte
3
Lieferumfang
3
Maße der Glasbearbeitungen
4
Werkzeuge für die Montage
4
Zargenbefestigung mit Eingelassener Montageplatte
4
Lieferumfang
4
Glas an Glas-Befestigung
4
Lieferumfang
5
Maße der Glasbearbeitungen
5
Werkzeuge für die Montage
5
4 Montage
5
Dicke der Zwischenlage Bestimmen
5
Wandbefestigung mit Aufliegender Montageplatte
5
Glastürflügel Prüfen
5
Pendeltürband Vorbereiten
5
Montageplatten Befestigen
6
Glasflächen Reinigen
6
Pendeltürband am Glastürflügel Befestigen
6
Glastürflügel an Wand Montieren
6
Zargenbefestigung mit Eingelassener Montageplatte
7
Glastürflügel Prüfen
7
Türzarge Vorbereiten
7
Pendeltürband Vorbereiten
7
Montageplatten Befestigen
7
Pendeltürband an der Zarge Befestigen
8
Glasflächen Reinigen
8
Glastürflügel Positionieren und Festschrauben
8
Glas an Glas-Befestigung
8
Seitenteil Montieren
8
Glastürflügel und Seitenteil Prüfen
9
Pendeltürband Vorbereiten
9
Glasflächen Reinigen
9
Glastürflügel an Seitenteil Befestigen
9
Überdrehen der Tür Verhindern
10
Nulllage Einstellen
10
Pendeltürband Warten
11
Reinigungshinweis
11
Wartung und Pflege
11
Demontage und Entsorgung
11
English
13
About These Instructions
14
Information about the Instructions
14
Proper Use and Foreseeable Misuse
14
Specifications for the Installation Location
14
Specifications for the Glass Door Leaf
15
Safety
14
Symbols Used
14
Safety Instructions
14
Further Markings
14
Tool Icons
14
Target Group
14
General Safety Instructions
15
Identification Label
15
Principle of Operation
15
Product Description
15
Product Variants
15
Wall Mounting with Surface Mounted Mounting Plate
15
Scope of Delivery
15
Size of Glass Preparations
16
Tools for Mounting
16
Frame with Embedded Mounting Plate
16
Scope of Delivery
16
Glass to Glass Mounting
16
Scope of Delivery
17
Size of Glass Preparations
17
Tools for Mounting
17
Requirements for the Wall and the Mounting Material
15
Determine the Thickness of the Gasket
17
Wall Mounting with Surface Mounted Mounting Plate
17
Check the Glass Door Leaf
17
Prepare the Double Action Hinge
17
Fix Mounting Plates
18
Clean Glass Surfaces
18
Attach the Double Action Hinge Onto the Glass Door Leaf
18
Mount the Glass Door Leaf Onto the Wall
18
Frame with Embedded Mounting Plate
19
Check the Glass Door Leaf
19
Preparing the Door Frame
19
Prepare the Double Action Hinge
19
Fix Mounting Plates
19
Attach the Double Action Door Hinge to the Frame
20
Clean Glass Surfaces
20
Position and Screw in Double Action Hinges
20
Glass to Glass Mounting
20
Mount the Side Panel
20
Check the Glass Door Leaf and the Side Panel
21
Prepare the Double Action Hinge
21
Clean Glass Surfaces
21
Attach the Glass Door Leaf to the Side Panel
21
Prevent Excessive Opening of the Door
22
Adjusting the "0" Position
22
Cleaning Instructions
23
Maintenance and Care
23
Dismantling and Disposal
23
Maintain the Double Action Hinge
23
Advertisement
Related Products
Dormakaba TENSOR Double-Acting Hinge
Dormakaba Terminal ONE
Dormakaba TS93 Series
Dormakaba TS9356 PKT 120/170
Dormakaba TS 93 B EN 5-7
Dormakaba TS9356 PKT 180
Dormakaba TS9356 PKT 90/PF
Dormakaba TS93 PTH Series
Dormakaba TS9315 PT
Dormakaba TS9315 PTH
Dormakaba Categories
Door Opening System
Door locks
Locks
Keypad
Indoor Furnishing
More Dormakaba Manuals
Login
Sign In
OR
Sign in with Facebook
Sign in with Google
Upload manual
Upload from disk
Upload from URL