Sign In
Upload
Manuals
Brands
Canon Manuals
Printer
imageRUNNER ADVANCE DX C357iF
Canon imageRUNNER ADVANCE DX C357iF Manuals
Manuals and User Guides for Canon imageRUNNER ADVANCE DX C357iF. We have
4
Canon imageRUNNER ADVANCE DX C357iF manuals available for free PDF download: Service Manual, Installation Manual, Faq Manual
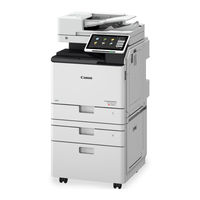
Canon imageRUNNER ADVANCE DX C357iF Service Manual (1121 pages)
Brand:
Canon
| Category:
All in One Printer
| Size: 65 MB
Table of Contents
Important Notices
2
Explanation of Symbols
3
Table of Contents
5
Safety Precautions
13
Laser
14
Laser Safety
14
Handling of Laser System
14
Power Supply / Lithium Battery
15
Turn Power Switch on
15
Power Supply Guidelines
15
Notes When Handling a Lithium Battery
15
Toner Safety
16
About Toner
16
Handling Adhered Toner
16
Notes on Works
16
Points to Note before Servicing
16
Points to Note at Cleaning
16
Notes on Assembly/Disassembly
17
Product Overview
18
Product Lineup
19
Host Machine
19
Function Expansion System Options
21
Hardware Products
21
License Products
21
Product Features
23
Product Overview
23
Specifications
24
Host Machine
24
FAX Specifications
25
Weight and Size
26
Productivity
26
Paper Type
29
Available Paper Types
29
Parts Name
31
Cross Section View
31
Control Panel
32
Main Menu
33
Service Buttons
33
Technical Explanation (Device)
35
Functional Configuration
36
Original Exposure System
37
Features
37
Specifications
37
Basic Configuration
39
Parts Configuration
40
List of Sensors
42
Dust Detection Control
42
Image Processing
44
Shading Correction (ADF Side)
48
Outline of Electric Circuits
49
ADF Scan Operation Sequence (Common to both 2-Sided/1-Sided)
50
Scanner Unit
53
Pickup Feed System
54
Double Feed Detection Control
57
Controller System
60
Overview
60
Laser Exposure System
65
Overview
65
Specifications
66
Laser ON/OFF Control
67
Horizontal Scanning Synchronization Control
68
Vertical Scanning Synchronization Control
69
Scanner Motor Control
70
APC (Auto Power Control)
71
BD Detection Correction Control
72
Dustproof Shutter
72
Image Formation System
74
Overview
74
Primary Charging
76
Drum Unit (Developing/Drum)
77
Transfer
82
Drum Cleaning Control
90
Image Stabilization Control
91
Toner Supply Area
98
Waste Toner Feed Unit
107
Other Controls
109
Fixing System
112
Overview
112
Specifications
112
Component Parts
112
Fixing Temperature Control
114
Standby Temperature Control
115
Print Temperature Control
116
Down Sequence Control
117
Fixing Film Unit Engagement/Disengagement Control
119
Pre-Fixing Arch Level Control
120
Protection Function
122
Pickup Feed System
124
Overview
124
Parts Configuration
125
Layout Drawing of Rollers
125
Cassette Pickup Assembly
127
Multi-Purpose Tray Pickup Assembly
131
Registration Area
132
Delivery Assembly
134
Reverse/Duplex Assembly
135
Jam Detection
138
External Auxiliary System
141
Software Counter
141
Fan
143
Power Supply
145
Power-Saving Function
145
Conditions for Not Entering Deep Sleep Mode (Check Items)
147
Quick Startup
147
Quick Start
148
Operating Conditions of the Heater Control
148
Technical Explanation (System)
149
Overview
150
Periodical Service
151
Periodically Replacement Parts
152
Consumable Parts
153
Parts Replacement and Cleaning
154
Preface
155
Outline
155
Points to Note When Tightening a Screw
155
List of Parts
156
External / Internal Cover
156
Parts Replacement and Cleaning
156
List of Main Unit
160
Electrical Components
163
External Cover/Interior System
175
Removing the Front Cover
175
Removing the Rear Cover 1
176
Removing the Left Upper Cover
180
Removing the Left Lower Cover
180
Removing the Right Front Cover
181
Pre-Check Items
181
Removing the Right Rear Cover/Right Rear Lower Cover
182
Removing the Left Upper Cover
184
Removing the Right Cover Unit
185
Removing the Multi-Purpose Tray
191
Removing the Delivery Tray
192
Removing the Rear Upper Cover
193
Removing the Upper Cover
194
Removing the Control Panel Unit
197
Original Exposure/Feed System
202
Removing the ADF Unit
202
Removing the ADF Pickup Unit
204
Removing the ADF Separation Unit
205
Removing the Scanner Unit (Back)
206
Removing the Copyboard Glass Unit
214
Removing the Scanner Unit (Front)
215
Removing the Reader Motor
219
Removing the ADF Feed Frame
221
Removing the CIS Holder
228
Controller System
230
Removing the Wi-Fi PCB
230
Removing the Main Controller Sub Cover /Main Controller Cover
230
Removing the HDD
232
Removing the Main Controller Unit
232
Removing the Low-Voltage Power Supply Unit
237
Removing the DC Controller PCB
242
Removing the Primary Transfer High-Voltage PCB Unit
243
Removing the Secondary Transfer High-Voltage Pcb/Developing High-Voltage PCB Unit
246
Actions after Assembly
247
Removing the Fax Unit
247
Removing the Fax Speaker Unit
248
Removing the Control Panel Unit
249
Removing the Control Panel CPU PCB/LCD Unit/Led PCB
253
Removing the All-Night Power Supply PCB Unit
258
Laser Exposure System
260
Removing the Laser Scanner Unit
260
Actions after Assembly
264
Image Formation System
265
Removing the Waste Toner Container
265
Removing the Toner Container (Y/M/C/Bk)
265
Removing the Drum Unit (Y/M/C/Bk)
266
Removing the ITB Unit
269
Removing the Registration Patch Sensor Unit
274
Removing the Secondary Transfer Outer Roller Unit
275
Removing the Secondary Transfer Outer Roller Guide Unit
277
Installing the Duplexing Drive Gear Unit
280
Removing the Registration Drive Unit
281
Removing the Main Drive Unit
283
Removing the Hopper Unit (Y/M/C/Bk)
284
Removing the ITB Pressure Release Switch
286
Removing the Bottle Drive Unit (Y/M/C/Bk)
287
Removing the Toner Bottle Mount (Y/M/C/Bk)
289
Fixing System
296
Removing the Fixing Assembly
296
Removing the Fixing Pressure Roller Unit
297
Removing the Fixing Drive Unit
301
Pickup/Feed System
303
Removing the Delivery/Reverse Unit
303
Removing the Right Inner Cover Unit
304
Removing the Cassette Pickup Roller/Cassette Separation Roller/Cassette Feed Roller
305
When Removing the Cassette Pickup Roller
307
When Removing the Cassette Feed Roller
308
Removing the Multi-Purpose Tray Pickup Roller /Multi-Purpose Tray Separation Roller /Multi-Purpose Tray Feed Roller
310
Assembling Procedure
313
Removing the Registration/Pickup Unit
322
Procedure after Replacement When Images with Uneven Density (White Spots) Are Generated after Replacing the Registration Unit
326
Image with Uneven Density (White Spots) on the Front Side
326
Image with Uneven Density (White Spots) on the Rear Side
326
Procedure When Images with Uneven Density (White Spots) Are Generated on the Front Side
328
Procedure When Images with Uneven Density (White Spots) Are Generated on the Rear Side
330
Removing the Cassette 1 Lifter Drive Unit
332
Removing the Cassette 1 Pickup Drive Unit
335
Cleaning Procedure
338
Cleaning the Copyboard Glass/Reading Glass
338
Cleaning the Dustproof Glass
338
Cleaning When Installing/Removing the ITB Unit
339
Cleaning the Registration Patch Sensor Unit
340
Cleaning the Registration Front Guide
342
Cleaning the Registration Roller/Pre-Registration Roller
343
Cleaning the Secondary Transfer Guide
344
Cleaning the Fixing Inlet Guide
345
Adjustment
347
Pickup Feed System
348
Image Position Adjustment
348
Software Adjustment
348
Feed Direction
349
Original Feed System
350
Skew Adjustment (at Stream Scanning of Originals)
350
Right Angle Adjustment (Slant Adjustment)
355
Light Intensity Adjustment
356
Automatic Adjustment of the Stream Reading Position (Automatic Adjustment of the Reading Position at ADF Reading)
357
White Level Adjustment
357
Front/Back Side Difference Correction Adjustment
357
Parallelogram Correction
357
Angle Correction (Front / Back)
358
Image Position Adjustment (at Stream Scanning of Originals)
358
Original Exposure System
364
Adjustment of the White Plate
364
Actions at Parts Replacement
367
Main Controller PCB
367
Actions after Parts Replacement
367
DC Controller PCB
369
Before Parts Replacement
369
Hard Disk
370
Registration Patch Sensor Unit
373
After Replacing the Copyboard Glass
373
After Replacing the Scanner Unit (Front)
374
After Replacing the Scanner Unit (Back)
374
Control Panel Unit
376
Troubleshooting
378
List of Initial Check Items
379
Test Print
380
Overview
380
Steps to Select a Test Print Type
380
How to Use the Test Print
381
Gradations (TYPE = 4)
381
Full Page Halftone (TYPE = 5)
381
Mcybk Horizontal Stripes (TYPE = 10)
383
Gradations (TYPE = 12)
383
List of Troubleshooting Items
384
Image Failure
384
Fixing Wrinkle in Envelopes Due to a Problem of Feedability between the Secondary Transfer Nip and the Fixing Nip
386
Category: Malfunction
390
The ITB Unit Cannot be Removed Due to a Disengagement Error of the Primary Transfer Roller
390
Troubleshooting by Forcible Stop of Paper Feed
390
Startup System Failure Diagnosis
397
Overview
397
Basic Flow
398
Control Panel LED Check Flow
400
5 V Power Supply Assembly Check Flow
402
12 V Power Supply Assembly Check Flow
405
Controller Self Diagnosis
407
Boot Method
407
Diagnosis Result
408
Limitations
410
Debug Log
411
Function Overview
411
Saving and Collecting Debug Logs
414
Setting the Overwrite Function
418
Setting the Encryption Function
418
Setting the Filter Function
419
Setting the Startup Collection Function
419
Collecting into a USB Device
421
Service Mode Relating to Debug Logs
427
Error/Jam/Alarm
429
Overview
430
Location Code
430
Pickup Position Code
430
Pickup Size
430
Points to Note When Clearing MN-CON
432
Points to Note When Clearing HDD
432
Error Code
433
Error Code Details
433
Jam Code
526
Jam Type
526
Jam Screen Display Specification
527
Host Machine / Cassette
527
ADF / Reader
530
Uniflow (Advanced Scanning)
531
Staple Finisher
532
Jam Code Details
533
Alarm Code
534
Alarm Code Details
534
Service Mode
576
Overview
577
Basic Operations
577
Switching the Screen Display (Level 1 2)
578
SITUATION Mode
580
Security Support
585
Service Mode Backup
589
Output of Service Print Data
589
COPIER (Service Mode for Printer)
594
DISPLAY (State Display Mode)
594
I/O
625
ADJUST (Adjustment Mode)
626
FUNCTION (Operation / Inspection Mode)
730
OPTION (Specification Setting Mode)
752
TEST (Print Test Mode)
874
COUNTER (Counter Mode)
881
FEEDER (ADF Service Mode)
907
ADJUST (Adjustment Mode)
907
FUNCTION (Operation / Inspection Mode)
911
OPTION (Specification Setting Mode)
912
SORTER (Service Mode for Delivery Options)
914
ADJUST (Adjustment Mode)
914
OPTION (Specification Setting Mode)
914
BOARD (Option Board Setting Mode)
915
OPTION (Specification Setting Mode)
915
FAX (FAX Service Mode)
916
Overview
916
Setting of Bit Switch (SSSW)
919
Setting of Menu Switch (MENU)
930
Setting of Numeric Parameter (NUMERIC Param.)
931
Setting of Destination (TYPE)
933
Setting of Printer Functions (PRINTER)
934
IPFAX Setting
936
Initialization of Set Value (CLEAR)
937
Test Mode (TEST)
937
Service Report (REPORT)
941
Installation
945
How to Utilize this Installation Procedure
946
Installation of the Host Machine
947
Setting the Dehumidification Switch
947
Installation Outline Drawing
962
Checking the Contents
963
Installation Procedure
964
Connecting the Power Supply
980
Copy Card Reader-F1/Copy Card Reader Attachment-B4
981
Points to Note at Installation
981
Checking the Contents
981
Installation Outline Drawing
982
Installation Procedure
982
Setting after Installation
993
Checking the Contents
995
Points to Note at Installation
995
Installation Outline Drawing
995
Installation Procedure
996
Points to Note When Turning ON/OFF the Main Power
1007
Checking the Contents
1008
Installation Procedure
1010
Installing the Control Panel
1023
Setting after Installation
1027
Points to Note at Installation
1028
Checking the Contents
1029
Removing the Covers
1030
Installation Procedure
1035
Installing the Covers
1050
Affixing the Label
1053
Points to Note at Installation
1056
Checking the Contents
1056
Installation Procedure
1057
Checking the Operation
1063
Basic Setting
1064
Service Tools
1079
List of Special Tools
1079
Solvents and Oils
1079
Software Counter Specifications
1094
Work Procedure
1100
List of Service Modes that Can be Restored
1103
Advertisement
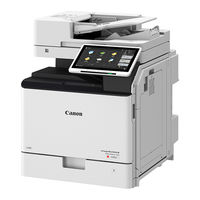
Canon imageRUNNER ADVANCE DX C357iF Installation Manual (242 pages)
Brand:
Canon
| Category:
All in One Printer
| Size: 18 MB
Table of Contents
Table of Contents
4
Safety Precautions
6
Toner Safety
7
About Toner
7
Handling Adhered Toner
7
Points to Note at Installation
7
Points to Note before Servicing
7
Essential Items to be Performed before Installation
7
Points to Note When Turning ON/OFF the Main Power
7
Illustrations
8
1 Product Lineup
9
Host Machine Options
10
Combination Table of Accessory Installation
11
Paper Feed / Paper Output Options
12
2 Host Machine
13
How to Utilize this Installation Procedure
14
Symbols
14
Installation of the Host Machine
15
Setting the Dehumidification Switch
15
Operation When Using Uniflow Online
15
Installing the IC Card Reader
15
3 Host Machine Options
30
Serial Interface Kit-K3/Control Interface Kit-A1
31
Installation Outline Drawing
31
Checking the Contents
32
Installation Procedure
33
Copy Card Reader-F1/Copy Card Reader Attachment-B5
53
Points to Note at Installation
53
Checking the Contents
53
Installation Outline Drawing
55
Installation Procedure
55
Setting after Installation
78
Nfc Kit-E1/E2
79
Points to Note at Installation
79
Installation Outline Drawing
79
Checking the Contents
79
Installation Procedure
82
Setting after Installation
99
Connection Kit-A2/A3 for Bluetooth le
100
Points to Note at Installation
100
Installation Outline Drawing
100
Checking the Contents
100
Removing the Covers
102
Installation Procedure
107
Installing the Covers
122
Affixing the Label
125
Setting after Installation
126
IC Card Reader BOX-D1
128
Points to Note at Installation
128
Installation Outline Drawing
128
Checking the Contents
129
Installation Procedure
130
Connecting the Power Supply
162
Super G3 FAX Board-AT1
163
Points to Note at Installation
163
Product Name
163
Installation Outline Drawin
163
Checking the Contents
164
Installation Procedure
165
Checking the Operation
177
Super G3 2Nd Line Fax Board-AT1
179
Points to Note at Installation
179
Product Name
179
Checking the Contents
180
Installation Outline Drawin
181
Installation Procedure
181
Checking the Operation
201
Staple Finisher-Z1
203
Points to Note at Installation
203
Points to Note When Relocating the Host Machine
203
Product Name
203
Super G3 2Nd Line Fax Board-AT1
203
Installation Outline Drawing
204
Unpacking
205
Checking the Contents
206
Installing the Hinge Cover Sheet
207
Installation Procedure
208
Cassette Heater Unit-39
227
Points to Note at Installation
227
Product Name
227
Installation Outline Drawing
227
Checking the Contents
228
Installation Procedure
228
Revision
242
Canon imageRUNNER ADVANCE DX C357iF Service Manual (104 pages)
Brand:
Canon
| Category:
Printer
| Size: 1 MB
Table of Contents
Table of Contents
4
Overview
8
Unified Firmware Platform
9
Data Backup Service
10
Configuration
11
Monthly Copy/Print Volume
16
Hardware Accessory Options
17
Cassette Module-AE1
17
Cassette Feeding Unit-AJ1
17
Cassette Feeding Unit-AK1
17
Staple Finisher-Z1
17
Copy Card Reader-F1
17
IC Card Reader Box-D1
17
System Features and Options
18
Copy and Print Options
18
PCL International Font Set-A1
18
Barcode Printing Kit-D1
18
Universal Send Features
18
Universal Send Trace & Smooth PDF
18
Universal Send Digital User Signature Kit-C1
18
Fax Options
18
Super G3 2Nd Line Fax Board-AT1
18
IP FAX Expansion Kit-B1
18
Data Security and Wireless Options
19
Ir-ADV Security Kit-AQ1 for IEEE 2600.1 Common Criteria Certification
19
Connection Kit-A2 for Bluetooth le
19
NFC Kit-E1
19
Accessibility Options
20
ADF Access Handle-A1
20
Braille Label Kit-F1
20
Storage Capabilities
21
Mail Box
21
Advanced Box
22
Shared Folders
22
Personal Folders
22
Network
23
Memory Media
23
Security Features
24
Device Authentication
24
ULM (Universal Login Manager)
24
Department ID Management
24
UA (Universal Authentication)
25
Access Management System
25
Uniflow Online Express
25
Device Security
26
Verify System at Startup
26
SIEM (Security Information and Event Management) Integration
26
Mcafee Embedded Control
26
Security Policy Function
27
Data Security
28
Initialize All Data/Settings Function
28
HDD Data Erase Kit
29
HDD Data Encryption Kit
29
HDD Data Erase Scheduler
29
TPM (Trusted Platform Module)
30
Universal Send Security Feature Set
31
Encrypted Secure Print Software
31
Document Security
32
Secure Watermark
32
Encrypted Secure Print Software
32
PDF Visible Digital Signature
32
Adobe Livecycle Rights Management es Server Integration
33
Network Security
34
IP Sec
34
Filtering by Port Number
34
Encryption and Authentication
34
Network Port and Application Access Control
35
Software Solutions
36
Document Management and Binding Software
36
Ecopy PDF Pro Office
36
Scan Management Software
37
Authorized Send
37
Uniflow (Scanning)
37
Ecopy Sharescan
37
Print/Output Management Software
38
Uniflow
38
Uniflow Online
38
AA-PRINT (Advanced Anywhere Print)
39
EFI Printme
39
Device Security and Management Software
40
Uniflow Device Security & Management
40
Uniflow Serverless Secure Print
40
Imageware Enterprise Management Console and Plug-Ins
40
Imageware Secure Audit Manager Express
41
MEAP Web
41
MDS Cloud
41
Business Workflow Software
42
Forms and Print Services for Salesforce
42
Canon Enterprise Imaging Platform
42
Dealer Sales/Service Authorization
43
Educational Training
43
Training Program Overview
43
Imagerunner ADVANCE DX C357/C257 Series Training
43
Learning Path for New Service Technicians
43
Learning Path for Technicians with Imagerunner ADVANCE C350If and C250If
44
Certification
44
Recommended Training for Technicians with Imagerunner ADVANCE C356If III and C256If III Certification
44
Certification
45
Who Should Attend
45
Course Format
45
Training Facilities
45
Course Equipment
45
Service Materials
46
Uniflow Online Training
46
Uniflow Online Express Training
46
Data Backup Service Training
46
Servicing Notes
47
Power and Plug Requirements
47
Installation Space Requirements
49
Estimated Installation Times
51
Serviceability
52
Remote Services
53
Imageware Remote
53
Content Delivery System
55
Remote Services Suite
58
Device Configuration Management
60
DCM (Device Configuration Manager)
60
Device Migration Navigator
60
LMS (License Management System)
61
Content Delivery System Website
62
Recommended System Engineer Requirements
63
Firmware Upgrades Using the Service Support Tool
64
Hard Disk Drive Handling
65
Special Tools, Solvents and Oils
65
Consumables
66
Consumable Parts
68
Periodically Replaced Parts
68
Counters
69
Soft Counters
69
MEAP Counter
70
Toner Bottle Counters
71
Less Maintenance for Service Cost and Downtime Reduction
72
Installation/Parts Replacement by Nontechnical Staff Option
73
Remote Support
83
Limited Warranty Support
85
End-User Limited Warranty Conditions
85
Drum Unit Limited Warranty
85
Warranty Programs
86
Flat-Rate Program
86
Warranty Parts for Repair
86
E-Tag
86
Parts Support Program
86
Product Technical Support Offerings
87
Canon USA Technical Support Center
87
Technical Support Escalation
88
Internet Support
89
Canon Usa's Partner Portal Website
89
Appendix
90
Specifications
90
Canon Imagerunner ADVANCE DX C357If Series Limited Warranty
102
List of Tables
103
List of Figures
104
Advertisement
Canon imageRUNNER ADVANCE DX C357iF Faq Manual (96 pages)
Brand:
Canon
| Category:
Printer
| Size: 27 MB
Table of Contents
English
4
Table of Contents
4
Check the Following First
6
The Machine Does Not Respond to the Computer
7
The Authentication Screen (Logon Screen) Is Displayed and You Cannot Go Further
7
How to Load Paper
8
Loading Paper in the Paper Drawer
8
When You Have Loaded a Different Type of Paper than the Preset One
9
Loading Paper in the Multi-Purpose Tray
10
Loading Paper with Printed Logos
12
Loading Envelopes
13
Images Are Shifted/Slanted
16
Irregularities Appear in Images
16
Images Are Faint
16
Black Streaks Appear in Images
17
White Streaks/Color Streaks Appear in Images
18
Bleed-Through Occurs
19
Paper Jams Occur
20
Paper Jams Occur Frequently
21
Loading Paper or Paper Settings Cannot be Done Successfully
22
Paper Is Not Fed
22
If the "Load Paper." Message Is Displayed
23
Printing Cannot be Performed on the Expected Side of Paper
24
Printing Cannot be Performed with the Expected Size
24
In Two-Sided Printing, the Print Direction Differs
25
Paper
25
Using [Scan and Send]
26
Stopping Scanning/Faxing
26
If You Cannot Send Documents to a Server
26
Scan/Fax Cannot be Performed Successfully
26
Scanned Documents Cannot be E-Mailed
27
If You Cannot Send/Forward Faxes
28
If You Cannot Receive Faxes
29
Replacement Parts
32
An Error Screen Is Displayed
34
Illustrated Index
36
Appendix
40
Do You Want to Know more
49
You Can Consult the User's Guide
49
If You Notice a Search Number
49
Español
52
Verifique Primero lo Siguiente
54
Aparece la Pantalla de Autenticación (Pantalla de Inicio de Sesión) y no Se Puede Avanzar Más
55
El Equipo no Responde al Ordenador
55
Carga de Papel en el Casete
56
Cómo Cargar Papel
56
Si Ha Cargado un Tipo de Papel Distinto del
56
Preestablecido
57
Carga de Papel en la Bandeja Multiuso
58
Carga de Papel con Logotipos Impresos
60
Carga de Sobres
61
Se Producen Atascos de Papel
68
Se Producen Atascos de Papel con Frecuencia
69
Detención del Escaneado/Envío por Fax
74
No Se Puede Escanear/Enviar por Fax Correctamente
74
Si no Puede Enviar Documentos a un Servidor Empleando [Leer y Enviar]
74
No Se Pueden Enviar por Correo Electrónico Los Documentos Escaneados
75
Si no Puede Enviar/Reenviar Faxes
76
Si no Puede Recibir Faxes
77
Advertisement
Related Products
Canon imageRUNNER ADVANCE DX C3800 Series
Canon imageRUNNER ADVANCE DX C478iZ
Canon imageRUNNER ADVANCE DX C478i
Canon imageRUNNER ADVANCE DX C5870i
Canon imageRUNNER ADVANCE DX C5860i
Canon imageRUNNER ADVANCE DX C5840i
Canon imageRUNNER ADVANCE DX C478iF
Canon imageRUNNER ADVANCE DX C257iF
Canon imageRUNNER ADVANCE DX C7700 Series
Canon imageRUNNER ADVANCE DX C5850
Canon Categories
Printer
Digital Camera
All in One Printer
Camcorder
Scanner
More Canon Manuals
Login
Sign In
OR
Sign in with Facebook
Sign in with Google
Upload manual
Upload from disk
Upload from URL