Sign In
Upload
Manuals
Brands
Canon Manuals
Card Reader
H1
User Manuals: Canon H1 Camcorder Memory Card
Manuals and User Guides for Canon H1 Camcorder Memory Card. We have
2
Canon H1 Camcorder Memory Card manuals available for free PDF download: Service Manual
Canon H1 Service Manual (189 pages)
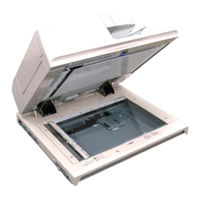
Duplex Color Image Reader
Brand:
Canon
| Category:
Printer Accessories
| Size: 10 MB
Table of Contents
Explanation of Symbols
3
Table of Contents
4
Product Outline
7
Characteristic
7
High Speed 2-Side Scan-At One Time (DADF)
8
High Capacity Pickup Tray (DADF)
8
Scanner Unit (Dadf/Reader)
8
Specification
9
Reader
9
Dadf
10
Names of Parts
11
External View
11
Cross-Section View
12
Basic Operation
12
Original Set Display
12
Option Configuration
13
Technology
14
Basic Configuration
14
Function Configuration
15
Image Processing
15
Magnification Change
15
Reader
16
Dadf
20
Drive Configuration
21
Controls
31
Reader
31
Shading Adjustment
42
Shading Correction
42
Dadf
45
White Plate Dust Detection Control
47
Pickup Roller Unit
59
Pickup Operation
60
Service Work
69
Reader
69
Dadf
70
Periodic Servicing
71
Periodic Servicing List
71
Reader
72
Dadf
74
Parts Replacing and Cleaning
76
Parts List (Reader)
76
External Covers (Reader)
77
Main Unit (Reader)
77
List of Periodical Consumable Parts/Locations for Periodical Cleaning (Reader)
78
Motor (Reader)
78
Fan (Reader)
79
Sensor (Reader)
79
PCB (Reader)
80
Connector Layout Drawing (Reader)
81
Removing from the Connection Equipment (Reader)
82
Removing the DADF + Reader Unit
82
Major Unit (Reader)
93
Removing the Scanner Unit (Reader)
93
Removing the Reader Controller PCB
95
External Auxiliary System (Reader)
97
Removing the Box Right Cover
97
Removing the Box Left Cover
98
Removing the Box Upper Cover
99
Removing the Right Middle Front Cover 1
100
Removing the Right Upper Front Cover
100
Removing the Front Left Cover
101
Removing the Left Upper Cover
101
Removing the Decurler Unit
103
Periodical Consumable Parts/Locations for Periodical Cleaning (Reader)
106
Cleaning the Copyboard Glass (Large)
106
Cleaning the Copyboard Glass (Small)
107
Cleaning/Lubrication of the Scanner Rail
108
Parts List (DADF)
110
External Covers (DADF)
110
Main Unit (DADF)
110
List of Periodical Consumable Parts/Locations for Periodical Cleaning (DADF)
111
Solenoid (DADF)
112
Motor (DADF)
112
Fan (DADF)
113
Lamps, Heaters, and Others (DADF)
113
Sensor (DADF)
114
Pcb (Dadf)
115
Connector Layout Drawing (DADF)
116
Removing from the Connection Equipment (DADF)
119
Removing the DADF
119
Major Units (DADF)
121
Removing the DADF Scanner Unit
121
Removing the Pickup Roller Unit
123
External Auxiliary System (DADF)
124
Removing the DADF Front Cover
124
Removing the DADF Rear Cover
124
Installing the DADF White Sheet
125
Consumable Parts for Periodical Replacement and Locations for Cleaning (DADF)
127
Removing the Pickup Roller / Feed Roller
127
Removing the Separation Roller
128
Removing the Dust Collecting Sheets Type
129
Removing the Dust Collecting Sheets
130
Cleaning the Back Surface of the Reading Glass
132
Cleaning the Post-Separation Sensor 1/Post-Separation Sensor
133
Post-Separation Sensor
134
Cleaning the Pullout Roller/Feed Roller 2/Lead Roller 1
135
Cleaning the Registration Sensor/Lead Sensor/Registration Roller -4-61
136
Cleaning the Lead Roller 2/Lead Roller 3
138
Cleaning the Delivery Roller/Delivery Sensor
139
Height Adjustment
140
Adjustment Procedure
142
Adjustments
143
Overview
143
Reader
144
Dadf
145
Service Mode Backup
146
Adjustment Method
147
Measurement During Reader Controller PCB Replacement and after RAM Clear
147
Processing after Scanner Unit Replacement
149
Processing after Copyboard Glass Replacement
151
Preparation or Creation of Test Chart
152
Angle Restriction Release (Opening Angle at 90 Deg)
152
Sensor Output Adjustment
153
Tray Width Adjustment
153
Tilt Adjustment
154
Height Adjustment
154
Adjustment Procedure
156
Right Angle Adjustment
157
Registration Roller Wheel Skew Adjustment
158
Stream Reading Adjustment
160
Side Registration Adjustment
161
Leading Edge Registration Adjustment
162
Magnification Adjustment
163
White Level Adjustment
164
Hinge Pressure Adjustment
164
Installation
165
Symbols in the Illustration
165
Product Name
165
Point to Note about Installation
166
Checking the Contents
167
Contents of the Equipment
167
Contents of the Host Machine
167
Turning off the Power of the Host Machine
168
Installation Outline Drawing
168
Unpacking of the Reader Unit
168
Installation Procedure
170
Affixing Labels
179
Installing the Cleaning Tool
179
Operation Check
180
Auto Adjust Gradation
181
Register Paper to Adjust
182
Execution of Correct Shading
183
Auto Correct Color Tone Settings
184
Appendix
185
Service Tools
185
Special Tools
186
General Circuit Diagram
187
Reader
187
Dadf (1/2)
188
Advertisement
Canon H1 Service Manual (112 pages)
Color Image Reader Unit
Brand:
Canon
| Category:
Card Reader
| Size: 15 MB
Table of Contents
Table of Contents
4
Safety Precautions
7
Notes before It Works Serving
8
Points to Note at Cleaning
8
1 Product Outline
9
Original Exposure System (Reader)
10
Features (Reader)
10
Specifications (Reader)
10
Specifications
10
Names of Parts (Reader)
11
Cross Section
11
External View
11
Major Components
11
Reader Relay PCB
12
Features (DADF)
13
Specifications (DADF)
13
Names of Parts (DADF)
13
Cross Section
13
External View
13
2 Technology
14
Controls (Reader)
14
Basic Sequence
15
Controlling the Scanner Drive System
16
CCD Unit
17
Enlargement/Reduction
19
Detecting the Size of Originals
19
Dirt Sensor Control
23
Image Processing
24
Color Offset Correction in Sub Scanning
26
Servicing (Reader)
27
Periodically Replaced Parts
27
Consumable Parts
27
Periodical Servicing
27
Action to Take When Replacing Parts
27
Major Adjustments
27
Troubleshooting
27
Basic Configuration (DADF)
28
Component Configuration
28
Outline of Electric Circuits
28
Drive Configuration
28
Sensor Layout
29
Outline of Operation Modes
29
Forward Pickup/Delivery Operation
29
Outline
29
Forward Pickup/Reverse Delivery Operation
30
Controls (DADF)
32
Document Detection
32
Outline
32
Initial Document Size Detection
33
Document Pickup/Separation
34
Basic Pickup Operation
34
Pickup Unit and Stopper
35
Document Reversing
35
Basic Operation
35
Document Feeding/Delivery
36
Basic Operation
36
Release Operation
37
Detecting Jams
37
Jams
37
Power Supply
38
Stamp Operation
38
Outline
38
Fan
39
Fan Operation
39
Work of Service (DADF)
40
When Replacing the Parts
40
Periodic Servicing
41
3 Periodic Servicing
41
List of Work for Scheduled Servicing
41
4 Parts Replacement and Cleaning Procedure
43
List of Parts(Reader)
43
External Covers
44
List of Electrical Components
44
External Covers(Reader)
45
Removing the Reader Left Cover
45
Removing the Reader Front Cover
45
Removing the Reader Right Cover
45
Removing the Reader Rear Cover
45
Original Exposure System (Reader)
46
Removing the Platen Glass
46
Removing the ADF Scan Glass
47
Removing the CCD Unit
48
Cleaning in the CCD Unit (Mirror
52
Removing the Reader Controller PCB
53
Removing the Reader Assembly
54
List of Parts (DADF)
57
External Covers
57
Consumable Parts Requiring Periodic Replacement and Cleaning Points
57
List of Clutchs, Solenoids, Motors, Fans, Pcbs
58
Others
58
List of Sensors
59
External Covers (DADF)
60
Removing the Front Cover
60
Removing the Rear Cover
60
Removing the Feeder Cover
61
Main Units (DADF)
62
Removing the Feed Unit
62
Consumable Parts Requiring Periodic Replacement and Cleaning Points (DADF)
64
Removing the Pickup Roller Unit
64
Removing the Separation Pad
65
Replacing the Stamp
65
Exchanging the Feed Guide
66
Clutch Solenoid Motor Fan PCB (DADF)
67
Removing the ADF Motor(M1)
67
Removing the Release Motor(M2)
67
Removing the Pressurization Solenoid(SL1)
68
Pickup Clutch/Registration Clutch(CL1/CL2)
68
Removing the ADF Driver PCB
69
Removing the LED PCB
70
Removing the Fan
70
Removing the Sensor(SR1,SR2,SR3)
71
Removing the Timing Sensor(SR4)
74
Removing the Document Set Sensor(SR5)
74
Removing the Cover Open/Closed Sensor(SR6)
74
Removing the Document Length Sensor(SR7,SR10)
75
Removing the A4R/LTRR Identification Sensor(SR8)
75
Removing the Release Motor HP Sensor(SR11)
76
Removing the Document Width Volume(VR1)
76
Removing the Hinge
77
Removing the Left Hinge
77
Removing the Right Hinge
77
Removing the Platen Roller
78
5 Adjustment
80
Overview (Reader)
80
When Replacing Parts (Reader)
81
Platen Glass
81
ADF Scan Glass
82
CCD Unit
82
Overview (DADF)
85
Outline
85
Adjustment Method (DADF)
86
Preparation or Creation of Test Chart
86
Adjusting the Height of the Hinge
86
Adjustment Procedure
86
Pre-Check
86
Check the Height of the Left Hinge
87
Check the Height of the Right Hinge
87
Adjust the Height of the Left Hinge
88
Adjust the Height of the Right Hinge
88
AB-Configuration Adjustment
89
Adj of DADF Tray Width
89
Adjusting the Perpendicularity
89
Inch-Configuration Adjustment
89
Scan Position Auto Adj in DADF Mode
90
Adj Img Pstn in DADF Mode:horz Scan
91
Adj of DADF Img Lead Edge Margin: Front
91
Fine Adj of DADF Image Magnifictn: Front
92
White Level Adj
92
6 Installation
94
How to Utilize this Installation Procedure
95
When Using the Parts Included in the Package
95
Symbols in the Illustration
95
Caution During Installation
95
Check Items When Turning off the Main Power
95
Checking the Contents
96
Installation Procedure
98
Appendix Service Tools
109
Special Tools
109
Oils and Solvents
109
General Circuit Diagram(Reader)
110
General Circuit Diagram (1/1)
110
General Circuit Diagram (DADF)
111
General Circuit Diagram (1/1)
111
Advertisement
Related Products
Canon H12295
Canon H12157
Canon H12249
Canon SmartBase H12219
Canon H12425
Canon H12251
Canon H12250
Canon H12-2513
Canon H12-2515
Canon H12-2517
Canon Categories
Printer
Digital Camera
All in One Printer
Camcorder
Scanner
More Canon Manuals
Login
Sign In
OR
Sign in with Facebook
Sign in with Google
Upload manual
Upload from disk
Upload from URL