Table of Contents
Advertisement
Quick Links
Advertisement
Table of Contents

Related Manuals for Caple SO108


Summary of Contents for Caple SO108
-
Page 2: Table Of Contents
L i s t o f c o n t e n t s I n t r o d u c t i o n p . 3 S t e a m c o o k i n g S t e a m c o o k i n g p . - Page 3 Dear Customer, You have just acquired a CAPLE oven and we would like to thank you. We have invested all our dedication and know-how in this appliance so that it would best meet your needs. With innovation and performance, we designed it to be always easy to use.
-
Page 4: Steam Cooking
Steam cooking Overview Steam cooking presents nothing but advantages if you follow the instructions for use. Healthy and natural, steam cooking preserves the full flavour of foods. A delicate sauce or aromatic herb seasonings add that something extra that makes the difference. This kind of cooking releases no odours. -
Page 5: Safety Instructions
Safety instructions Warning Keep this user guide with your appliance. If the appliance is ever sold or transferred to another person, ensure that the new owner receives the user guide. Please become familiar with these recommendations before installing and using your oven. They were written for your safety and the safety of oth- ers. -
Page 6: Care For The Environment
Steam cooking Care for the environment — This appliance’s packing materials are recyclable. Recycle them and play a role in pro- tecting the environment by depositing them in municipal containers provided for this pur- pose. — Your appliance also contains many recyclable materials. It is therefore marked with this logo to indicate that used appliances must not be mixed with other waste. -
Page 7: Yo U R O V E N , H O W I T W O R K S P
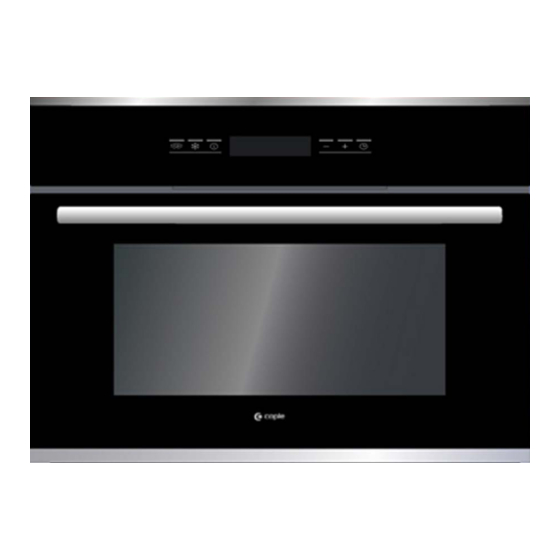
Your oven, how it works Display Indicator panel Water supply tube Tank Steam generator Channel The indicator panel in detail 8 15 11 6 Steam cooking control Temperature display Defrosting button +/- controls for timer Start/Stop control 10. Selector button : SET Time and delay display 11. -
Page 8: A C C E S S O R I E S
A c c e s s o r i e s Food dish (fig.1) Tin ware Pierced stainless steel cooking dish to prevent contact between food and condensation water. Condensate dish (fig.2) fig.1 Dish to recover the condensation water. When cooking place the fig.1 dish on the fig.2 fig.2 dish in reverse order so that they do not fit into each other (see diagram). -
Page 9: H O W T O I N S T A L L Y O U R O V E N
H o w t o i n s t a l l y o u r o v e n Electrical For a permanent connection, make sure a system of disconnection that complies with the connection installation regulations. The appliance must be placed in such a way as to leave the plug accessible if it is flush-fitted. -
Page 10: Fitting
H o w t o i n s t a l l y o u r o v e n Fitting 550 mini 1. Place the appliance in the hole. The appliance must be horizontal. Check this position. 2. For improved stability, attach the oven to the unit using 2 screws, via the holes provided for this purpose on the side posts. -
Page 11: H O W T O U S E Y O U R O V E N
H o w t o u s e y o u r o v e n Setting the time The first time the oven is turned on: Set the time. The display flashes on Use the + and - buttons to adjust the Validate 12.00. -
Page 12: Locking The Control Panel
The control panel can be locked. This can only be Locking the activated when you are not using timed or delayed control panel cooking features. A beep sounds and a “pad- Hold down To unlock, hold down lock” appears on the screen. START/STOP button the START/STOP button From this moment, no button is... -
Page 13: Cooking Immediately
Cooking immediately The water contained in the tank reaches the cavity via a Operational tube. This water is transformed into steam on contact with principle a hot surface placed in the lower part of the cavity: the steam generator. There is no need to add water to the cooking dish. To guarantee TRUE STEAM COOKING, your oven is supplied with a set of specially designed for cookware to perfection. - Page 14 Defrosting Defrosting at 60°C. Validate with Adjust the cooking time as Press the button necessary ( minimum 5 min the START A time of 40 minutes is and maximum 60 min by button. suggested. pressing on + and - button. The symbol comes on.
-
Page 15: Managing The Water
Advice Freeze small portions; defrosting will be faster, more homogenous and quality will be pre- served. When semi-defrosted, you can turn over the food items or spread them out (for example vegetables patties). Protect pastries with a cling wrap or keep the original pack- aging. -
Page 16: Delayed Cooking
Delayed cooking Steam Steam cooking at 100°C. You can program the cooking time so that your dish is cooking ready at a time of your choice. For example: It is 10 o'clock, and you have to go out, your dish should be ready at 12 o'clock and it will take 20 minutes to cook. -
Page 17: T H E T I M E R
How to use the timer Timer Your oven is fitted with an electronic timer that is inde- pendent of the operation of the oven, and allows time to be counted down. This function is independent of your oven. It can not order the end of automatic cooking. -
Page 18: Cooking Times
Cooking times TIME VEGETABLES PREPARATION REMARKS Whatever the quantity Artichokes (Small) 40 to 45 min . placed upside down in the dish • These times depend on the Asparagus 35 to 40 min. for the tips, reduce the cooking time nature, size and in little flowerets Broccoli... - Page 19 FISH TIME REMARKS PREPARATION Pike 25 to 30 min. whole (1kg) • *Steaks :slices of fish 2 or 3 cm Cod/hake 13 to 15 min. steaks (180g)* thick (180/200g) whole (1kg) Sea bream 20 to 25 min. per person. • Always insist on Haddock 15 min.
-
Page 20: How To Maintain Your Oven
How to maintain your oven Maintenance Cavity (after each use) Wipe out the cavity with a dry cloth after the steam generator has cooled or leave the cavity to dry out with the door open. Water supply tube (Once per month) Remove the water supply tube by unscrewing it. -
Page 21: Changing The Light Bulb
Changing the light bulb ? bulb right corner. Always switch the oven off at mains before changing the bulb in order to safe- guard against electric shocks. - Turn the cover slightly anti-clockwise (left). - Unscrew the bulb the same way. The bulb is a : - 25 W 220/240 V...
Need help?
Do you have a question about the SO108 and is the answer not in the manual?
Questions and answers