
Related Manuals for Caple Sense Premium


Summary of Contents for Caple Sense Premium
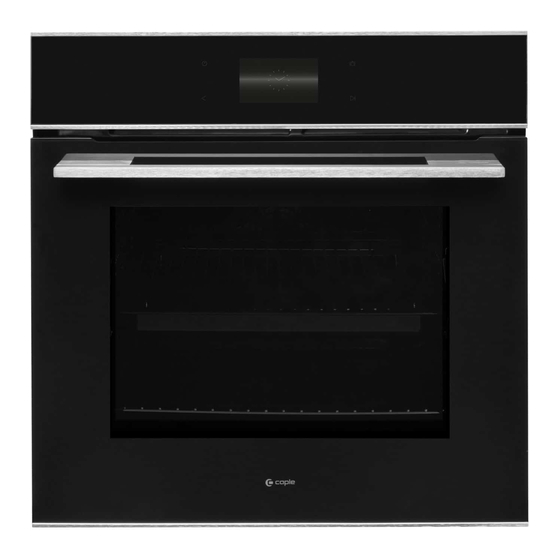
- Page 1 S i n g l e O v e n I n s t r u c t i o n M a n u a l C 2 6 00 , C 2 6 0 0G M , C2 6 00 S S Contact Caple on 0117 938 7420 for spare parts or www.caple.co.uk...
-
Page 2: Table Of Contents
Settings Menu Oven Functions Special Functions Pyrolytic Cleaning Using The Rotisserie Using The Meat Probe Care and Maintenance Removing the Glass Panels CapleHome App Troubleshooting Error Codes Caple Contact Details Instruction manual C2600 Please keep this instruction manual for future reference... - Page 3 Welcome to your new Sense Premium Oven. Featuring our new CapleTouch+ Technology, you’ll be able to save your family favourites, set multi-stage cooking timers and customise your oven display with ease. To control your appliance from your smart phone or...
-
Page 4: Safety Warnings
S A F E T Y I N S T R U C T I O N S : Read these instructions carefully and completely before using your appliance. They provide you with important information regarding the safe installation, use and maintenance of the appliance as well as useful advice for getting the best out of your oven. - Page 5 - This oven may only be used by persons (including children) with reduced physical, sensory or mental capabilities, or lack of experience and knowledge, if they are supervised whilst using it. They may only use it unsupervised if they have been shown how to use it in a safe manner.
- Page 6 - To maintain the efficiency and safety of your appliance, we recommend you always use original spare parts and to call only our authorised Caple Service agents in case of need. - Multi-socket adapters and extension leads should not be used to connect the oven to the mains electricity supply.
- Page 7 - Do not operate the appliance before it is fully installed. - The appliance must be installed by an authorised technician. - Caple is not responsible for any damage that may be caused by defective placement and installation by unauthorised persons.
- Page 8 - Protect your appliance against atmospheric effects. Do not expose it to effects such as sun, rain, snow etc. - The surrounding materials of the appliance (i.e. kitchen cabinet or furniture) must be able to withstand a minimum temperature of 120°C. D U R I N G U S E : - Before using the oven for the first time, heat the empty oven at max.
- Page 9 - Only use plastic containers that are suitable for use in an oven. - Pay close attention to the oven while cooking with solid or liquid oils as they could potentially catch fire when oven is hot. - Never pour water on flames that are caused by oil. Cover the saucepan or frying pan with its lid in order to choke the flame and turn the oven off.
- Page 10 - Do not touch the appliance with wet hands. - Do not obstruct the ventilation openings. - Do not allow supply cords from other small appliances to come into contact with the oven. - Do not use the appliance to heat a room. - Do not place magnets on the oven door.
- Page 11 Accessories that are not suitable for this function will be damaged by the high temperatures. - Only use the Caple meat probe supplied with the appliance. If it is faulty, it must be replaced with a new original Caple meat probe.
-
Page 12: Environmental Protection
Radio Equipment Directive (RED) 2014/53/EU This Declaration is issued under the sole responsibility of the manufacturer. Hereby, Caple declares that the radio equipment included in the product is in compliance with the RED directive 2014/53/EU. The full text of the EU Declaration of Conformity is available on our website www.caple.co.uk. -
Page 13: Warranty
(found inside the door opening). Registration can also be completed online by visiting www.caple.co.uk. Ensure you keep your warranty card safe, you may need to show it to Caple Service together with proof of purchase. -
Page 14: Installation
I N S T A L L A T I O N I M P O R TA N T: Isolate your oven from the electrical supply before performing installation or maintenance. › Installation should be carried out according to the instructions by a professionally qualified person only. - Page 15 For the most efficient air circulation, the oven should be fitted according to the dimensions shown below: 589mm 593mm 578mm 25mm 50mm 593mm 589mm 25mm Instruction manual C2600 Please keep this instruction manual for future reference...
- Page 16 The rear panel of the cabinet must be removed so that air can circulate freely. The panel to which the oven is fitted should have a gap of at least 50mm at the rear for ventilation: See page 17 for full dimensional drawings of your oven to help with installation. For a built-in oven to work well, the cabinet must be of the right type.
-
Page 17: Oven Dimensions
O V E N D I M E N S I O N S FRONT 555mm 20mm 20mm 595mm SIDE 540mm 565mm Instruction manual C2600 Please keep this instruction manual for future reference... -
Page 18: Electrical Connection
E L E C T R I C A L C O N N E C T I O N W A R N I N G : This appliance must be earthed. Check that the power rating of the mains supply is suitable for the maximum power of the appliance as indicated on the rating label. - Page 19 The manufacturer cannot be held responsible for any damage to persons or objects due to lack of an earth connection. The ovens are designed to operate with a mono-phase alternating current of 220-240V, 50Hz. B E F O R E T H E I N S TA L L AT I O N O F T H E A P P L I A N C E , C H E C K T H E S P E C I F I C AT I O N S O N T H E R AT I N G L A B E L .
-
Page 20: Control Panel And Display
2 X Full Extension Telescopic Runners 2 X Safety Stop Shelves 1 X Enamel Grill Rack 1 X Enamel Grill Pan with Handle To purchase additional or replacement accessories, please visit www.caple.co.uk 20 Instruction manual C2600 Please keep this instruction manual for future reference... -
Page 21: Operation
O P E R A T I O N P O W E R B U T TO N : To turn the display screen On and Off. N OT E : Turning Off will take you to the standby screen. L I G H T B U T TO N : Press the light button on the control panel to switch the internal oven lights on and off. - Page 22 N AV I G AT I N G T H E TO U C H C O N T R O L D I S P L AY: To adjust Times, Dates, Temperatures and Functions etc., press the up and down arrow controls or scroll by pressing and dragging up and down.
- Page 23 U S I N G F O R T H E F I R S T T I M E 1. Press to turn the appliance on. When turning the appliance on for the first time you will be asked to set the date and time. N OT E : All other menu items cannot be selected at this point.
- Page 24 Q U I C K S TA R T G U I D E To quickly start cooking without setting a timer and cooking stage or saving to favourites, proceed as follows: 1. Press to turn the appliance on. The 10 : 10 home screen will appear.
- Page 25 S E T T I N G C O O K I N G S TA G E S A N D S AV I N G TO FAV O U R I T E S ONE COOKING STAGE: 10 : 10 1.
- Page 26 6. Press to begin cooking. 10 : 10 SAVED TO FAVOURITES PRESS TO START COOKING 7. Cooking will begin and the main cooking 10 : 10 screen will display. ACTUAL TEMP 01 : 49 TEMP. ˚C FUNCTION TIMER 8. When cooking has completed. 10 : 10 ‘COOKING FINISHED’...
- Page 27 M U LT I - S TA G E C O O K I N G 1. Press to turn the appliance on. 2. Select desired Function, Temperature, Boost (if required). 10 : 10 Then press BOOST ˚C FUNCTION TEMP. ˚C 3.
- Page 28 5. Select 2nd cooking stage Duration. 10 : 10 Further Cooking Stages (maximum of 4 COOKING STAGE 2 in total) can be added by repeating FINISH process. Press FINISH to go to overview screen. DURATION END TIME 6. Review selection, press EDIT 10 : 10 COOKING STAGES...
- Page 29 E D I T I N G S TA G E S B E F O R E C O O K I N G 1. To Edit a cooking stage before 10 : 10 COOKING STAGES cooking has begun, press next EDIT STAGE...
- Page 30 If you no longer want to Edit the selected cooking stage press button. WOULD YOU LIKE TO CONTINUE EDITING OR REVIEW COOKING? ‘WOULD YOU LIKE TO CONTINUE EDIT REVIEW EDITING OR REVIEW COOKING’ message with appear. Press to return to the REVIEW cooking review screen.
- Page 31 A U TO M AT I C C O O K I N G After selecting a Cooking Duration, you can adjust the End Time so that your cooking automatically starts later in the day. Oven Start Time = End Time – Duration For example: If you select a Duration of 2 hours 10 : 10 and an End Time of 6:30pm, your cooking...
- Page 32 E N D T I M E E R R O R If an End Time is selected that is sooner than the 10 : 10 ‘Current Time + Duration Time’, an Error ADDITIONAL message will display. COOKING STAGE FINISH For example: If the current time is 10:10am, you select a Duration of 2 hours and an End Time 12:00pm, the Error message will appear.
- Page 33 A U TO - T I M E 10 : 10 If no Timer is set, when you press to begin cooking, the Timer will count up from 00:00, so 00 : 01 you can see how long you have been cooking. PROVING FUNCTION TEMP.
- Page 34 A D J U S T T I M E R 10 : 10 Touch the Timer Display (’01:49’) to amend cooking time. ACTUAL TEMP 01 : 49 TEMP. ˚C FUNCTION TIMER The Time Adjustment screen will appear. 10 : 10 EDIT COOKING TIME Use controls to adjust the Duration and End Time, then press...
- Page 35 The Minute Minder Symbol will now appear 10 : 10 white. Press the Minute Minder symbol again to view the time remaining before the audible ACTUAL TEMP alarm sounds. 01 : 49 N OT E : To cancel the Minute Minder, press reduce the Duration to 00:00, then TEMP.
- Page 36 R E S I D U A L H E AT When cooking has completed, the oven’s RESIDUAL HEAT will display on the RESIDUAL HEAT 290˚ Standby screen. If you decide to make a new cooking selection and the Residual Temperature is greater than the Set Temperature, 6th Mar ‘WARNING! Residual temperature is...
- Page 37 C H I L D S A F E T Y L O C K To activate the Child Safety Lock, press and hold the button for 3 seconds. COOKING: When the Child Safety Lock is turned ON during cooking, both the touch screen display and control panel (ON/OFF, LIGHT, BACK, START/PAUSE buttons) will be disabled.
- Page 38 FAV O U R I T E S › To view your saved favourites, press 10 : 10 on the Function Selection Screen. BOOST ˚C FUNCTION TEMP. ˚C › Choose from your favourites: 10 : 10 Press to view relevant cooking SELECT Roasted Veg.
- Page 39 › Adjust the End Time and press SELECT SELECT SELECT 18 : 20 18 : 20 END TIME END TIME HOUR HOUR › The Cooking Review Screen will now show 10 : 10 COOKING STAGES the new End Time. STAGE FUNCTION TEMP.
- Page 40 R E V I E W A N D C A N C E L C O O K I N G 10 : 10 To review and/or cancel your selection after < cooking has begun, press the button. ACTUAL TEMP 01 : 49 TEMP.
- Page 41 PA U S E C O O K I N G 10 : 10 To pause cooking press the button. ACTUAL TEMP 01 : 49 TEMP. ˚C FUNCTION TIMER ‘COOKING PAUSED…’ message will display. Press to continue cooking. COOKING PAUSED N OT E : PRESS TO CONTINUE COOKING...
-
Page 42: Settings Menu
FUNCTION TEMP. ˚C From here you will be able to customise the following options for your oven: TIME & DATE SOUND DISPLAY SENSE PREMIUM SERVICE DEMO MODE CONNECTIVITY 42 Instruction manual C2600 Please keep this instruction manual for future reference... - Page 43 T I M E A N D DAT E Adjust the Time using the controls before 10 : 10 pressing SET TIME TIME & DATE SOUND DISPLAY SET TIME SERVICE DEMO MODE CONNECTIVITY Press underneath Analogue or Digital. SELECT 10 : 10 ANALOGUE DIGITAL TIME &...
- Page 44 S O U N D 10 : 10 Set Key Tone, Key Volume and Alarm TIME & DATE Volume levels. KEY TONE SOUND DISPLAY After making your adjustments, select a different KEY VOLUME SERVICE setting option from the menu or press the DEMO MODE ALARM VOLUME button to return to the home screen.
- Page 45 S E R V I C E View Error codes and reset the appliance. 10 : 10 TIME & DATE After making your adjustments, select a different SERVICE LOG SOUND setting option from the menu or press the CODE: 101 DISPLAY 30/1/19 button to return to the home screen.
- Page 46 N OT E : By connecting the appliance to the Caple Home App, you are allowing the appliance to be controlled by the App. WiFi frequency: 2.4Ghz...
-
Page 47: Oven Functions
O V E N F U N C T I O N S BOOST Both the fan and circular heating element operate together for the most even air distribution. This is the FA N H E AT ideal cooking method for several types of food (meat & ˚C fish, pastries etc). - Page 48 BOOST The heat produced by the circular and bottom elements B A S E H E AT & is evenly distributed by the fan. This function is ideal for ˚C FA N H E AT cooking pizza and pastries. BOOST FA N H E AT &...
- Page 49 Uses Conventional Heat with a selectable time of up S A B B AT H to 74 hours, and a selectable temperature of 70°C to 140°C. This function uses Fan Heat. Once your chosen temperature is set, the function automatically raises ˚C ROAST R O A S T...
-
Page 50: Special Functions
S P E C I A L F U N C T I O N S D E H Y D R AT E 10 : 10 Dehydrate is pre-set to 60°C , with alternative options of 50°C and 70°C. From here, proceed to select Temperature, BOOST if BOOST necessary, choose a cooking Duration and/or... - Page 51 Press to adjust the cooking duration, EDIT 10 : 10 then press to return to the Cooking FINISH Overview screen. FINISH N OT E : END TIME is unavailable for this function. DURATION Press to add your cooking selection SAVE 10 : 10 to favourites.
- Page 52 10 : 10 4. Pressing takes you to the PREHEATING screen. The oven will start heating. Do not place your pizza(s) in the oven at this stage. PREHEATING WAIT TEMP. ˚C FUNCTION TIMER 5. When the oven has reached 345°C, 10 : 10 ‘READY’...
- Page 53 6. When your pizza(s) is finished cooking 10 : 10 ‘FINISHED! PLEASE REMOVE YOUR PIZZA’ message will display. FINISHED! PLEASE REMOVE YOUR PIZZA Press to return to the PREHEATING screen (step 4). COOK ANOTHER PIZZA Press to turn off the appliance. The oven’s RESIDUAL HEAT will display RESIDUAL HEAT 290 on the Standby screen.
- Page 54 R O A S T ROAST Ideal for roasting joints of meat, the Roast function raises the oven to 250°C and once reached will lower to the set temperature; effectively sealing flavours in the meat before cooking. 1. Turn on the oven by pressing the button.
- Page 55 S A B B AT H The Sabbath function can be set up to a 10 : 10 maximum of 74 hours. 1. Turn on the oven by pressing the button. BOOST 2. Select from the Function Selection screen and a cooking Temperature. ˚C FUNCTION TEMP.
- Page 56 S L O W SLOW This function is for slow cooking over a period of 10 : 10 time at 90°C only. 1. Turn on the oven by pressing the button. BOOST SLOW SLOW 2. Select from the Function Selection screen. ˚C 3.
- Page 57 W A R M This function is pre-set to 40°C, with the option 10 : 10 to select 30°C or 50°C. 1. Turn on the oven by pressing button. BOOST 2. Select from the Function Selection screen. ˚C FUNCTION TEMP. ˚C 3.
-
Page 58: Pyrolytic Cleaning
P Y R O LY T I C C L E A N I N G With the Pyrolytic Clean mode, the internal temperature of the oven reaches 475°C. The pyrolytic cycle is activated, burning away food and grime residues. C AU T I O N : Keep children away from the appliance during the automatic cleaning cycle as surfaces may become very hot. - Page 59 › Turn on the oven by pressing 10 : 10 button. 1:15hr BOOST 1:30hr › Select from the Function Selection screen. 2:00hr ˚C Select a cycle duration of either 1:15hr, FUNCTION TEMP. ˚C 1:30hr or 2:00hr. N OT E : END TIME is unavailable for this function.
- Page 60 › When the oven has reached 350°C 10 : 10 ‘DOOR LOCKED” message and symbol will appear. 00 : 55 CLEANING DOOR LOCKED FUNCTION TEMP. ˚C TIMER › When the cycle has finished, the 10 : 10 screen will display ‘CLEANING COMPLETE’...
-
Page 61: Using The Rotisserie
U S I N G T H E R O T I S S E R I E The Rotisserie turns meat automatically as it cooks, so that it bastes itself. This feature can be used with several programmes in this oven (See OVEN FUNCTIONS). W A R N I N G : T H E R OT I S S E R I E S P I T H A S S H A R P E D G E S A N D T H E R E I S A R I S K O F I N J U RY. - Page 62 › Turn the oven on by pressing 10 : 10 button. BOOST Select a Cooking Function and Temperature, then press ˚C FUNCTION TEMP. ˚C › Select a Cooking Duration if 10 : 10 necessary, then press The Rotisserie symbol will display on ACTUAL TEMP the Main Cooking Screen.
-
Page 63: Using The Meat Probe
U S I N G T H E M E A T P R O B E The Meat Probe feature can be used with several programmes in this oven (See OVEN ˚C FUNCTIONS). › Connect the Meat probe to inside of your oven. ›... - Page 64 › Choose a Core Temperature then 10 : 10 press SELECT CORE TEMPERATURE N OT E : SELECT Probe is accurate to 1°C. N OT E : A Cooking Duration cannot be set when TEMP. ˚C the Meat Probe is selected. Multi-Stage cooking is unavailable when the Meat Probe is selected.
-
Page 65: Care And Maintenance
Should it become damaged, please contact Caple service. We recommend you avoid using the oven until it has been repaired. › Never line the oven bottom with aluminium foil, as the consequent accumulation of heat could compromise the cooking and even damage the enamel. - Page 66 R E P L A C I N G T H E O V E N B U L B S › Switch off your oven at the mains. › Remove the glass cover of the bulb-holder. › Remove the light bulb and replace it with a similar one. ›...
- Page 67 R E M O V I N G T H E O V E N D O O R To make it easier to clean the inside of your oven, the oven door can be removed by proceeding as follows (Fig. 1-2): ›...
-
Page 68: Removing The Glass Panels
R E M O V I N G T H E G L A S S PA N E L S The oven door is made up of 4 panes of glass and has vents at the top and bottom. When the oven is operating, air is circulated through the door to keep the outer pane cool. - Page 69 T E L E S C O P I C R U N N E R S To assemble the telescopic runners: Remove the side racks (see section below and Fig.2) › Choose which shelf to use with the telescopic runner.
-
Page 70: Caplehome App
WIFI network. Further instructions on how to connect your appliance to the CapleHome App are available from www.caple.co.uk Or, scan the Q R Code to access the ‘How to guide’. 70 Instruction manual C2600 Please keep this instruction manual for future reference... - Page 71 Choose to add an additional appliance by repeating previous steps or use the arrows SELECT APPLIANCE to choose the appliance you wish to control. Press to display the Oven’s SELECT Function Selection Screen. OVEN 1 OVEN 2 MICROWAVE SELECT I M P O R TA N T: If the Oven WIFI is turned Off, you will need to go through the connection process again.
- Page 72 ˚C FUNCTION TEMP. ˚C CAPLE WEBSITE BUTTON O F F B U T TO N Due to safety measures, this button operates differently to that on your device. This button instantly cancels cooking, however is unable to turn the oven On/Off. To turn the oven On/Off, you must do so by the actual oven controls.
- Page 73 C A P L E W E B S I T E B U T TO N Takes you to the Caple website where you can also review the Instruction Manual and CapleHome App Connection Guide in digital form if preferred.
- Page 74 FAV O U R I T E S Cooking selections can be saved to your oven, the CapleHome App on your chosen device,or both. To save to Favourites, open the CapleHome App on your device and follow the instructions as detailed in ‘SETTING COOKING STAGES AND SAVING TO FAVOURITES’.
- Page 75 ONE MINUTE WARNING CAPLEHOME COOKING FINISHED N OT E : By connecting the appliance to the Caple Home App, you are allowing the appliance to be controlled by the App. Instruction manual C2600 Please keep this instruction manual for future reference...
- Page 76 R E N A M E & D E L E T E To rename or delete an appliance from the CapleHome App, proceed as follows: › Choose the appliance you want to Rename or Delete from the App SELECT APPLIANCE Home screen and press SELECT MICROWAVE...
-
Page 77: Troubleshooting
Lower and upper parts of the oven are Adjust the shelf position, cooking period and not cooking evenly temperatures according to the manual If the problem still persists, please contact Caple service for assistance: Phone: 0117 938 7420 Email: service@caple.co.uk Instruction manual C2600... - Page 78 U S E F U L N OT E S F O R C O O K I N G In the following table, some indicative hints for cooking: FA U LT S C A U S E S R E M E D I E S »...
-
Page 79: Error Codes
E R 0 4 temperature. If this is detected for 3 minutes the heating elements will switch off. Contact Caple Service. If the problem still persists, please contact Caple service for assistance: Phone: 0117 938 7420 Email: service@caple.co.uk Instruction manual C2600... -
Page 80: Caple Contact Details
Caple Service Fourth Way Avonmouth T: 0117 938 1900 Bristol E: service@caple.co.uk BS11 8DW www.caple.co.uk...
Need help?
Do you have a question about the Sense Premium and is the answer not in the manual?
Questions and answers