Table of Contents
Advertisement
Quick Links
Advertisement
Table of Contents

Related Manuals for Caple SO209WH


Summary of Contents for Caple SO209WH
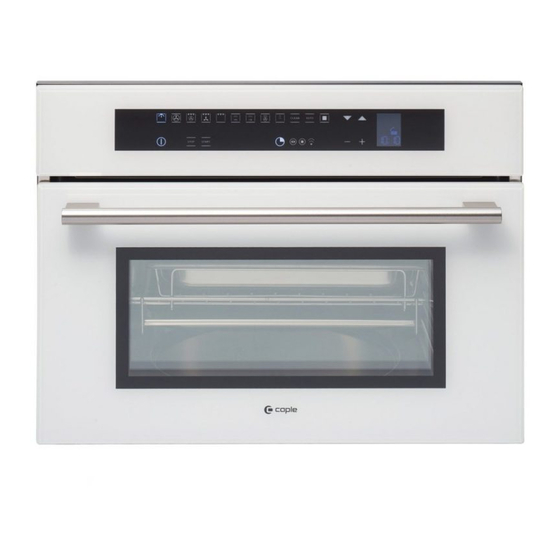
- Page 1 SO209WH Caple Steam Oven 460mm Service Manual...
-
Page 2: Table Of Contents
Steam Oven Service Manual Models SO109 – SO209 This document has been published to be used for service only. The contents are subject to change without notice CONTENTS 1. SERVICING REQUIREMENTS HEALTH & SAFETY 1.1.1 Electrical Safety 1.1.2 Good Working Practices 1.1.3 Insulation Test 1.1.4 Sheet Metal Edges SPECIAL TOOLS &... - Page 3 COOLING FAN PROBLEMS CONVECTION FAN PROBLEMS OVEN LIGHT PROBLEMS DISPLAY PROBLEMS DOOR HINGES PROBLEMS BAD COOKING PERFORMANCE STEAM PROBLEM 7. COMPONENT REPLACEMENT AND ADJUSTMENT PROCEDURE OVEN REMOVAL COOLING FAN MOTOR SUBSTITUTION OVEN DOOR REMOVAL CONVECTION FAN MOTOR SUBSTITUTION RING ELEMENT SUBSTITUTION GRILL ELEMENT SUBSTITUTION BOTTOM ELEMENT SUBSTITUTION DOOR GASKET SUBSTITUTION...
-
Page 4: Servicing Requirements
Servicing Requirements Health & Safety Note: When servicing the oven, health and safety issues must be considered at all times. Specific safety issues are listed below with their appropriate icon. These are illustrated throughout the service information to remind service people of the health and safety issues 1.1.1 Electrical Safety WARNING! TO AVOID ELECTRIC SHOCK! -
Page 5: Special Tools & Materials
Servicing Requirements Special Tools & Materials 1.3.1 Tools 1.3.2 Necessary Measuring Instruments 7.5V Power Screw / Nut Driver Recommended TESTER (VOLTS-DC, AC, Ohmmeter) 3” socket extension bar Glass thermometer: 100°C or 212°F (1 deg scale) 7mm socket 10 mm socket 12mm socket Flexible shaft socket extension #1 and #2 Short Phillips Screw driver... -
Page 6: Technical Overview
Technical Overview Oven Specifications 2.1.1 Oven Weight lbs /Kg =79/36 2.1.2 Power rating TECHNICAL DATA Electrical Ratings and Maximum Connected Load MULTIFUNCTION OVENS @ 220-240 Volts 50Hz Amperes Watts SO109 – SO209 13.9 3200... -
Page 7: Serial Plate
Technical Overview Serial Plate 2.2.1 Location The product serial number plate is located on the bottom frame. 2.2.2 Model & Serial Number The numbers printed on the plate contains the following information:... -
Page 8: Component Specifications
Technical Overview Components Specifications 2.3.1 Heating Elements Volts Freq. Watts Note Grill 1500 Ring (if present) 1500 Bottom (Temperature limiter 240V 10A T250) Boiler heating element 2.3.2 Motors Volts Freq. Watts Note Convection Fan CL H 220-240 50/60 Cooling Fan CL H 220-240 50/60... -
Page 9: System Description
Technical Overview System Description ELECTRONIC CONTROL. The control consists of a main power board and Full Touch Keyboard. COOKING MODE & TEMPERATURE SELECTION. The Multifunction oven is full touch control for the set cooking modes and set temperature. TEMPERATURE SENSOR. There is one NTC sensor, fixed on the top of the internal cavity. HEATING ELEMENTS. -
Page 10: Test Procedure
Technical Overview Test procedure Steam Oven Control IMPORTANT: The MANUAL TEST procedure can be activated only after power on. To enter in the MANUAL TEST follow the following procedure: a) NEW CONTROL BOARD (unprogrammed): When the oven is plugged in to the power the language mode appears to the display Holding simultaneously the &... - Page 11 5. During the traditional coking functions the following parameters should be showed: Hold key (ON/OFF) Hold key Ring: preset 165°C; Verify the power (1500W)+(50aux); Hold key Ring + Grill: preset 210°C; Verify the power (3000W)+(50aux); Hold key Convection Grill: preset 165°C; Verify the power (1500W)+(50aux); Hold key Grill: preset MAX°C;...
-
Page 12: Fault Numbers
Technical Overview Fault Numbers Faults N° Temperature sensor disconnected or shorted. Err 1 Door micro switch open (if present) Err 2 Electronic boards over temperature (more than 85°C) Err 3 Electronic boards sensor temperature damaged Err 4 Flexible key board damaged Err 5 Anomaly probe Boiler Err 6... -
Page 13: Child - Safe Locking System
Technical Overview Oven Safety Features 2.7.1 Child – Safe Locking System This future can be is used on the operating mode in the household where a minor is present to prevent children from possibility to change the oven setting. The key function is activated/deactivated by pressing the ON/OFF button for at least 3 seconds. You can activate and deactivate the operating mode of the oven at any time. -
Page 14: Cleaning Procedure Of Steam Circuit
Technical Overview Cleaning procedure of Steam Circuit To enter in the CLEANING PROCEDURE follow the following procedure: a) Turn on the oven with the key Select the CLEAN program. The following screen appears on the display: b) Using the keys select “STEAM CIRCUIT”. At this point, when you select the START key, which is flashing, the program that cleans the inside of the CIRCUIT will start. - Page 15 Afterwards, with the oven off, it will display together with the beep: Open the door and remove the tray: After partially extracting the tray (look at the arrow on the left side or the two notches above the carafe), press START to empty the steam production circuit the following text will appear: After discharging, the following text appears: IMPORTANT NOTE...
-
Page 16: Troubleshooting Guide
Troubleshooting guide Error Message BEFORE TOUCHING any parts of the oven, always remove the power plug from the outlet. Code Error Description Possible Cause Corrective Action section Temperature sensor The control reads out of Bad connection Check the connectors and the harness 7.10 ERROR 1 disconnected or shorted. -
Page 17: Oven Doesn't Work
Troubleshooting guide Oven doesn’t work Anomaly Possible Cause Corrective Action section Oven does not run Main breaker or main fuses Replace the fuses No power supply Short circuit Find the short circuit and remove it Oven does not run Connections to Control Board Replace Control Board Power supply ok. - Page 18 Troubleshooting guide Cooling Fan Problems Anomaly Possible Cause Corrective Action section Fan does not run Control Board relay not switching Replace Control Board No power supply 7.12 Fan does not run Blocked rotor Replace fan Power supply ok. Burned coil Replace fan Noisy fan Lose attachment screws on...
- Page 19 Troubleshooting guide Convection Fan Problems Anomaly Possible Cause Corrective Action section Fan does not run Control Board relay not switching Replace Control Board 7.12 No power supply Fan does Not run Blocked rotor Replace fan Power supply ok. Burned coil Replace fan Noisy fan Lose attachment screws on...
- Page 20 Troubleshooting guide Oven Light Problems Anomaly Possible Cause Corrective Action section The Oven lights are always OFF. Control Board relay not Replace Control Board. No power supply. switching. 7.12 The Oven lights are always OFF. Lamps are burned out. Replace lamps. 7.13 Power supply is ok.
- Page 21 Troubleshooting guide Display Problems Anomaly Possible Cause Corrective Action section The display of Control Board is always dark. The power supply to the display Verify if the voltage is correct on the Control board. of Control Board is missing. Check the connections and eventually replace the main 7.12 power board.
- Page 22 Troubleshooting guide Door Hinge Problems Anomaly Possible Cause Corrective Action section The door does not close or there is not sealing Hinges system is broken or Replace the units between door and gasket damaged 7.11...
- Page 23 Troubleshooting guide Bad Cooking Performance Anomaly Possible Cause Corrective Action section Bad performance Heating elements not working Check the connection of the heating elements If there is not power on the heating elements check relays on the Control Board. 7.12 If the Control Board relay not switching replace the units.
- Page 24 Troubleshooting guide Steam problem NOTE: Before servicing perform a cleaning cycle (see section 2.8) Anomaly Possible Cause Corrective Action section Steam generator does not make steam. The oven temperature is to high Wait until the internal temperature drop down below No power supply on heating element 85/90°...
- Page 25 Component replacement and adjustment procedure Oven removal Disconnect the power supply cord. Open the door. Remove the screws shown in the pictures. Pull off the oven. Remove the oven by using the lateral handles. Lateral Handles (if present)
- Page 26 Component replacement and adjustment procedure Cooling fan motor substitution Disconnect the power supply cord and remove the Oven from the cabinet. Remove the upper cover. Disconnect the terminals on the fan. Remove the five screws on the fan and remove the fan. Replace the new one with the screws and connect the terminals.
- Page 27 User Manual Oven Door Removal To Remove Door To Replace Door Open the door completely. Insert the upper arms (2) of both hinges into the slots. The recesses (3) must hook on the lips (4). Lift up the hinge bracket (1) from the arms (2) . Move the hinge brackets (1) back down into position.
- Page 28 Component replacement and adjustment procedure Convection fan motor substitution Disconnect the power supply cord and remove the Oven from the cabinet. Remove the upper and rear covers. Remove the internal convection fan cover removing its four screws on the corner. Remove the fan blade by using a 10mm socket (fig.1).or pulling it (fig.2), depending on model.
- Page 29 Component replacement and adjustment procedure Ring element substitution Disconnect the power supply cord and remove the Oven from the cabinet. Remove the upper, rear covers. Remove the internal convection fan cover removing its four screws on the corner (fig.1). Remove ring element damaged by its screws (fig.2).
- Page 30 Component replacement and adjustment procedure Grill element substitution Disconnect the power supply cord and remove the Oven from the cabinet. Remove the upper cover. Remove the internal component cover (fig 1) its six screws. Remove the probe from its location using a clamp make rounded the border to extract it.
- Page 31 Component replacement and adjustment procedure Bottom element Substitution Disconnect the power supply cord and remove the Oven from the cabinet. Remove the upper and rear covers. Disconnect the terminals. Unscrew the two screws (fig.1). Remove the element as shown (fig2). Replace the new one by reversing the previous steps.
- Page 32 Component replacement and adjustment procedure Door Gasket substitution Open door and pull out the gasket by hands unhooking it by its 4 hooks on the corners. Replace with a new one by reversing the previous steps. Run the Oven and check all functions.
- Page 33 Component replacement and adjustment procedure Safety thermostats substitution Disconnect the power supply cord and remove the Oven from the cabinet. Remove the upper cover. Unscrew and disconnect the thermostat damaged. Replace the new one by reversing the previous steps. Connect the terminals. The connections must not be loose.
- Page 34 Component replacement and adjustment procedure 7.10 Probe Temperature substitution Disconnect the power supply cord and remove the Oven from the cabinet. Remove the upper cover. Remove the internal components cover (fig 1) by its six screws. Remove the probe from its location using a clamp make rounded the border to extract it (fig.2).
- Page 35 Component replacement and adjustment procedure 7.11 Door hinges substitution Remove the Oven door following the section 7.3. Put the door on a flat surface with a soft cloth to prevent scratching of the aesthetics. Unscrew the door external glass A. Before to remove the hinges the hinge arm must be placed in the correct position following the steps (1 to 4) below.
- Page 36 Component replacement and adjustment procedure 7.12 Electronic Control board substitution Disconnect the power supply cord and remove the Oven from the cabinet. Remove the upper cover. Disconnect the bad Control Board and remove it by its four plastic bracket. (fig.1) Replace the new one by reversing the previous steps.
- Page 37 Component replacement and adjustment procedure 7.13 Light bulb substitution Disconnect the power supply cord. Remove the upper, rear and lateral cover . Open the door and remove the lens to access to bulb as showed (fig. The oven lamp must have precise characteristics: a) Structure suitable for high temperatures (up to 300 °C);...
- Page 38 Component replacement and adjustment procedure 7.14 Load & Drain Pump substitution Disconnect the power supply cord and remove the Oven from the cabinet. Remove the upper cover. Disconnect the terminals from bad Pump. Disconnect the silicon tubes from pump body. Remove it by removing the fixing screws.
- Page 39 Component replacement and adjustment procedure 7.15 Steam generator substitution Disconnect the power supply cord and remove the Oven from the cabinet. Remove the upper cover. Disconnect the terminals from bad Generator. Disconnect the silicon tubes from its body. Remove it by removing the fixing screws positioned under the generator body.
- Page 40 Component replacement and adjustment procedure 7.16 Water Softener substitution Disconnect the power supply cord and remove the Oven from the cabinet. Remove the upper cover. Disconnect the silicon tubes from its body. Replace the new one by reversing the previous steps. Connect the terminals.
- Page 41 Component replacement and adjustment procedure 7.17 Water Counter substitution Disconnect the power supply cord and remove the Oven from the cabinet. Remove the upper cover. Disconnect the terminals from bad water counter. Disconnect the silicon tubes from its body. Remove it by the its fixing plastic plug. positioned under the counter body.
- Page 42 Component replacement and adjustment procedure 7.18 Door Sensor substitution Disconnect the power supply cord and remove the Oven from the cabinet. Remove the upper cover. Disconnect the connector of the bad sensor from board. Remove it by removing its fixing screw. Replace the new one by reversing the previous steps.
- Page 43 Component replacement and adjustment procedure 7.19 Door external glass substitution Remove the door from the oven section 7.3. Put the door on a flat surface with a soft cloth to prevent scratching of the aesthetics. Remove the external glass from the door unscrewing two screws on the corner (fig.1).
- Page 44 Component replacement and adjustment procedure 7.20 Door middle glass substitution Remove the door from the oven section 7.3. Put the door on a flat surface with a soft cloth to prevent scratching of the aesthetics. Remove the external Figure 1 glass from the door Figure 2 unscrewing two screws on...
- Page 45 Component replacement and adjustment procedure 7.21 Door internal labyrinth glass substitution Remove the door from the oven section 7.3. Put the door on a flat surface with a soft cloth to prevent scratching of the aesthetics. Remove the external glass from the door unscrewing two screws on the corner (fig.1).
- Page 46 Component replacement and adjustment procedure 7.22 Door internal labyrinth glass gasket substitution Remove the door from the oven section 7.3. Put the door on a flat surface with a soft cloth to prevent scratching of the aesthetics. Remove the external glass from the door unscrewing two screws on the corner (fig.1).
- Page 47 Component replacement and adjustment procedure 7.23 Glass Control panel substitution Disconnect the power supply cord and remove the Oven from the cabinet. Remove the upper cover. Remove the Control Board without disassembling the cable. (section 7.12) Substitute the glass damaged by removal of the four screws on metal brackets. (fig.1) Replace the new one by reversing the previous steps mounting also a new plastic control board brackets.
- Page 48 Component replacement and adjustment procedure 7.24 Door magnet substitution Remove the door from the oven (section 7.3). Put the door on a flat surface with a soft cloth to prevent scratching of the aesthetics. Remove the external glass from the door unscrewing two screws on the corner (fig.1).
Need help?
Do you have a question about the SO209WH and is the answer not in the manual?
Questions and answers
How can we get the cooker off demo mode?
To remove the Caple SO209WH cooker from demo mode, press the light symbol and hold it for five seconds. The oven will then switch to normal operation and be ready to turn on.
This answer is automatically generated