Table of Contents
Advertisement
Available languages
Available languages
Gas/Charcoal Grill & Smoker
Función Dual Parrilla/Ahumador
OWNER'S MANUAL / MANUAL DEL PROPIETARIO
GUARDE ESTE MANUAL PARA REFERENCIA FUTURA
MODEL / MODELO 810-6340-S
NOTICE TO INSTALLER:
LEAVE THESE INSTRUCTIONS
WITH THE GRILL OWNER FOR
FUTURE REFERENCE .
AVISO PARA EL
INSTALADOR:
ENTREGUE ESTAS
INSTRUCCIONES AL
PROPIETARIO DE LA PARRILLA
PARA REFERENCIA FUTURA.
Dual Function
De Gas Y Carbón
ASSEMBLY AND OPERATING IN STRUC TIONS
INSTRUCCIONES DE ARMADO Y OPERACIÓN
SAVE THIS MANUAL FOR FUTURE REFERENCE
HAZARDOUS EXPLOSION MAY RESULT IF THESE WARNINGS AND INSTRUCTIONS
ARE IGNORED. READ AND FOLLOW ALL WARNINGS AND INSTRUCTIONS IN THIS
MANUAL TO AVOID PERSONAL INJURY, INCLUDING DEATH OR
SE PUEDE PRODUCIR UNA EXPLOSIÓN PELIGROSA SI SE HACE CASO OMISO A
ESTAS ADVERTENCIAS E INSTRUCCIONES. LEA Y SIGA TODAS LAS ADVERTENCIAS
E INSTRUCCIONES EN ESTE MANUAL PARA EVITAR LESIONES PERSONALES,
WARNING/ADVERTENCIA
PROPERTY DAMAGE.
INCLUSO LA MUERTE, O LOS DA—OS MATERIALES.
Advertisement
Chapters
Table of Contents

Related Manuals for Brinkmann 810-6340-S


Summary of Contents for Brinkmann 810-6340-S
- Page 1 ASSEMBLY AND OPERATING IN STRUC TIONS INSTRUCCIONES DE ARMADO Y OPERACIÓN SAVE THIS MANUAL FOR FUTURE REFERENCE GUARDE ESTE MANUAL PARA REFERENCIA FUTURA MODEL / MODELO 810-6340-S WARNING/ADVERTENCIA NOTICE TO INSTALLER: HAZARDOUS EXPLOSION MAY RESULT IF THESE WARNINGS AND INSTRUCTIONS LEAVE THESE INSTRUCTIONS ARE IGNORED.
- Page 2 IMPORTANT SAFETY WARNINGS WE WANT YOU TO ASSEMBLE AND USE YOUR GRILL AS SAFELY AS POSSIBLE. THE PURPOSE OF THIS SAFETY ALERT SYMBOL IS TO ATTRACT YOUR ATTENTION TO POSSIBLE HAZARDS AS YOU ASSEMBLE AND USE YOUR GRILL. WHEN YOU SEE THE SAFETY ALERT SYMBOL PAY CLOSE ATTENTION TO THE INFORMATION WHICH FOLLOWS! READ ALL SAFETY WARNINGS AND INSTRUCTIONS CAREFULLY BEFORE ASSEMBLING AND OPERATING YOUR GRILL.
-
Page 3: Table Of Contents
TABLE OF CONTENTS: GAS GRILL SECTION General Warnings ......... . 3-4 LP Gas cylinder (tank) Specifications and Installation:. -
Page 4: General Warnings
GENERAL WARNINGS: WARNING • Leak test all connections before first use, even if grill was purchased fully assembled and after each tank refill. Check the propane tank rubber seal for damage. • Always check the grill and propane tank prior to each use as indicated in the “Checking for Leaks”... -
Page 5: Lp Gas Cylinder (Tank) Specifications And Installation
• DO NOT store items in cart that can catch fire or damage your grill (such as swimming pool supplies/chemicals, table cloth, wood chips). • Grill is hot when in use. To avoid burns: • DO NOT attempt to move the grill. •... - Page 6 LP GAS CYLINDER (TANK) SPECIFICATIONS: LP gas cylinder (not supplied with this grill) The LP (Liquid Propane) gas cylinder specifically designed to be used with this grill must be 12” (30.5 cm) diameter x 18” (45.7 cm) tall and have a 20 lb. (9.1 kg) capacity incorporating a Type 1 cylinder valve and an over-filling protection device (OPD).
-
Page 7: Hose & Regulator Specifications And Installation
• DO NOT attempt to connect grill, as purchased for LP (propane) gas, to any other fuel supply source such as a natural gas line. A Brinkmann conversion kit must be purchased and installed for use with natural gas. •... -
Page 8: Leak Testing
HOSE AND REGULATOR: Your grill is equipped with a Type 1 connection device with the following features: 1. The system will not allow gas flow from the cylinder until a positive connection to the valve has been made. Note: The cylinder valve and all grill burner knobs must be turned OFF before any connection is made or removed. -
Page 9: Checking For Leaks
DANGER To prevent fire or explosion hazard: • Do not smoke or permit ignition sources in the area while conducting a leak test. • Perform test OUTDOORS in a well ventilated area that is protected from the wind. • Never perform a leak test with a match or open flame. •... -
Page 10: Pre-Start Check List
PRE-START CHECK LIST: DANGER Property damage, bodily harm, severe burns, and death could result from failure to follow these safety steps. These steps should be performed after the grill has been assembled and prior to each use. DO NOT operate this grill until you have read and understand ALL of the warnings and instructions in this manual. -
Page 11: Lighting The Side Burner
6. If the burner does not light within the first few attempts, there is a problem with the gas supply. Turn off the gas at the burner and cylinder. DO NOT attempt to operate the grill until the problem is found and corrected. -
Page 12: Operating The Grill
OPERATING THE GRILL: WARNING • Read and follow all warnings and instructions contained in the preceding sections of this manual. • Never use charcoal, lava rocks or wood briquets in a gas grill. Flavoring chips must be contained in a metal smoking box to contain ash and prevent fires. •... -
Page 13: Using Other Features Of The Grill
WARNING • When using an AC current rotisserie, it must be electrically grounded in accordance with local codes, or in the absence of local codes: • In the US: The National Electrical Code – ANSI-NFPA No. 70 – Latest Edition •... -
Page 14: Charcoal Grill General Warnings
CHARCOAL GRILL GENERAL WARNINGS: WARNING • Only use this grill on a hard, level, non-combustible, stable surface (concrete, ground, etc.) capable of supporting the weight of the grill. Never use on wooden or other sur fac es that could burn. •... - Page 15 We advise that a fire extinguisher be on hand. Refer to your local authority to determine proper size and type of fire extinguisher. • Accessory attachments not manufactured by The Brinkmann Corporation for this particular product are not recommended and may lead to personal injury or property damage. •...
-
Page 16: Charcoal Operating Instructions
CURING YOUR GRILL: Prior to your first use of the Brinkmann Dual Function Grill, follow the in struc tions below carefully to preheat your grill. Curing your grill will rid the grill of paint odor that can impart unnatural flavors to the first meal prepared on your Brinkmann Dual Function Grill. - Page 17 Note: It is important that the exterior of the smoker is not scraped or rubbed during the curing process. IMPORTANT: To protect your grill from excessive rust, the unit must be properly covered at all times when not in use. YOUR BRINKMANN DUAL FUNCTION GRILL IS NOW PREHEATED AND READY FOR USE.
-
Page 18: Flavoring Wood
A lot of wood is not required to obtain a good smoke flavor. A recommended amount for the Brinkmann Dual Function Grill is 5 to 6 wood chunks or sticks. Experiment by using more wood for stronger smoke flavor or less wood for milder smoke flavor. -
Page 19: Proper Care & Maintenance
ADDING CHARCOAL/WOOD DURING COOKING: Additional charcoal and/or wood may be re quired to maintain or increase cooking tem per a ture. Stand back and carefully open grill lid. Use caution since flames can flare-up when fresh air suddenly comes in contact with fire. -
Page 20: Burner Assembly/Maintenance
BURNER CLEANING AND MAINTENANCE: • Keep the appliance free and clear of combustible materials, gasoline and other flammable vapors and liquids. • Keep the ventilation openings of the cylinder enclosure free and clear of debris. • Visually check burner flames for proper operation (see pictorial in “Burner Assembly/Maintenance” under Proper Care and Maintenance). -
Page 21: Transporting And Storage
BURNER ADJUSTMENT: WARNING • DO NOT attempt to adjust burner air shutter until grill has cooled down for approximately 30 minutes. Failure to do so could cause severe burns. • Normal flame should be soft blue with yellow tips between 1 in a 2 in (2.5 cm a 5 cm). When burner is on “HIGH”. -
Page 22: Trouble Shooting
TROUBLE SHOOTING: To see trouble shooting or assembly videos, visit us at: Problem Possible Cause Prevention/Cure Burner will not light LP gas tank valve is closed Make sure regulator is securely attached to the LP gas tank, turn LP gas tank valve to “OPEN” LP gas tank is low or empty Check if LP gas tank is empty. -
Page 23: Grill Cooking Tips
Problem Possible Cause Prevention/Cure Flame blows out High or gusting winds Do not use grill in high winds Low on LP gas Replace or refi ll LP gas tank Burner holes may be obstructed Refer to “Burner Assembly/Maintenance” instructions Flow limiting device tripped Refer to “Regulator Resetting Procedure”... -
Page 24: Assembly Instructions
READ ALL SAFETY WARNINGS & ASSEMBLY INSTRUCTIONS CAREFULLY BEFORE ASSEMBLING OR OPERATING YOUR GRILL. WE RECOMMEND TWO PEOPLE WORK TOGETHER WHEN AS SEM BLING THIS UNIT. The following tools are required to assemble this Brinkmann Dual Function Grill: • Phillips Head Screwdriver • Adjustable Wrench... - Page 25 FOR COVERS, ACCESSORIES AND OTHER PRODUCTS, PLEASE VISIT US ONLINE AT: Inspect contents of the box to ensure all parts are included and undamaged.
- Page 26 Make sure you have all items listed under PARTS LIST and PARTS CARD CONTENTS before you begin the installation process. PARTS CARD CONTAINS: 1 Hex Nut Wrench 18 M4 X 10 mm Bolts 53 M6 X 10 mm Bolts 12 M5 Nuts 12 M5 X 10 mm Bolts 8 M4 Nuts 16 M4 X 6 mm Bolts...
- Page 27 Choose a good, cleared assembly area and get a friend to help you put your grill together. Lay card board down to protect grill M12 Washer M12 Lock Nut finish and assembly area. Turn the grill on its side to begin assembly. Step 1 Attach the wheels to the left leg.
- Page 28 Step 5 Attach gas grill chimneys to gas grill lid assembly using three M5 X 10 mm bolts and M5 nuts for each chimney. Note: Gas grill lid assembly has exhaust vents in the back. Gas Grill Chimney Charcoal Grill Chimney Step 6 Attach charcoal grill chimneys to charcoal grill lid assembly using three...
- Page 29 Step 8 Attach gas grill lid assembly to gas grill bottom using eight M4 X 6 mm bolts. Repeat for charcoal grill lid assembly. Note: Gas grill lid assembly has exhaust vents in the back. Step 9 Attach two warming rack brackets to the gas grill lid assembly using two M4 X 10 mm bolts for each bracket.
- Page 30 Step 11 Screw temperature gauge fully into lid. Slightly unscrew temperature gauge until gauge is in an upright position. Use pre- attached nut to lock into place. Repeat for other temperature gauge. Step 12 Attach grill handles using eight M4 X 10 mm bolts and M4 nuts. Step 13 Attach lid stopper to each lid using one M4 X 10 mm bolt for each lid stopper.
- Page 31 Step 15 Attach the grill side handle to the charcoal body using four M6 X 10 mm bolts. Step 16 Attach main control panel assembly to gas grill using four M6 X 10 mm bolts from inside gas grill body. Step 17 Insert electrode wire and burner openings through burner holes in gas grill bottom.
- Page 32 Step 18 Attach the tank bracket by inserting the pre-attached carriage bolt through the keyhole, slide down and then use the wing nut to secure. Wing Nut Carriage Tank Bracket Bolt Step 19 Igniter Lead Wire Insert each main burner igniter lead wire to each valve.
- Page 33 Step 22 Remove two M4 bolts from the side burner valve. Insert the side burner valve assembly through the hole in the side burner front panel, seat the valve nozzle into the burner venturi. Hold in place while you perform Step 23. WARNING: Never use your grill without leak testing all gas connections and hoses.
- Page 34 Step 25 Charcoal Grate Charcoal Grate Bracket Handle Hang the charcoal grate inside the charcoal grill body. WARNING: Never hang charcoal grate from charcoal grate bracket handles. Warming Rack Step 26 Place two cooking grates on support ribs directly above charcoal grate. Cooking Grates Step 27 Place warming rack onto warming rack...
- Page 35 Step 31 Tracks Insert grease tray into tracks on the bottom of the gas grill. Hang grease cup from brackets on bottom of grease tray. Grease Tray Grease Cup Step 32 Hang the grease cup bracket underneath the charcoal grill body. Note: Place empty soup can (not included) in grease cup bracket before use.
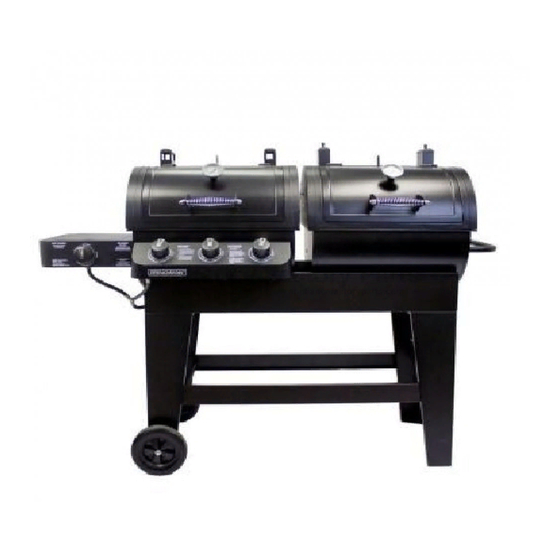
- Page 36 Brinkmann 6340 (Assembled)
- Page 37 IMPORTANTES ADVERTENCIAS DE SEGURIDAD ES NUESTRO DESEO QUE ARME Y UTILICE SU ASADOR EN LA FORMA MÁS SEGURA POSIBLE. EL PROPÓSITO DE ESTE SÍMBOLO DE ALERTA DE SEGURIDAD ES QUE USTED PRESTE ATENCIÓN A LOS POSIBLES PELIGROS CUANDO ARME Y UTILICE SU ASADOR.
- Page 38 TABLA DE CONTENIDOS: SECCIÓN DEL ASADOR A GAS Advertencias Generales ........38-39 Especifi caciones e Instalación del Cilindro (Tanque) de Gas LP .
-
Page 39: Advertencias Generales
ADVERTENCIAS GENERALES: ADVERTENCIA • Antes de usar el asador por primera vez, pruebe todas las conexiones en busca de fugas, incluso si compró el asador totalmente armado y cada vez que vuelva a cargar el tanque. Inspeccione el sello de caucho del tanque de propano en busca de daños. •... -
Page 40: Especificaciones E Instalación Del Cilindro (Tanque) De Gas Lp
que no queden cerdas sueltas sobre dichas superficies antes de usar el asador, ya que las cerdas sueltas se pueden pegar a la comida. • NO almacene artículos en el carrito que puedan prenderse fuego o dañar el asador (como químicos o suministros para piscinas, manteles, trozos de madera). - Page 41 ESPECIFICACIONES DEL CILINDRO (TANQUE) DE GAS LP: Cilindro de gas LP (no suministrado con este asador) El cilindro de gas LP (propano líquido) específi camente diseñado para usarse con este asador debe tener 12 in (30.5 cm) de diámetro × 18 in (45.7 cm) de alto y una capacidad de 20 lb (9.1 kg), con una válvula del cilindro Tipo 1 y un dispositivo de protección contra sobrecarga (OPD).
-
Page 42: Especificaciones E Instalación Del Regulador Y La Manguera
INSPECCIÓN DEL SELLO DE CAUCHO DEL CILINDRO (TANQUE) DE GAS LP: • Antes de usar, inspeccione el sello de caucho de la válvula del tanque de propano en busca de fi suras, desgaste o signos de deterioro. Un sello de caucho dañado puede causar una fuga de gas, lo que posiblemente derive en una explosión, un incendio o lesiones corporales graves. -
Page 43: Pruebas De Detección De Fugas
REGULADOR Y MANGUERA: El asador viene equipado con un dispositivo de conexión Tipo 1 con las siguientes características: 1. El sistema no permitirá la circulación de gas desde el cilindro hasta que se establezca una conexión positiva a la válvula. Nota: La válvula del cilindro y todas las perillas de los quemadores del asador deben estar cerradas antes de realizar o quitar cualquier conexión. - Page 44 PELIGRO Para prevenir los peligros vinculados con los incendios o explosiones: • NO fume ni permita que haya fuentes de ignición en la zona donde lleve a cabo una prueba de detección de fugas. • Realice la prueba en un área bien ventilada AL AIRE LIBRE, protegida contra el viento. •...
-
Page 45: Lista De Comprobación Previa Al Arranque
LISTA DE COMPROBACIÓN PREVIA AL ARRANQUE: PELIGRO Si no se siguen estos pasos, pueden ocurrir daños a la propiedad, lesiones corporales, quemaduras graves y la muerte. Estos pasos deben llevarse a cabo después de que el asador se armó y antes de cada uso. NO use este asador hasta haber leído y entendido TODAS las advertencias y las instrucciones incluidas en este manual. - Page 46 6. Si la hornilla no se enciende dentro de las tentativas primeras, hay un problema con la fuente de gas. Dé vuelta apagado al gas en la hornilla y el cilindro. No procure funcionar la parrilla hasta que se encuentra el problema y se corrija.
-
Page 47: Funcionamiento Del Asador
FUNCIONAMIENTO DEL ASADOR: ADVERTENCIA • Lea y siga todas las advertencias y las instrucciones incluidas en las secciones anteriores de este manual. • Nunca use carbón, rocas volcánicas o briquetas de madera en un asador a gas. Los copos saborizantes deben colocarse en una caja para ahumar de metal para contener las cenizas y evitar incendios. -
Page 48: Funcionamiento Del Asador
ADVERTENCIA • Cuando use un rostizador para corriente CA, debe estar puesto eléctricamente a tierra conforme a los códigos locales o, de no existir tales códigos: • En los Estados Unidos: El Código Eléctrico Nacional, ANSI-NFPA n.º 70, última edición •... -
Page 49: Advertencias Generales De Seguridad Para El Asador De Carbón
ADVERTENCIAS GENERALES DE SEGURIDAD PARA EL ASADOR DE CARBÓN: ADVERTENCIA • Utilice este asador únicamente sobre una superficie estable dura, nivelada, no combustible (concreto, piso, etc.) capaz de aguantar el peso del ahumador. Nunca lo utilice sobre superficies de madera o de otro tipo que podrían quemarse. -
Page 50: Instrucciones De Operación Del Asador De Carbón De Leña
CURADO DEL ASADOR: Antes de utilizar por primera vez su Asador a Gas y Carbón de Brinkmann, siga detenidamente las instrucciones dadas a continuación para curar su asador, ya que esto eliminará el olor a pintura de el asador que puede impartirle un sabor no natural a su primera comida preparada en su Asador a Gas y Carbón de Brinkmann. - Page 51 Nota: Es importante que el exterior del ahumador no se raspe ni se frote durante el proceso de curado IMPORTANTE: Para proteger su asador de oxidación excesiva, debe cubrir la unidad en todo momento cuando no la use. SU ASADOR A GAS Y CARBÓN DE BRINKMANN YA HA SIDO PRECALENTADO Y ESTÁ LISTO PARA USARSE...
- Page 52 AHUMAR: 1. Siga las instrucciones arriba de como construir una llama en la caja de fuego. 2. Con los carbones quemándose bien, agregue cuidadosamente los pedazos de madera usando las pinzas largas para cocinar (Vea las secciones “madera de la condimentación” y la “adición de Carbón de Leña/Madera durante cocinar” de este manual.) 3.
-
Page 53: Cuidado Y Mantenimiento Adecuados
ADVERTENCIA: Nunca le agregue líquido encendedor de carbón a trozos calientes de carbón porque puede ocurrir una llamarada que podría causarle una quemadura grave. 3. Cuando el carbón esté ardiendo bien nuevamente, póngase guantes protectores o guantes gruesos para el horno y cuidadosamente regrese el emparrillado para el carbón a la posición deseada de cocimiento. - Page 54 • Nunca use limpiadores que contengan cloro ni almacene químicos o suministros para piscinas en el compartimiento del carrito, ya que el cloro promueve el óxido. LIMPIEZA Y MANTENIMIENTO DE LOS QUEMADORES: • Mantenga el artefacto libre de materiales combustibles, gasolina, y otros líquidos y vapores infl amables. •...
-
Page 55: Transporte Y Almacenamiento
AJUSTE DE LOS QUEMADORES: ADVERTENCIA • NO intente ajustar el obturador de aire de los quemadores hasta que el asador se haya enfriado durante aproximadamente 30 minutos. Si no cumple con esta indicación, puede sufrir quemaduras graves. • Las llamas normales deben ser de color azul claro con puntas amarillas, y deben ser de entre 1 in a 2 in (2.5 cm a 5 cm) cuando el quemador está... -
Page 56: Solución De Problemas
SOLUCIÓN DE PROBLEMAS: Para ver videos de montaje o solución de problemas, visítenos en: Problema Causa posible Prevención/Cuidado El quemador no La válvula del tanque de gas LP está cerrada Cerciórese de que el regulador esté conectado al tanque de gas enciende LP con fi rmeza;... - Page 57 Problema Causa posible Prevención/Cuidado El patrón de la llama es Los puertos de los quemadores están Limpie los puertos de los quemadores irregular. No se forma obstruidos o bloqueados la llama en toda la longitud del quemador El obturador de aire del quemador debe Consulte la sección “Ajuste de los Quemadores”...
-
Page 58: Sugerencias Para Cocinar Con El Asador
SUGERENCIAS PARA COCINAR CON EL ASADOR: HIGIENE: • Siempre lávese las manos minuciosamente con jabón y agua caliente antes de manipular la comida y después de manipular carne vacuna o de pollo cruda, o mariscos/pescados. • Cuando use una fuente para transportar carne vacuna o de pollo cruda, o mariscos/pescado hasta el asador, asegúrese de lavar la fuente minuciosamente con jabón y agua caliente antes de colocar la comida cocida en dicha fuente, o use fuentes diferentes para los alimentos crudos y la comida cocida. -
Page 59: Instrucciones De Ensamblado
INSTRUCCIONES DE ENSAMBLADO ANTES DE ENSAMBLAR Y UTILIZAR SU PARRILLA. RECOMENDAMOS QUE DOS PERSONAS ENSAMBLEN ESTA UNIDAD CONJUNTAMENTE. Se necesita la siguiente herramienta para ensamblar esta parrilla Función Dual de Brinkmann: • Destornillador con cabeza Phillips • Llave Ajustable Lista de Piezas: 3 Placas de Distribución del Calor... - Page 60 PARA CUBIERTAS, ACCESORIOS Y OTROS PRODUCTOS, FAVOR DE VISITARNOS POR LA RED MUNDIAL Inspeccione el contenido de la caja para verificar que todas las partes estén incluidas e intactas.
- Page 61 Cerciórese de tener todas las partes enumeradas en la LISTA DE PIEZAS y en la lista del CONTENIDO DE LA BOLSA DE PIEZAS antes de comenzar con la instalación. LA BOLSA DE PIEZAS CONTIENE: 1 Llave de Tuercas Hexagonal 18 Pernos M4 X 10 mm 53 Pernos M6 X 10 mm 12 Tuercas M5 12 Pernos M5 X 10 mm...
- Page 62 Elija un área de montaje buena, despejada y consiga un amigo para que lo ayude a armar la parrilla. Coloque cartones debajo para proteger Arandela M12 el acabado de la parrilla y el área de montaje. Tuerca de Fijación M12 Coloque la parrilla de costado para empezar a armarla.
- Page 63 Paso 5 Fije la chimenea de gas a la tapa de gas usando tres pernos M5 X 10 mm y tuercas M5 para cada chimenea. Nota: Armado de la tapa de gas tiene ventilación en la parte trasera. Chimenea de Gas Chimenea de Carbón Paso 6 Fije la chimenea de carbón a la...
- Page 64 Paso 8 ontaje del Una la m gas a la parte inferior de la parrilla usando cuatro pernos M4 X 6 montaje del mm. Repita para carbón. Nota: Armado de la tapa de gas tiene ventilación en la parte trasera. Paso 9 Una dos soportes de rejillas para calentar en la tapa de la parrilla a gas usando dos...
- Page 65 Paso 11 Enrosque el medidor de temperatura completamente en la tapa. Levemente desenrosque el medidor de temperatura hasta que este quede en posición vertical. Use la tuerca de bloqueo previamente instalada para trabarlo en su lugar. Repita con el otro medidor de temperatura. Paso 12 Coloque las manijas de la parrilla usando ocho pernos M4 X 10 mm y tuercas M4.
- Page 66 Paso 15 Una la manija lateral al cuerpo del lado de carbón usando cuatro pernos M6 X 10 mm. Paso 16 Una el panel de control principal al lado a gas usando cuatro pernos M6 X 10 mm del lado interior del cuerpo de la parrilla. Paso 17 Inserte el cable de electrodo y las aberturas de quemador a través de los agujeros...
- Page 67 Paso 18 Una el la abrazadora del tanque insertando el perno previamente instalado en la carreta a través del agujero, deslícelo hacia abajo y use la tuerca de mariposa para asegurarlo. Tuerca de Mariposa Perno de la Abrazadora del Tanque Carreta Cable del Conductor del Encendedor...
- Page 68 aso 22 Retire dos pernos M4 de la válvula del quemador lateral. Inserte el montaje de la válvula del quemador lateral por medio del agujero en el panel frontal del quemador lateral, asiente la boquilla de la válvula en el venturi del quemador. Sosténgalo en el lugar mientras realiza el Paso 23.
- Page 69 Rejilla de Carbón Agarrador para Rejilla de Carbón Paso 25 Cuelgue la rejilla de carbón dentro del cuerpo de la parrilla de carbón. ADVERTENCIA: Nunca cuelgue la rejilla de carbón de los agarradores. Rejilla para Paso 26 Calentar Coloque dos rejillas de cocinar sobre las nervaduras de apoyo, directamente sobre la rejilla de carbón.
- Page 70 Paso 31 Ranuras Inserte la bandeja para la grasa en las ranuras en la parte inferior de la parrilla a gas. Cuelgue el recipiente para la grasa sobre los soportes en la parte inferior de la bandeja de la grasa. Bandeja para la Grasa Recipiente para la Grasa Paso 32...
- Page 71 Brinkmann 6340 (Armada)
-
Page 72: Garantía
PARA CUBIERTAS, ACCESORIOS Y OTROS PRODUCTOS, FAVOR DE VISITARNOS POR LA RED MUNDIAL EN: WARRANTY The Brinkmann Corporation warrants to the original pur chas er that the Brinkmann Dual Function Grill is free from defects due to workmanship or materials for: Ten-year: on stainless steel burners...