Table of Contents
Advertisement
Quick Links
1
INSTALLER: LEAVE THIS MANUAL WITH THE APPLIANCE.
CONSUMER: RETAIN THIS MANUAL FOR FUTURE REFERENCE.
INSTALLATION AND
OPERATING INSTRUCTIONS
CERTIFIED UNDER CANADIAN AND AMERICAN NATIONAL STANDARDS: CSA C22.2 No-12 / UL 153
EF39S
ELECTRIC FIREPLACE
CERTIFIED FOR CANADA AND UNITED STATES USING ANSI/CSA METHODS.
SAFETY INFORMATION
WARNING
!
If the information in these instructions are
not followed exactly, a fi re or explosion
may result causing property damage,
personal injury or loss of life.
- Do not store or use gasoline or other fl ammable
vapors and liquids in the vicinity of this or any
other appliance.
Wolf Steel Ltd., 24 Napoleon Rd., Barrie, ON, L4M 4Y8 Canada /
103 Miller Drive, Crittenden, Kentucky, USA, 41030
Phone (705)721-1212 • Fax (705)722-6031 • www.napoleonfi replaces.com • ask@napoleonproducts.com
1.16A
W415-0924 / A / 08.19.10
$10.00
Advertisement
Table of Contents

Related Manuals for Napoleon EF39S


Summary of Contents for Napoleon EF39S
-
Page 1: Safety Information
Wolf Steel Ltd., 24 Napoleon Rd., Barrie, ON, L4M 4Y8 Canada / 103 Miller Drive, Crittenden, Kentucky, USA, 41030 Phone (705)721-1212 • Fax (705)722-6031 • www.napoleonfi replaces.com • ask@napoleonproducts.com 1.16A... -
Page 2: Table Of Contents
TABLE OF CONTENTS INTRODUCTION DIMENSIONS LISTING APPROVALS GENERAL INSTRUCTIONS LOCATING APPLIANCE UNPACKING AND TESTING APPLIANCE GROUNDING APPLIANCE HARDWIRE INSTALLATION INSTALLATION WALL MOUNT INSTALLATION 3.1.1 MINIMUM MANTEL CLEARANCES 3.1.2 MINIMUM CLEARANCE TO COMBUSTIBLES 3.1.3 INSTALLING THE APPLIANCE RECESSED INSTALLATION 3.2.1 MINIMUM CLEARANCE TO COMBUSTIBLES 3.2.2 FRAMING FINISHING... -
Page 3: Introduction
1.0 INTRODUCTION WARNING • THIS APPLIANCE IS HOT WHEN OPERATED AND CAN CAUSE SEVERE BURNS IF CONTACTED. • Do not operate appliance before reading and understanding operating instructions. Failure to operate appliance according to operating instructions could cause fi re or injury. •... -
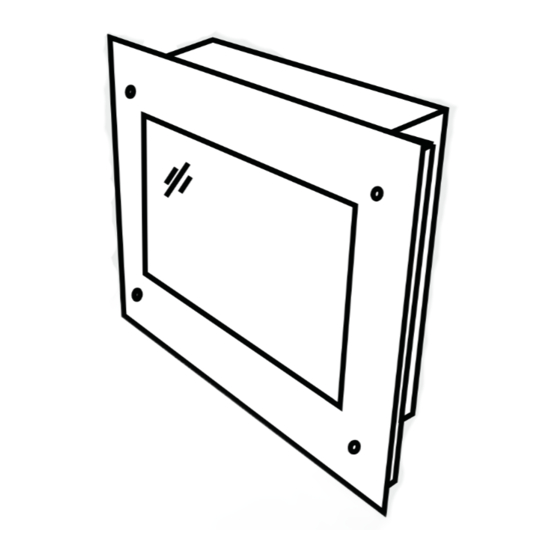
Page 4: Dimensions
This appliance has been tested in accordance with the CSA Standards for fi xed and location-dedicated electric room appliances in the United States and Canada. If you need assistance during installation, please contact your local dealer. Model Number EF39S NOTE: This appliance must be electrically wired and Description Wall-Mount Appliance... -
Page 5: General Instructions
GENERAL INSTRUCTIONS WARNING READ THESE INSTRUCTIONS COMPLETELY BEFORE BEGINNING INSTALLATION. FAILURE TO FOLLOW THEM COULD CAUSE AN APPLIANCE MALFUNCTION RESULTING IN SERIOUS INJURY AND/OR PROPERTY DAMAGE. ALL ELECTRIC APPLIANCES HAVE HOT AND ARCING OR SPARKING PARTS INSIDE. DO NOT USE IT IN AREAS WHERE GASOLINE, PAINT OR FLAMMABLE LIQUIDS ARE PRESENT. -
Page 6: Locating Appliance
2.0 LOCATING APPLIANCE WARNING DUE TO HIGH TEMPERATURES, THIS ELECTRIC APPLIANCE SHOULD BE LOCATED OUT OF TRAFFIC. KEEP COMBUSTIBLE MATERIALS SUCH AS FURNITURE, PILLOWS, BEDDING, PAPERS, CLOTHES AND CURTAINS AT LEAST 36" FROM THE FRONT OF THE APPLIANCE. NEVER LOCATE THIS ELECTRIC APPLIANCE WHERE IT MAY FALL INTO A BATHTUB OR OTHER WATER CONTAINER. -
Page 7: Hardwire Installation
HARDWIRE INSTALLATION WARNING ENSURE ALL POWER IS TURNED OFF BEFORE HARD WIRING THIS APPLIANCE. ELECTRIC DIAGRAM W415-0924 / A / 08.19.10... - Page 8 If it is necessary to hard wire this appliance, a qualifi ed electrician may remove the cord connection, and wire the appliance directly to the household wiring. This appliance must be elctrically connected and grounded in accordance with local codes, if hard wired. In the absense of local codes, the current CSA C22.1 CANADIAN ELECTRICAL CODE in Canada or the current ANSI/NFPA 70 NATIONAL ELECTRICAL CODE in United States.
-
Page 9: Installation
CREATE A FIRE HAZARD. Your EF39S may be wall mounted or recessed up to the mounting frame. Select a suitable location that is not susceptible to moisture and it away from drapes, furniture and high traffi c areas. NOTE: Follow all National and local electrical codes. -
Page 10: Minimum Clearance To Combustibles
3.1.2 MINIMUM CLEARANCE TO COMBUSTIBLES Measurements are taken from the glass front. Bottom 1" " to mantel Sides 1" " to ceiling Back 0" 3.1.3 INSTALLING THE APPLIANCE Due to the many different materials used on different walls, it is highly recommended that you consult your local builder before you install this appliance on the wall. -
Page 11: Recessed Installation
RECESSED INSTALLATION 3.2.1 MINIMUM CLEARANCE TO COMBUSTIBLES Measurements are taken from the body. Sides, back and top 1" 3.2.2 FRAMING Finish Material 27” 26”* *NOTE: finish material must cantilever framing by 1/2” at both the top and bottom. 1. Once the rough opening has been prepared, and the power has been routed to the left side of the recess, the appliance may be installed. -
Page 12: Finishing
4.0 FINISHING WARNING POWER SUPPLY SERVICE MUST BE COMPLETED PRIOR TO FINISHING TO AVOID RECONSTRUCTION. HEAT VENTS AND AIR OPENINGS CANNOT BE COVERED IN ANY CIRCUMSTANCES. GLASS EMBER INSTALLATION Glass front must be removed and the appliance must be mounted in its fi... -
Page 13: Operating Instructions
5.0 OPERATING INSTRUCTIONS Once the appliance has been plugged into a grounded electrical outlet, it is ready to operate. NOTE: Ensure the house circuit breakers for the power supply are turned on. In the event of a power failure, when the main power switch is in the "I" ON position and the hand held remote control is in the OFF position, the fl... -
Page 14: Maintenance
6.0 MAINTENANCE WARNING PREPARATION FOR MAINTENANCE ALWAYS DISCONNECT THE POWER AND ALLOW THE ELECTRIC APPLIANCE TO COOL BEFORE PERFORMING ANY CLEANING, MAINTENANCE OR RELOCATION OF THIS ELECTRIC APPLIANCE. TURN CONTROLS TO OFF AND REMOVE PLUG FROM OUTLET OR TURN OFF THE HOUSE CIRCUIT BREAKER TO ELECTRIC APPLIANCE RECEPTACLE. -
Page 15: Replacing The Flame Generation Light Bulbs
REPLACING THE FLAME GENERATION LIGHT BULBS WARNING REMOVE THE APPLIANCE FROM THE WALL AND TURN OFF ELECTRICAL POWER BEFORE SERVICING THE APPLIANCE. Remove the 6 screws on the back plate of the Flame Generation Bulb Location appliance near the bottom. Open back plate from the top. -
Page 16: Replacing The Ember Bed Light Bulbs
REPLACING THE EMBER BED LIGHT BULBS Ember Bed Bulb Replacement Ember Bed Bulb Replacement 2 screws Right Left Back View Screw Screw Screws Switch wires Remove the 2 screws on the bottom left and right corner of the appliance behind the front panel. Remove the 2 screws holding the main power switch and pull switch down carefully. -
Page 17: Replacement Parts
7.0 REPLACEMENT PARTS Contact your dealer or the factory for questions concerning prices and policies on replacement parts. Normally all parts can be ordered through your Authorized dealer / distributor. FOR WARRANTY REPLACEMENT PARTS, A PHOTOCOPY OF THE ORIGINAL INVOICE WILL BE REQUIRED TO HONOUR THE CLAIM. -
Page 18: Troubleshooting
8.0 TROUBLESHOOTING WARNING TURN OFF THE APPLIANCE COMPLETELY AND LET COOL BEFORE SERVICING. ONLY A QUALIFIED SERVICE PERSON SHOULD SERVICE AND REPAIR THIS ELECTRIC APPLIANCE. OBSERVED PROBLEM POSSIBLE CAUSE REMEDY Dim or no fl ame 1. Bulb(s) are burnt out 1. -
Page 19: Warranty
Notwithstanding any provisions contained in the President’s Limited Lifetime Warranty, NAPOLEON’s responsibility under this warranty is defi ned as above and it shall not in any event extend to any incidental, consequential or indirect damages. -
Page 20: Service History
10.0 SERVICE HISTORY 43.1 W415-0924 / A / 08.19.10...
Need help?
Do you have a question about the EF39S and is the answer not in the manual?
Questions and answers