Napoleon EF30G Installation And Operation Instructions Manual
Electric fireplace
Hide thumbs
Also See for EF30G:
- Installation and operating instructions manual (24 pages) ,
- Installation and operating instructions manual (24 pages)
Table of Contents
Advertisement
Quick Links
CERTIFIED UNDER CANADIAN AND AMERICAN NATIONAL STANDARDS: CSA C22.2 No-46 / UL 1278 CSA STANDARD
EF30G
ELECTRIC FIREPLACE
CERTIFIED FOR CANADA AND UNITED STATES USING ANSI/CSA METHODS.
SAFETY INFORMATION
WARNING
!
If the information in these instructions are not
followed exactly, an electrical shock or fire may
result causing property damage, personal injury
or loss of life.
- Do not store or use gasoline or other flammable
vapors and liquids in the vicinity of this or any other
appliance.
Wolf Steel Ltd., 24 Napoleon Rd., Barrie, ON L4M 4Y8 Canada (705)721-1212 fax(705)722-6031
$10.00
INSTALLER: LEAVE THIS MANUAL WITH THE APPLIANCE
CONSUMER: RETAIN THIS MANUAL FOR FUTURE REFERENCE
OPERATION INSTRUCTIONS
www.napoleon replaces.com ask@napoleon.on.ca
For customer service inquiries, please call 1-866-592-6667
(9:00am - 5:00pm PST)
INSTALLATION AND
1
W415-0760 / 12.19.08
W415-0760 / 12.19.08
Advertisement
Table of Contents

Related Manuals for Napoleon EF30G


Summary of Contents for Napoleon EF30G
- Page 1 CONSUMER: RETAIN THIS MANUAL FOR FUTURE REFERENCE INSTALLATION AND OPERATION INSTRUCTIONS CERTIFIED UNDER CANADIAN AND AMERICAN NATIONAL STANDARDS: CSA C22.2 No-46 / UL 1278 CSA STANDARD EF30G ELECTRIC FIREPLACE CERTIFIED FOR CANADA AND UNITED STATES USING ANSI/CSA METHODS. SAFETY INFORMATION...
-
Page 2: Table Of Contents
table of contents iNTrOduCTiON Warranty general instructions precautions listing approvals dimensions locating appliance unpacking and testing appliance ElECTriCal rEquirEmENTs grounding appliance hardWire installation iNsTallaTiON minimum clearance to combustibles neW construction or renovation installing the appliance glass ember installation thermostat and thermal sensor installation framiNg hearth cold climate installation... -
Page 3: Warranty
warranty NAPOLEON® electric fireplaces are manufactured under the strict Standard of the world recognized ISO 9001 : 2000 Quality Assurance Certificate. NAPOLEON® products are designed with superior components and materials, assembled by trained craftsmen who take great pride in their work. Once assembled the complete fireplace is thoroughly inspected by a qualified technician before packing to ensure that you , the customer, receive the quality product that you expect from NAPOLEON®. -
Page 4: General Instructions
general instructions WARNING Read these instructions completely before beginning installation. Failure to follow them could cause a fireplace malfunction resulting in serious injury and/or property damage. All electric fireplaces have hot and arcing or sparking parts inside. Do not use it in areas where gaso- line, paint or flammable liquids are present. -
Page 5: Listing Approvals
NOTE: This appliance must be electrically wired and grounded model number ef30g in accordance with local codes or, in the absence of local description electric appliance... -
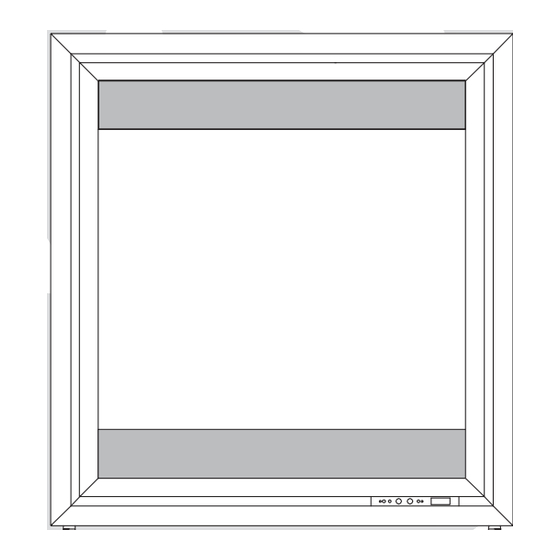
Page 6: Locating Appliance
dimensions 10.250” figurE 1b Heater vents - DO NOT COVER Side 32.250” View figurE 1c figurE 1a Top View 11.000” 30.000” Rating Plate and Serial Number WARNING 30.375” figurE 1d Heater vents and air openings can not be covered in any circumstances. Power Cord Back View Thermostat... -
Page 7: Electrical Requirements
3.0 electrical requirements grounding appliance this appliance is for use on 120 volts. the cord has a plug as shown in (a) of figure 1 given below. an adapter as shown in (c) is available for connecting three-blade grounding type plugs to two-slot receptacles. -
Page 8: Hardwire Installation
hardwire installation WARNING Ensure all power is turned off before hard wiring this fireplace. ElECTriC diagram figurE 3.3 12-12 t105! POWER P-N0 MOTOR P-NI LAMP IF YOU PUT IN THE TEMPERATURE MAIN CONTROL SENSOR ON THE WALL.PLS CHOOSE 2 SIP2 REMO. - Page 9 3.3.1 remove cover plate figurE 3.3.1 figurE 3.3.2 located beside the power cord to reveal the 7/8” wire hole. discard cover plate, hot Wire screws and insert a box connector into the hole. common Wire 3.3.2 remove the lower back panel from the remove 2 screws on cover plate.
-
Page 10: Installation
3.0 installation WARNING RISK OF FIRE! The power cord must not be pinched against a sharp edge. Secure cord to avoid tripping or snagging to reduce the risk of fire, electric shock or personal injury. Do not run cord under carpeting. Do not cover cord with throw rugs, runners or the like. -
Page 11: Installing The Appliance
installing the appliance 3.3.1 once the site has been prepared, the appliance can be installed. 3.3.2 make sure the main power switch is in the "off" position. 3.3.3 plug the appliance into a 15-amp/120 volt, grounded outlet. use a csa or ul approved surge protector. 3.3.4 Push in the appliance so that the trim is against the finished mantel or wall surface. -
Page 12: Thermostat And Thermal Sensor Installation
thermostat and thermal sensor installation this appliance has two options for heat control. first is a thermal controlled sensor, which comes plugged into the appliance beside the main power cord. this sensor has no user temperature set points, it will turn off the heater when the sensor reaches its pre-set point, and will only turn the heater back on when it has cooled back down below this set point. -
Page 13: Framing
4.0 framing figurE 9 figurE 10 D E R H E A 31 1/2” 29” 11 3/4” NOTE: in order to avoid the possibility of exposed insulation or vapour barrier coming in contact with the appliance body, it is recommended that the walls of the appliance enclosure be “finished” (ie: dry- wall/sheetrock), as you would finish any other outside wall of a home. -
Page 14: Cold Climate Installation
hearth a hearth is not necessary but is recommended for aesthetic purposes. cold climate installation WARNING It is MANDATORY to have an insulated wall behind the fireplace, when the fireplace is being installed on an outside wall or chase. minimum mantel clearances WARNING Risk of fire, maintain all specified air space clearances to combustibles. -
Page 15: Operating Instructions
5.0 operating instructions the controls are located on the bottom right corner of the appliance. 5.0.1 plug in your electric appliance. figurE 5.0.3 5.0.2 main on/off power switch and led: - this switch is located on the right side of the control panel. -
Page 16: Remote Control
remote control 5.1.1 plug in your electric appliance. REMOTE CONTROL FOR ELECTRIC FIREPLACE 5.1.2 make sure the appliance's main power on/off button is at the on position! the remote control will not work if the main power button is at the off Infrared Ray Exit position. -
Page 17: Maintenance
6.0 maintenance WARNING Always disconnect the power and allow the electric fireplace to cool before performing any cleaning, maintenance or relocation of this electric fireplace. Turn controls to OFF and remove plug from outlet or turn off the house circuit breaker to electric fireplace receptacle. Do not install replacement bulbs that exceed specified maximum watts. -
Page 18: Ember Bed Bulb Replacement
6.1.3 remove spring clip. hold socket and pull out old bulb. figurE 6.1.2 6.1.4 hold socket and push in new bulb (do not exceed wattage). replace spring clip. 6.1.5 repeat steps 3 and 4 for the second bulb. 6.1.6 insert bottom edge of removed cylinder half into bottom drum track. Gently squeeze drum cylinder until its top edge fit into top drum rack. -
Page 19: Replacements
7.0 replacements Contact your dealer or the factory for questions concerning prices and policies on replacement parts. Normally all parts can be ordered through your Authorized dealer / distributor. FOR WARRANTY REPLACEMENT PARTS, A PHOTOCOPY OF THE ORIGINAL INVOICE WILL BE REQUIRED TO HONOUR THE CLAIM. -
Page 20: Troubleshooting
8.0 troubleshooting WARNING Turn off the fireplace completely and let cool before servicing. Only a qualified service person should service and repair this electric fireplace. SYMPTOM PROBLEM TEST SOLUTION Dim or no flame. Bulb(s) are burnt out. - Inspect the bulbs inside the flame generation cylinder drum and replace them if necessary.
Need help?
Do you have a question about the EF30G and is the answer not in the manual?
Questions and answers