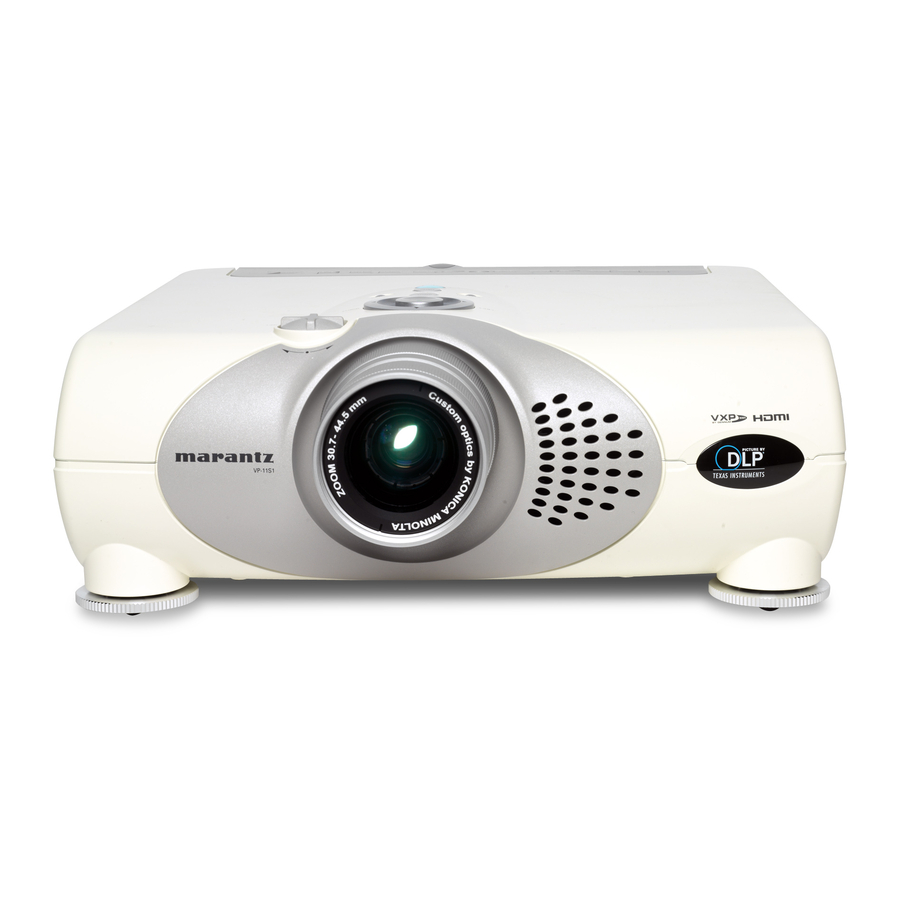
Marantz VP-11S1 User Manual
Marantz dlptm projector user guide model vp-11s1
Hide thumbs
Also See for VP-11S1:
- Service manual (34 pages) ,
- Specification (12 pages) ,
- Manual (4 pages)
Table of Contents
Advertisement
Quick Links
Advertisement
Table of Contents

Related Manuals for Marantz VP-11S1


Summary of Contents for Marantz VP-11S1
- Page 1 Model VP-11S1 User Guide Projector...
-
Page 2: Important Safety Instructions
CAUTION RISK OF ELECTRIC SHOCK DO NOT OPEN CAUTION: TO REDUCE THE RISK OF ELECTRIC SHOCK, DO NOT REMOVE COVER (OR BACK) NO USER-SERVICEABLE PARTS INSIDE REFER SERVICING TO QUALIFIED SERVICE PERSONNEL The lightning flash with arrowhead symbol within an equilateral triangle is intended to alert the user to the presence of uninsulated “dangerous voltage”... -
Page 3: Warranty
• If the lamp breaks, unplug the AC power cord shall be placed on the apparatus. from AC power outlet and call for Marantz authorized dealer to replace it. Do not replace the lamp yourself or clean up broken glass... - Page 4 – Veiller à ce qu’aucun objet ne soit à moins de SECTEUR DE L’APPAREIL – Pour monter le projecteur au plafond, vous Cet appareil Marantz a été conçu pour respecter les exigences de votre région en matière d’alimentation secteur et de sécurité.
- Page 5 – Cuando se eliminen baterías usadas, deben seguro o se ponga en contacto con Marantz. IMPORTANTE Cuando solicite el servicio otorgado por la garantia –...
- Page 6 REGULAÇÃO DO EQUIPAMENTO – Quando o projector for montado no tecto, o CONFORME A ALIMENTAÇÃO DA REDE O seu produto Marantz foi condicionado a satisfazer os requisitos domésticos de energia e segurança existentes na sua zona. – Não olhe para dentro da lente quando o DIREITOS DE AUTOR Poderá...
-
Page 7: Garantie
Lampe zerbricht, groß. Wir empfehlen, die Lampe gegen Ende ihrer festgelegten Lebensdauer auszutauschen. Verwenden Sie die Lampe nicht nach ihrer maximalen Beleuchtungslebensdauer. • Verwenden Sie nur die originellen Marantz- Lampeneinheiten. Überprüfen Sie, ob der Modellcode der Lampeneinheit mit dem in der Bedienungsanleitung angeführten Code übereinstimmt. -
Page 8: Garanzia
– La presa di corrente usata deve essere vicina REGOLAZIONE DELLA TENSIONE DI – Non mettere sull'apparecchiatura alcun FUNZIONAMENTO DELL’APPARECCHIO Il vostro apparecchio Marantz è stato predisposto per l’adattamento alla tensione ed alle norme di sicurezza esistenti nella vostra zona. VP-12S4 può essere alimentato soltanto da corrente alternata a 230 V. -
Page 9: Table Of Contents
Adjusting the Image Position ...12 Adjusting the Height ...12 Keystone Correction ...12 INSTALLATION...13 Recommended Setting ...13 Screen Size and Projection Distance (inch) VP-11S1 ...14 Screen Size and Projection Distance (mm) VP-11S1 ...14 Lens shift position ...15 BASIC OPERATIONS ...16 Turning on the Power...16 Selecting the Input Signal Source ...16... -
Page 10: Important Safeguards
There is potential glass particle hazard if the lamp ruptures. Caution Concerning the Lamp Unit There is a potential hazard of glass particle if the lamp ruptures. In case of lamp rupture,contact your nearest Marantz Authorized Dealer or Service Center for a replacement. See “Replacing Lamp Unit”. ( P.28) -
Page 11: Features
IC featuring Gennum’s proud “VXP contouring technology, “TruMotionHD ”, “FineEdge ”, “RealityExpansion • Konica Minolta optical system custom-made for Marantz. • A large 98mm 7-segment color wheel that builds an ND filter. • 4 Picture Modes (Theater, Standard, Dynamic, User) •... -
Page 12: Projector Layout And Functional Overview
It is almost impossible to have zero pixel defects, even using the most advanced technology. This is not a problem only for Marantz, but all DLP ® projector manufactures. Therefore we have to note that the warranty does not cover the ®... -
Page 13: Rear And Terminals View
AV amp/processor, DVD player, etc. m REMOTE IN/OUT v S-VIDEO IN By connecting this projector to another Marantz audio component using a supplied System Control Connect the S-VIDEO output from a video cable, you can remotely operate the components equipment. -
Page 14: Remote Controller
Select the HDMI 2 IN signal. ¡1 VIDEO button ( Select the VIDEO IN signal. ¡2 A1 button This button does not work with this projector. ¡3 A2 button This button does not work with this projector. ¡4 RGB button ( Select the RGB IN signal. - Page 15 £7 INPUT (Input signal select) button ( P.16) Selects the input signal. Every time the 3/4 buttons are pressed, the input signal rotates in the order of COMPONENT 1 ↔ COMPONENT 2 ↔ S- VIDEO ↔ VIDEO ↔ RGB ↔ HDMI 1 ↔ HDMI 2. £8 BLACK LEVEL button ( P.24) Sets the black level.
-
Page 16: Preparing The Remote Controller
Remote control operation may not be possible if the remote control unit’s transmitter is not pointing in the direction of the remote sensor or if there is an obstruction between the transmitter and the remote sensor. Remote Controller VP-11S1 Remote Controller VP-11S1... -
Page 17: Connection
• Be sure to grab the plug, not the cable itself. Connection with AC Power Supply Connect the supplied AC power cord into the AC IN socket of the projector. The STANDBY indicator lights up and the projector goes into the standby mode. -
Page 18: Connection With A Hd-Video, Dvd Player, Satellite, Cable Tuner Or Pc
Connection with a HD-Video, DVD Player, Satellite, Cable Tuner or PC You can connect this projector to HD-Video /PC using RGB IN port, or DVD Plyer /Satellite /Cable Tuner /PC using HDMI IN port. Connect one end of the RGB cable to the RGB IN port, or one end of the HDMI cable to the HDMI IN port on the projector. -
Page 19: Initial Setting
Connect the supplied AC power cord. ( P.9) Press the ON button on the remote controller or the / I button on the projector. The ON indicator lights up. Zooming and Focusing Project an image on the screen roughly at first. -
Page 20: Adjusting The Image Position
Turn the adjuster to fine-adjust the height. ❖ Returning the Projector to its Initial Position Slightly lift the projector, turn the adjuster lever to the left or right, then carefully set the projector down. Keystone Correction Counterclockwise When the projecting image is a trapezoid, correct it in Keystone and in the Display Menu. -
Page 21: Installation
CAUTION – For ceiling installation, consult with Marantz authorized dealer. – Do not look into the lens when the projector is turned on. It could damage your eyesight. Screen upper end Height from installing level to light axis... -
Page 22: Screen Size And Projection Distance (Inch) Vp-11S1
To calculate the installation measurement (unit : inch) Minimum = 1 5/16 x Screen Size - 2 2/16 Maximum= 1 14/16 x Screen Size - 1 15/16 When installing the projector, consider ±5% tolerance for the Projection Distance in the above table. Note : ❖... -
Page 23: Lens Shift Position
Lens shift position ❖ Standard condition (From -85% to +100%) Screen Position (+100%) VP-11S1 0% (Center) -85% ❖ Extended mounting condition (From +100% to +165%) 0.5H VP-11S1 0.4H Down CAUTION: In the expanded mounting condition (green focus pattern), the corners of the picture may appear dark or distorted. -
Page 24: Basic Operations
Switch to the equipment connected to the projector. Every time the INPUT button of the projector or the INPUT 3 button of the remote controller is pressed, the input signal rotates in the order of COMPONENT 1 ➔ COMPONENT 2 ➔ S-VIDEO ➔ VIDEO ➔ RGB ➔... -
Page 25: The Screen Images In A 16:9 Screen
The Screen Images in a 16:9 screen • Press the ZOOM button, the NORMAL button or the FULL button on the remote controller for the 4:3 aspect ratio video source. • Press the FULL button on the remote controller for 16:9 aspect ratio video source, such as 1080i, 1035i, and 720p video systems. -
Page 26: The Screen Images In A 4:3 Screen
/ I button on the projector after the projector turns into standby mode. - When on standby, power to the projector is not OFF completely. If not planning to use the projector for an extended period of time, unplug the AC power cord from AC power outlet as explained above. -
Page 27: Operations
OPERATIONS Menu Structure Main Menu Item Picture Mode Theater Default* / 1 / 2 / 3 P.22 Standard Default* / 1 / 2 / 3 Dynamic Default* / 1 / 2 / 3 User 1* / 2 / 3 / 4 / 5 / 6 / 7 / 8 / 9 Picture Adjust Gamma P.23... -
Page 28: Functions By Signal
Functions by Signal NO SIGNAL ANY INPUT Picture Mode Theater – Standard – Dynamic – User – Picture Adjust Gamma – Contrast – Brightness – Color – Tint – Color Temp. – Lamp Mode – Iris – Aspect – Fine Menu 1 Sharpness –... - Page 29 NO SIGNAL ANY INPUT Display Keystone – Scale – Width – Position H – Position V – Overscan – Installation OSD/Blanking Menu Position Language Status Info. Power-OFF Confirm. Blanking Memory – Blanking Top – Blanking Bottom – Blanking Left – Blanking Right –...
-
Page 30: Picture Mode
This unit has four picture modes: Theater, Standard, Dynamic and User. The picture quality recommended by Marantz is already set for each mode. The User mode has eight gamma curves that can be chosen and saved by users. Also, the Theater, Standard and Dynamic modes three indexes for memorizing picture quality adjustments. -
Page 31: Picture Adjust
Picture Adjust Picture quality in each of the picture modes can be adjusted to your liking and those adjustments can be saved in memory. User 1 Picture Adjust Gamma Fine Menu 1 Contrast Fine Menu 2 Brightness Input Signal Color RGB/HD Adjust Tint Display... -
Page 32: Fine Menu 1
A projector is forced into the intra-field only deinterlacing mode. Off : A projector is used with external field memories and operates in the full set of deinterlacing modes, i.e., motion adaptive video deinterlacing and full frame film source deinterlacing using 3:2 pulldown detection (2:2 pulldown for 625/50 sources). -
Page 33: Input Signal
Input Signal Standard 1 Picture Adjust Component 1 Auto Fine Menu 1 Component 2 Auto Fine Menu 2 S-Video Auto Input Signal Video Auto RGB/HD Adjust Auto Display HDMI1 Auto OSD/Blanking HDMI2 Auto Config. CSC HDMI1 Auto Auto CSC HDMI2 Item Adjustments Component1,... -
Page 34: Display
Rear: Select to set the projector on a tabletop and project from behind the screen. F + Ceiling: Select to mount the projector on the ceiling and project from in front of the screen. R + Ceiling: Select to mount the projector on the ceiling and project from behind the screen. -
Page 35: Configration
Set to use the included remote controller. Wired: Set to control the projector from either Marantz’s AV components connected to the REMOTE CONTROL IN/OUT terminals or a PC or other device connected to the RS- 232C terminal of the projector. The included remote controller cannot be used in this case. -
Page 36: Maintenance
• Do not loosen any screws except for those mentioned below. • The lamp may break if handled improperly. • Do not use other than a Marantz replacement lamp unit. ❖ How to replace the Lamp Unit PREPARATION: When replacing the lamp, turn off the power for the projector. - Page 37 Cover sheet Install the lamp cover back in its original position and fasten with the fastening screw. Plug in the video projector and turn on the power and project the image. • If the lamp is replaced before reaching its 2000 hours lamp life, see “Reset Lamp Life”...
-
Page 38: Cleaning The Lens
It may damage the lens and remain as stains. Replacement Parts When replacement parts are required, be sure to inform a Marantz authorized service center. Use only replacement parts specified by Marantz. Unauthorized substitutions may result in fire, Ceiling Mount kit : MOUNT 20 electric shock, or other hazards. -
Page 39: Troubleshooting
Notes: • If the lamp still does not function after the replacement and initialization of the lamp life, contact a Marantz authorized dealer, or service center. • This projector uses a microcomputer. External noise can cause malfunctions. In such case, shut power OFF and unplug the power cable from AC power outlet. -
Page 40: Error Mode
ERROR MODE WARNING/LAMP indicator, ON indicator, and STANDBY indicator diagnose error mode of the projector as follows. Indicators Error mode WARNING /LAMP Lamp cover Lamp Temperature Flashing Flashing Other Flashing ON SCREEN MESSAGE Use the list below to check the message displayed on the screen. -
Page 41: Specifications
SPECIFICATIONS ❖ ❖ Optical characteristics General Panel 0.8 inch 16:9 Power requirement 1920 x 1080 pixels Digital Micromirror Device Power consumption Lamp Super High Pressure 200W DC Standby consumption < 0.3 W (AC 100-120V) Lens f: 30.7 to 44.5mm F: F3.0/F6.0 Chassis isolation Projection size 70 to 250 inches... -
Page 42: Dimensions
DIMENSIONS ❖ STANDBY MENU LAMP WARRNING ENTER FOCUS INPUT DOWN RIGHT LEFT SHIFT LENS 3/16 ( 82.6) 12/16 (182.5) (222.0) ❖ Front (171.0) 12/16 ❖ Bottom 5/16 (145.75) (185.25) 11/16 11/16 (93.5) (110.0) 12/16 (19.75) ❖ Rear 1/16 (153.5) (105.0) Unit : inch (mm) GLOSSARY Aspect ratio... - Page 43 You can find your nearest authorized distributor or dealer on our website. U.S.A. Marantz America, Inc. 100 Corporate Drive, Mahwah, NJ, 07430, U.S.A. EUROPE Marantz Europe B.V. P.O. Box 8744, 5605 LS Eindhoven, The Netherlands Printed in Japan is a registered trademark.
Need help?
Do you have a question about the VP-11S1 and is the answer not in the manual?
Questions and answers