Marco Qwikbrew 2 Service Manual
Hide thumbs
Also See for Qwikbrew 2:
- Service manual (28 pages) ,
- Instructions for use manual (9 pages) ,
- Service manual (26 pages)
Table of Contents

Related Manuals for Marco Qwikbrew 2


Summary of Contents for Marco Qwikbrew 2
- Page 1 Qwikbrew 2 Service Manual Marco Beverage Systems Ltd. Ireland Tel: (01) 295 2674 63d Heather Road, Ireland Fax: (01) 295 3715 Sandyford Industrial Estate, Dublin 18, UK Tel: (0207) 2744577 Republic of Ireland UK Tel: (0207) 9788141...
-
Page 2: Table Of Contents
PCB Timer Single 2002 PCB Brew Board 2002 Probes Element De-scaling the tank Pipework and Sprayhead 9. Wiring Diagrams 10. Amendments 11. Spare Parts List Service Manual 1000379 Qwikbrew 2 01-10-12Page 2 of 37... -
Page 3: Introduction
1. INTRODUCTION The information provided in this manual is intended to assist in the installation and maintenance of the Marco Qwikbrew 2 Boiler Brewer. Please read the instructions carefully to prevent accidents and ensure an efficient installation. This manual is not a substitute for any safety instructions or technical data affixed to the machine or its packaging. -
Page 4: Safety Instructions
Do not operate any appliance with a damaged cord, plugs, or after the appliance malfunctions or has been damaged in any manner. The use of spares and accessories not recommended by Marco may cause damage and/or injuries. Do not use outdoors. Do not place on or near a hot gas or electric burner. -
Page 5: General Description
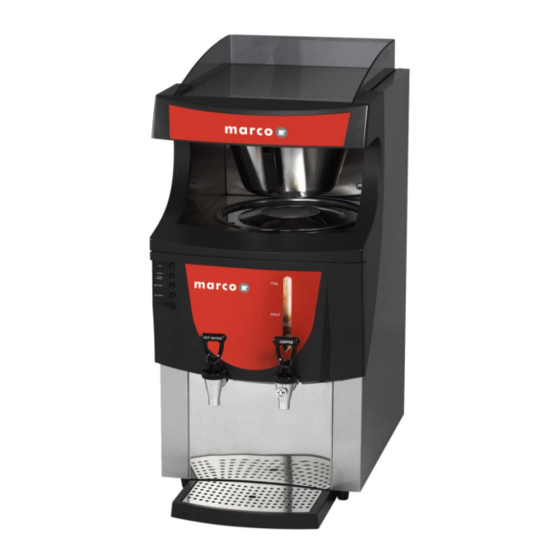
0.75” BSP Fittings Food grade inlet hose supplied Plumbing Pressure 5-50 psi (35-345 kPa) 705mm Height Height incl. Cup Rail 775mm Dimensions Width 365mm 440mm Depth Depth incl. Drip Tray 575mm Service Manual 1000379 Qwikbrew 2 01-10-12Page 5 of 37... - Page 6 11. Tap Hot Water - 2100275 Urn Lid - 2300350 12. Curved Panel Plastic Body - 1801480 13. Drip Tray Complete (255mmX186mm)- 2300299 Plastic Service Face - 1801490 Label Face - 1900700 Label Controls - 1900710 Service Manual 1000379 Qwikbrew 2 01-10-12Page 6 of 37...
- Page 7 19. Lamp – 1501213 27. PCB Brew Board – 1600321 (1600326 – see amendments/parts list) 28. PCB Timer – 1600322 (1600323 – see amendments) 20. Lampholder - 1501212 21. Drain Valve - 2100100 Service Manual 1000379 Qwikbrew 2 01-10-12Page 7 of 37...
-
Page 8: Installation
5. A hose is not a permanent connection so it is advisable to close the stop when not in use. Electrical: A moulded 13A plug is factory fitted. A suitable 13A outlet is all that is required. Fig.3 – Plumbing and Electrical Connections Service Manual 1000379 Qwikbrew 2 01-10-12Page 8 of 37... -
Page 9: Start Up
Level Probe’ controls this level. After a recovery period (up to 20min), the machine will be ready to brew once again. Note: a longer recovery is required before any substantial amount of Hot Water can be drawn off. Service Manual 1000379 Qwikbrew 2 01-10-12Page 9 of 37... -
Page 10: Brewing Coffee
Slide out the coffee filter basket and place a single sheet of filter paper inside Put the correct amount of ground coffee into the filter paper. Your coffee supply company may have pack sizes to suit the brews of your new Qwikbrew 2; if not, as an approximate guide for your first brews: Try about: 110g-130g (4-4½oz) for a 5 pint brew (2.85 litres) -
Page 11: Lock Function
This is a particularly useful function in a self-service environment. Fig.6 – Display 7. HYGIENE Like any cooking utensils, the coffee-holding urn of your Qwikbrew 2 must be cleaned properly, regularly. MARCO recommend cleaning after each day's brewing using a proprietary urn- cleansing compound. -
Page 12: Technical Data
Maintenance should be carried out by Marco approved technicians only. Access to internal components: The Qwikbrew 2 has been designed with ease of service in mind. All the components (PCB’s, inlet solenoid, probes, pump and element) are accessible from the front of the machine. - Page 13 Fig.7 – Plastic Service Panel Plastic Service Panel Mounting Screws Fig.8 – Plastic Service Panel Removed Service Manual 1000379 Qwikbrew 2 01-10-12Page 13 of 37...
- Page 14 Fig.9 – PCB connections Fig.10 – Display PCB connections Service Manual 1000379 Qwikbrew 2 01-10-12Page 14 of 37...
-
Page 15: Pcb Timer Single 2002
To Display PCB bottom Microchip Time Adjust Pot Software:SM5023-.. matches Brew PCB code SM5022-.. Neutra from PCB Brew Board From Pump Neutral (black/white) P.C.B. Brew Board 2002 – 1600321 (NOTE: also see amendments) Service Manual 1000379 Qwikbrew 2 01-10-12Page 15 of 37... -
Page 16: Pcb Brew Board 2002
This is a modification to the EZT boiler PCB. The software code on this PCB (SM1078-05 or SM5022-..) enables it to be used in this brewer or any other standard Marco Boiler – EZT 400/700, Comet2, Aquarius 15, 3/30,6/30,6/45. The jumper J12 (6below) selects either boiler or brewer mode. - Page 17 Heater/Element Tab Live Tab Inlet Solenoid Tab Live tab - spare Suppressor Relay – Inlet Solenoid o switches the inlet solenoid Fuse Neutral tab Neutral tab – spare Service Manual 1000379 Qwikbrew 2 01-10-12Page 17 of 37...
- Page 18 This is the level in the tank at which the Hot Water tap runs out of water. A brew can still be selected at this point. Drawing off water at any time should not affect the brewing system. Service Manual 1000379 Qwikbrew 2 01-10-12Page 18 of 37...
-
Page 19: Probes
Probes: As mentioned earlier, there are 3 probes (low level, high level and brew level) on the Qwikbrew 2, the positions of which are shown in figure 2. Figures 13 and 14 show how the probes are removed. Note: Tank does not have to be drained to remove any probes. -
Page 20: Element
Since the European standard voltage is 230V, we are in the process of changing our elements to suit this. Figure 17 shows the element to be used on new batches of the Qwikbrew 2. This shape of element has a great advantage. -
Page 21: De-Scaling The Tank
De-scaling the tank: Follow instructions for removing the element. The tank can now be cleaned through the clean out door (see figure 23). Fig.18 Fig.19 Fig.20 Fig.21 Fig.22 Fig.23 Service Manual 1000379 Qwikbrew 2 01-10-12Page 21 of 37... -
Page 22: Pipework And Sprayhead
Fig.26 Hose Clip Restrictor – 1800545 (obsolete - see amendments) Sprayhead (obsolete - see amendments) T-piece plastic – 1801255 (obsolete - see amendments) Pump Outlet to Sprayhead (obsolete - see amendments) Service Manual 1000379 Qwikbrew 2 01-10-12Page 22 of 37... - Page 23 The flow can be adjusted by closing the hose clip. There are no restrictors of the type found on previous Marco brewers. The flow rate is controlled by pipe work and in some cases hose clips. The larger bores in the hoses should prevent failures due to scale blockages.
-
Page 24: Wiring Diagrams
9. WIRING DIAGRAMS (also see amendments): Wiring diagram for 2.8kW machines with serial numbers up to 04031237 Service Manual 1000379 Qwikbrew 2 01-10-12Page 24 of 37... - Page 25 Wiring diagram for 2.8kW machines with serial numbers from 10040001 Service Manual 1000379 Qwikbrew 2 01-10-12Page 25 of 37...
- Page 26 Wiring diagram for 5.6kW machines Service Manual 1000379 Qwikbrew 2 01-10-12Page 26 of 37...
-
Page 27: Amendments
The small pipe comes directly from the pump. The large silicone tube is the bypass and feeds back into the hot water tank. See the picture below. Sprayhead Complete – part no. 1401550 Service Manual 1000379 Qwikbrew 2 01-10-12Page 27 of 37... - Page 28 PCB Single Timer (Part No. 1600322). These are found on all Qwikbrew 2 machines produced to date. Future batches of Qwikbrew 2 machines will use the PCB Brew Board 2004 (Part No. 1600326) and the PCB Dual Timer (Part No. 1600323) as standard.
- Page 29 AMENDMENTS: Machines with serial numbers 10040001 - present: Modification of Qwikbrew 2 – replacing the Single Timer with the Dual Timer: 1. Press the power button to switch the machine off. 2. Unplug the machine. 3. Disconnect the Display PCB (1600324) ribbon cable links from the Single Timer PCB (1600322).
- Page 30 Dual Timer PCB (1600321). See Fig.2 and Fig.3. 8. Reconnect the spade terminals as shown in Fig.2 and Fig.3. 9. The selector switches should be in the positions shown in the inset in Fig.3. SELECTOR SWITCHES Fig.3 Service Manual 1000379 Qwikbrew 2 01-10-12Page 30 of 37...
- Page 31 The Half brew time can be adjusted through VR1 on the Dual Timer PCB (1600323). Increase the Half brew time by turning VR1 clockwise. To decrease the brew time – anticlockwise. The Full brew time is double the Half brew time. Service Manual 1000379 Qwikbrew 2 01-10-12Page 31 of 37...
- Page 32 AMENDMENTS: Machines with serial numbers 10040001 – present Diagnostic indication Any Qwikbrew 2 machine fitted with the PCB Brew Board 2004–Part No. 1600326 (software code: SM5029-..) and PCB Dual Timer-Part No. 1600323 (software code: SM5030-..), will display error signals via flashes of the Power LED.
- Page 33 The element and inlet valve are turned OFF when this error is detected This is a recoverable error. When the correct range of resistance is measured, normal operation resumes. Probable causes: 1. The thermistor has failed. Action required: 1. Replace the thermistor. Service Manual 1000379 Qwikbrew 2 01-10-12Page 33 of 37...
- Page 34 1. Check the mains water supply. If it is good, wait 5 minutes to check that the error cycle is continuing. 2. If the mains water supply is good, check that the inlet solenoid valve is working. Service Manual 1000379 Qwikbrew 2 01-10-12Page 34 of 37...
-
Page 35: Spare Parts List
1801200 STRAIN RELIEF BUSH (FOR ELECTRICAL CORD) 1800190 FEET NYLON 1401800 SCREW PLASTITE FOR FEET 8000150 FILTER PAPER 1800690 WATER INLET HOSE 8000240 URN CLEANSER 1700010 URN BRUSH 1700000 SIGHTGLASS BRUSH Service Manual 1000379 Qwikbrew 2 01-10-12Page 35 of 37... - Page 36 1801200 STRAIN RELIEF BUSH (FOR ELECTRICAL CORD) 1800190 FEET NYLON 1401800 SCREW PLASTITE FOR FEET 8000150 FILTER PAPER 1800690 WATER INLET HOSE 8000240 URN CLEANSER 1700010 URN BRUSH 1700000 SIGHTGLASS BRUSH Service Manual 1000379 Qwikbrew 2 01-10-12Page 36 of 37...
-
Page 37: Service Manual 1000379 Qwikbrew 2 01-10-12Page 2 Of
1801200 STRAIN RELIEF BUSH (FOR ELECTRICAL CORD) 1800190 FEET NYLON 1401800 SCREW PLASTITE FOR FEET 8000150 FILTER PAPER 1800690 WATER INLET HOSE 8000240 URN CLEANSER 1700010 URN BRUSH 1700000 SIGHTGLASS BRUSH Service Manual 1000379 Qwikbrew 2 01-10-12Page 37 of 37...
Need help?
Do you have a question about the Qwikbrew 2 and is the answer not in the manual?
Questions and answers