Table of Contents
Advertisement
Advertisement
Table of Contents

Summary of Contents for Marco SP9
- Page 1 Instruction Manual Machine P/N: 1000830# & 1000831#...
-
Page 2: Table Of Contents
5. Electrical Installation Procedure....................4 6. Plumbing Installation Procedure....................4 7. Maintenance..........................4 9. Descaling Procedure........................4 10. Operating the SP9 Head For The First Time................4 11. Operating the SP9 Boiler For The First Time................5 12. Dispense Volume Calibration....................5 13. Boiler Modes Of Operation.....................6 14. -
Page 3: Information
Warning Notes • Boiler: SP9 Boiler MUST be connected to a SP9 Head before use. • Head: SP9 Head is powered only through the connection of the head to the boiler with the electrical con- nection provided. • DO NOT turn on the boiler or engage the brew switch until head and boiler are plumbed together. -
Page 4: Contact
Operating the SP9 Head for the first time The SP9 Head is connected to the SP9 Boiler by silicone hoses and a flying lead. The SP9 Head’s silicone hoses should be connected to the SP9 Boiler’s hose adapters and secured with the supplied hose clips. The connections on both machines are marked “A”... -
Page 5: Operating The Sp9 Boiler For The First Time
• Check that all installation procedures have been carried out. • Ensure the water valve is on. • Plug in the SP9 Boiler to an appropriate electrical supply and press the power button on the front of the machine. • The light will glow green and the machine will fill to a safe level, above the elements, before heating. -
Page 6: Boiler Modes Of Operation
INFORMATION Boiler Modes of Operation Ensure the boiler is set to SP9 Mode for use with the SP9 Head. Live read-out of the tank temperature 22.0°C Current machine status WAIT... Setup Mode • To enter setup mode press power and set buttons on the front panel at the same time. - Page 7 INFORMATION Sets the mode the machine works in. SP9 mode must be selected for use with the SP9 Head. MODE: SP9 TEMP UNITS:°C Sets temperature units on screen. Default value °C MAX TEMP: 96.0 This sets max limit of the temperature that user can set in USER SERV PIN: 0000 SETUP;...
-
Page 8: Display Information Descriptions
INFORMATION Display Information Descriptions Status Description Machine off. Display backlight off but temperature read-out still working. Boiler Off Water level below low level probe. Machine is filling automatically. Filling... Status LED – 2 red blinks. Fill the Tank Water level below low level probe. Machine has to be refilled manually (shown only in MANUAL mode). -
Page 9: Cutting Template
CUTTING TEMPLATE 131mm NOT TO SCALE The above drawing illustrates where to position the counter cut outs if two SP9 Heads are being installed. For a 1:1 scale cutting template please see the back page of this manual. Option 1: Using an 80mm hole saw, drill two holes as per the drawing. -
Page 10: Installation
INSTALLATION 4. Underside of SP9 Boiler Mains Water Input Power Socket... - Page 11 INSTALLATION 5. Attaching SP9 Head to the counter, standard counter 6. Attaching SP9 Head to the counter, thin counter thickness thickness 25-40mm. <25mm. The 2 standard braces can accommodate counter thicknesses up to 40mm. Where the counter thickness is less than 25mm the hard plastic legs on the front brace must be removed and reattached to the other side of the brace using a screwdriver.
-
Page 12: Diagram Of Parts
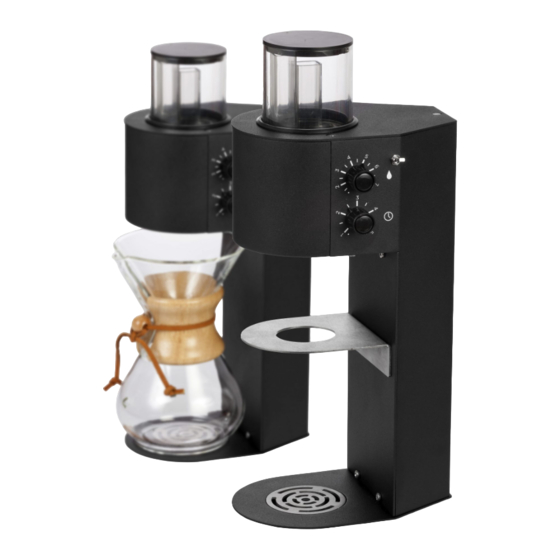
Ready/ Status Indicator Set Button Head Box Contains Boiler Box Contains • SP9 Head & mounting brackets • SP9 Boiler • Hosing • Power Cord • Spray Head 4 hole (factory fitted)* • Vent Hosing • Spray Head 7 hole •... -
Page 13: Calibration
CALIBRATION 2. Dispense, note not using continuous dispense mode. 1. Turn quantity to maximum value & time to between 2-3 minutes. 3. Weigh output 4. Feedback weight (see text on page 5) >3 sec... -
Page 14: Brewing
BREWING 1. Select quantity 2. Select time 4. Press toggle once 3. Place device with coffee under the spray head... - Page 15 BREWING 5. For continuious dispense - double click 6. To cancel - click mid brew anytime 7. Beeps 3 times once finished...
-
Page 16: Cutting Template
1:1 CUTTING TEMPLATE SCALE 1:1...


Need help?
Do you have a question about the SP9 and is the answer not in the manual?
Questions and answers