Air Live BC-5010 User Manual
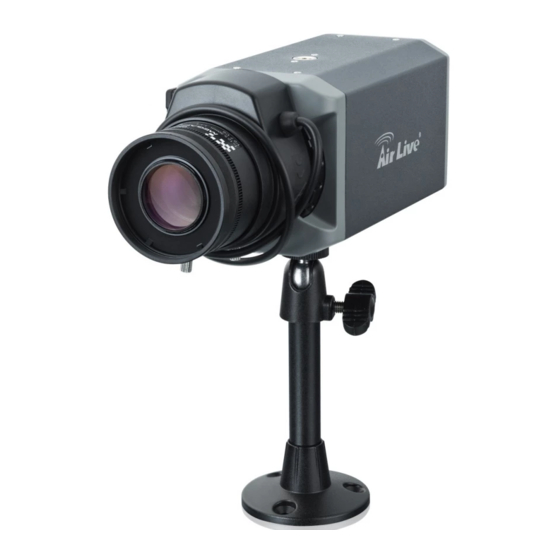
5-mega pixel box type
poe ip camera
Hide thumbs
Also See for BC-5010:
- User manual (82 pages) ,
- Quick setup manual (5 pages) ,
- How to adjust (9 pages)
Table of Contents
Advertisement
Quick Links
Download this manual
See also:
User Manual
Advertisement
Table of Contents

Related Manuals for Air Live BC-5010


Summary of Contents for Air Live BC-5010
- Page 1 BC-5010 / BC-5010-IVS 5-Mega Pixel Box Type PoE IP Camera 5-Mega Pixel Box Type PoE IP Camera with Video Analytics User’s Manual...
- Page 2 This product contains some codes from GPL. In compliance with GPL agreement, AirLive will publish the GPL codes on our website. Please go to www.airlive.com and go to the "Support->GPL" menu to download source code. All Trademarks are properties of their respective holders. AirLive BC-5010/BC-5010-IVS User’s Manual...
- Page 3 The lists of entities entitled to receive used equipment can be found on the websites of municipalities. Some components of devices such as external wiring, circuit boards and liquid crystal displays have a negative impact on the environment. AirLive BC-5010/BC-5010-IVS User’s Manual...
-
Page 4: Table Of Contents
5. Configuration of Main Menu..............19 5.1 Live View....................20 5.2 Configuration ..................21 6. Configuration-Network ................23 6.1 General ....................24 6.2 UPnP/Bonjour/QoS ................26 6.3 IP Filter....................27 6.4 IP Notification..................28 6.5 iSCSI....................29 6.6 Wireless .....................29 7. Video Settings ..................31 7.1 Video Profile..................32 AirLive BC-5010/BC-5010-IVS User’s Manual... - Page 5 11.4 Firmware ..................48 11.5 Maintenance..................49 12. Status ......................50 12.1 Basic ....................50 12.2 Audio/Video..................50 12.3 Network....................51 12.4 System Log ..................52 13. Video Analytics ..................53 13.1 Video Analytics (Only for BC-5010-IVS) ..........53 14. Appendix....................61 A. Alarm I/O Connector ................61 AirLive BC-5010/BC-5010-IVS User’s Manual...
-
Page 6: Overview
1.1 Introduction AirLive BC-5010 / BC-5010-IVS is a standalone system that can be connected directly to an Ethernet or Fast Ethernet network. Equipped with a powerful 5 megapixel color CMOS sensor, the camera allows you to capture a wider field of view with high resolution up to 2592 x 1920. -
Page 7: Features
SD/SDHC Slot and USB slot for local storage Compatible with ONVIF standard Built-in Video Analytics (Equipped only for BC-5010-IVS) UPnP device discovery and NAT router transversal for easy installation Dynamic IP Service, DIPS®, to search your IP camera from Internet easily 1.3 Product Specification... - Page 8 Text, time and date OSD Digital Zoom G711 u-law Audio Encoder Audio Audio Streaming Two-way Audio Input/Output speaker port and microphone port One RJ45 Port; IEEE 802.3u Compliant 10/100 Mbps Network Ethernet Fast Ethernet with Auto-MDIX AirLive BC-5010/BC-5010-IVS User’s Manual...
- Page 9 CamPro Express 64,CamPro Professional Software Integration Search & Installation- IP Wizard II Motion detection Event Triggers External input via DI interface Motion Detection Event handler FTP or NAS file upload E-mail alert HTTP, and TCP notification AirLive BC-5010/BC-5010-IVS User’s Manual...
-
Page 10: System Requirement
Internet Explorer 7 or later; Apple Safari 2 or above; Firefox Web Browser 2.00 or above; Google Chrome Note: Please keep updating the latest Windows software and service package. (Ex: Net Framework, Windows Media Player, Enhance ActiveX Security AirLive BC-5010/BC-5010-IVS User’s Manual... -
Page 11: Package Contents And Installation
2.1 Package Content A user can find the following items in the package as below: 1. AirLive BC-5010/BC-5010-IVS is the main part of the product with Camera Mount Kit. Note: The lens is optional. For further information about the lens, please contact with your installer. -
Page 12: Connections
Front / Top / Side Panel 1. DC-iris Connector: It allows you to attach the DC-Iris lens (optional). 2. C and CS Lens Focus Ring: You can adjust C and CS lens focus ring to fit your lens type. Back Panel AirLive BC-5010/BC-5010-IVS User’s Manual... - Page 13 5. Iris Level: It is used only when the DC-Iris lens is connected to the camera. This screw-knob allows you to adjust the brightness of the video images from the DC-Iris lens. AirLive BC-5010/BC-5010-IVS User’s Manual...
-
Page 14: Connections Mounting The Camera
After attaching the camera to the Wall Mount Kit, the camera can be mounted on the wall or ceiling securely through the three screw holes on the base of the Wall Mount Kit. Fix the camera to ceiling with the three supplied screws. AirLive BC-5010/BC-5010-IVS User’s Manual... - Page 15 (LAN). When you connect the AC power adapter, the camera is powered on automatically. You can verify the power status from the Power LED on the Ethernet port. Once connected, the Link LED starts flashing green light and the camera is on standby and ready for use now. AirLive BC-5010/BC-5010-IVS User’s Manual...
- Page 16 3. Plug the cable to the DC-Iris connector on the side panel of the camera. When you use a DC-Iris lens on your camera, you can adjust the brightness of the video image through the Iris Level screw-know on the back panel of the camera. AirLive BC-5010/BC-5010-IVS User’s Manual...
- Page 17 Upload images or send email messages with the still images attached. The following diagram explains one of the typical applications for your camera and provides a basic example for installing the camera. Home Applications of the Internet Camera AirLive BC-5010/BC-5010-IVS User’s Manual...
-
Page 18: Connect Usb Dongle For Wireless Function (Optional)
2. Package Contents and Installation 2.4 Connect USB dongle for wireless function (Optional) You can add wireless function to your BC-5010 / 5010-IVS by connecting the optional wireless USB dongle. 2.5 Connect to IP Camera 1. Insert the bundle CD into your PC/Laptop. - Page 19 5. If the Camera’s IP address is in the same IP segment as your LAN, select the founded IP Camera and double click on the item. Then, the default browser will show up and connect to the IP camera’s Web automatically. AirLive BC-5010/BC-5010-IVS User’s Manual...
-
Page 20: Using Ip Camera Via Web Browser
Warning” window. If so, select “Yes” to install and run the ActiveX control into your PC. Otherwise, the system will load the ActiveX silently. 4. After the ActiveX control was installed and ran, the first image will be displayed. AirLive BC-5010/BC-5010-IVS User’s Manual... - Page 21 3. Using IP Camera via Web Browser 5. The monitor image will be displayed in your browser. In the left side of main configuration is “Configuration”. For more details, you can check the following chapters. AirLive BC-5010/BC-5010-IVS User’s Manual...
-
Page 22: Operating Ip Camera Via Mobile Phone
You can access into your IP camera via the iOS/Android device. Please follow the setup steps below. 1. Download AirLive CamPro Mobile 2. Execute the AirLive CamPro Mobile program. from APP store/Android market. 4. Setup page appears. 3. Click Setup button. AirLive BC-5010/BC-5010-IVS User’s Manual... - Page 23 4. Operating IP Camera via Mobile Phone 5. Click Add button. 6. Click LAN button and select the camera. AirLive BC-5010/BC-5010-IVS User’s Manual...
-
Page 24: Configuration Of Main Menu
In the left side, you can control Live View in your main Browser. The functions include Function Buttons, Streaming Protocol, Video Profile, Monitor Image Section, Language and Digital Output. Function Buttons Streaming Protocol Configuration Menu Monitor Image Section Video Profile Language Digital Output AirLive BC-5010/BC-5010-IVS User’s Manual... -
Page 25: Live View
NOTE. The button is available only when the speaker function is enabled from Configuration > Audio of Web Configuration. 2. Monitor Image Section The image from BC-5010 / BC-5010-IVS is shown here. 3. Streaming Select to transmit and record the video using H.264 (MPEG4), or MJPEG compression. -
Page 26: Configuration
7. Digital Output This IPCAM allows you to trigger on/off the GPIO output manually 5.2 Configuration This function is only for the Administrator. In the left side of main configuration, you can see Configuration including below. AirLive BC-5010/BC-5010-IVS User’s Manual... - Page 27 Chapter 11. Status The Status menu provides the current status of the camera, including the basic information, audio/video settings, networking configuration, and system logs. For more detail information, you can refer to Chapter 12. AirLive BC-5010/BC-5010-IVS User’s Manual...
-
Page 28: Configuration-Network
6. Configuration-Network Configuration-Network Click the Network to display the sub-menus including General, UPnP/Bonjour/QoS, IP Filter, IP Notification, iSCSI. AirLive BC-5010/BC-5010-IVS User’s Manual... -
Page 29: General
When the camera starts up, it will be assigned an IP address from the DHCP server automatically. - Static IPv4/IPv6: Select this option to assign the IP address for the camera directly. You can use IP Finder to obtain the related setting values. AirLive BC-5010/BC-5010-IVS User’s Manual... - Page 30 Enable PPPoE: Select this option when you use a direct connection via the ADSL modem. You should have a PPPoE account from your Internet service provider. Enter the User Name and Password: The camera will get an IP address from the ISP as starting up. AirLive BC-5010/BC-5010-IVS User’s Manual...
-
Page 31: Upnp/Bonjour/Qos
Discovery option to enable the feature. In addition, it supports port auto mapping function so that you can access the camera if it is behind an NAT router or firewall. Select the Enable Port Mapping option to enable the feature. AirLive BC-5010/BC-5010-IVS User’s Manual... -
Page 32: Ip Filter
IP address located within the range will not be allowed to access the camera. To remove the assigned range of IP addresses for IP Filter, select the setting in the Accept/Deny IP List and then click Delete. AirLive BC-5010/BC-5010-IVS User’s Manual... -
Page 33: Ip Notification
- TCP Server: Type the server name or the IP address of the TCP server. - TCP Port: Set port number of TCP server. - Message: The message will be sent to FTP server. AirLive BC-5010/BC-5010-IVS User’s Manual... -
Page 34: Iscsi
IP cam setting. 6.6 Wireless When you insert AirLive wireless dongle to BC-5010/BC-5010-IVS USB port, the wireless page will appear. After enabling the wireless function, please choose your wireless SSID and key in security key, then click Apply button to save the settings. When you complete the setting, please unplug the internet cable and search BC-5010/BC-5010-IVS again by AirLive IP Wizard II. - Page 35 6. Configuration-Network AirLive BC-5010/BC-5010-IVS User’s Manual...
-
Page 36: Video Settings
7. Video Settings Video Settings Click the Video to display the sub-menus including Video Profile, Exposure, Image, WDR, Overlay settings of the camera. AirLive BC-5010/BC-5010-IVS User’s Manual... -
Page 37: Video Profile
7.2 Exposure 1. Exposure Setting: There are two options (Auto and Manual) to select. When you select Manual mode, you can adjust Exposure Value, Exposure Time and Gain settings of the day and night mode. AirLive BC-5010/BC-5010-IVS User’s Manual... - Page 38 - IR-Cut: IR-Cut filter is used for the camera to produce true color images, which avoids the color deviation for the captured images effectively. Select Auto, Always ON, Always OFF, or Schedule (and then set the period by entering From/To time) for the function. AirLive BC-5010/BC-5010-IVS User’s Manual...
-
Page 39: Image
- Mirror: Select Vertical to mirror the image vertically, or select Horizontal to mirror the image horizontally. - Power Line Frequency: Select the proper frequency according to the camera’s location to reduce the flicker: NTSC/60Hz or PAL/50Hz. - Video Output: You can enable or disable video output of BNC connector. AirLive BC-5010/BC-5010-IVS User’s Manual... -
Page 40: Wdr
7. Video Settings 7.4 WDR 1. WDR Setting You can adjust WDR level to fix your backlight environment. 2. BLC Setting You can adjust BLC level to fix your backlight environment. AirLive BC-5010/BC-5010-IVS User’s Manual... -
Page 41: Overlay
Update to apply the setting. NOTE. The width and height of the input overlay graphic should be multiple of 4 at a maximum size of 160x128, and in JPG or BMP (24-bit RGB) format. AirLive BC-5010/BC-5010-IVS User’s Manual... -
Page 42: Audio
2. Speaker: Select the option to enable the camera’s audio out function, so that the connected speaker can play the sound and voice through the camera. 3. Recording File: You can upload audio file for event action. AirLive BC-5010/BC-5010-IVS User’s Manual... -
Page 43: Event
2. FTP Event Server: Select Enable to enable the FTP server for the camera. - FTP Server: Enter the IP address of the target FTP server. - Port: Enter the port number used for the FTP server. AirLive BC-5010/BC-5010-IVS User’s Manual... - Page 44 - URL: Enter the IP address of the HTTP server. - HTTP Port: Set port number of HTTP server. - User Name: Enter the user name to login into the HTTP server. - Password: Enter the password to login into the HTTP server. AirLive BC-5010/BC-5010-IVS User’s Manual...
-
Page 45: Event Schedule
1~60 seconds (according to the setting of the pull-down menu). - Audio File Playback: The camera will play voice file when triggered. When done, click Add. The event profile will be added to the Event list. AirLive BC-5010/BC-5010-IVS User’s Manual... -
Page 46: Motion Detection
3. Set the Percentage and Sensitivity (1~99) for detecting motion to record video. 4. When done, click Apply to save the settings and activate the motion detection function. AirLive BC-5010/BC-5010-IVS User’s Manual... -
Page 47: Tamper Detection
9. Event 9.4 Tamper Detection Tamper Detection allows the events triggered by scene change / bright images / dark images / movement images / blur images. AirLive BC-5010/BC-5010-IVS User’s Manual... -
Page 48: Rs-485
10. RS-485 RS-485 Click the RS-485 to display the sub-menus including RS-485 Settings, RS-485 PTZ. AirLive BC-5010/BC-5010-IVS User’s Manual... -
Page 49: Rs-485 Settings
Please note that the setting values in the Command Name string boxes should be from the connected external device (please refer to the manual of the connected device). 10.2 RS-485 PTZ You can enable RS-485 PTZ function when you have Pan/Tilt Head. AirLive BC-5010/BC-5010-IVS User’s Manual... -
Page 50: System
11. System System Click the System to display the sub-menus including Device Settings, Account, Management Ports, Firmware, Maintenance. AirLive BC-5010/BC-5010-IVS User’s Manual... -
Page 51: Device Settings
1. Admin To prevent unauthorized access to the camera’s Web Configuration, you are strongly recommend to change the default administrator password. Type the administrator password twice and then click Modify to set and confirm the password. AirLive BC-5010/BC-5010-IVS User’s Manual... - Page 52 Web Configuration; the “Guest’ can only view the live view image from the Main screen of the Web Configuration while accessing the camera. Only the “Admin” is allowed to configure the camera through the Web Configuration. AirLive BC-5010/BC-5010-IVS User’s Manual...
-
Page 53: Management Ports
1. Update Firmware: You can upgrade the firmware for your camera once you obtained a latest version of firmware. - Current Firmware Version: This item displays the current firmware version. - Update: Click Browse to locate the backup file on your PC and then click Update. AirLive BC-5010/BC-5010-IVS User’s Manual... -
Page 54: Maintenance
Strongly suggest that DO NOT upgrade firmware via Wireless LAN due to high error rate possibly and don't allow any other clients to access this unit during updating procedure. AirLive BC-5010/BC-5010-IVS User’s Manual... -
Page 55: Status
Basic information includes Camera Name, Firmware version, MAC, Camera Date & Time. 12.2 Audio/Video 1. Video -H.264: Video Resolution/Video Quality/Frame Rate -MJPEG: Video Resolution/Video Quality/Frame Rate -Mobile View: 3GPP (Enable/Disable) 2. Audio: Microphone In, Microphone Gain and Speaker Out AirLive BC-5010/BC-5010-IVS User’s Manual... -
Page 56: Network
Enter the Subnet Mask of the camera. The default setting is Subnet Mask 255.255.255.0. Gateway of the camera. The default setting is Gateway 192.168.1.254 Media access control address (MAC address) is a unique identifier assigned to network interfaces for communications on the physical network segment. AirLive BC-5010/BC-5010-IVS User’s Manual... -
Page 57: System Log
You can check the usage log of IP camera here. In this page, you can click: 1. First page / Final page: Jump to first / final page of log. 2. Previous / Next: Jump to previous or next page of log. 3. Remove: Clear log. AirLive BC-5010/BC-5010-IVS User’s Manual... -
Page 58: Video Analytics
Video Analytics 13.1 Video Analytics (Only for BC-5010-IVS) BC-5010-IVS provides multiple intelligent video analytics that helps you to save your human resources and reach the goal of automatic surveillance. Please go to Configuration Video Analytics to experience the entire IVS function. - Page 59 Face Enhancement: Enable this function for more accuracy. Image Capture: Enable this function to save the image to Samba server or SD card. Note: When you change the media format, it will effect all the exsisted events. AirLive BC-5010/BC-5010-IVS User’s Manual...
- Page 60 You can save up to 10 face images to the AirLive BC-5010-IVS for recognition, so when the camera catch the face which match the database, the camera will trigger related output devices by necessary reaction.
- Page 61 Objects must move and stay within the boundary for at least 100 ms. Select Sensitivity to set the detection sensitivity level. Higher sensitivity will make it easier to detect and less objects missing, but more misjudgments. Select People / Vehicles / Anything as the detected objects. AirLive BC-5010/BC-5010-IVS User’s Manual...
- Page 62 “Against Traffic”. Select Sensitivity to set the detection sensitivity level. Higher sensitivity will make it easier to detect and less objects missing, but more misjudgments. Select People / Vehicles / Anything as the detected objects. AirLive BC-5010/BC-5010-IVS User’s Manual...
- Page 63 You may choose one way or two way directions for counting. The numbers can be displayed on screen and saved to the database. It is also useful to calculate the amount of traffic flow on the highway. AirLive BC-5010/BC-5010-IVS User’s Manual...
- Page 64 This function can be used in many applications, either as a standalone protection system or other protection systems such as airports, power plants, radio towers or even military camps. AirLive BC-5010/BC-5010-IVS User’s Manual...
- Page 65 15 points at most can be used in each zone. Select Delete Zone/All to delete the zones. Select Enable/Disable to allow the trigger or not. Statistics Chart Display: Here will show the detection result of e-Fence. AirLive BC-5010/BC-5010-IVS User’s Manual...
-
Page 66: Appendix
GPIO In #1 Action high voltage: 9~40 VDC Dropout voltage: 0 VDC GPIO In #2 User can refer to the schematic below to make a proper connection between I/O connector and external sensor and output device. AirLive BC-5010/BC-5010-IVS User’s Manual... - Page 67 THAT REQUIRE LARGE AMOUNTS OF CURRENT. IN SOME CASES, A CUSTOM INTERFACE CIRCUIT (CUSTOMER PROVIDED) MAY HAVE TO BE USED. SERIOUS DAMAGE TO NETWORK CAMERA MAY RESULT IF A DEVICE IS CONNECTED TO THE EXTERNAL I/O THAT EXCEEDS ITS ELECTRICAL CAPABILITY. AirLive BC-5010/BC-5010-IVS User’s Manual...
Need help?
Do you have a question about the BC-5010 and is the answer not in the manual?
Questions and answers