Table of Contents
Advertisement
Quick Links
Advertisement
Table of Contents

Subscribe to Our Youtube Channel
Related Manuals for Air Live POE-5010HD


Summary of Contents for Air Live POE-5010HD
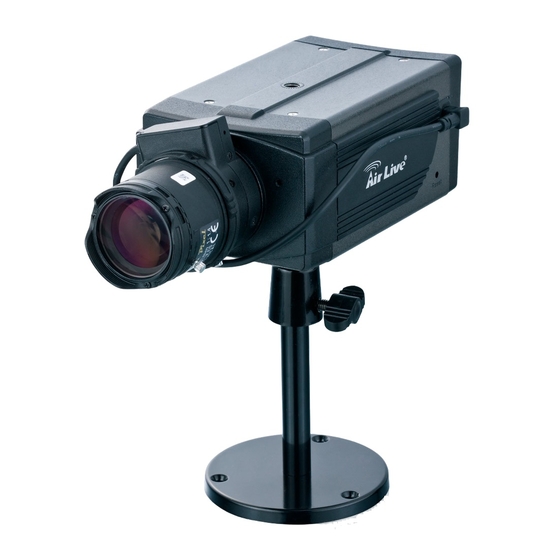
- Page 1 POE-5010HD POE 5 Mega-Pixel Box Type IP Camera with ICR User’s Manual...
- Page 2 This product contains some codes from GPL. In compliance with GPL agreement, AirLive will publish the GPL codes on our website. Please go to www.airlive.com and go to the "Support->GPL" menu to download source code. All Trademarks are properties of their respective holders. AirLive POE-5010HD User’s Manual...
-
Page 3: Table Of Contents
5.1.1 Device Settings..................22 5.1.2 Maintenance ....................23 5.2 Network: Configure Network Settings ..........24 5.2.1 General......................25 5.2.2 UPnP/Bonjour/QoS..................27 5.2.3 IP Filter ......................28 5.2.4 IP Notification ....................29 5.3 Audio/Video/Image................31 5.3.1 Video ......................31 5.3.2 Audio......................32 5.3.3 Image......................33 5.3.4 ROI ......................35 AirLive POE-5010HD User’s Manual... - Page 4 Appendix D: Bandwidth Estimation ............54 Appendix E: Specifications.................55 Appendix F: Configure Port Forwarding Manually ........57 Appendix G: DDNS Application ..............61 Appendix H: Power Line Frequency............68 Appendix I: 3GPP..................69 Appendix J: Enable UPnP of Windows XP ..........70 AirLive POE-5010HD User’s Manual...
-
Page 5: Overview
The camera can be powered by the Ethernet, so that you can place the camera anywhere without a power outlet supported. Note: This product does not come with lens. It must be purchased separately. AirLive POE-5010HD User’s Manual... -
Page 6: Features
Image transmission using an FTP or e-mail for event DDNS and PPPoE Multi-channel control software for surveillance application On-line firmware upgrade I/O Connectors and RS-485 Supported 802.3af PoE support (wired model only) SD/SDHC Slot for Local Storage Compatible with ONVIF Standard AirLive POE-5010HD User’s Manual... -
Page 7: Minimum System Requirements
Microsoft® Internet Explorer 7.0 or above; Apple Safari 2 or above; Mozilla Firefox 2.00 or above; Google Chrome Note: If you connect multiple cameras to monitor various places simultaneously, you are recommended to use a computer with higher performance. AirLive POE-5010HD User’s Manual... -
Page 8: Package Contents
Network Camera. 4. Quick Start Guide provides important information and instructions for installing this device. If any of the above items are missing, please contact your dealer immediately. AirLive POE-5010HD User’s Manual... -
Page 9: Connections
Restore the device: (i) Press the button down continuously. (ii) Hold the button at least 5s seconds and release it. Then the device has been restored to default settings and reboot again. AirLive POE-5010HD User’s Manual... - Page 10 This LED will be flashing while network accessing via Ethernet. Power (orange color) This LED is used to indicate whether DC power is on or not. In addition, this LED will be flashing while the wireless accessing of the Camera. AirLive POE-5010HD User’s Manual...
- Page 11 5. Iris Level: It is used only when the DC-Iris lens is connected to the camera. This screw-knob allows you to adjust the brightness of the video images from the DC-Iris lens. 6. SD Card Slot: SD Card Slot allows you to insert a memory card for expansion of storage. AirLive POE-5010HD User’s Manual...
-
Page 12: Connections Mounting The Camera
When you connect the AC power adapter, the camera is powered on automatically. You can verify the power status from the Power LED on the Ethernet port. Once connected, the Link LED starts flashing green light and the camera is on standby and ready for use now. AirLive POE-5010HD User’s Manual... - Page 13 Remove the protective cap. b) Fit the C or CS lens onto the CS-mount ring and screw it in clockwise. c) Plug the cable to the DC-Iris connector on the side panel of the camera. AirLive POE-5010HD User’s Manual...
- Page 14 When you use a DC-Iris lens on your camera, you can adjust the brightness of the video image through the Iris Level screw-know on the back panel of the camera. Adjusting the Focus You can use the provided L-type wrench to adjust the lens focus. AirLive POE-5010HD User’s Manual...
- Page 15 Upload images or send email messages with the still images attached. The following diagram explains one of the typical applications for your camera and provides a basic example for installing the camera. Home Applications of the Internet Cameras AirLive POE-5010HD User’s Manual...
-
Page 16: Preparation
Camera’s IP address and set up related parameter in a Camera. Search When launch the IPWizard II, a searching window will pop up. IPWizard II is starting to search Network Cameras on the LAN. The existed devices will be listed as below. AirLive POE-5010HD User’s Manual... - Page 17 LAN button. Relative settings will be carried out as below. You could modify the relative settings of the selected device. Click “<<” button will quit the LAN setting procedure and click “>>” button will move to next page as below. AirLive POE-5010HD User’s Manual...
- Page 18 If you like to change username and/or password of the device, just click the check button. Then, the related fields will show up as below. After keying in new username and password, click “Submit” button to perform your setting accordingly. Click “<<” button will go back to previous page. AirLive POE-5010HD User’s Manual...
-
Page 19: Using Upnp Of Windows® Xp Or Vista
Windows XP. Note: Windows 2000 does not support UPnP feature. To discover your device, go to your Desktop and click My Network Places. Click the targeted Device. Then Internet Explorer will connect to this Network Camera automatically. AirLive POE-5010HD User’s Manual... -
Page 20: Install The Device Behind A Nat Router
(2) Enable UPnP NAT traversal option of the Network Camera Refer to Setting Network UPnP page for detail NAT traversal setting. (3) Access your Network Camera by DIPS Refer to Setting System System page for detail DIPS information. AirLive POE-5010HD User’s Manual... -
Page 21: Access The Device From The Internet Explorer For The First Time
According your browser’s security setting, the IE Web Page may prompt the “Security Warning” window. If so, select “Yes” to install and run the ActiveX control into your PC. Otherwise, the system will load the ActiveX silently. AirLive POE-5010HD User’s Manual... - Page 22 If you log in the Camera as an ordinary User, “Setting” function will be not accessible. Logging in as an Administrator If you log in the Network Camera as the Administrator, you can perform all the settings provided within the device. AirLive POE-5010HD User’s Manual...
-
Page 23: Operating The Network Camera
: Click to enable/disable the speaker of the camera. When it is enabled, you can broadcast your sound/voice through the camera. NOTE The button is available only when the speaker function is enabled from Setup > Audio/Video/Image > Audio of Web Configuration. AirLive POE-5010HD User’s Manual... -
Page 24: Administrating The Device
Advance The Advance menu contains five sub-menus that allow you to set up the advanced feature of the camera, including the event, event schedule, motion detection, recording, RS-485, etc. AirLive POE-5010HD User’s Manual... -
Page 25: System Setting: Configure And Maintain System
It’s a unique number of each device for identification and this ID is used for DIPS. This function now is reserved for future use. Indication LED: This item allows you to set the LED illumination as desired. The available options include: Normal and OFF. AirLive POE-5010HD User’s Manual... -
Page 26: Maintenance
- Manual: Select this option to set the date and time manually. - Synchronize with PC: Select this option and the date & time settings of the camera will be synchronized with the connected computer. 5.1.2 Maintenance AirLive POE-5010HD User’s Manual... -
Page 27: Network: Configure Network Settings
This section provides the menu for connecting the device through Ethernet cable. The Network menu contains the networking related settings for the camera, such as the IP Setting, DDNS Setting, IP Filter, etc. When completed, click Apply to save the settings AirLive POE-5010HD User’s Manual... -
Page 28: General
You can use IPFinder to obtain the related setting values. IP Address Enter the IP address of the camera. The default setting is (IPv4/IPv6) 192.168.1.100. Enter the Subnet Mask of the camera. The default setting is Subnet Mask 255.255.255.0. AirLive POE-5010HD User’s Manual... - Page 29 Enable PPPoE: Select this option when you use a direct connection via the ADSL modem. You should have a PPPoE account from your Internet service provider. Enter the User Name and Password. The camera will get an IP address from the ISP as starting up. AirLive POE-5010HD User’s Manual...
-
Page 30: Upnp/Bonjour/Qos
Discovery option to enable the feature. In addition, it supports port auto mapping function so that you can access the camera if it is behind an NAT router or firewall. Select the Enable Port Mapping option to enable the feature. AirLive POE-5010HD User’s Manual... -
Page 31: Ip Filter
0 to 63. - Audio DSCP: Assign the DSCP (DiffServ Code Point) of the stream audio from the camera by setting the value from 0 to 63. 5.2.3 IP Filter AirLive POE-5010HD User’s Manual... -
Page 32: Ip Notification
To remove the assigned range of IP addresses for IP Filter, select the setting in the Accept/Deny IP List and then click Delete. 5.2.4 IP Notification In case the IP address is changed, system is able to send out an email to alert someone if the function is enabled. AirLive POE-5010HD User’s Manual... - Page 33 If enable this function, then the fields below need to be filled. URL: Type the server name or the IP address of the HTTP server. HTTP Login name: Type the user name for the HTTP server. HTTP Login Password: Type the password for the HTTP server. AirLive POE-5010HD User’s Manual...
-
Page 34: Audio/Video/Image
Video Resolution pull-down menu: up to 2592 x 1960 if High Resolution is selected. You also need to select a proper setting of Frame Rate. Please note that higher settings in Computer View and Frame Rate obtain better video quality while it uses more resource within your network. AirLive POE-5010HD User’s Manual... -
Page 35: Audio
Enable Speaker: Select the option to enable the camera’s audio out function, so that the connected speaker can play the sound and voice through the camera. AirLive POE-5010HD User’s Manual... -
Page 36: Image
IR-Cut: IR-Cut filter is used for the camera to produce true color images, which avoids the color deviation for the captured images effectively. Select Auto, AlwaysON, AlwaysOFF, or Schedule (and then set the period by entering From/To time) for the function. AirLive POE-5010HD User’s Manual... - Page 37 Update to apply the setting. NOTE The width and height of the input overlay graphic should be multiple of 4 at a maximum size of 160x128, and in JPG or BMP (24-bit RGB) format. AirLive POE-5010HD User’s Manual...
-
Page 38: Roi
5.4 Security The Security menu provides the required options for administrator to control the camera for security purpose. When completed, click Apply to save the settings. AirLive POE-5010HD User’s Manual... -
Page 39: Account
Then, enter the password twice for the new user. When done, click Add to add the new user for the camera. - User List: Display the existing users of the camera. To delete a user, select the one you want to delete and click Delete. AirLive POE-5010HD User’s Manual... -
Page 40: Https
The Advance menu contains five sub-menus that allow you to set up the advanced feature of the camera, including the event, event schedule, motion detection, recording, RS-485, etc. When completed, click Apply to save the settings. AirLive POE-5010HD User’s Manual... -
Page 41: Event
- Password: Enter the password to login into the FTP server. - File Path Name: Enter the destination folder for uploading the images. For example, /Test/. - Enable Passive Mode: Select the Enable option to enable passive mode. AirLive POE-5010HD User’s Manual... - Page 42 - Password: Enter the password to login into the Network Storage server. - Test SMB: When done, click the button to test the network storage server. NOTE The recorded video files in Network Storage are enclosed by MP4/AVI format without audio. AirLive POE-5010HD User’s Manual...
-
Page 43: Event Schedule
5.5.2 Event Schedule This menu is used to specify the schedule of Event or Schedule Trigger and activate the some actions provided by this device. Where the Schedule Trigger will be activated by user-define interval without event happened. AirLive POE-5010HD User’s Manual... - Page 44 AIL: The camera will send the attachment to the assigned receiver when triggered. Enable Samba: The camera will transfer the attachment to the network storage when triggered. Enable TC P: The camera will send instant message to the TCP server when triggered. AirLive POE-5010HD User’s Manual...
-
Page 45: Motion Detection
1~60 seconds (according to the setting of the pull-down menu). hen done, click Add. The e vent profile will be added to the Event list. To change/remove the event profile, select the desired profile from the Event list and then click Modify/Dele 5.5.3 Motion Detection AirLive POE-5010HD User’s Manual... -
Page 46: Recording
- Upload Path: Assign the path for uploading the files on the Network Storage/CI server. For example, /Test/. Login Name: Enter the u ser name to login into the Network Storage/CIFS server. - Password: Enter the password to login into the Network Storage/CIFS server. AirLive POE-5010HD User’s Manual... -
Page 47: Rs-485
When done, click Apply to save the settings. 5.5.5 RS-485 The RS-485 option provides the control settings for external device through the I/O port. Select Enable RS-485 and complete the required settings to activate the RS-485 function of the camera. AirLive POE-5010HD User’s Manual... -
Page 48: Sd File List
This page shows the files list information. User may play or delete the selected file. 5.6 Status The St atus menu provides the current status of the camera, including the basic information, audio/video settings, n etworking configuration, and system logs. AirLive POE-5010HD User’s Manual... -
Page 49: Appendix A: Alarm I/O Connector
AC power: 24V 6 AC24V Power Input 7 RS-485 TX+ Compliant to RS-485 8 RS-485 TX- User can refer to the schematic below to make a proper connection between I/O connector and external sensor and output device. AirLive POE-5010HD User’s Manual... - Page 50 REQUIRE LARGE AMOUNTS OF CURRENT. IN SOME CASES, A CUSTOM INTERFACE CIRCUIT (CUSTOMER PROVIDED) MAY HAVE TO BE USED. SERIOUS DAMAGE TO NETWORK CAMERA MAY RESULT IF A DEVICE IS CONNECTED TO THE EXTERNAL I/O THAT EXCEEDS ITS ELECTRICAL CAPABILITY. AirLive POE-5010HD User’s Manual...
-
Page 51: Appendix B: Frequently Asked Questions
Note that it’s all case sensitivity. time after factory default reset Forgot username Follow the steps below. and password 1. Restore the factory default setting by press pressing and holding down more than 3 seconds on the device. AirLive POE-5010HD User’s Manual... - Page 52 • Make sure enter the IP address of Internet Explorer is correct. If the Network Camera has a dynamic address, it may have changed since you last checked it. • Network congestion may prevent the web page appearing quickly. Wait for a while. AirLive POE-5010HD User’s Manual...
- Page 53 Internet Explorer. Try to browse and log in again. Internet Explorer Setup the IE security settings or configure the individual settings to displays the following allow downloading and scripting of ActiveX controls. message: “Your current AirLive POE-5010HD User’s Manual...
- Page 54 Video quality of the device The focus on the • The lens is dirty or dust is attached. Fingerprints, dust, stain, etc. on AirLive POE-5010HD User’s Manual...
- Page 55 White-light LED on. Miscellaneous Can not play the Have installed Microsoft®’s DirectX 9.0 or later and use the Windows recorded ASF file Media Player 11.0 or later to play the AVI filed recorded by the Device. AirLive POE-5010HD User’s Manual...
-
Page 56: Appendix C: Ping Ip Address
The replies, as illustrated below, will provide an explanation to the problem. If you want to detect any other devices conflicts with the IP address of Network Camera, also can utilize the PING command but you must disconnect the Network Camera from the network first. AirLive POE-5010HD User’s Manual... -
Page 57: Appendix D: Bandwidth Estimation
128 kbps. Thus, you may not be able to receive good quality video while also streaming audio on a 128 kbps or lower connection. Even though the upload speed is more than 128kbps, for optimal video performance, disabling audio streaming will get better video performance. AirLive POE-5010HD User’s Manual... -
Page 58: Appendix E: Specifications
Password protection, IP address filtering, user access log 20 simultaneous unicast users Users Unlimited users using multicast Ethernet 10/100M auto negotiation System Integration Application Open API for software integration Programming Interface Alarm Triggers Intelligent video motion detection and external input AirLive POE-5010HD User’s Manual... - Page 59 Windows® XP, Vista,Win7 IE 6.0 or latter / Firefox 2.0 or later Browser Cell Phone With 3GPP player Video Player VLC, Quick Time, Real Player Software Search & Installation IPWizard II Bundled NVR CamPro Express 64 Program AirLive POE-5010HD User’s Manual...
-
Page 60: Appendix F: Configure Port Forwarding Manually
Reset IP address at next boot button at the top of the screen after modifying the IP address. Failure to do so will reset the IP address when you restart your computer. AirLive POE-5010HD User’s Manual... - Page 61 Internet. This is accomplished using the Virtual Server function on the router. The Virtual Server ports used by the camera must be opened through the router for remote access to your camera. Virtual Server is accessed by clicking on the Advanced tab of the router screen. AirLive POE-5010HD User’s Manual...
- Page 62 80 to something else, such as 8080. Not all routers are the same, so refer to your user manual for specific instructions on how to open ports AirLive POE-5010HD User’s Manual...
- Page 63 Enter valid ports in the Virtual Server section of your router. Please make sure to check the box on this line to enable settings. Then the device can be access from WAN by the router’s WAN IP Address. By now, you have finished your entire PC configuration for this device. AirLive POE-5010HD User’s Manual...
-
Page 64: Appendix G: Ddns Application
If users is under an environment of dynamic IP network (Dial-up xDSL), they have to apply a domain name in advance. Then apply DDNS service. Finally setup the necessary information of DDNS and PPPoE of the Networked Device in order to let the outside administrator be able to access through internet. AirLive POE-5010HD User’s Manual... - Page 65 Appendix G: DDNS Application 3. Application Steps—DDNS & Domain Name (1). Visit the following web site: http://www.dyndns.org/ (2). Click “Account” (3). After the columns show up at the left side, click “Create Account” AirLive POE-5010HD User’s Manual...
- Page 66 Appendix G: DDNS Application (4). Fill the application agreement and necessary information. a. Username b. E-mail address and confirmation c. Password and confirmation d. Submit all the input information and finish creating an account Click these two options AirLive POE-5010HD User’s Manual...
- Page 67 Account Information“. Click the hyperlink address to confirm the DDNS service that you just applied. Then DDNS you applied activated. Click to confirm (6). Enter the web page http://www.dyndns.org/ again. Input your username and password that you just applied to login administration interface of DDNS server. AirLive POE-5010HD User’s Manual...
- Page 68 Streaming Protocol User can select proper streaming protocol according to networking environment. Digital Output This item allows you to trigger on/off the GPIO output manually Language The device could provide multiple languages to meet customer’s requirement. AirLive POE-5010HD User’s Manual...
- Page 69 Input your account (7). If the correct username and password are input, you can see the following picture at the top-right of the login page. (8). Click the “Services”. (9). Click the “ Dynamic DNS ”. AirLive POE-5010HD User’s Manual...
- Page 70 (Pink No.1) Then we pick a domain that is easy to remember. (Pink No.2) The 3 step is to click “Offline Hostname” from Service Type. (Pink No.3) Finally, click the “Create Host” to submit the domain name information and finish DDNS application. (Pink No.4) AirLive POE-5010HD User’s Manual...
- Page 71 DDNS and PPPoE after the application of DDNS service. Please check the user manual to access the DDNS and PPPoE pages. After saving the modification, restart the device. Then the external users could browse the Networked Device by the input of their domain name. AirLive POE-5010HD User’s Manual...
-
Page 72: Appendix H: Power Line Frequency
50 Hz *Outlets typically controlled by adjacent switch. Though nominal voltage has been officially United Kingdom 230V* 50 Hz changed to 230V, 240V is within tolerances and commonly found. United States of 120V 60 Hz America AirLive POE-5010HD User’s Manual... -
Page 73: Appendix I: 3Gpp
2. Use the following URL to access: rtsp://host/mpeg4 Where host is the host name or IP address of the camera. Compatible 3G mobile phone: Please contact your dealer to get the approved list of compatible 3G phone. AirLive POE-5010HD User’s Manual... -
Page 74: Appendix J: Enable Upnp Of Windows Xp
Appendix J: Enable UPnP of Windows Use the following steps to enable UPnP settings only if your operating system of PC is running Windows XP. Go to Start > Settings, and then click Control Panel Click Add or Remove Programs AirLive POE-5010HD User’s Manual... - Page 75 Appendix J: Enable UPnP of Windows XP Click Add/Remove Windows Components The following screen will appear: Select Networking Services, and then click Details AirLive POE-5010HD User’s Manual...
- Page 76 Appendix J: Enable UPnP of Windows XP Select Universal Plug and Play, and then click OK Click Next AirLive POE-5010HD User’s Manual...
- Page 77 Appendix J: Enable UPnP of Windows XP Please wait while Setup configures the components. Click Finish AirLive POE-5010HD User’s Manual...
Need help?
Do you have a question about the POE-5010HD and is the answer not in the manual?
Questions and answers